Learn to use a Fan Brush with Christie
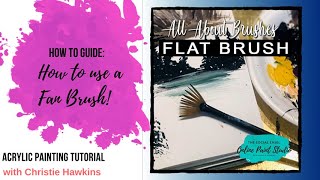
In this instructional YouTube tutorial, Christie Renee Hawkins demonstrates how to master the fan brush for painting grass, various tree types, and related effects. She begins by emphasizing the importance of practice and explains how brush loading and bristle separation affect the texture of foliage. Christie walks through creating beachy grass, long wispy stems, and different grass styles using techniques such as holding the brush flat, on its side, or with the bristles fanned. She then shows how to paint Christmas trees, silhouette trees, and deciduous trees, covering color mixing (adding black, brown, cream, green, yellow, and white), layering, and adding highlights. Throughout, she offers practical tips on rinsing the brush, using a mixed‑media pad for practice, and recommends specific supplies available in her Amazon store and blog. Christie also promotes her free Facebook group for students, situates this lesson as the third in a brush‑series (following large flat and angled brushes, with palette knife upcoming), and encourages viewers to keep practicing to improve their painting skills.
Chapters
So today we are gonna learn a little bit more about the fan brush. Some of you may be familiar with it, but I think it's always good to go back to the basics and practice. That's the best way to get better, is just keep practicing. Same with anything that you do in life. Okay, so do you guys want to— I've got some basic colors here. Do you guys want to see the grass or trees first? I'll kind of let you choose. I might put a little cream on here for, for some of the grass so we can do some beachy grass. I'm gonna start And I'm going to show you guys a couple different things here depending on how you have— how much paint you have in your fan brush too. But don't give up on a fan brush, okay? So it does take a little getting used to for sure, but once you get the hang of it, you'll love it, and it makes doing grass and trees so, so simple. So it's just a little bit of a learning curve. But you, but you will get it. So this is— you can kind of see how much paint is in there, right? So it's kind of all together right now, so you kind of get that look with it. Now once it starts separating a little bit, you kind of get— I need a little bit more on there. See how it gives you the separate— so you kind of get that grassy look. So usually if I'm doing grass, I want my bristles to be separated a little bit. Does that make sense? So let's start. We're doing grass first. Let me rinse some of this black out of here because I don't want black in my grass. Let's do some beachy grass first. So I'm gonna grab a little bit of my brown and cream. I'm just gonna mix a little bit of this together. Let's give ourselves some ground right here. Maybe I'll pick up a little bit of yellow with that brown just to change the color a little bit. You guys know I love my color mixing. So I want this to separate a little. Sometimes I just kind of dab it on my palette too, just so it starts— or you can run it along the edge so it starts separating a little bit. So you can do grass two different ways. You can do it kind of holding the whole brush down I need a little bit more paint in there. Okay, like this. So it's giving you that nice base. See, I'm just kind of flicking my hand back and forth. Or we can turn it on its side. See how on the side you get the skinnier little— that's catching on some kind of bump underneath my— so it almost becomes like dry brush because there's such little paint in there. So this is using the side. See how I'm just kind of going vertical up and down. And then you can do more horizontal, and it gives you a little bit thicker at the base like that. Now the other thing you can do when we're working with grass here— so let's say we have these tall skinny— this is how I teach it in my beach tutorial, which you can still buy if you go to my blog post. You can go to my blog on thesocial easel onlinepaintstudio.com, and you'll see where you can buy that in one of my blog posts. So we also could do some kind of grass, more of like this brush stroke that I showed you earlier. So we've got these long stems that that are coming out, and then off the side of that we get these fan-looking brushes. I'm gonna pull a little bit of black into my brown just to make that a little bit darker. Can you guys see that enough, or do I need to make it go the other direction? I'm just adding— I'm gonna do it in— grab a little bit of black, just because I want you to be able to see it. So let's do it down here again. Well, that's not what I'm wanting to do. Hang on. We'll just fan that out a little bit. That's not what I'm wanting. Let's do this. I'll show you because this is easier. Usually I just use this and make a line, but this is bumpy and it's catching, so I'm going to show you this way instead. So you've got your long, long pieces of grass here like this. Okay, and they don't have to be completely solid. I'm not worried about that. And then I'm gonna load up my black again. I see again how my bristles are separated. They're not all stuck together. So you'll learn that as you play with it. This is what it's gonna look like if they're all stuck together. Then you get obviously more separation if they're not. So I'm gonna go on the sides of all these, and you kind of get this wispy— depending on how much paint you have in there, you get a little bit different look. So I go along that skinny line, and then I just kind of pull down, and you get that really pretty wispy grass that you could have coming out of up here. Just like that. So that is some fun grass for you. So now, and again, what I recommend— this is the same thing I tell the women in my tribe, this is the same thing I tell my ladies— keep on Practicing, okay? Don't expect to just put a paintbrush to the pad the very first time and you're just gonna get it. You might if you're lucky, but it takes practice. So this is a mixed media pad that I use. You can find that in my Amazon store, or you can get it at your craft store, but it's basically like a sketchbook for painting. And I tell everyone in my tribe to get this because it's nothing but just a practice book. Book. So this is really good for you to work out and get used to doing these techniques and practice. That is the key. That is the beginning of painting, is just practicing. So don't be afraid to do that. And I highly recommend getting a mixed media pad and then a set of brushes. So there's a good set in my store. I'm not— I can't remember right now if it has the fan brush in it. You may have to buy a fan brush separately. Okay, so that's one. Now I'm gonna show you how to do— you guys want to learn how to do some Christmas trees? So I'm getting some black and some dark green. So let's do— I'm just gonna do one, one big Christmas tree. We'll do it over top of this. Okay, so I always give myself like a straight line. This doesn't matter what this looks like because you're going to cover it up. So I'm going to start at the top again. My bristles are separated. Now when I am at the top, I am not pressing down like this. I'm not going all the way across. I am using the corner and I'm just kind of dabbing along because I want it to be at a point, right? So it's like a little triangle. Up here. I know that's hard to see because it's over that black right now. And then as I get further down, I'm still using the corner until I get to about the width of my bristles, and then I'm going to start going out from here. So see how I'm covering that tree trunk? We're not even going to see that. That's all going to be covered up. And you can decide how thick you want this tree. There's so many different ways to do this. And you can have— you can give a little bit of curve to your tree if you want. You want it to curve down a little bit, or you could go straight across. And when I say straight across, I'm still doing the same brushstroke. I'm just getting further and further out as I go down. I need a little bit more paint in my brush, and you don't have to see a lot of separation here, so you can press down fairly hard because I'm going to come back over top of this and add some snow, and then you'll really start to be able to see some of the different areas of the tree. And I do Christmas trees— you can do them with an angled brush or you can do them with a flat brush. So there's two different ways to do it. So I'm just kind of rotating as I get to the top. If I want it to be a little bit taller here, maybe come out a little bit more on the sides. So you can change how much you press down of your brush as you're going. So I'm gonna let that dry for a little bit because I want to come back and add to that. Another thing you can do, and this is really simple, I'm gonna get some more black paint here. Let's say you do like a really pretty sunset and you just want like a silhouette of some trees. We're just going to load this up with black. Let's say this is our horizon line right here. I use this just as kind of like my base where I want my trees. Same thing. Now, if I was doing this bigger, I I could go all the way, all the way across, just like I did that big Christmas tree. So down at the bottom you can get away with that a little bit more because they're all going to kind of blend together down at the bottom, right? That part's not going to matter. So I'm just using the corner here. All different heights of trees. Nice little silhouette here. And I'm just rotating it around because I have more paint on that other side of my brush. So just think of little Christmas tree shapes. They can all be a little bit different, but when I go to the top, I usually turn my brush vertical so I can get that nice tip at the top. So I'm cheating a little bit here, and I'm going across at the bottom because I know they're all going to blend together. Then I turn it vertical to get that nice point at the top. So you've got a nice little silhouette of trees here, right? Not too hard. So just picture that with whatever background you want, and then you can put those trees over top of it. So then what if we want to do just a regular tree? And you could do that. I'm going to show you with green, but you could do this with a fall tree too. Let's see, I ran out of my brown. Let me get a little bit more brown on here. I think I'm gonna go over here and just paint over top of this little mess anyways, so I'm just gonna quickly add a little branches here. This really doesn't matter too much. Most of this is going to be covered up, just kind of giving you the idea of of the base of my tree here. And if you weren't with me at the beginning, I'm gonna let that dry a little bit. This is— and this too. So let's see, I think this might be— I'm gonna come over this with a little bit of green. We're gonna have a couple layers to this Christmas tree, so I've got pretty much black in the back. Then I'm gonna come back with some just regular dark green that doesn't have any black added to it, just so we have some different areas of color here. And then once that dries, I'm gonna come back and add white over top of that. And you may not be able to see that color change too much. I'm gonna lower you just a little bit more. See if I can get you a little bit closer there. So now you can be a little bit messier, and we want some different looking trees. And I can push down really hard and just almost making like where they're like blobs, a little rough around our edges here. And I'm just rotating my brush to get the paint wherever I have it. See how simple that is? Already starting to look like a tree, right? Let me get a little bit more paint here. And I'm really loading the paint up on this. I'm gonna hold that a little bit closer. Can you see how much paint is in there? So you'll hear me say this again and again. You got to have enough paint on your brush. Load it up. If you don't have enough paint on your brush, you make it much, much harder on yourself, and you can't get the brushstrokes to do the exact same thing that I'm doing. So we want these, these types of trees. I want it nice and rough around the edges. I don't want it to be like one round shape. What do you guys think so far? Some, some good tips you can try out? We'll leave a little bit of opening there. Now I'm gonna go straight in to some yellow while my green is still wet, then I can get this variation in the trees here. I wonder if this light is shining too bright on that. I'm gonna turn that a little bit. You can decide how much lighter green you want in there. Maybe add a little bit more yellow towards the top where the light might be hitting it. And if you get too much, go back with some of your dark, work some of that in. You could even get a little bit of black in there if you wanted to add some shadows. So you're just kind of playing with it. Can you guys see that okay? So now you've got your deciduous tree and your Christmas tree. Okay, so the last thing I'm going to show you is once we add the white, which I need to get. Rinse my brush really good. And I do want to show you something. This is another tip for you. You don't always have to— this is dirty water from earlier today when I was painting that I haven't rinsed out yet. So I can go from those dark colors like black and green and I can rinse my brush off. Okay, doesn't matter what that paint watercolor is. I'm squeezing it in my paper towel. Okay, nice and clean, no paint in there, but you do want to squeeze it because sometimes water gets stuck up in these handles and then it drips down into your next color. So now I know I don't have any of that other color in there. All right, I'm just going to kind of I'm just taking this with my fingernail and just kind of pushing some of those back together so they're not super separated. And we'll come in with our white, and you can decide how much you want. Let's start at the bottom and just start adding. I start a little sparse first, and you don't want it to all look exactly the same. So we don't want it to just look like dashes all the way across. You may have some heavier white in some areas, a little bit lighter in others. Again, when I get up here, I'm gonna rotate, get it on the corner there. So I can control and make that smaller up at the top. And so now you've got your snowy white Christmas tree. Now this is obviously a little bit easier to see if— I'm just gonna spread this out because I've got some green here— if we had a different color background. If you had a blue sky behind this, that would stand out. A lot more. But those are some different tips that you can do with a fan brush. So, um, they're mostly used for trees and grass. So I hope you guys enjoyed that, um, and I hope you practice. If you do, make sure you join our free Facebook group and you can post your progress in there and you can share what you're working on. and this was brush number 3 of my series. The first week we did the large flat, which is used for a lot of backgrounds and different stuff. Last week we did the angled brush, which is one of my favorites. This week is the fan. Next week I'm actually jumping away from brushes and I'm gonna do palette knife. So palette knife has become a huge passion of mine. It's in a lot of my paintings now. So I'm gonna, I'm gonna do some palette knife painting with you guys next week, and then we'll jump back and do some brushes again. That leaves us the round and the filbert to go over. So hope you guys enjoyed that. So you guys have a good night, and I will talk to you soon. Bye!










