Let's Paint an Oceanscape today!
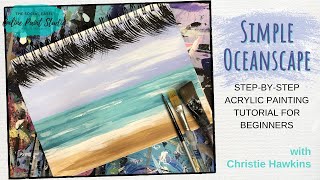
In this live YouTube stream, Christie Renee Hawkins guides viewers through a fast, 20‑minute acrylic oceanscape on a mixed‑media pad. She introduces the essential supplies—a large flat brush, a rake/wisp brush, and a small round brush—along with a simple palette of whites, teals, blues, sand color, and black, explaining how to mix and blend colors for sky, water, and sand. Christie demonstrates brushwork for sky gradients, turquoise water, wave highlights, and cloud formation, emphasizing quick, fluid strokes and the forgiving nature of acrylics. She answers live viewer questions about pad flattening, painting on vacation, and color choices. Throughout, she promotes her Amazon store (text “Amazon” to a short code) for the brushes and supplies, references detailed blog tutorials on palm‑tree techniques at thesocialeasel.com, and markets her Painting of the Month Club, highlighting the upcoming June exclusive “Field of Poppies.” The session ends with a recap, encouragement for beginners, and information on replay availability.
Chapters
Okay, it looks like we are live, so if you are on with us right now, um, let us know you're here. We're here. Hey, Tori! We're trying something a little different today. We got a couple screens going on. So I am going to do a fun little oceanscape with you guys, um, from a painting that I did a few years ago, and show you a couple fun brush techniques that you can use to do the palms with. So, um, I just wanted to give a quick hi, and then we're gonna make the actual painting full screen. So so you guys can get a nice up-close view. So, um, all you need for today's class is just a large flat. I'm going to kind of show you these. Mine are already wet. You don't have to have them wet. Um, we just washed my brushes. I have my new assistant Emily here in the office with me, so she's helping me from behind the scenes. Someone's saying no sound. Oh, she said never mind, it's working now. Okay, all right, so we're gonna use a large flat, and then I'm gonna introduce you to— if you haven't seen this yet, this is called a rake brush, or some people call it a wisp. So I I'm going to show you how to use that, and then I'm going to grab a little skinny one here. Let me see if this one's skinny enough for what I want to do. So yeah, I'm super excited. I've got Emily here working with me now. She started last week, and, um, it's really going to help me, one, stay more organized so I can go live with you guys more, and, uh, she's gonna help me keep things running on the back end. So I'm super excited to have her here. Okay, so this is all we need, and then you're going to pick out whatever colors you want your oceanscape to be. So I'm going to use plenty of white. I just got these big refills of white paint, um, from Amazon, and then I picked a couple teals that I like. This is Bahama Blue and Peacock Teal, and then I've got Blue Harbor. And then I need like a sand color, and then we're going to use black. So hang on just a second. Um, we'll use this. This is Cocoa from DecoArt. And then I need my black paint. Emily, do you remember where that— it was a— oh, I see it. Never mind, just kidding. And then I'm grabbing some black. So super simple palette here. And then we're going to be mixing, because you guys know I love color mixing. We're going to be mixing some blues and whites together, and maybe some of the blues and teals together to create our own color. So just keep in mind, you don't always have to use what is in the bottle. I want you guys to have fun with painting. Get creative and mix your own colors of blue to create what you want. So I'm gonna jump over here to this, and we're gonna make this full screen. At any point, if you guys want the supplies that I'm talking about, all of these brushes that I'm using today are in my Amazon store, and you can text the word Amazon. Thank you, Emily, to 417-217- 7044, and it'll give you the link to my Amazon store. And you're gonna go to the Getting Started Supply List. That's all my favorite stuff, all the brushes I use, um, the surfaces, all the good things. It's all going to be there for you. Okay, so I'm gonna take this one off and we're gonna go full screen here. Everything look good? To everybody. Just let me know in the comments if we're good to go. I'll be keeping up with you here, and if you have any questions, um, Emily will throw them up on the screen if I miss them. So I'm just going to start by loading up my palette. I am just using a mixed media pad today. So this is what I use anytime I'm just doing some practice, or if I just don't want to use a canvas because I don't have the extra room for it. This one's a 7 by 10. I have also an 11 by 14 that I use most of the time, but this is great that I really recommend for everyone just getting started with painting because you're not committing to a canvas and it just allows you to practice and not stress out about whether it's good or bad. You're just practicing. So I'm just going to start getting some paints on here. Anyone else ready for the beach? We leave for our family vacation in June, and we're taking the kids and the grandparents all to Florida for a week, and I'm super excited and can't, can't wait for that to get here. Until then, I will paint the beach. And this scene that we're going to do today is kind of, um, one of my favorite places to be at the beach is on a lounger under a little tiki hut, um, especially if I'm in Mexico. So that's kind of what this one is going to be inspired by. Is going to be us sitting under those palms like that. Now I usually get a fair amount of white on here because I'm going to mix it with so many of the different colors that we're using today. Hey Pam, Sherry booked her trip yesterday. Woohoo! Heather's at Hilton Head this week. Kelly said, with a little umbrella in my drink. Yes, hopefully. Sheila, that's a good question. So she said, how do you keep your media pad painting flat after you're done? It's, it's nothing you're doing wrong, by the way. That is just what happens when you add wet paint to this, whether you're doing watercolor or acrylic. It's going to start pulling up on the sides. So what I do is I let it dry completely, and then I put like a heavy book over top of it and flatten it out. Um, Sheila's asking, do I paint on vacation? Sometimes I painted when we were in Belize. I did a watercolor. Um, so sometimes I do, and sometimes I just don't stress about it. I always bring my watercolors and my pens with me though. Um, Sharon said, is there a colorless? No, Sharon, I do not make colorless for any of the, um, Lives I do on my public page, I just show you what I'm using. So you can just pick your favorite blues. I shared at the beginning some of the colors that I used. So I'm going to take some of my Blue Harbor and my white. I just mixed it together. So you can see it's kind of swirled on there. And this painting is going to be all about blending. So I want my sky to be this kind of pretty baby blue color. And when you're blending, you really want to focus on moving quickly, especially when you are working in a mixed media pad. It tends to dry faster than if you're painting on canvas. So I'm just going to move nice and quickly on here, and I just keep dipping and picking back up again. And you can decide how much sky you want versus water. But look, this already is just a nice peaceful looking sky here, and you can make it as dark or bright as you want it to be. You see how I just keep moving back and forth? I'm going in long horizontal brushstrokes just to cover that surface. And then once this dries, if I want to go back and kind of add the look of some clouds in some areas, I can once it's a little bit drier. So that's it for our sky. Now I'm going to go in— I'm not even going to rinse this. I'm just going to go into some of my teals that I have here. And I want the nice turquoise water. And you can use— this is the large flat. You can either pull this way where it's about 1 inch thick going that, or you can turn it to where it makes the skinnier brushstrokes. Let's get a little darker mixed in there too. And if you are new to painting with acrylic, one thing I want you to remember is anything you do right now, if you're not happy with it and you don't like it, all you have to do is let it dry and you can paint right over top of it again. So you're never stuck with anything. You just don't want to try to fix your mistakes while it's wet. Isn't that pretty water? So I'm just going to drag this across here. Oh, see, we got a little in the sky. I'm not going to let that stress me out. Let's grab a little white. So that was our happy little accident. Now we're just going to create a little cloud there. Easy peasy, right? And I think I want to have— I'm going to go into the lighter teal, kind of drag that through the middle. So I want some areas of dark, some of light. Maybe even I'm going to switch to this smaller brush like I just did in the sky up here. I'm going to grab a little bit of this, pull some more white into it, make it even lighter version. I'm just going to quickly kind of pull that in, in a few spots, maybe go back to the dark. I just want some nice variation in there. I got another spot where— so I'm obviously painting very quickly and a little bit messy, as you can see. So I've got these little spots there. We're just gonna use that as our guide to say that's where we're gonna put some clouds. So I'm just using this small round and I'm getting very little amount of paint on there. There's not a ton. And then I'm just lightly kind of dragging it across there, and then we've just got some nice pretty clouds in the sky. What do you guys think so far? Nothing too intimidating, hopefully. I want to add a few waves out here. I'm going to do the same thing just like I did in the sky. So once it starts drying, it kind of catches the paper and gives you kind of this dry brush look. I love this. Doesn't that just look like a little wave crashing right there? All right, so we're going to go a little heavier white here towards the bottom. Now you could jump back to this brush again if you wanted to. Usually I put them in water, but I know because I'm going to bounce back and forth, that's why I was leaving that one out. Okay, I'm gonna rinse this and we're gonna go to our sand. I'm gonna try to get this painting done in 20 minutes. We're gonna try to make this a 20-minute painting. And what I want you guys to realize is if you're new to painting, or even if you're not and you love painting and you wish you could make more time for for it. Sometimes I think we build things up in our head and we have to set all this time aside for it. You can do a quick little fun painting, something small, just to kind of leave the world for a little bit, relax, do something for yourself. It doesn't have to be a huge time commitment. I want to give you guys some short, quick little paintings give you some small wins so that you know that you can do this too. That color is perfect. So we got our nice sand color on here. I'm even going to drag that over some of the blue where the water kind of hits and just a little bit of that color is coming over. Maybe a little bit darker in some areas. So you see that throughout this whole painting so far, I've done the same thing at each level. So whether I was doing the sky, the ocean, or the beach. We were using the same techniques, but they look completely different depending on what area we're doing. Let's go back here, and I want you to look at this horizon line. If you want this to be nice and straight— I'm giving this a chance to dry right now— if you want this to be nice and straight, we're going to grab some of our teal And I'm going to start, and I'm just going to kind of pull this across here, and you get that nice straight line there all the way across. And it's always a little brighter teal out further in the ocean like that. Okay, so let me know in the comments if you think you can do this. We've got about 4 minutes. I'm going to test myself and see if I can get it done in 20, but so far Not too hard, right? Look at all this paint I have, by the way. I could do about 5 paintings with this. I think I got a little overzealous and forgot I was painting on a 7 by 10. So we want to have the waves crashing here. We're just going to do the same thing. I'm going to have some of this white on my small round. And just kind of pull over. Let some of that sea foam come up on the beach. And the more you guys practice, the better you're gonna get. Just like anything else in life, don't let fear stop you from trying something new. You're never gonna know if you don't try. So my goal is to make things easy enough for you that you're not too intimidated to just sit down and give it a try. What do you guys think? I think I'm liking the way that that's looking. I think I'm done there. All right, I'm glad you guys are going to try it out. Okay, so remember, I'm picturing this like we're looking out at the beach and we're kind of under one of those little hut things. Um, so we're going to have some little palms coming down from up here. I'm going to show you how to do it with a small round. And I'm just making it black just for simplicity, just a silhouette of this. And I'm going to show you how to do it with a rake brush. Both of these are in my Amazon store. You can text the word Amazon to 417-217-7044 and it will take you right to my Amazon store where you can find all the supplies that I've used today. So I'm going to do this quick kind of motion like this. Kind of flicking of the wrist here. Now I'm not putting down a lot of pressure. If I pushed down hard, it'd be like this huge thick line. I don't want that. I want nice wispy little palms coming down here, and they're going to overlap. They can even go different directions. And you can keep overlapping to fill in however thick you want that to be. Or I can use this rake brush. This guy's super fun and handy. And if you haven't seen my blog post, I have a whole blog about using these different brushes and how to actually do palm trees. So you just go to thesocialeasel.com and go to blog and and there's all kinds of information there for you. Look how fun that is. So you want them to be separated. It kind of does the hard work for you, right? How am I doing on time, guys? I got 15 seconds left. Can I do it? I think I can because this guy's so handy. All right, 20-minute painting minus some touch-ups, right? So let me know what you guys think. Nice simple little oceanscape, seascape for you. Maybe introduced you to a new brush you hadn't seen before. Let me know what you guys think. I'm gonna zoom in a little bit so you can get a nice close-up of our finished painting. And we did that with just a few colors. Obviously, you don't need to use near as much as I did, and a few paintbrushes. Um, all that— I have blogs that show you how to do palm trees and videos. So just, um, or Ada, sorry, I thought that was an L. Um, you can go to the social easel.com and go to my blogs, and there are videos on how to do palm trees there. Okay, happy— what day is it, Tuesday? Oh yes, see, this is why, this is why I have someone here. I'm gonna scroll back out. If you had fun painting with me doing this today. Right now my Painting of the Month Club is open. We open it for about half the month and you sign up now and then you get the painting delivered to our membership portal on the first of each month. The June— right, we're in May, right? The June Painting of the Month is My Field of Poppies. So they— these are exclusive paintings that are not available in my store. Um, they either come from my Inner Tribe, which is my tribe membership, or they come from previous challenges that I've done that I no longer sell. So this is the one coming for June. It's only $20 a month. You can sign up now. Um, sign up ends on the 31st at midnight, so we close registration. On the 31st, and that will be your last chance to get this painting for only $20. Once it goes into my store in July, it'll be the full price of $37. And then Painting of the Month Club, you get a new painting each month delivered to your inbox on the 1st, and they're pre-recorded, so you have 24/7 access, lifetime access. You can go back to them whenever you want to, whenever it works on your schedule. So, um, last chance is the 31st, so you've got about 6 days left, um, to get signed up for the Field of Poppies. And this is a really, really fun one. I taught you some basic techniques today with the blending, very similar to this, um, and then obviously all the techniques we're going to use that you're going to learn for how to add your poppies and your trees in. So I hope you guys had fun today, and we will be back next Tuesday again to do another fun live with you guys. So I will see you guys next week. Um, replays will be available on YouTube and, um, this Facebook page, uh, as soon as I end this video. You can go to the videos tab and find the replay there. All right, you guys have an awesome day. Bye-bye.










