Let’s Talk About Brushes! - ANGLED BRUSHES || The Social Easel
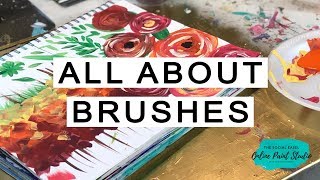
Christie Renee Hawkins teaches how to use angled brushes for grass, leaves, and flowers, covering brush size, loading, and pressure. She's running a 4-day Fall Chapel challenge starting Sept 9 for $15, and her Tribe membership includes monthly tutorials and a live paint party Sept 15.
Chapters
Hey guys, how's everybody doing today? It is Christie with The Social Easel, and I wanted to jump on and we're just gonna do a quick lesson on how to use an angled brush. And in case you missed it, I'm also going to tell you about the fall painting challenge that we have coming up. So if you haven't done a challenge with me before, this is a really fun way to learn how to paint if you haven't done it, or or if you just love the painting and you already know how to paint and you just want more, you can join the challenge as well. So I'm gonna show you guys that, and then we're gonna talk about how to use an angled brush today, which kind of ties in to the challenge that we're gonna do, and I'm getting ready to show you the picture for that. So let me turn my little messenger bot on. Hey Tish, how are you? Hoping some of you guys can catch me at lunchtime. I decided to do a quick live in the midst of my to-do list today. We're leaving for— I say we're leaving, meaning me and all my girlfriends leaving for Canada in the morning, and we all get to be together. So for the next 6 days, you'll probably see me with a bunch of girls talking to you from Canada. So we're super excited about that. Let me just fix this here really quick. As you guys are hopping on, just say hi. Let me know you're here, where you're watching from. Hey, Luanne. How many of you have, while you're on here, and I'm finishing this up, let me make sure this is all right here. How many of you have seen, hey, Linda, the fall challenge and seen what we're doing? So we're doing the fall chapel. It's behind me. I'm gonna give you guys a closer look. You can see it while I'm leaning over here. Okay, just kidding. Um, give me one second. Sorry guys. Thankful for technology messing up on me again. I'm gonna show you this really quick and then I'm gonna sneak over to my computer and activate it from there. Usually I can do it on my iPad, but it's messing up today. So what we're gonna do today is I'm gonna show you how to do angled brush, different things you can do with it. This is one of them. So this whole background, all these trees and these leaves down below, I did all of this with an angled brush, so I'm going to show you a little bit of that. Obviously not the full thing, that's for the challenge, but I'm going to show you how I do these trees so you can start practicing before the challenge starts if you want to. This starts on September 9th, and what I'm doing is teaching you guys how to do this painting over the span of 4 days. So each day I'm going to teach you a different step of the painting. So we're just going to break it down into 4 simple videos. In addition to learning the painting. Now mine is on palette board, and you can learn how to do that. So that's in addition to the painting. If you don't have the tools to do a palette board, or that sounds like too much work for you and you don't want to do it, you can definitely do this on a canvas. Let me show you the size I have here. That would also be— you could do it on a 16 by 20, or this is a 10 by 20, so it's a little bit smaller than my palette board, but it would still be really pretty. You could shrink that chapel down a little bit and do it on a canvas. So don't feel like you have to know how to build or do any of that. If you don't have a palette board, you can still most definitely join the challenge and just learn the painting and paint it on whatever you want to. Now, I do not build my own palette boards. If you followed me for a little bit, you know that Corey does all that stuff for me, my husband. And when you join the challenge, inside there is gonna be a video from him showing you how to do that. So you may not want to do it yourself, but you may have a guy or friend in your life who will do it for you, and they can watch that video. And the supply list is in there, and it tells you everything that you need to be able to make your pallet board. So that is an option for you too. Hey Carrie! Hey Lisa! Debbie, thank you for praying for a safe trip. So I'm gonna jump over here really quick. Sorry, I have to do this, but I just gotta activate this post, and then we're gonna jump back over here. Okay, that's done. So you guys saw the fall chapel, and now I'm going to flip you around and we're gonna start painting. If you want more information about the fall chapel challenge, just comment challenge and you will get a messenger from my bot. That's what I just had to go activate that for some reason my iPad wouldn't do for me today. So it will send you a message and it will have the link to register. And I didn't even tell you that it's only $15. So for only $15, you get to learn to paint that. And we have our own private Facebook group where you are gonna get to join with other ladies in that group or wanting to paint just like you, so that's fun. And my number one question is, what if I can't make the lives? I will go live each day in the group. The videos stay in the group, so this is not one of those you have to like fit it into your schedule. It's just there and you can go to the Facebook group whenever you want to. Each day a new video is, you know, a new step is released and then they just stay in there for you. So you do not have to catch them live or have to do it necessarily that week, that group eventually will be archived, but the videos never go away. So archiving it just means you can't still comment after about a month or so, but you can still go in and get all, all your good stuff. So I'm gonna flip you guys around really quick here, okay? So bear with me. And I already had— see if I can get you angled down. Good here, and then I'm gonna pull you up on my iPad so I can see what you're seeing. I already had this done. I don't know what I was gonna do in here, but it actually works out perfect because I have 4 separate things I'm going to teach you with the angled brush today. So this is an angled brush. I've got 2 different sizes here, and normally I don't necessarily work with 2 different sizes. I just kind of wanted to show you the difference. This is a really good size. I don't know if this has necessarily a number on it. Let me see if I've got another one without paint all over the handle. Okay, that's what I thought. This is a 5/8-inch angled brush, and that's my typical size that I use is a 5/8-inch. So I'm just getting you guys pulled up here. Thank you, Tish. Tish is in the group. Karen, if you are in my tribe, all you guys have to do is join the group. So I've got a message inside our tribe Facebook group with the link for you to join the group. All right, Facebook's acting up again. This is driving me crazy. I can't wait— they have an update for this app for my page, and I really hope it works because everything is glitching with the app right now. I can't see comments anymore unless I turn it vertical, which is pretty annoying. I'm gonna let you guys flat here. Okay. Hey Agnes. Hey Tamara. I get to see Tamara tomorrow. I'm so excited. Get to see our friends. Okay, so let's get some paint here. The first thing I'm gonna teach you how to do is just some quick grass. And I've used this in like paintings, like doing like my mason jars and fireflies on the grass. I've done wildflowers where I just have some grass background that I do with my angled brush and then put flowers on top of it. So I'm gonna use my 5/8, and I get both colors of paint on there because then it just kind of does the work for me. And that's one of the things I love about an angled brush. Let me scoot this over just a little bit. There we go. That's one of the things I love about the angled brush is you just let it do the work for you. So if you use it correctly— hold on here, I'm gonna prop this up. There we go. If you use it correctly, then it makes your life a lot easier. You can just use the angle to get the brush strokes that you want. So we're just gonna hold it like this right now. And just back and forth. And then I may start down below and just make it a little bit thicker down there because I don't want it to look— flip, you can do it both ways. Now the angle is pointing down. I don't want to have little pockets of grass. That may be something that you want in certain paintings, but that's not the way that I like to use it. I like to have kind of solid grass all the way across. So all that means is your points where you're touching down are going all the way across your baseline here, okay? So this is holding it with the angle down, or you can hold it with it up. So do whatever is most comfortable for you, but that's just a quick and easy way to get some grass as the bottom of your paintings. Agnes, we are all leaving tomorrow. My flight leaves at 6:00 a.m., so I'll be getting to the airport at about 4:30. Okay, so while I've got— I just rinsed all that off. I forgot I was gonna do leaves with you guys. So this is another thing I love about the angled brush. Again, using the brush to help you. I do this with a lot of my— see, what do I have in here I was going to show you guys? My leaves behind— let me grab my pig painting real quick. A lot of my leaves behind my flowers, I'm going to show you a couple different kinds. One on my pig and one on my cow painting. So if you missed these, these paintings I'm getting ready to show you— this is Miss Maggie Moo. She is in my tribe membership. So if you're not familiar with that, that is a membership where I teach 3 paintings per month with my tribe members, and this was one of the 3 that we did. So see these little leaves that I've got going right here? These are super simple and you do them with an angled brush. So all I do— and again, see how I mean just like let the brush do the work? Then you've got these pretty leaves that can kind of tuck out behind your flowers. Super easy. And again, I like to have two different colors on there. You can come back with the lighter color on top just to have some variation. See how quick and easy that is? Just a couple dabs. So you're not doing like a full brush stroke, you're just kind of basically taking the shape of this angled brush and letting it do the work. You could even— I'm in green, but if we wanted to continue around do some quick little flowers with it. Again, super simple, but easy to do with an angled brush. So that's one type of leaf, and I did that in the cow painting. Making sure I'm not missing your questions here, but what I was going to tell you— oh, so the tribe membership. So this is the other painting. This is Miss Petunia the pig, and I love— we had so much fun in Tribe this month because we did all farm animals. So I did a rooster. I've got her right here. I think this is my duplicate. This is my second one. So we did a rooster first, then we did Maggie the cow, and now we're doing Petunia the pig this week. So I taught this to my Tribe Sunday night, but this is a membership. They get 3 paintings per month with me, then we have a guest art instructor or a business coach come in to answer questions that fourth week. When you join my tribe, which opens again on September 15th to new members, you automatically have access to all the previous tutorials. So that means when you come in, those 3 that I just showed you, you get all of them in addition to the 3 new ones that we do every month. So see these bigger leaves here? So I did these with a palette knife, but I'm going to show you how to do it with an angled brush too because it's the the same thing. The farm animals are so fun, Jesse, and everyone's are turning out so cute. I love them. I need to do a— I need to save some of those photos and share them with you guys so you can see some of the work going on inside the Tribe. But if you're interested in that, just comment like membership or something, and I'll come back and send you the link and send you some more information. About that. So see how I'm doing this again? And it depends on how you want your leaves, but so I kind of always say like little parentheses. You've got one here and another there, and then you're just filling it in. Then if you want to come back with some, you know, variation in color, you could do white or yellow, whatever you want to as your accent color. But again, super simple, right? And all you're doing is quick little brush strokes. So you can do this with another brush, but I think the angle just makes it so much easier. Thank you, Agnes. Lynn, I will get you some information. And when you guys— I'll send you a link. You can get on my waitlist. You'll also get a free painting tutorial. As my gift to you, just to kind of give you an idea. You know how I paint if you follow me on Facebook, but you get a free full painting tutorial that you can kind of play with, and then you'll get more information about how the membership works. So there we go, just some fun little leaves. You've got the little dainty ones, or you've got these bigger ones that you can do. And what I like to do, like when I'm doing Let me see what's on the back of here. No, I got trees on the back of there, which is actually what I'm gonna show you. But let's say, okay, here's another example. These are some abstract flowers that I taught. So see, I've got all these leaves in the background. So sometimes I like to put the leaves in first and just put some greenery filler back there, like these are behind that. And then sometimes after I get my flowers on there, I may want to add another one, but it's still that quick angle. I use an angled brush to do all those because it makes it super easy. and then we can use this skinnier one here, and you get daintier little leaves. Maybe if you wanted to have, like, a vine. So same thing, it's just on a smaller scale. So you can play with some different brush sizes and see what you're comfortable with. I do have a very loose, kind of messy style, so I definitely don't worry about having perfectly shaped leaves. For me, it's all about the idea of what we're painting, if that makes sense. This is not photorealism. That is not my style of painting. Okay, so I'm gonna rinse the green out of this. Let's get— I told you I would show you some trees, so let me pick a couple fall colors here. How many of you have used an angled brush before, or a variety of brushes? Tell me what your experience is. Last— I say last week, two weeks ago. I skipped last week because it was back to school and crazy, and I apologize for that. But moving forward it'll be once a week. Last week we did the large flat brush and I showed you how to do that. This week we're doing the angled brush, so next week we'll do like the filbert, but there's several different brushes that basically I'm gonna go through with you guys. So yeah, I'd love to know what you're familiar with or what have you worked with, or maybe you're completely new to painting and you have no idea what I'm even talking about and You just want to soak up all the, all the info. That's good too. That's the great thing about, you know, the way I teach and inside my membership, we literally have women from all different levels. I have women in there who teach paint parties. I have women in there who have never picked up a paintbrush before. That is honestly the majority of them. So if that's you, don't feel like this is too much for you to learn. You can easily do this with us. That is, the majority of the women in my group have not painted before, and now they're making all kinds of beautiful art. So it's super exciting for me to see as their teacher. So I'm gonna do a couple quick lines here. I'm gonna show you the Fall Chapel again. So if you missed earlier, I'm gonna wait for me to catch up on the viewing. This, if you're interested in learning how to paint this painting, just type in the word challenge and it will send you the link to sign up for this. But I am teaching this painting in its entirety and how to build a palette board. And just type in the word challenge. It's gonna be a 4-day challenge we do from September 9th through through the 12th, but I'm gonna really quickly show you kind of how to do these trees so you get a little bit of a sneak peek into what the fall chapel is gonna be like. But see these quick little messy lines I have in here? I don't even put real tree trunks down. I kind of just give the idea of tree trunks being behind there. So that's what I'm gonna show you today is just a quick couple of versions of these trees that we're doing. The Fall Chapel is one of my favorite chapels. I have one for every season. And a question I've been getting, because I have more women now because of my partnership with Heidi who do teach paint parties, they were asking if they join the challenge, do they have permission to teach them in their local town? And the answer is yes. You do. So if you are a paint teacher and you want to do that Fall Chapel as a paint night, you do have my permission if you join the group to use that and teach it to your class. So I'm just going to do a couple quick little messy lines here. So when I'm doing that to get that skinny line, because I could do that and push down hard and I get this big thick line, right? So it's all about the pressure on your brush. I'm doing it quickly, which I do suggest. See how quick I'm moving my wrist back and forth? If you do it slow, you can't get quite the same type of line, that wispiness anyway. So I recommend doing it fast, and you just keep going back and forth, and I'm just barely dragging that tip across. Now we're gonna start with some of the fun fall colors. So I've just grabbed some red, orange, and yellow, just like whatever I had next to here. I'm actually going to grab a little, like, a plum wine color too. Here, this one's called Wine. I like— this one needs to be shaken up quite a bit. There we go. Just gives a little bit different base color there. Okay, so I really load my brush up with paint. So a lot of people, that's like the number one thing when I'm teaching in class. I'll teach a step and then they'll do it, and as I'm walking around and helping them, they're like, I don't understand why mine doesn't look like yours. And I'll show you why in just a second. So I'm not gonna go all the way down here, but we're just gonna start making some messy— I'm gonna separate these a little bit so you can see what my brushstrokes look like. Messy brushstrokes everywhere, right? All different directions, all different widths. So I can pull this direction, that way, that way. So think of it like a mosaic. This is not blending. I We are not blending these. If we blend them, then we basically just have this background and then we add orange over top of it and you can't really see the difference in everything. So for the style of painting that I'm doing in the fall chapel, I want to be able to see the brushstrokes. So does that make sense how I'm showing you guys? And some can be bigger where they almost look like a square, and then some can be even little quick dashes more rectangular or even have a little bit of curve to them. It's fine. We want to have variation in shape there. So let me know if that makes sense. You can shoot me up some hearts or you can leave me some comments, whatever you want. And so that was my wine color. Now I'm going to come back with red and we're just going to start layering. So I'm gonna focus on staying closer to the bottom, and I want to fill in any negative spots. So that means any empty spots that I see there. I don't want any color coming through because this is going to be like really dense woods, so we're not going to see any light coming through there. And I may bounce back and forth. Now I'm going to go back to wine. There's not a ton of difference in these two colors. I'm gonna lower it down so you can see a little bit closer, but you see a little bit. Sometimes it's those very subtle little things that make a painting come together. So I'm gonna rinse that out. And I'm gonna go to orange, and I don't want to go all the way to the bottom. Mine kind of progresses as it goes up. So, and, and it's still wet. Again, load that paint up. It's okay for it to pick up some of this underneath color. So I'm gonna carry this all the way to this green line up here. So notice how I keep going back to my paint and loading it up again. I got plenty of paint in there. This is not all blended. You can see the wetness there, how thick that is. So I'm not trying to blend this. And if you're new to following me, I am just using regular craft paint like you would get at Walmart or anywhere. So I forgot to say, I was going to show you what happens when you don't have enough paint in your brush. So let's say someone— I showed you how much I get in mine. Let's say someone just gets like this much. They can make the shape, but they don't have— look how fine that is, and it already soaks in. It will do the same thing on canvas, and then it's harder to layer. So we want that thicker paint to where it's kind of standing off our surface a little bit more. Okay, now we're gonna do some yellow. I'm just gonna carry this over top of my grass here. I really want the yellow concentrated a lot at the top, and then I would just kind of round out my trees so they don't all end at the same spot here. But again, okay if it picks up a little bit of orange. Maybe we jump down here and have just a couple little yellow ones here and there, and then I wipe that off. I do a lot of back and forth, and then I want to work in some orange again, and you'll get these brushstrokes where the orange and the yellow mix together a little bit, or the yellow and the red, and you can just play with it until you get the transition that you like. So I'll come back with a little bit more of my red and and do the same thing because I like there to be a little mixture of the colors. It doesn't have to be an exact, you know, scale going up red, orange, yellow. We can have some mixture there in the trees. So that is a very quick condensed version of showing you kind of how I build those trees in the Fall Chapel. But this is a style that if you like kind of look back through my catalog of paintings that I use this a lot. I love the messiness of the angled brush. I love the messiness of the trees. I have another one. This is a little bit of a surprise, but I open the doors to my membership on the 15th, and as my painting that I'm gonna do live with you that night— we're gonna have a live pajama paint party, and it's gonna be free to everybody. We're gonna do one of my, probably my most popular painting of all time since I've been doing this for the last 6 years, and it's called Autumn Road, and it's more of like a rainbow color everything fall road that we're gonna do. And I have that scheduled for September 15th, so mark your calendars. I either have it 7 or 7:30 p.m. Central Standard Time at night. So just remember that Sunday evening of the 15th. I'll be sending something out to where you guys can opt into that and say you want to come to the live pajama paint party, and you'll get all your color and supply list before we go live. So I got all kinds of fun things coming up for you. I got the Fall Chapel that you can learn, and we'll do one more. We'll have a Pajama Paint Party the night I open my membership. Okay, so the very last thing I was gonna show you is flowers. And what color do I want? I'll use some of those reds. I'm gonna grab a little bit of pink too. So there's a couple different kinds of flowers you can do. Show you this again. So a lot of these techniques I use in this painting, so this style of flower and this style of flower. So one's a little messier than the other, but I did them both with an angled brush. Okay, so I'm going to show you these two styles of flowers. There's lots of other types of flowers you can do, most definitely with the angled brush, but these are the ones I'm going to show you today. I have this requested so often, is like, do you just have a tutorial on how to do your flowers? So this is it. And then you guys can take everything you've learned. You know how to do your leaves and your background now, or some grass, and I'm going to teach you flowers. You can come up with your own composition and post it in our free Facebook group and share your work that you've done from this tutorial. So all kinds of fun stuff. All right, so loading my brush up again, I'm going to get more of this wine color, I think. —and I'm just— same thing, remember how I talked about those leaves being like parentheses? I'm just gonna kind of fill this in here. Let's have a more orangey color one here. So crazy and fast, right? That's kind of how I paint. There's not too much that's slow and meticulous about what I do. But see how I don't want a perfect circle? I want it to have some curves kind of coming out here and there, right? Come back and add a little bit more here, and then I could do some like little— just kind of mush it around. Again, I don't want perfect circular shapes. I kind of want these messy type of shapes so it looks more like a flower. So I get my base color down, and then I decide what colors I want to kind of accent with. Kim said, I guess I'll have to watch replay. That's weird, Kim. She said she can't hear or see the video, only comments. Can the rest of you still see? Kim, if you're still on here, get out and come back in, and you might be able— sometimes you have to do that. Let's add— let's have a yellow flower. See, and it's got a little bit of my orange or red left in it. That just kind of adds to the prettiness of it. Okay, then let's have a pink one down here. So we've got a couple different colors. Okay, everyone else can see. Yeah, Kim, if you're still on here, just hop out and hop back in and you should be good. I need a little bit of white for my contrast, or I've got a cream. I'll just grab that. Sometimes I do use like a cream color, like that one's Vanilla Ice Cream, instead of white, just because. So for that first one, I just came in and then just started adding these quick little lines around there. So I'm just using the pink because that's what I had in my brush. We'll do the same thing here. All these colors kind of complement each other, but I don't want it to just necessarily go in complete swirls. I want the brushstrokes to kind of stagger around. I'm gonna do— I'm gonna pick up some yellow because I think that'll contrast a little bit more on this one. So I'm going to use the tip of my angled brush here. So again, I just call these quick little parentheses or apostrophes, whatever you want to call them. Just tell yourself you're making that little shape. See how I just kind of start going around? Some are longer. Some are shorter, some I push down a little harder, some are a little lighter so they have more of a line. Okay, so you kind of get the general idea there. And then sometimes I'm just a little thicker and a little messier and I really load it up and I just bounce back and forth. Between my colors. So these are really thick. Sometimes I do these with palette knife too, but it's the same, same idea. See, I'm just kind of bouncing back and forth between these colors here. They can mix. You see a little bit of variation here and there. Let's pick up some white, maybe swirl that in. A little bit. And then I like them— we're just gonna make them like with dark black centers. I kind of like the way that stands out. So I'll just come in the middle and just add my dark centers here. We're just using this for an example today, a little one. And let's come back here. So some of that orange is a little see-through. I picked up a little bit of black. That's okay. If you ever mess up or anything like that, don't try to fix it while it's wet. Just let it dry. You'll be able to come back to it. So I'm just using the tip again here. I think I might want to add a little pink into this one. And you don't have to have all your color be equal amounts on all sides. So maybe you have more pink on this side and barely any on that side, or same, same with the white. Let's grab a little bit of that cream. So just simple little brushstrokes, and you get enough of these together and overlapping each other, then it kind of just looks like a bundle of flowers, and they're really fun to do. So we've got our yellow down here. I'm gonna quickly put on like a second coat because yellow is really see-through. Maybe pick a little bit of pink to add in this one. See, isn't that pretty? So I have some heavier brushstrokes over here, lighter over to the side. Grab a little white to go around there. Now I didn't mean to grab that black, but if I try to fix this now instead of letting it dry, it's gonna blend that black into everything. So all I'm gonna do is let that dry. When it's dry, I can come back right over top of that and put pink or yellow, whatever I want to, and you won't know it's there. So just give yourself some grace when you're painting, when you're playing. It's not supposed to be perfect. If you make a mistake, sometimes they're happy accidents, and sometimes I really like what they do, especially when I'm working with a palette knife. So I move on, move to a separate part of your painting, focus on that, come back to it when it's dry, and then you can decide what you want to do with it. So don't get caught up on things in the process. But can you guys kind of see how this starts building? And you can just kind of play with these colors. So some are a little messier, thicker, and I really scoop the paint on there. And then some have more of the skinny little lines. So just quick little things here and there like that. Let's do one up here. We've got these leaves back here just dying to have some flowers on them. So this is what I mean, what I do sometimes when I'm making like flowers and vases and that kind of thing. So I already have my leaves down there, and I want them to poke out a little bit. But not all the way. And see how that's super see-through right now? Scoot this down a little bit. I'm not worried about that because I know I'm going to put enough paint on there to cover that up. So just kind of swirl that around, grab a little bit more of my pink here, and let's give this one like a yellow center. So I want you to notice I didn't rinse my brush that entire time. Now I can get away with doing that because I'm not pressing down super hard, so I'm not letting that blend too much. It's blending a little bit, it's picking up a little bit of that pink reddish color, but nothing that you can't tell that that's the center of my flower, right? And then I can just wipe off my extra because I'm working with colors that are so similar. It really doesn't matter too much that I rinse my brush. So I'm just gonna mix a little bit of my— these are pretty fall colors— I mixed a little bit of my orange and yellow. That's like the perfect fall flower color here. And I'm just doing the same thing, messy little flowers. Come in and add our black in the middle here. And notice how none of those are perfect circles. I could come back with my skinnier angled brush if I wanted to. If you wanted more detail, you get the skinnier lines with that. But what I want you to practice when you're practicing this at home, practice with speed. it's much harder for you to get the look and the style of what I'm doing if you do it slow and meticulously. So sometimes I come around my paint classes and I always tease these people in a loving way, but I'm coming around and, you know, I show them, I'm like, okay, do it, do it fast, do it quick, and I come around and they're just Slowly, you know, slowly getting that edge. And what happened— it's fine, but it's not gonna have that same free, loose style that these are. So if that's the style you're going after, picking up some speed when you're doing it helps that looseness come through in your finished painting. Does that make sense to everyone? So sometimes people think I'm like speeding them along just to speed them along, and I'm not. It helps you kind of get the style down to not allow— we're— I think most of us are so Type A by nature, we want everything to be really controlled, right? And painting is loss of control. Painting is having fun and being creative and experimenting and just seeing what happens. You'll never know what can happen if you keep yourself in that little box. And you won't explore. Like, what's, what's the worst? You fill this page with a bunch of practice flowers and you don't like any of them? Guess what? You can tear this page out and toss it and no one's ever gonna know, but you learn something. And sometimes we learn by failing and learn by messing up, and then you just flip the page and you do it again and you keep practicing. And that's how people become better artists. They don't try it one time and then say, well, I can't do it. You just got to keep going and allow yourself to make mistakes and allow yourself to have fun with it. So if you are interested in getting— like, this is a mixed media pad. I have a link to my Amazon store that I'll post for you guys in the comments when I hop off here that will show you a great brush set to get started with. It will show you— this is a mixed media pad that can handle paint and stuff. So everyone in my membership has one of these and they practice in this before they go to their full paintings. But it's great to really work on brushstrokes, details, all that stuff that you maybe are a little too nervous to go straight to a canvas to do it. This allows you the freedom to just play. So like, look at this one's all wet and I don't want to mess with it, but like, this is my old one. And these are all different things like I've taught and played. These are all from old Facebook Lives. See, I've done leaves and flowers before, my sunflower fireworks. But this is just like a big sketchbook for you to practice and have fun in. Some of my sketches. So I highly, highly recommend getting one of those. And even if you can take like 10 or 15 minutes a day and just focus on this. It's kind of like therapy. It's kind of like the same as going to do yoga. You're focused on what you're doing right now, and the rest of the world kind of leaves you, and that's good for us. We need that brain reset. So allow yourself the freedom to just have fun and play. So I hope you guys enjoyed that. Debbie said that's what— that is so hard for her to do. I need to learn to let go. It's so much more fun when you let go. I promise you, so much more more fun. So I'm gonna flip you guys back up here really quick just so I can— Facebook doesn't like what I'm doing. I am rotating my phone. Now I'm upside down, Facebook. There we go. There's a little message on my screen saying rotate your phone. Okay, so if you want to learn more about painting with me and you want to do the fall challenge, this is the fall challenge. We're doing the chapel. You learned how to do a palette board. Or you can do it on canvas, but you're gonna learn everything step by step every bit of the way. Don't let the finished product overwhelm you because I break everything down into simple step-by-step instructions, and those ladies that are on here who have been painting with me can tell you that. So if this looks like something you want to do, it's only $15. It starts September 9th and goes through the 12th. We'll have 4 lessons. So I break it down into 4 lessons, one per day, and then the videos stay in the Facebook group. So you do not have to catch them live. You don't have to worry about my schedule. I usually get on in the morning while my kids are in school, but you don't have to worry about that. So just comment challenge if you want more information about that, and you will get a message, a message from my messenger bot that will have the link to the challenge. It's only $15. So registration closes for that, I believe, on the 6th. So September 6th. So you've got a few weeks, but when you get in there, we'll be adding everyone to the group at the beginning or the end of August, and then your supply list and all that good stuff is in there too. So I hope you had fun painting with me today. Would love to have you in our Fall Chapel class. And that's it. So I am off to Canada. It's gonna be all fun and games for me for the next 5 days with my girlfriends. and you'll probably see us back on several times. We have some fun stuff planned for you guys that we're all kind of partnering together with, but it's a secret. So, um, anyways, we'll be back on live from Canada, and then next week I'll jump back on and we will do a new brush and I'll teach you some new techniques with that. So everyone have an awesome day and I will talk to you soon. Bye!










