Let’s Talk About Brushes! - FILBERT BRUSHES || The Social Easel
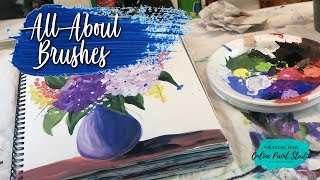
Christie Renee Hawkins paints a hydrangea still life with a filbert brush, showing how its rounded tip makes petals and comma-shaped leaves. She covers paint load, color mixing, wet-on-wet blending, and layering to build depth.
Chapters
Hey guys, how's everybody doing today? It's Christie with The Social Easel, and today we are going to talk about our filbert brush. This is the last one in my series of brushes that I'm going over with you guys, so if you missed the first ones, you can go back to my YouTube channel and you can see all of those posted there. So today we are gonna do our filbert brush, and I'm gonna show you some flowers and leaves. These are really easy to do with the filbert. This is an example of some of the flowers that I've done. So if you want to paint something like hydrangeas, the filbert brush is the perfect brush for that. So I'm going to show you that today and some quick and easy things that you can do with this. Let's get a couple more colors of paint here. And if you know someone who would want to see this and catch up on some new painting techniques, be sure to send it their way. So I'm going to get some light purple, and I like my blue. That looks really pretty with the hydrangeas. Maybe we'll pick up a little bit of dark purple here. Hey, Deborah! And when you guys get that message, it will have some links at the bottom for you as well. So if you're new to the Social Easel and you kind of want to catch up on everything I have going on, you can look at those links below. We are opening my membership where you'll have me as a personal instructor teaching you paintings each month. That happens this Sunday, so we're only a few days away, and we're gonna have a live paint party to celebrate the opening of that. So that's gonna be tons of fun, but you can get on the waitlist there, so you'll get emails as well as Facebook notifications to let you know about all the upcoming stuff. And I also have a free 4-part video series that you can take advantage of as well, where you'll get more details like this. Okay, so we're just gonna start. I've got a little bit of my darker blue and kind of like this lilac color, and the filbert has a rounded tip, so it makes it really easy to make petals with it. So just very simple, and when you stack enough of these on top of each other— see how I kind of rotate around as I'm doing it, but when you stack enough of these on top of each other, it starts looking like little petals from a hydrangea. And you don't have to have them all the complete flower. Does that make sense? So you don't— they don't all have to have 5 petals. They're gonna overlap and pick up some different colors So I just kind of bounce back and forth between my colors when I'm doing these. You could even come in with just a couple lighter brushstrokes, add a little light source in some areas. So super simple. And what you'll learn if you go back and watch some of these other videos and the different brushes that I use is when you use the right brush, you can let the brush do the work for you. So just by making these simple little pulls, you're basically just kind of pushing down and pulling, it makes the petals for you. So I hope that makes sense. Then, so that's kind of holding it flat like this. We could also go on the side and just do some quick little brushstrokes kind of clustered together to make some like taller flowers that might come out of your bouquet. And this has a mixture— I like to put a couple colors in my brush too because you kind of get that fade where it transitions from one color to the other. So it's more of this bright purple on top and then it kind of transitions to the darker down below. And that's just holding, again, the brush on its side, and you're not pushing down super hard to get these. You can let them overlap, but very simple way to start building flowers. And a little centerpiece that you do. So let's pick up a little bit of green here. I'm gonna leave my blue in there, and if we wanted to, we could come in and pull a quick little line down here for the bottom of that. Maybe some of those bigger leaves over here where our hydrangeas are I'm just gonna kind of push out on the side here. I'm gonna get a little green and a little bit of white here, and we're just gonna— like a comma shape, okay? So like little commas, just to kind of come in for a leaf here. Need a little bit more paint on my brush. When you're working with— when you're learning how to paint, having the right amount of paint on your brush is super helpful. So make sure you have enough on there. If it's dragging and starting to look like wispy, then you can pick up a little bit more paint so you can get your brushstrokes a little bit better. And these would make pretty leaves with pumpkins too, these big fat ones. Then maybe I've got a little brown left over here from my painting this morning. You could come in Add just a little line there, maybe drag a little bit of that in. This might be pretty to do even some fall leaves with. Let's see, I've got a little bit of red here, kind of play with it. So real simple, nothing too detailed. But just by making those like little comma-like shapes— pick up a little bit of orange here— you can get these simple rustic-looking little leaves. So just a couple ideas. For you. I'm using some more purple in here because that's what I have left on my palette. So let me know if you guys have any questions as we're going along. And then I am gonna get this really quick. Hang on. There was one more I wanted to show you. Oh, I was going to show you the different ways that you can, you can do this for the flower. So we've— I've shown you some other flowers, but you can do the same thing kind of with that comma shape, and these just have a little bit more roundness to them. But same story, so there's a couple different brushes you can use. You can use the angled, you can use the round, depending on how big you want your brushstrokes. And then same thing with these little— like, if you're not pushing down hard, maybe you just want some little flowers kind of peeking through, adding those little dots in. So let's take this and these different techniques that I'm showing you and let's turn it into a little flower arrangement. Let me find myself a blank page here. If you're curious about the supplies that I'm using, this is a mixed media pad, which is kind of like a big sketchbook for paint. Here, we'll just flip this over. This is awesome to practice in. So everyone in my tribe membership has one of these, and this is what we use to do our paintings in when they're practicing brushstrokes and techniques before they want to take it straight to a canvas. You can use this mixed media pad. To do that. So let's just make ourselves a little vase here, and I'm going to use the same brush for the entire painting here. So we're only using our filbert, which works great for filling in too because it picks up a decent amount of paint here. How many of you on here have gotten your free video series? That got sent out last week. You should have received video number 2 yesterday, so if you haven't gotten that, just comment series or links or whatever, and you'll get a message with the link so you can sign up for that. And they all come straight to your email inbox, so you can keep those and refer back to them whenever you want to. So I'm just working with some shading here too. I'm just going to choose and say this is where my light is coming from, over on, on this side, so we'll have a little bit lighter over here and then pick up a little bit more of my darker blue. I need to grab a little bit more of that over on this side. Hey, Jean! I like a nice little mixture of colors here. Now I've got some more green already, so I like to add— if you watched my sunflowers one the other day, you can kind of see how I like to add the greenery in my flowers before I Kelly said yes, she got her second video. Awesome. I like to add my greenery before I add all the flowers on, and then I can kind of go back and fill in. And there's a couple things you can do. You can get a couple shades of green. I'm gonna pick a darker one too. Or if you wanted to do some color mixing, you could get one shade of green and either add some black to it to tone it down to have some darker areas, or red because it's opposite on the color wheel, that gives you some darker areas. So we're just going to start— let's just add some leaves in here. And you can still get a pretty decent point when you're working with a filbert brush on your leaves. So see, I'm just kind of pushing down and out. And if you get a couple colors in your brush like that, kind of get that nice mix. And it doesn't mean I'm necessarily gonna have flowers attached to all this greenery that I'm putting back here, but I like to kind of have a little bit of filler. But this is fun to just kind of practice your brushstrokes, make your own little flower arrangement, just kind of play with it a little. But the filbert brush is nice, gives you those slightly curved lines there. Let's have a couple maybe come out here, and we'll add some of those little lines I told you about. Just kind of fill that in with a little green here. So what color— I'm already liking this. I like all the different shades of green. You guys like the leaves so far? So that was like a dark green. This one's called Campground and Apple Tart. These are from Michaels. Actually, they're all from Michaels. Shamrock, Campground, Apple Tart— just a nice mixture of greens. And I try to teach my, you know, my inner tribe, don't get too caught up on the names of things. I'll share them with you guys, but any greens are fine. If you looked at my cabinet over here, you'd see I have about probably 20 different shades of green, so it doesn't have to be anything specific. That's just what I grabbed for this project. All right, now I'm trying to decide what colors I want to have for my flowers. Maybe we'll do some hydrangeas in here. I think I want a little bit more white. You guys got any ideas for me? I want some contrast with my vase. Maybe some pinks and some corals. The corals will be pretty because orange and blue are opposite on the color wheel. It's kind of the same thing— coral, orangish. They're gonna complement each other well. So I've got some white, I've got a couple shades of purple, still a little dark blue, I've got some hot pink and coral. So we'll just kind of play with this and see what we come up with. So you guys are getting to watch me kind of build this composition as I go. I don't have it completely planned out. Let's start with some hot pink little flowers back here, and I'm just using the side, just kind of dabbing along just like those little dots there. Might be pretty to pick up a little bit of purple in there. Make it a little bigger towards the bottom. So what questions do you guys have for me today? Questions when it comes to painting, questions about video series or the membership that's opening. What do you guys want to know today? Let's add some coral in here, maybe some bigger. So I've let my green dry a little bit so it's not mixing those colors too much. If you guys are curious about supplies, you can go to my Amazon store. That will be in the links in the message that's sent to you. So if you comment, you'll get a link to my Amazon store and you can see all my favorites that I use. To help you get started if you're not sure where to start. I'm liking it so far. Now I'm maybe going to add one more pink over here. Let's pick up a little bit of white with this one. I think I might want to come back later and add some some pops of yellow in there. Cindy said, perhaps a lesson on using social media. I actually do not teach the business side of things in my group. It is just painting. I do have, however, I have guest speakers come in. So the fourth week of each month, I either have a guest artist come in or I have a guest business coach. Like this month, I have my friend Christie, who runs the entire background of my membership. She's gonna come in and actually talk about that specific thing. So I don't personally teach that, but I have people who specialize in those areas to come in and teach you guys those things. So Christie's gonna talk about that, how to use social media to grow your business, how to get things for sale, if you're to the point where you want to start selling some stuff, building your audience, all that good stuff. So that was a good question, Cindy. Alright, let's do some hydrangeas here. I'm gonna get some purple, a little bit of white, and you don't have to worry too much when you're starting. About them all being those 5 petals like I talked about earlier, because we're going to be overlapping to get this hydrangea nice and full. I think I want to pick up a little bit more of that purple. Isn't it fun to watch it kind of come together? Same brush, all these different brush strokes that we're using. I'm gonna get a little bit more of that purple. And don't be afraid to overlap when you're putting together like a composition like this. The more you overlap, the more depth it gives, so it pushes those other flowers that are in the back behind there. I think I want this other hydrangea to have a little bit more white in it. Cindy, that's okay. You can have a bigger chapel, or you can let it dry and paint over top of it. You can easily pull those fall leaves back over top if you don't like the shape of your chapel that you've got so far. So I think that's an important lesson when learning to paint too, is just because you put something on your canvas or on your mixed media pad, whatever it is that you're working on, it does not mean it's permanent. When you— and I think I'm gonna do like a little video on this, kind of like the top, top common, top 5 common mistakes that people make with painting, but learning to just kind of overcome that. That just because you put something on your canvas, if you do it and you're just not happy with it, you can go back and change it. Don't feel like you have to be stuck with it. And sometimes it's also good to just step away from your painting. I recommend people take pictures of their paintings while they're working on them because you see different things in pictures. Like, I'm able to look up here and see in the video what this looks like too, so that's good because it gives me a different outlook, a different perspective on my painting. But yeah, if you do something you don't like in your painting, don't be afraid to just let it dry in and go back over it if you need to. What do you guys think of those hydrangeas so far? Aren't they pretty? Clintus, so I can be your example of what not to do, but hey, listen, it's all a learning process, right? We can't learn without making mistakes, so it's part of the process. And in my tribe, we always say— this is our little saying now— is just trust the process. I say it all the time when I'm in the middle of teaching you lessons, because a lot of times things start out not looking that pretty, but you just have to trust it. I show you everything step by step all the way through the painting, so I know what the finished product's going to look like. There may be points in time along that process when we're painting and you're like, "Ooh, I don't know about this. I hope Christie knows what she's talking about," but I promise you I do. You just have to trust it and keep moving. Try not to get too stuck and focused on one area. I try to keep people moving with a decent amount of speed because it's very easy to get fixated on areas, but if you just keep moving along, you'll learn that, that one thing you were fixated on isn't that big of a deal when you get to the end of your painting. So case in point, kind of looking at this, think of all the leaves I had on there initially. Now you can barely see any of them, but that's okay because I didn't know what I was doing when I started this. But I can come back and add some more leaves back in. I can come back over here And just paint and overlap. Just because I painted something on there doesn't mean I have to stick with what my original thing was. Okay, same thing for you and your paintings. Maybe have another one kind of stick up, up here. But I do a lot of back and forth and a lot of looking and stepping away and kind of deciding what I like and what I don't like. Thank you, Helen. Thank you, Glynnis. I'm glad you have. All right, I want to do a couple more skinny little lines. See, I'm still using, still using that filbert brush, and when you turn it on its side, you can get some skinny little lines with it too. Maybe have another one kind of come out over here, cover our vase a little bit more. Can break up where that blue and purple is meeting, give it a little bit more contrast there. And then I'm gonna let that dry a little bit and And I want to make this a little bit darker down here. Let's give it a little bit more shading. So I'm just gonna— that was way too much black, but I'm gonna take my blue, tiny little bit of black. You don't need a ton of it. Just add a little bit of darkness over here to kind of tone that down. This is going to be the darker side of our vase, almost is like a navy color. And I just kind of keep blending, get a little bit more blue on there. And it starts getting a little lighter over on this side. So when you're blending like this It's working because all of my paint colors are still wet. So if I tried to blend this and they weren't wet, it'd be dragging and you'd see like definite lines and brushstrokes instead of it kind of blending together. So if you're doing some blending and shading, just make sure all your colors are staying wet, which again kind of comes in with the the speed that I talk about. Sometimes you do have to paint a little faster depending on what part of the painting you're doing. Sometimes you want to paint a little bit slower, so you just kind of have to judge it. Let's add in some more white up here. We talk about layers too when you're working with acrylic paint. You don't want to keep laying thick wet paint on thick wet paint. You want to let it dry a little bit in between your coats so that your colors actually do layer and get thicker instead of just becoming a thick gloppy mess. And then I can add more more petals, more little flower bursts for the hydrangeas. So it's just a lot of layering and stacking. And then we want to add our centers. So I'm going to use white on these blue ones, and my trick is to just tip— flip my brush over And I'm just going to come in the center and just dot down and add some centers to some of these flowers. It doesn't have to be all of them. Maybe do some darker ones in the center of these. Barbara, the Fall Chapel is in its own private Facebook group, so you should have received an email with a link to that group. If you didn't, you can just shoot me a message and I'll send you the link to that group. And the video— we did video number 1 today, and it is pinned in the announcements at the top. And we're going live each day inside that group at 9:30 Central Standard Time. So yeah, that is up and going, and we just got started this morning. All right, so what do you guys think? You like it? I think I want to come in and add maybe just a little bit of yellow. We'll see. I may not like it. I may like it. And then I think I'll probably come back and add some little white dots in there too to kind of act as like baby's breath. That's a fun little flower bouquet. Yeah, it does need a table, doesn't it? Let's add a little table down here. And if you wanted to, you could keep going and fill in a background. I didn't put a background on this one. And then we'll just pull that vase back out over top of this again. Hey, Nikki. All right. Take a little bit more black here, right up against that, and we're just gonna pull it out this way. Sometimes I like to add the accent color itself in the shadow instead of just black. So you can kind of play with it and decide how dark you want it to be. I could keep playing with this, come back and add some darker greens over on this side, maybe a little bit lighter over here, or even a little bit of yellow mixed in, in my leaves. You could do that. So just kind of keep playing, stepping back from it, getting different vantage points, and decide when you think you want to be done with it. Thank you, Cindy and Susan. I'm gonna come in, flipping my brush around again, and I'm just gonna come and dot in some white. You won't see it as much in this just because I have a white background, but some little clusters of white in here. So this was all using our filbert brush. So it's great to use for flowers and leaves. It's had a little bit more of a highlight over here. Maybe pick a little bit of white up. And not everything has to blend. You can have some bold brushstrokes that don't necessarily blend into something. All right, ladies, I think I'm done here. So there's your lesson and little free bonus on doing a little flower still life. So let me know if you like it. Let your friends know about it if you want to pass it on to them so they can see the video. And just comment if you have any questions for me. You'll get a message from me with links to to what I have going on right now and just save the date. This Sunday night, 7:30 PM, we're gonna have a live pajama paint party. You're gonna get more details about that, but just mark it on your calendar. 7:30 PM this Sunday night, a live paint night with me, and I'm gonna give you guys all the colors and everything that I use, and it's gonna be a fun time, and we'll open the doors to my membership. So I will be back on tomorrow, and we'll do something else fun. Okay, bye.










