Let’s Talk About Brushes! - FLAT BRUSHES || The Social Easel
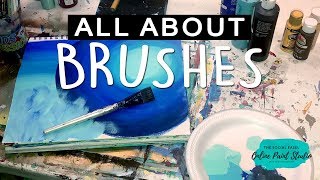
Christie Renee Hawkins teaches how to use a large flat brush for painting backgrounds and trees. She covers loading the brush, whole-arm motion, three background techniques including blended skies and circular gradients, and dry-brushing for highlights.
Chapters
Hey guys, how's everyone doing tonight? I am Christie Renee Hawkins with The Social Easel, and tonight I wanted to hop on and show you everything you can do with a flat brush. So if you are new to painting and you've never done it before, I'm going to show you some tips and tricks and different things that you can do with this one brush. And this is video number 1 in a series of videos that I'm going to be doing for you guys over the next few weeks. So each week I'm going to feature a new paintbrush and show you all the different things you can do with it. So there are several. I'm just going to show you just a few that I have handy here. Some of these may look a little old and beaten up. So as you guys are hopping on, let me know where you're watching from. I always like to see where everybody is, and I'm just going to show you a couple brushes that we are going to have coming up. and then I'm gonna flip the camera around and I'm gonna show you how to paint and the different things you can do with them. So when you are on here, commenting on this post will trigger a message from me and my little bot on this page and just give you more information about the Social Easel. So if you are new or you haven't watched me paint before, it'll give you that information and you can choose whether you want to receive alerts when I go live so you don't miss any of the videos. So, um, tonight we are doing the flat brush. Hey, Jesse! And then there's a fan brush that we'll do in another week. Our angled brush— this is one of my favorites. I love the angled brush. We have our little round, so I'm going to show you on that week, actually, probably a few different things you can do with a round brush because this is a round brush. This is a round brush. Some of these are beat up. And this is a round brush. So depending on the size of them, and some of these are like liners and daughters, you can do different things with them. And then this is a filbert brush, and this is really good for petals. So that will be over the next few weeks, and tonight we're gonna do our large flat. So I'm gonna pull you up on here really quick before I flip you around and just let me know if you have any questions as we're going along. Tonight I am just using craft paint. So that's one question that I get pretty often is what type of paint do I use, and I'm gonna do a live video on that and I'm gonna show you some different paints and what what paint you may want depending on the project that you're working on. So hopefully these techniques that you're getting ready to see will help you with your painting. And let me know in the comments, if you don't mind, if you are new to painting or if you're a seasoned painter. Where are you at? Where are you at on your artistic journey? So tonight I'm gonna use some cool colors. Just do a little blending. These are some of my favorite cools. And the first thing I'm gonna show you— again, this is just like a 1-inch flat— is just a basic background. This is a blended background. I'm gonna kind of divide this page up into a couple different things so you can see some different techniques on the same page. —so real basic background that I do for skies, like sunsets, or like ocean water, any kind of water really, lakes, all that kind of good stuff. Really, really load my brush up, and I'm going to show you that again. So see how much paint I get in there? So you really want to have plenty of paint in your brush, and that helps See how easily it glides nice and smooth, and I just keep going back and forth until it's nice and blended. Now if you want to wipe off some of that excess blue in there and just get more of the turquoise, you can do that. Kelly said she's a new painter, only did the kids' summer art camp with the kids, and they were so cute. I love all their pictures, so hopefully you had as much fun as they did. So I just wiped that blue out, but see, I still have plenty of paint in there. I'm just going to keep going down, and I kind of keep going until my paint is almost gone in my brush. And then I'm going to grab some lighter paint here, and we're just going to have this really pretty transition. But if you practice this at home, what I want you to practice on is the blending. So this is a very simple background you can do with sunset colors, watercolors, whatever you choose. Okay, so that is background number 1. And by the way, I am not left-handed. Facebook has a glitch right now and it is not letting me flip the video around, so you're seeing, you're seeing the opposite of what I'm doing, so to speak. Miss Susan says she's had a successful business for 6 years. That's awesome. All right, so So that's background number 1. Now let me show you a different kind of background. We're gonna do kind of a circular background. So now I'm starting with this lighter color in the middle. I'm just kind of blending that out. So I want kind of like a circle. Okay. Still plenty of paint in there because I'm able to move it around. Let me show you what happens if you don't have enough paint. This happens a lot in my class and people are like, why isn't it working? Mine doesn't look like yours. It's because we're a little scared of our paint and we'll start by putting like that much in there instead of that much, and it makes a big difference. So hopefully you can see that having the right amount of paint in your brush really does make a big difference for you. So now I'm going to go to the darker color and I'm going to come right up against it and just kind of circle around Both of these are really good basic techniques that you can practice on. So I like to move fairly quickly when I'm doing backgrounds like this because just me jumping down here, that dried a little bit. So I'm gonna jump back to that lighter color in the middle like that, and same thing I was doing over here with horizontal lines, now I'm doing with circular. And I really— notice I'm not just moving my wrist. I'm moving my whole arm, and that may seem strange that I mention it, but when you just move your wrist, people end up with ovals instead of circles. Okay, so there's only so much range of motion you can get if you're just using your wrist. So I move my whole arm while I'm doing it. Then I'll grab some more of this darker color. So same thing, you just kind of keep working. We don't want it to look like a bullseye, we don't want it to look like a ring. Ring upon ring. We want to keep blending out. Now I'm gonna pick up some of that darker blue. Scoot you guys down just a little bit. I'm cutting you off. There we go. Hey, Nikki! So now I'm gonna go into the darker blue, and I go all the way around first, but I don't want to leave it like that. Because that just looks like a ring around it. So I'm gonna slowly start blending that in, kind of work that extra blue paint out here, and then I'm gonna grab a little bit of the second color. So here's my other tip for you: you want to blend two colors together, okay, it's So I've already got a little bit of blue in here. This is still wet, so I'm going to grab a little bit of that other color. You want a little bit of both colors, and then you're going to overlap that line where they meet. And see how it softens it? And then just keep blending out from there. And now that we've got that nice and blended, we can go back to our dark blue and keep getting darker. The further that we go out. So a lot of times on my paintings, this is when I like to get out about like this, and then I can add a little bit of black or purple, kind of whatever you want to. I like to usually add a little bit of black just to— so it's kind of like a dark navy. But you get that really pretty contrast the darker you go. So this makes it really pretty. This is very similar to my sky in my Dragonfly painting, if you've seen that. That's one of the ones that I teach in my membership. So doors open for my membership September 15th. So if you've been wanting to learn how to paint and you don't want to do it alone and you want to have an awesome group of friends to do it with, you want to be a part of our Inner Tribe full of awesome ladies. We have our own private Facebook group where we get to share our artwork. You have over 40 videos that you get to go back and pick which one you want to start with, plus 3 new paintings with me each month, as well as a guest speaker at the end of the month. So full of all kinds of goodies for you guys, and I think we're 37 days away from opening doors to the membership. So super excited about that. Okay, so that's 2 things. Now I'm going to use this background. I've got a little bit of empty room over here. What do you guys think of the circle? It's pretty, isn't it? I like blending these colors together. So I'm just rinsing this out just a little bit. Thank you, Susan. And I'm gonna grab that lightest color and a little bit of that dark cobalt at the same time. And I'm just gonna make some crazy brushstrokes just back and forth all over the place. This is another one of my favorite backgrounds, so it gives it more of that abstract feel. It's just a fun, crazy little background, but it's really good like behind florals and like that kind of stuff, like maybe like a still life, and you just have that fun texture and brush strokes. So super fun, very simple. You saw how fast that was. My students in my class always, always love it when I give a background like this because it's very simple and fast. This is an example of one of them, so you can see like on the, behind the cotton, I have all those crazy brush strokes on there. So those are 3 different backgrounds you can do with the big brush. Thank you, Teresa. Oh, Teresa said, how much is the membership? So this is the very last time it will be this price. Um, I have had my membership for over a year and a half now, which means we have a ton of content in there. So this is the very last time I'm going to offer it at $47 a month. And if you join in September, um, you stay locked in at that price. So when it raises in 2020, you will not have to worry about that. Your price is gonna stay the same as long as you are a member. So this will be the very last time it'll be $47 a month. So definitely the time to get in and join the community. I'm gonna find another blank page here. Just push that down slightly. All right, so that was with a large rectangle. What about a smaller one? So I've got— this is a brand new brush. This is from my favorite brush set in my Amazon store. If I can get it out of the package— there we go. I love these brushes. This is Addie's Art Set. And if you want to know where my store is, just go to thesocial easelonlinepaintstudio.com. And when you go to my blog post, there's all kinds of good information there for you. But when you go to my blog post, in the column, it'll say shop here, and that's where you can shop all those supplies. So flat brushes are just like rectangular bristles. So these are really good for making squares, rectangles, all that kind of stuff. Because you can just pull your brush along and you get these nice smooth lines. That's the same thing I do when I'm doing like a horizon line and I want a really smooth line. Sometimes people struggle with like it's a little bumpy and wavy. If you can just hold your brush, really load it up with a lot of paint, and just pull your brush that flat brush gives you that nice smooth edge. And then I just kind of flip it over and reload it when I need to. And then these are going to kind of be— oh, I do have some black here. I'm going to show you how to do some trees. These are like— I've done really fun Christmas trees like this, so these are going to be like evergreen looking trees that I'm gonna show you. Susan, I hear you. She said, "I've run my business by myself this whole time," and she loves spending time with other business owners and creatives. I agree. It makes it a lot more fun to do it together, for sure. Okay, so this is a very simple tree. Give yourself a base, you know, that's like your tree trunk, and I'm gonna start at the top. Get a little bit more paint in here, and I'm only going to use like this tip right here and just kind of dab, and then I'm kind of going out from there. Okay, so I'm not putting the whole length of the brush down when I'm doing that. Then as I get further down, I can, and I just start kind of staggering. I like to fill in up against my tree trunk first. I don't really want to see that. You could see it maybe in a few areas, but we want it mostly covered up. And you can decide how thick you want your tree. So if you're doing like a big fat Christmas tree, you just kind of keep going. Notice I'm not changing the angle of my brush. I'm not doing this. It's staying horizontal, but I'm going out further. And then you can kind of rotate back up, turn it vertical, and get like a nice point. So just like that, you've got a simple tree that you can do with the same brush. So this one brush we've done all these different things with. And then what about dry brushing? So if you get that, that really pretty look, especially if you're painting on wood— I don't think I have I don't think I have a scrap of wood, but dry brushing— I've got just a little bit of paint in here, not a ton, so I'm just going to use this as an example. Basically what that means is your paintbrush is not fully wet, it's a little bit dry, and then you get this like wispy— this is like dry brushing. That's that technique. So this looks really good like if you have— well, you could do it two different ways. If you have a dark background and you want to do some white over top of it and kind of give it that softened look, you could do dry brushing with that. Or you could have a white background and then want to age it a little and pull some of the dark colors. So see, like, there's hardly any paint in there and I'm just lightly dragging it over the surface and you get that dry brush technique. So that is it, my friends, just some quick tips I wanted to show you. Let me know what you thought of that lesson. If you want to make sure that you're notified when I go live, because this is just lesson number 1 out of this series, so each week I'm going to show you a different paintbrush, and I kind of went over those at the beginning if you came on later. But if you want to make sure that you get notified when I go live, just comment. You can comment anything and it will trigger a message to you from my Messenger, and then you can just reply yes and you'll get notified. If you are interested in learning more about the membership, you can type in waitlist too, and it'll also send you the link for that, and you can get on the waitlist, and doors open September 15th, and I've got all kinds of goodies planned leading up to that. So had fun painting with you guys tonight, and I will see you next week. Bye!










