Let’s Talk About Brushes! - ROUND BRUSHES || The Social Easel
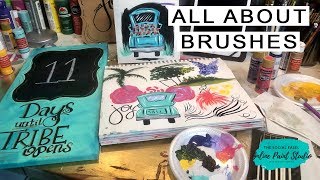
In this live tutorial, Christie Renee Hawkins walks viewers through a comprehensive set of round‑brush painting techniques. She begins by engaging the audience, explaining how to receive notifications and where to find links to supplies. The core of the session covers how brush pressure controls line thickness, demonstrating the creation of palm trees, stippling for flowers and foliage, comma/parenthesis strokes for petals, starburst/firefly effects, and quick outlining for small objects like a truck. She compares round brushes of various sizes (0, 2‑6) with a tiny liner brush, showing how the same brush can produce both skinny and thick lines depending on pressure. Throughout she offers practical material recommendations—affordable craft brush sets sold in her Amazon store, mixed‑media pads for practice, and tips on keeping the brush loaded with paint. Christie also addresses common viewer questions about lettering, blending, and time management, promoting her membership, a free 4‑part video series, and a limited‑time Fall Chapel Challenge. The tutorial blends instructional, promotional, and community‑building elements, encouraging viewers to practice, experiment, and share the content.
Chapters
Hey guys, how's everybody doing today? We are getting ready to do brush number 4 in our series, and that is the round brush, and I've got several things I'm gonna show you with that. So as you guys are hopping on, let me know you're here. When you do comment, just a heads up, it will trigger a message to your Messenger on Facebook, and you can always unsubscribe to that just by typing unsubscribe. But if you would like to get notifications of when I go live, you can reply back yes, and it will notify you every time before I go live. So that is set up, and it will also provide you all the links that you need of things that I'm going to be talking about today. But today we are gonna do some fun stuff with our round brush. So let me know where you are, where you're watching from today. Maybe if you're new to painting, what's your experience level? All right, I think I've got you set up here so I can see comments. Okay, so there's a few things we are gonna do with the round brush today. Hey, Kathy! I'm gonna show you how to do palm trees. That was a question the other day that someone had asked for on a live, so I'm gonna show you how to do that. And I'm gonna show you how to use stippling and how I use that for flowers, and I also use it for trees and leaves. We're gonna show you how you can use commas, or parentheses is what I like to call column to create flowers with. We're gonna show you how to do a starburst, and then I'm just going to talk to you about how using— I've got 3 different round brushes here, but I'm going to talk to you a little bit about just pressure and learning how to get the right amount of pressure when you're painting so that you can get those skinny lines that you want. Because I know that's something a lot of people struggle with, and it's one of the most popular questions I have is like, how do I get those skinny lines? Every time I do it, my lines are too big. So it's two things: one, not having the right brush, and two, the amount of pressure you're putting down. And I'm going to show you that with these brushes, because even though they're all different sizes, I can get thin or thick lines depending on how hard I push down with them. Hello, Sandy, about an hour away from South Dakota. Awesome. We are spread out all over. All right, so the first thing I'm going to show you is how to do palms. Now I am using— you can use a thicker round if you want to. This is a 0, and this brush comes in the set that I have in my Amazon store. And I'll post the link for that. I'm gonna post one thing and it's gonna have all the links of all the stuff that I talk about, so it's all in one place for you. But if you like these brushes I'm using them, they're the white brush set, just to kind of show you some of the different sizes that they come with. This is the 0 out of that set, and this is a good size for doing palms. So the first thing you're gonna want to do is kind of create like a starburst-like shape. And notice how light I'm pushing down. Can you see that from the aerial? I'm gonna watch my replay really quick and see if I can see. So when I am doing this, you still want plenty of paint in your brush, but I'm not pushing down super hard. Now these lines don't matter too much because we're going to put palm leaves over top of them. So the thickness of these doesn't matter, but I just want you to see how little I push down. So this is just me lightly dragging, and then if I push down hard— so same brush, just a different amount of pressure. So that's kind of what I'm talking about. So with the palms, I'm just going to start Right up here. And I'm coming down. You're going to keep reloading your brush. Okay. So this is important. You want to make sure there's enough paint in there. If you don't have enough paint in your brush, you're going to get frayed out looking lines. Okay. So keep in mind, these are little bristles. They don't hold a ton of paint. So you are going to have to keep reloading them. And I'm just doing quick little brushstrokes. And I'm using that line that I put on as a guide, and you can decide how far you want your palms to come out. I always like to do one side first, and then I decide if I want to go back in and fill in on the other side. So for this side, I'm going to do over here. And there are so many different types of palm trees. You can definitely have thicker leaves than what I'm doing. This is just one version, one style. So say I'm just doing this kind of like flicking motion. And let me know if it's your first time watching or if you're new to the Social Easel. I don't think I introduced myself at the beginning, but I'm Christie Hawkins and I'm the owner. So I have been teaching people how to paint for the last 6 years. So I've taught thousands of women both locally and online. And these are just some quick little brushstrokes I'm showing you here. So you can kind of get the idea, and then like I said, you can go back in and fill these in if you want them thicker. You could go back with a lighter green. On this one, I'm going to come out on the other side, and you don't have to even come out the equal amount on both sides. Maybe one side of your palms are a little bit shorter. And I'm painting in a mixed media pad. This is what I recommend if you are just starting out painting. Honestly, even whatever level you're at, I recommend getting one of these because it's like a big giant sketch pad for paint, and this is what you want to practice in. You don't want to take what I'm teaching you today and go straight to a canvas and try to do a painting. You want to fill at least 1 to 2 pages of practice rounds of doing this kind of stuff. Before you take it to a canvas. And if you need to, doing these angles, sometimes it helps to rotate. So I do that when I'm painting. Sometimes I rotate my canvas if I need to, to get a better angle that feels a little bit more natural. So there's nothing wrong with needing to do that. You do what works for you. So I'm doing some of these a little bit different. Some are a little thicker. So you can— you see that these are a little bit thicker than these started out over here, and I'm pushing down a little bit harder on my brush. And I can show you— I'm going to show you with the liner brush too how different it looks with different brushes. So this is with a 0, 0 round. And then like I said, you can decide if you want to have a couple kind of shoot out that other side, or if you just want to leave it. So you can decide how full you want it. So this is with a number 0 round. Now I'm going to show you the exact same thing with a little liner brush. These are also in my Amazon store. This is I'm gonna show you what they look like. There's 12 or 14 of them. These little itty-bitty liner brushes, and I love them. These are my new ones that I haven't used yet. So the one I'm using is a 4/0, but basically it's a tiny itty-bitty little brush. So we're gonna do the same thing. I'm gonna jump over here. We'll just use these lines that I've already got. And again, I'm not putting a ton of pressure down. Quick little— notice what my wrist is doing. These are quick little movements. Sometimes when I'm teaching in class, people are like, no, you're making me move too fast. I don't try to get you guys to move fast for the sake of speeding through the painting, but I do do it to help you get the brushstroke correct. Because if you go too slow, it looks heavy-handed. You see that? I can't get that same look I can with a quick flick of my wrist where it kind of feathers out a little bit more. You can get really, really skinny lines So practice this technique in your mixed media pad or sketchbook. Again, I recommend the mixed media pad because this paper is meant for paint, whereas if you do this in a sketchbook, it's gonna— I mean, this will warp a little bit, but it'll dry flat. If you put something heavy over it. Your sketchbook is not meant for paint, though. It's just meant for pencils and pens. Cheryl said she had a problem with lettering. Cheryl, I'm gonna add that to my list. Really, I've got a little list here so I don't forget everything I'm teaching you. I'm gonna put lettering on there because I was gonna show you that, so I'm glad you brought that up because Like in this painting, this is one of the ones in my membership. This is our mason jar full of cotton. So this where I wrote ball on the mason jar, that was done with a little liner brush like I just showed you. So I can show you how to do that too. You want a tiny little brush when you're doing lettering like that, and you don't have to invest a lot in brushes. So like, if you were to go into the store, I mean, you can spend a lot of money on paintbrushes. You could buy one brush for like $20. I don't recommend that. I use craft brushes. I use these sets that I sell in my Amazon store. So you're getting, you know, 8 to 14 pieces per brush set for under $20. So you do not need to spend a lot on each individual brush. If I showed you my collection, I have a ton, and a lot of— they're all different brands, and they're not super expensive. But this Addi's Art Set, the ones that I'm showing you today, these white ones, are some of my favorites, and that's what I recommend inside my membership. Make sure I'm not missing any questions here. Hey Ginger, first time watching. Yeah, if you guys are hopping on, just let me know if you're new. Hey Diane! Diane's in our membership. Helen, perfect for beachscapes. Yes, they are. All right, and Jesse says lettering for her too, so I'll show you guys that. So that's Palms. So let me show you one of my favorite things to use, like, the stippling technique for. I'm looking to see if I have a painting in here that I used that on. I don't think I did, so I'm just gonna come over here. And these are like flowers that I have sometimes coming out of like floral centerpieces or vases of flowers that I do. I'll put these little lines on first for the flowers, and I'm gonna switch— this is a number 5 4 round, a basic good size. Anything between like a 2 to a 6, those are all just good size round brushes to have for different, different things. So let's get some— I've got some lavender and some navy here. I'm going to get a little bit of both colors on my brush at the same time. Okay, and again, notice how much paint I have on there. Make sure you have enough paint. A lot of people don't put enough paint on and they can't get the same effect that I'm doing. So don't be, don't be scared of your paint. It's cheap. You can get more. We're just using craft paint for those of you that are new. So this is kind of this stippling, and I'm gonna start along the stem, and I go a little bit wider at the bottom. And notice how I'm overlapping Make sure you guys can see this. Okay, these are not perfect circles. We do not want them to look like a pattern. So again, I'm moving quickly because what happens if I move slow? You start overthinking it and then it just looks like you have polka dots and it doesn't look very natural. So we want messier, overlapping try to stray away from that perfectionist part of you. So see how that looks? So that's mostly dark. There's a little bit of purple in there. I'm gonna come back with some of that lavender, kind of add in as my accent color here. These are like some of the easiest and some of my favorite kind of flowers to add in to your floral bouquets and centerpieces and all that kind of stuff. So what do you guys think about that? Do you like this technique? Not too hard. And if you guys are having fun watching this video, you know, Facebook does not like us to use the word S-H-A-R-E. Anymore. They may even catch me spelling it out. I don't know. So we have a new thing. So if you enjoy this and you want your friends to enjoy it with you, if you want to sprinkle the love and pass this on over to them on their page, you can do so, and I would love you for it. So if you hear me say sprinkle the love, that's what I'm talking about. Sprinkle that love of art to your friends. Let them know what we're doing over here and all this awesome free technique they can get by watching these videos. Alright, so that's stippling. Now you could also do it if you wanted to do like trees like that. Let me get a different color. We'll get some yellow here. Yeah, and in the comments, instead of saying the other word, you could just say sprinkle, and then everyone's gonna wonder what we're talking about and why is she saying sprinkle in her video. We'll see how long this takes before they start changing this too. So I'm getting a little bit of my dark green and yellow. These are Packers colors for those of you out there who are football fans. Packers and a Chiefs girl. So you can do the same thing. Let's say these are our branches to a tree. I'm not worried about it being brown right now because I'm just kind of showing you how this works. Now I'm pushing down a little bit harder here, right? Still messy, still overlapping, but this is a really simple way to to get some leaves on. And I'll give you a little hint— if you're in my membership or you're thinking about joining my membership, which opens in 11 days, this technique that I'm showing you right now is what we are going to use in our last painting in September doing our fall birch trees. We just did it with some different colors. And you could even use this— let's say you have like a little horizon line here, you've got a little hill in the back. Of course, you can use your round to kind of smooth this in. So I've got a nice little grassy hill here. And then I want some trees back here on that horizon line, doing the exact same thing. How easy is that? Now you've got some fun little trees. Happy little trees back here on your horizon line. Maybe pick up a little bit of this yellow, add some highlights in there so it's not just one color. You'll notice if you paint with me much, I don't normally use just one color. See, I can even take in some of this navy and dark green, and look at that— now I've made this really pretty hunter green color. Just by color mixing those, and then it just adds one more dimension to the colors that I have in my tree. Hey, Miss Robbie! Sorry, grabbing a drink of water really quick. So, um, let's do this. I'm gonna rinse the green out. So next up is, you can call them commas or parentheses, just have that image in your head, okay, of what that looks like, kind of depending on how big you make them, right? So commas, these fun little flourishes. Now let's see, how I can turn this into a flower. Let's start in the middle, and then I'm just gonna start going further out around. Now, those start kind of as commas, right? And then the bigger I get, they kind of look more like the size of, like, a parenthesis. They get a little wider. They don't have quite as much kick to them as that, but all this is done with your round brush. Let's pick up some of this. We'll mix a little purple and pink. And if you follow me, you know I love color mixing. It's my favorite. I love seeing what new colors we can make with the colors that we have out of the bottle. And I try to break my people of not having to know the exact colors I use out of the bottle, because you use what you like. And if you can't find the exact color that I mentioned, then find something similar. You know it's a hot pink, so go in the store and find a hot pink that you like and use that. It doesn't have to be the exact color. And if you still don't like the colors that you see in the store, get some that are similar and you can come home and do a little color mixing of your own. Now I'm gonna get a little faster. I did that slow so you guys could see how I was doing those brushstrokes. Hey, Jan! So let's do a faster— and this is the same way you can do these for flowers, but I also do these— this is kind of like my Van Gogh-style thick brush strokes here. So we've got a simple little flower, but you can also use these— let's switch, let's go back to our smaller one. This is my 0, and you can do little stars or fireflies with these. So you start with a little dot in the middle Just like that. And these you can add in, you know, landscapes, backgrounds— kind of a whimsical way to add your stars in there. Are these helpful tips for you guys so far? On the different things you can do with your rounds. So let's stay with this smaller brush. I'm gonna get a little yellow, a little pink. Yellow and pink make a really nice coral color, and we can do some starburst So look like little fireworks, or you could use these like little puff balls, kind of Seussical looking. And the more of a flicking motion I have going out, the more you get that taper. Just like that. And we talked a little bit about the pressure. So the last thing I have to show you is like if we're lining something. So let's see. What shape should I do for you guys? Do you want me to do a quick truck? I can do a quick little truck and show you how I outline that. This is one that— this is a small one that I have here. Get these quick little highlights that I do in a lot of my paintings, these little lines. You guys want me to show you a quick little version of this here. Thank you, Callie. All right, so now what color do we make our truck? Let's see. How about a little mint? So this is gonna be a super quick version of these little trucks that I do. All right, so we're gonna start here. That's going to be where our bumper is. Overlapping my flowers here. Some little side mirrors. I'm not doing anything too fancy here, just a quick little truck for you, and I'll get this filled in. So let me know while I'm working on this, what questions do you guys have about painting? Is there a struggle that you have? You don't know where to start? You don't know what supplies to use? What concerns or issues do you have when it comes to painting? Or maybe what is stopping you from painting? Maybe you haven't started yet and that's the problem. What do you think is stopping you from doing it? I know for a lot of people it's time. We all struggle with that for fitting in the things that we love, but what I have found and what I have seen happen with so many of the members in my group is You know, it's— if it's something that you want to learn and it brings you joy and it makes you happy, you should find time for it. And so that may be even just carving out 20 minutes 3 times a week. It's no different than when we talk about exercise. Everyone's busy, but if you really want to find time for it, you find time for it, right? So it's the same thing with painting. Just kind of carving out that time that you can fit into your schedule. Lori says, struggling with sunsets and blending my colors. I have done— I wonder if there's one I can refer you back to, and I may do another video with it. Lori, did you watch my first one in the series. My first paintbrush that I covered in this series is a flat brush, and I actually go over blending. So that is really going to help you. So if you go back to video number 1, and you can go to my YouTube channel to see that, that should help you with your blending. But one of the things that most people struggle with the most with blending is they don't have enough paint in their brush. And if you don't have enough paint in your brush, it's hard to get your things to blend. And so we're talking about blending two colors. You want to make sure that both of those colors are still wet because we're working with craft paint and it dries quickly. You have to kind of move quickly when you're working with blending. So hopefully that helps give you some tips, and then you can go back and watch that video and check it out. So I had my little tires on. I'm just gonna put a bumper on here real quick. So we got our little bumper. Let's fill in— hey, Sherry! Let's get some sky color in our window and our side mirrors here. So right now this doesn't look like much, right? We've just got blocks of colors here. This is where those little details that I'm going to show you guys really come in and you start seeing the difference. So again, I did not have— I just want to show you guys this— I didn't have a baby blue out here, so I just took this dark blue, that navy that I had, and just pulled in a little bit of white to get myself this light blue color. So you don't have to have a different color of paint for everything that you're working on. So I do two kinds of highlights. I do black ones and then I do white ones. And sometimes people ask, like, when I decide to put the highlights down. When on images like this, I'm not really worried about where the source of light is coming from because these are just fun little whimsical paintings and it doesn't really matter. So I'm just kind of quickly going around and putting some white highlights around. Okay. Now if I was doing something where, like, maybe like a vase of flowers and really thinking about where the light was coming in, I would focus all the light on one side and the shadows on the other, but for something like this, I don't really worry about that too much. Okay, so let's start with black first. Now, since I did a really tiny truck, I'm going to use my little liner brush to do this, and it's the same thing that I was showing you up here. It's about the pressure that you put down with it, so I'm doing quick movements like this, not slow. That was a pretty good line for being slow. Usually they get a little more heavy-handed, but you can see how skinny you can get your lines. But I like my outlines to be wispy, so if you're wanting that kind of style, I'm going to show you how I do it. Just real quick, see how my lines are not all connected? I don't want it to be a solid outline. I want it to kind of be the idea of the edge of the truck without it being like perfect. So just quick little lines. Doesn't have to match up right on the corners of these colors. I think it looks better if it doesn't, actually. Kind of adds a little more character to it. Let's add some around our bumper here. So you guys see how quickly I'm doing that. We want it to be a little, a little messy. Or I should say, I want it to be a little messy. You may not want it to be. You may want it to be a little more precise than that, but I like that whimsical look. And the messiness of it. So that's how I do my black, and then we'll come on with our white here. Get you guys down a little bit closer and add some of these little strokes in the window, and then I just very randomly just kind of dance around the shape of my truck. Oh, I forgot, I want to add a little rectangle inside of here, so I'll come back and add that. I usually add a little rectangle in the back tailgate of my truck here, and again, not all connected, but you kind of get the the idea. So that's how I do my little wispy lines, and then it's just practicing with these small brushes. So I would just say start practicing your lines, seeing how skinny, how little pressure you can put down So this is me not putting a lot of pressure, just barely dragging the tip across my surface. Now with the same brush, if I push down hard, it flares out. I get these thicker lines, and you may want that in some areas. but the same brush got these thick lines as got these little lines, and that has to do with the amount of pressure you put on. Some curlicues— that was the other thing I was going to show you. Like, if you're doing— like, I'm teaching my pumpkin palette tonight as a local paint night, and we add these little curlicues coming off. These are fun to practice with your skinny brush. And don't think that everything always has to be super solid. You can have them kind of fan out and be wispy. That's fine. Oh, the last thing I said was lettering. So now you could practice, like, you can trace it out ahead of time. Let's just do What do we want to do? This is some lettering I did yesterday, so we'll just do joy again. So I'm gonna start here. So you can write on your canvas or your board, whatever you're working on, first. And then go back over with your lettering. I'm actually going to get my zero for this one, and you can also use— and I'll show that in my next video— you can also use a filbert for this, but if you're wanting fine lines, I'm just using a round. Now with this, I am moving slower. And I keep— notice I keep going back to my paint. Now, some of you sometimes struggle with having a steady hand. You can hold your wrist while you're doing it, and it helps steady your hand if it shakes a little bit too. But these can be short little brushstrokes. You don't have to try to get them to go really, really far. There you go. We could add a little word in here. So with this kind of lettering, tiny little brush. I'm just gonna put the word "fall," barely pushing down. So real light touch on that lettering. And that is what I have today for you. Let me know if you enjoyed it. If you did, sprinkle the love with your friends. I am going to— let me see if it saved my paste here. Perfect. I am posting all of my links below in the comments. So there's a few different things if you're new here that you can take advantage of. I have— I'm opening my membership, which teaches painting with me in our private Facebook group, and and you get 3 full paintings per month with me plus a guest speaker. The doors open for that in 11 days. That's what my little sign here is for. I also am giving out a free 4-part video series. It's going to be some more of this technique that's going to be delivered directly to your inbox. So in the links, you're going to see where it says 4-part video series. That's what that is, and video number 1 goes out tomorrow. So make sure you're signed up for that free video series. We have the Fall Chapel Challenge coming up, which I'm sure you've seen a picture of my fall chapel on my page. That is a one-time only limited time offer that I'm teaching this painting over the span of 4 days, and it's only $15. And that registration for that ends on Friday. We start that painting next Monday in our group. And then they're just— if you want to follow me on Pinterest or Instagram, YouTube, all that good stuff, is there for you. So let me know if you guys have any questions, and I'll check back in and answer those for you throughout the day and tomorrow. And we'll be back on tomorrow. We'll paint again. I haven't decided what I'm doing yet, so if you have some ideas— I have a list of things, but if anything pops in your head or something that you want to see, leave that in the comments for me, and we'll be back on tomorrow. Live again. And, um, just reply back yes on your Messenger and you will get notified before I go live so you don't miss them. Thanks so much, bye!










