Live Q&A + Behind the Scenes
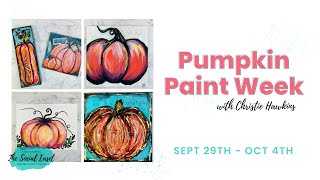
In this live YouTube session, Christie Renee Hawkins greets participants, apologizes for a schedule change, and extends access to the Paint Week content through the weekend. She walks viewers through a mixed‑media pumpkin project, explaining the concept of mixed media, demonstrating the use of acrylics, watercolor, napkins, scrapbook paper, Mod Podge/DecoPodge, paint pens, stencils, and various adhesives. Throughout the tutorial she answers a stream of live chat questions about materials, techniques, and Tribe membership logistics. Christie emphasizes the importance of play, patience, and embracing imperfection, offering self‑compassion advice. She also provides detailed information about the Tribe community: the Vault (a Netflix‑style library of 195+ painting tutorials), upcoming live Zoom events, organizational tools, pricing ($47/month or $470/year), gifting options, and ways members can monetize their art. The session concludes with a behind‑the‑scenes tour of the Tribe Facebook group, the monthly calendar, and a reminder that replays are available until Sunday midnight for non‑members.
Chapters
Okay, how is everyone today? Let me know if you can hear me and see if we're good. Hello, hello. Okay, so first of all, I want to say I am so sorry that we had to change yesterday's schedule. We had stuff come up and appointments that ran over and just things that were out of our control, and there was No way I could even get here. We barely made it to Emma's volleyball game last night, so it just turned into one of those crazy days. So, um, I appreciate you guys being able to switch times and come hang out with me today. I know it wasn't ideal for everyone, and we are going to extend access to all of the lives because of our delay yesterday. So, If you missed any of the previous days, or if you're just joining us for today, it was supposed to be the last day that we were opening doors to tribe and that we were allowing access to the videos. But because of that debacle yesterday, and me having to combine 2 things today, we're extending all of it. So now you guys have until Saturday. Sunday evening, we decided to just give you the weekend. I'm really hoping that allows you to carve out some time for yourself. So maybe look at your Saturday and Sunday right now, your Friday evening, whatever that may look like for you, and plan a time that you're going to tell your family you're going to step away and you're going to, you're going to go paint and you're going to find some peace and play. And because we want you to have that, so we're extending sending everything through the weekend, and we will be sending— if you're on our email list, we will be sending out emails with the replay links also. But Megan has put together a Paint Week hub page, and I believe she— yeah, she already dropped that in the comments. So we put everything in one spot for you so that it wasn't confusing and you weren't having to bounce over to Facebook and this link and that link. It's all on one page for you, so you can see the Tribe Sister, um, interviews that I've been sharing all week long and hear some of their stories, which are just amazing and I think will lift everyone up. And then in addition to that, it will have each one of our paint sessions that we have done this week. So it's been a super fun week so far. I'm excited for today. Mixed media is— again, I'm just going to kind of explain it for those of you that may have not been here with me on previous days, and maybe you don't know what mixed media is. But these are 2 examples, and if you signed up for Paint Week, you have these templates. So I'm only going to do one today. You can choose whichever one you want to do, but the techniques that I'm going to show you today are still going to be able to walk you through whether you do this style of pumpkin or the, the 2 pumpkins together. So what mixed media means is all— like, paint is a medium, papers are a medium, so watercolor is a medium. Those are all different mediums. And when you do a mixed media piece of art, it just means you're combining multiple mediums to that piece of art. So, for example, in these 2, obviously there is acrylic paint on here, but I've also incorporated napkins. So I don't know if you've ever— has anyone ever put napkins in any of their artwork? This is a really fun thing to do. I'm going to show you how to do that today. But this is how I got this cool look on the side and like my background behind the pumpkin. It also means it could have stencils. So I have like a collection of different stencils that I just keep handy. They are still not organized, uh, for me moving into the studio. So basically they're all in a big, big bin right now of a bunch of different stuff. Um, it could be scrapbook paper, and sometimes I use scrap— excuse me, scrapbook paper, um, as a background. And sometimes I actually use, like, these are such great pumpkin shapes that I cut these out, or cut the leaves out. Actually, I probably will do that today. These are great leaves. Um, so these leaves that I did on both of these, I just cut out of a shape of scrapbook paper. But you can also, like, if the scrapbook paper has a design on it, you can cut around that leaf shape and add that to your artwork. It's so fun. Um, so I'm always on the lookout when I go to my craft stores. I always look in their clearance and see what papers and tissue paper and all that kind of stuff they have on sale, because you never know how you could use it in your artwork. I also have— this is like tissue paper that you use for gifts, and I tear it up and I put it in backgrounds. Same with these pieces of scrapbook paper. But so if you're looking at this one, See those gold polka dots right there? That was from this paper, and then I paint over top of it. So I would love to know, let me know in the comments if you have ever done mixed media before, or if this is like a whole new thing to you. So those are some of the more like physical items. Like, this is just another, this is a roll of paper. Like scrapbook paper that I found at the store. It was on clearance for like $2 for this whole roll, so I actually haven't even used this in anything, but I'm just always looking for stuff like that. And then, um, obviously paint, and then stamps. You can use different stamps and stencils with inks and paints. I use paint pens, so I have a whole collection of different brands of paint pens. I have like super skinny ones, and then I have— let me see here— I have my collection of all my different Posca pens. So you can incorporate all these different elements into your artwork, and it is just so fun, especially paint pens. You'd be surprised how much you can use those in your artwork. For those of you that tend to say you are heavy-handed, Posca pens, paint pens— I haven't personally used them yet, but Sharpie, I just added them to my Amazon cart. But Sharpie now makes a paint pen, and I've heard they are even better than Posca. So I haven't tried them yet, but I did— or I'm in the process of ordering them, so I'll get back to you guys on that. Who knows, they may be my new favorite paint pens, but They're so fun to use in your artwork. And like I was saying, if you have a hard time with fine lines, all of these little skinny lines that you see in here, that's all with paint pen. So fun, fun, fun, fun. There's lots of different ways you can do it. I'm gonna try to hold this a little closer. I don't even know if you can see, but see these patterns? Like, that's one piece of scrapbook paper here. There's a floral one there. Each pumpkin section has like a different pattern, and then I painted over top of it. So it's very subtle, but it's— you still definitely see it. Like, you can see the polka dots behind these pumpkins. And the cool thing about mixed media is it is very much a one-of-a-kind piece of art. Um, so you are layering and building. These tend to take longer, so if you're in a rush, don't rush through this because It's really a very organic process where you are literally just playing. You're playing and working things together. It's almost like putting a puzzle together, and maybe you're like testing. You're like, oh, these polka dots would look good here. Now maybe I'm going to move them up here. So it really, really is a work and play type of things. Deborah said, could you use magazines? You could. I would just make sure that Like, I would not put like a photo into my art. Like, it would really have to like make sense to go in there. But like, maybe if there was like a cool pattern or something in a magazine, you could definitely do that. So what we use to adhere all of these things together is DecoPodge or Mod Podge. Those are just different brands. They do the exact same thing. This is my favorite one. This is the finish that is on both of these. Even though you see a little bit of sheen, this is the matte version. The high gloss version of this is very, very glossy. I just think this is just a really pretty sheen, but it's really cool because it works as a glue, it works as a sealer, and it works as a finish. So basically what that means is we're going to use this like glue the whole time that we're working on this today, and then you can paint right over top of it, and it gives you like this like super smooth surface you can paint on top of. So you'll see as I go, but like this, when you start out doing mixed media too, I'm just going to say it's going to look ugly in the beginning. It totally is. That is part of the magic of mixed media, is just having patience and letting it all come together. But when I first drew this out, and I'll show you guys, but when I first drew this out, I drew the shape of my pumpkin on here, and then I tore strips of tissue paper or scrapbook paper, whatever you choose, and I put them inside and glued them down and then start painting over top of them. I did the same thing with this napkin background that I put here before I drew the stem on. I decided, oh, that would be cool to have some of that checkered pattern in the background, so I'm going to put that down first and then paint on top of it. So you just have to let that layer of— well, technically you don't. I was going to say you have to let it dry, but really you don't have to. So that is kind of how it all works. Let me grab something to pour my Mod Podge in, and I still use my paintbrushes when I'm doing this. I use my fingers a lot in mixed media. So if you don't like getting dirty, you could put plastic gloves on. But I love, I love getting dirty with my artwork. So It's fun. Lindsay said there's no way this will be complete in an hour. It's very possible it may not, Lindsay. So we're just going to see how it goes. Elaine said, I've used decoupage in other projects. Hey, Trish, glad you're excited to be here. Okay. So first thing I'm going to do is go ahead and— if you have like a little dish or plastic bowl or something, or you can just dip out of your container, but it gets a little messy. So I'm going to pour some of my DecoPodge in here, and there are different finishes. So if you don't like the matte look, you can— there's satin, there's gloss, there's whatever you want. Um, I'm gonna set that there, and I'm gonna move— probably move this one over for right now and then come back to the one that is the same here. Grab my Sharpie. Okay, so let me pull you guys up. Just a little here, kind of set that one off to the side. So I'm just going to trace over my outline here. Again, I do that just so I don't lose it with the paint and all the layers that we're going to be adding. But you can do this same technique that I'm showing you today with any kind of shaped canvas. I do recommend— like, I'm able to do it on these small ones because they're so tight, and this is like a thick board, so it's, it's real firm. I would not do this on like a 16 by 20 or even an 8 by 10 canvas. It has too much give in the middle. So usually I do my mixed media pieces on small things like this, or like what we did the impasto pumpkins on, or I do them on wood panels. So that is kind of your choice, whatever you want there. But they can be done all different sizes. So while we're working on this today, because there's not a lot of like, I'm just going to be tearing things and pasting them together. This actually works out great for this to be done with a live Q&A. So we're combining the 2 today. So Sunday, you know, the deadline has been extended to join tribes. So you have until Sunday to make that choice. Um, but any questions you guys have about Tribe, let me know, because this will be the last time doors are open this year. So if you want to continue the painting fun into the holiday season, which is my favorite, favorite season of the year to paint, make sure and join us before Sunday night. So I am just looking at my scrapbook paper right now, and I think I need to grab my other book. Paper out. This was one I got last year at— where did I get this? I think Hobby Lobby. But like, look for like fall ones like this. They— there's so many pages that you can use in them. Um, Addie, no, you cannot use watercolor on canvas unless it says it's like a— what, like they— watercolor is meant for paper, but there are like watercolor pads out there that are more canvas feeling, but they're specific for that. Um, Barbie said, can you use school glue? I think you can. I'm not going to suggest that just because it's not what I use, but you could try it and see how it works out. I don't know comparison-wise. Oh, it might be cute to add a little sunflower. I have another page where I already tore it. So this is what I mean. You just are kind of like just seeing what happens. Maybe I'll add a little sunflower. On my pumpkin today, but I'm kind of deciding what I want in the background. This is a good pattern of my pumpkin today. Ashley's asking, is there an easy way I can gift the membership to someone else? I would say email customer support and ask them the best way they think that would work. This is our customer support, just christie@thesocialeasel.com. I'm not sure, like, I'm not sure exactly how that would work. Um, so Jen might be able to figure that out for you because it is a membership, so it renews every single month. But then if your friend decides they don't want it, and then— do you know what I mean? Like, so it's not, it's not a super easy thing to gift, unfortunately. Um, Suzanne said, I hope we do holiday happy mail again. I love doing it, it's so much fun. So this is something that we do inside of Tribe is we do what we call happy mail. Just like me sending you guys, um, gifts, um, for joining me live and, you know, getting a chance to do that. Everyone loves getting happy mail, and we do that inside a tribe too. So we will be doing something, Suzanne, over the next few months and doing some happy mail exchanges. This is where the tribe sisters will make like, um, cards, postcards, whatever little pieces of art, and they go into a name selection and send them to other tribe sisters. It's a really fun thing that we do. All right, so this is typically how I start. Um, I just kind of start selecting my patterns. I did have one over here I was gonna add in. Maybe we'll try this one since I haven't put that in anything yet. And the color of it really doesn't matter too much because you're going to be adding paint to it, and it's just a subtle little thing. Thank you, Janet. I got these new nails just the other day. They are super fun. So I'm thinking I want these 3 for my, um, 3 sections here, and I like the look of having the tear, so I don't usually use scissors. I usually, um, tear sections off and lay them in. It does not have to fill the entire section. You can decide how much kind of pattern you want in there. And you can even do different, different pieces and stack them together if you want to. So I think I'll probably do that. So I'm just kind of laying things out right now, kind of the planning stage. Maybe we'll go out a little bit more. I kind of like— I like this section showing. Um, replays, Renee, are going to be available through Sunday night at midnight, so that'll be the last time you can view these unless you become a Tribe Sister. If you sign up to become a Tribe Sister, um, before Sunday at midnight, then you will have unlimited access to these videos as long as you are a Tribe Sister because they are being added to the Tribe Sister Vault. So if you're, you You're new today and you don't know what I'm talking about as far as Tribe and being a Tribe sister and the vault. The vault is part of one of your perks of being a Tribe sister, and it is the membership website where we host and carry all of the painting tutorials that I've ever done inside of Tribe, which is over 195 of them and still growing. And that is where you log into the vault and you can just scroll. It's like Netflix for painting. You can pick and choose what you want to do. Um, and that is where we're adding the replays, um, for this as well as the Jump Start into Acrylics. So you guys will be able to continue to access these. So I've kind of laid out my pieces, got an idea of where I want them, and then I'm just going to go ahead and put some of the Mod Podge directly on here. You can either put it directly on Or you can put it on the back of your paper. I do it both ways, and just whatever I grab first, usually. Dory said, yes, I tell myself no straight cuts, and I'll tell you, like, if you do straight pieces, it does change the look of the It doesn't look as organic and natural. It just looks like chunks of paper in there. So the tears, anything you can do to make it look more natural is going to look better. We don't want harsh edges. So this is what I mean. I use my fingers a lot. You could continue to use your brush. So once you get that laid down on top of that glue, just add this little piece in. Why not? Then you go right back over top of it again and make sure those edges are pushed down good. Like I said, this is going to look like, does she even know what she's doing right now? But I promise you, I do. Make sure all your edges are fully down so you don't have anything popping up on there. Um, Barbie said, could you give me an idea of how you do the other pumpkins? It's exactly the same thing, so they're just different shapes. I would tear the paper, I would lay it inside. I'm literally the exact same shapes, different, different size, different style of pumpkin. So What I'm teaching you today is the same exact technique I would teach you for that one. Um, Cassandra said, how much of the paper shows when you are done? That is up to you. So you decide how much of that pattern you want to show. I'm going to show you how I kind of play with it, like Obviously, it is more visible in this section than it is up here, but that paper goes all the way to the top. So it's on how much paint you decide to put over top of it and how much pattern you want to show through. So a lot of— almost everything with mixed media is personal preference. This is about what you think looks good and how much you want to show through there. But the cool thing about it, because when you're using this Mod Podge and it kind of seals over top of it, and then you paint on top of this, you can wipe off excess. If you want more pattern to show through, you can wipe, wipe that off. So now would be where I would decide if I want to add anything to my background. I would go ahead and do that now. I love that, Lisa. Oops. Hold on. If my mouse will work. She said, I love looking in the vault. I feel like I am creatively shopping Amazon style. So many options. That's a great way to look at it. I love that. I am using a matte decoupage, same as Mod Podge, just different brand. Okay, so what do I want? Up here. I think I'm going to do the polka dots instead of the— so let me show you, um, with the napkins. If you decide to do napkin, you know, napkins have two different plies to them. Did I already tear this one off? Now I can't tell. Oh, there we go. So you want to make sure and separate them. You don't want this white piece of under part on there. And napkin is a little more delicate. I'll put a little on here just so I can show you guys. I'm tearing off that gold edging because I don't want the edging on there. So what I would do with napkin is go ahead and let's put it over here. I'd get some Mod Podge on here, and I'm just gonna very gently— a lot of people will put Saran Wrap. I don't have any with me right now, but Saran Wrap on their fingers and then smooth it over. It doesn't tug and pull on the paper as much, so that's an option. You can either wrap this around or you could tear it off, and I'm just very gently kind of tapping that down. With the wet Mod Podge on my brush. And then we're just going to leave that alone. Don't keep messing with it or it'll tear. So we'll put some of that over there. Let's add some polka dots over on this side. And it all is just going to look a little funky and crazy right now, so just know that this is another great one for— I always say you should take pictures of your work while you're working on it because it helps you make choices, but this is a fun one just to remind you that it is a journey and that it doesn't all just happen immediately. That there are different stages to this. It's going to have its kind of weird, awkward stage. Think of it like, you know, those weird preteen years when you're trying to figure things out. That's the stage we're at right now. It feels a little random. It all feels a little crazy, but it's going to work out. Okay, so then the next thing I do is I'm just going to go ahead and start kind of filling in my pumpkin color, or you could do your background. It really doesn't matter which order you go in. Let's see, I think since that's napkin and I want that to dry all the way, I'm going to start with the interior of my pumpkin first. So I'm going to get some of my Tiger Lily, which is just a nice vibrant orange. I'm going to get some of my Berry Cobbler. Any berry color is fine. I like that for the darker areas. And I think maybe I'll just do— have a little bit of yellow so we can make kind of like a yellow-orange, and then maybe just a little white so we can make some different tint of our colors. Um, Kat said these are so adorable. Is there any way to go back to the Van Gogh pumpkin painting class? Um, Kat, did you purchase it, or are you asking if it's still available for purchase? Um, Rita, you do not have to let this part dry completely. You can mix the paint and Mod Podge together and it doesn't mess anything up. I'm letting this dry because I want that to seal that napkin down all the way before I put paint over top of it. So I want that to dry so that it doesn't mess it up. Cat, so anyways, depending on for the Go to the Pumpkin Patch, if you bought it, you have lifetime access to it. If you did not sign up for it, registration for it is closed, but we are adding that as a bonus for joining TRIBE. So you would have access to it as long as you are a TRIBE sister. So hopefully that will answer your question. Okay, so I'm going to start with some of the darker. I mixed my, um, my berry and my orange. I'm going to go around my edges because I want it a little darker towards the top and the bottom in those grooves. And again, I'm not like pre-mixing one whole color. This doesn't have to be anything exact. The more variation you have, the more interesting it's going to be, instead of just sticking with one color. Okay, Megan, um, just posted the link for Tribe. So if you're curious about it and you want more information, you can click that link to check out more. So you see what I'm doing right now? I'm just kind of going in. I'm going to get a little bit of white with my orange. And I'm not sure if you can tell, but this is— I'm going to get a little closer. It's nice and smooth to paint on. So you can tell that covered a lot of my pattern up. So again, depending on how much of that you actually want to show through, you can decide if you want to leave it like that or wipe some off. I need to buy a new package of baby wipes. Mine are completely dried out, but I'm just going to dip my baby wipe into some water, and then you can come in and wipe off as much of the color as you want. So I would just make sure you have enough paint on there that you really should not be able to still see your edges of scrapbook paper, so your paint is covering those edges up so it doesn't look like just random pieces of paper stuck to your artwork. And then you can let this dry and come back to it if you change your mind, you want to add more. Mixed media stays a work in progress. I feel like until the very end and it starts kind of coming together. The other thing you could do is kind of make like a wash if, um, you don't want a ton of color but maybe you just almost want like a glaze over it. Water down your paint and just kind of lightly drag that over. Like, that looks pretty because I can still see that pattern through there. Um, Terry said, is it harder to do on wood versus canvas? Um, I actually— unless you are on a very small tight canvas like this, I prefer wood because it has no give. So this one's on a wood panel. It just makes it easier when you're adhering the papers and stuff to it. But I didn't have any more wood panels, and I love these skinny 4x12s that I found. I saw some people saying they couldn't find them. I did add these to my Amazon store. But if you go on Amazon and search 4 by 12 canvases, they come in like 3 packs, and they were actually cheaper than me purchasing them at Michaels. If you don't have a Michaels close by, they are available on Amazon. Sorry, I'm just reading a couple questions real quick. Um, Claudia said for the impasto, she did it on 4x8. How do I make it look more like a pumpkin than a pepper? Um, so did you change the, the template of it, or I mean, adding the grooves in, you could go back to like the day one, um, where we did the basic acrylic and use that template to where the sections are, you know, more like this, where it's like the big oval shape, and then adding your other curves in. Okay, so we're going to start in our next section. In the next few minutes, you'll see it start kind of coming together a little bit more and not looking quite so random. So I'm going to get some water on this now because I want it to be more transparent and kind of turn this into just like a glaze going over this middle section. I kind of like this berry color of the pumpkin too. Now around the edges and stuff, I'm letting all of that dry I know I'm going to need another coat on there. So you can see at the bottom, I like to show close-ups while I'm doing this so that you know from even that, like, 8 to 12 inches away, the difference it makes. Like, you can still see my Sharpie line. This is like very transparent and thin right here. So I show you that so when you are doing it at home, you're not like, what am I doing wrong? Christie's looks awesome right now, but it's because it's I'm just— you're further away from it. So that's what it looks like up close, and it just needs more layers. Carol said, what a cool technique! I would have never thought to put these together or let some of the patterns— it's so fun. Like, once you just tell your brain to just chill out and play, like literally just play, see what happens. I think, you know, for me, doing this kind of style of painting especially is very like tapping back into your, like, inner child. Like, when you— we're not on a deadline, you're not trying to impress anyone, you're just playing. Like, we need, we need more play in our lives and less stress. That's why we're doing this. That's why painting is so healing because it allows us to kind of shut off the rest of the world and focus on this, this one little task. Your task right now is just to keep playing and experimenting as you go and to not get— don't get frustrated in the process. Remember that mine looks ugly right now. When you're painting yours, remind yourself it's going to have an ugly stage. Which means most of the time you're painting in until you start getting those finishing touches down. But this is a good start, and then I can decide if I want to add more paint, take more paint away, but I'm going to kind of leave it like that for now. Um, Charlene said, would a light sanding on the edges of the napkin give it a smooth look? Yeah, if you want to. Like, when we've done napkin on wood, or like when I do it on edges like this, I purposely tore because I wanted that look, but sometimes I fill the whole edge. After it's dry, you do— you take a light piece of sandpaper and it will just sand that edge right off. Jen said this is a great way to use up all that leftover craft supplies. Absolutely. That's why I know, like, people— and I'm sure it's the same for all of you— people people who are not crafters or artists and love doing this kind of stuff, they're like, why do you have all that? Because when you might want to use it in a piece of art. Debbie, this is already dry. So she was asking, how long does it take to dry? Just a couple minutes. And no, I wasn't adding anything to my paint, just paint, and then in the middle section of the pumpkins, I just kind of watered it down a little, but that is already painted over top of the Mod Podge that was sealing those down. So now I'm going to transition to the background. I think I'm going to do some blue and teals. I think, I think we're just going to play and see, right? Yes, Lisa, a white pumpkin would be very cool with this technique also. All right, so I'm just grabbing what— again, the brush. This is really like, like technique, like use this brush for this brushstroke, but I'm just showing you what I'm using. This is my flat out of my set. I can't even see what number it is. I think it's an 8, but anyways, I'm just using a flat, something big enough. You could use a round, a flat, a filbert, it doesn't matter. You're just kind of filling in this background. So I'm just going to kind of play with my colors a little bit. I'm making like a darker teal by taking my Ultra Blue Deep and pulling in some of my Bluegrass Green, just making kind of a darker Oh, that's so pretty. A darker, richer version of that. Just kind of dragging that around the edges right now. And then I'm going to get a little bit of water for up here. I'm going to treat this more like a glaze on the top until I decide how much of that polka dots I want to show through. So I'm just dipping in my water into my paint. This needs a little more Mod Podge under there. I love these like jewel tones together. Claudia said, could you add some of the iridescent paint? Yeah, definitely. Maybe we should add some of that to the background, maybe have an iridescent background on this one. Okay, so this is just kind of like my initial background color, and then I'm just going to gently kind of come in and wipe off some where I want my pattern to show through a little bit more. And the cool thing is, even on this, this tissue paper that I use with the polka dots, look how once you wipe that off, that shimmer, that metallic gold still shows through, which is so cool. And you could also do this, you could kind of almost like you're sponge painting to get some of that excess paint off of there. Michelle said, I couldn't think how this might come out or come together, and I'm just fascinated. I thought I wouldn't do it now, but now I can't wait until tomorrow to try to play with it. I'm telling you, it is definitely one of those— I told you, it starts out so ugly, and I know people are like, what is she doing? This is going to be terrible. Trust me, trust me, trust the process. Alright, so that's like my initial background, and then it's just play again. You're going to get sick of me saying that, but it really is. I'm just going to kind of start working in some different variations of that teal color, kind of just dragging it over. I don't have a ton of paint on my brush at all, just a very light amount, and you can have areas where thicker paint versus thinner, and you're allowing more to show through. Again, I kind of want just at the end, your goal is not to see where the edges of your papers are behind your mixed media. So if you see them anywhere, then you want to add a little more paint around those edges, so it kind of disguises them a little bit more. And again, be patient with the background. Remember, you're going to be working in layers. Sometimes you need to let things dry a bit first. You can add some variations in your light and darkness in your background, so maybe pulling some white into your colors and then leaving some more vibrant dark areas. Anytime you can have, you know, changes in contrast and value, all of that just makes the artwork more interesting. So I'm going a little darker around my edges here. But I feel like this is also— you can always tell when I get quiet— this to me is like just super peaceful. Like, if I was doing this and not teaching you guys live right now, I'd have music on and I would just play and pick up some pieces and put them down and play with some different colors, and you're just continually looking at it, taking pictures of it, kind of seeing what you want to change, what you like. Do a little finger painting if you need to. Okay, so let's get some black. I'm going to paint my stem over top of that, and then you're going to see how when I paint the stem, that it's pushed all that stuff I've done in the background to the back, and it— and the stem is going to be the center of attention up at the top now too. So just remember, you're at a stage, if it's still— you're like, I don't even know if look good. You're not done. You've got to add more on top of that. So I'm going to use one of my skinnies. This is the number 2 out of my set. Again, whatever you're comfortable with. You could use Posca pen for this too. Whenever you're using paint pens, the main thing you want to remember is they need to— the paint underneath it needs to be dry before you add Posca pens. Otherwise, you're just dragging your tip through wet paint and it messes them up. Are we frozen? We're frozen for a second. Mary said— Mary, I'm going to pull your question up. That's a good question. She said, can modeling paste on top of the acrylic paint and the Mod Podge to give it dimension to the stem? Good. However, like, just applying modeling paste straight to this out of the tube or the jar, whatever you have. Kind of messy and hard to get like exact the way that you want it. So what I would recommend, if you want it to have more dimension, is to add paste or even gel medium to your paint and build that up. Or if you know you want to do that, you could do that ahead of time. You can— like what we did with the impasto pumpkins, all of that, everything we did with those could also be done with mixed media. So let me just grab one of these. So what I would say is, if you wanted to have the texture like you have in this, start the way we did this one and then come back and add some of your papers and stuff over top of it. So you, as long as you were able to like let that stem dry, you would be able to do something like that. So one of the other tricks for doing like smooth lines like this that sometimes I do with black— I didn't right now, this is just the paint straight out of the tube, but you want to have— you can water it down. It's the only time I usually say to Um, is if you're like doing a wash like I did in the middle, or if you're doing thin lines, adding just a touch of water to it makes it a little more fluid and it flows and pulls better. But really using a nice skinny long brush like this— this is called a liner brush, um, and it helps you create those delicate lines. But again, just like we've been talking about all week, it's all about the amount of pressure you're putting down. I could make a thick line with this exact same brush, or a super skinny line. So it's all about the amount of pressure that you're putting down. And just remembering, if you need to practice that, that's okay. I've been doing it for years and years and years. So for me, it's pretty natural, and that also is like muscle memory. The more you do, your hand starts, your wrist starts like remembering, oh yeah, this curve shape that we're doing. And I would say, don't do it super slow. Don't, don't hold on tight to your brush and grip it. Be loose with it, because the looser you are with it, the easier it's gonna— like, I'm almost when I'm doing it, I'm almost like just gliding it along. It helps. So you don't want to get real close and like you're, you know, you're like pulling it and kind of forcing that skinny line. That's where you get heavy-handed. So be light-handed, just kind of drag. And again, practice. Start just practicing those brushstrokes. Sally said, how do you get better at straight thin lines? Just practice. So, I mean, practice makes progress, right? We're not trying to be perfect, but you are wanting to make progress with what you're doing, right? So the more you do something, just like I was talking about with the muscle memory, the better you're going to get at it. You're not going to get better if you do it one time and then say, I can't make thin lines. Just got to keep practicing, and that's why I recommend having a mixed media pad so that that is your— think of it like your workbook. That's your place to make mistakes. That's what it's for. You've got to be willing to make mistakes. You've got to be willing to fail sometimes, and I always say fail forward. That means you're growing. In order to grow, we have to do things that are out of our comfort zone. So right now I'm just kind of going back over where my sharp lines were with my pumpkin. Can you guys see how even adding the lines to the pumpkin now, it's all starting to come together? Think of how ugly it was about 15 minutes ago. Congratulations, Miss Lisa Howell, you are our winner for our live today. All right. So, but still not done yet. Michelle said, I beat myself up when I make mistakes. I'm working on just the playing part. So let's talk about that, Michelle, because you're not the only one who does that, right? Perfection and perfectionism is the— we say comparison is the thief of joy, and it is. Comparison is the thief of joy, but so is I don't know why we're blurry right now. I'm not— hopefully it's not blurry for you guys. Are you guys blurry too? This is very irritating to me. Um, but, um, chasing perfectionism is chasing something that doesn't exist, right? How— like, no one— first of all, no one in this world on this earth learns anything by being perfect all the time. One, it's not possible. But how are you supposed to learn if you can't allow yourself the grace and the freedom to make mistakes, right? And especially in the creative process, like, that is part of it. And I say this all the time, but I want to make sure you guys hear me when I say, like, it is for— even for someone like me who's been painting my whole life, who's gone to art school for years. Like, I have skill sets, right? I, I have a lot of experience in painting. Does that mean that everything I paint is perfect and I'm happy with it every single time? Absolutely not. I have so many canvases that I've set aside that I'll paint over top of. Like, all of that— like, it doesn't always work out exactly the way that you thought it was going to, and that's okay. You have to give yourself grace that you're learning a new skill. And I think we have to remind ourselves to talk. Our self-talk is so important. What you say to yourself matters. Like, whether you think you can or you can't, you're right. So what are you telling yourself? Are you telling yourselves lies, or are you telling yourself truth? So just holding those thoughts captive. And if you've dealt with a lot of negative self-talk and maybe you don't you don't speak kindly to yourself and you're hard on yourself, trust me, I've been there. I always tease that I'm a recovering perfectionist in some areas, and some I very much struggle, and I have to remind myself to give myself grace. And once you kind of take that away and take that pressure off yourself, then you're able to enjoy it more. You're able to have more fun instead of being critical. And I say, talk to yourself like you would the younger version of yourself, or if you have a daughter or son, how would you talk to them? Or a grandchild? Would you tell them that they're no good and they shouldn't even try because they don't know what they're doing? You would never say that to them. You would encourage them to try. And I think we need to remember, we, we have to encourage ourselves sometimes too. And if that's hard for you to do on your own, That's what Tribe is all about. Tribe is about being in an environment and a group of women who are going to remind you what's truth and what's important and that you're learning. And they're not going to judge you and they're not going to say you should have done better. They're there to lift you up and help you along this journey. So if you don't have that at home, if you don't have that in local friends find that within our group because it's so important. Just as much as how you speak to yourself, it's important who you surround yourself with. And if you are surrounded with negativity and, you know, negative words and self-talk, that can be very detrimental and very hard. So make sure you have somewhere positive. You can be a positive outlet. Somewhere that you're going to be uplifted and encouraged. And that was my goal, like when we started growing as a tribe. And I just wanted this group to be a happy place. I wanted it to be a place that was filled with joy. Yes, I want you guys to learn how to paint, but I also want you to be kind to yourself. I want you to embrace learning. I want you to have an encouraging place where you can go when you're struggling, or if you need help with something. That's what tribe is all about. So, you know, just making sure that you have, have that important outlet in your life or somewhere that you can go is so important because we don't have to do this alone. All right, what are you guys thinking? Thinking she's starting to come together. Susan said, I'm so far behind, but still feel included. One, I'm glad you feel included. But you, Susan, you are not far behind because there is no finish line. You're at your own pace. Everyone in the group is working on different things. There are so many people who haven't, you know, started on maybe whatever our last monthly lessons were like. There's no behind inside of TRIBE. Everyone is working on different projects on different things. So you never have to worry about catching up or fitting in. Everyone's doing their own thing. It's your journey. And your journey alone. So what I'm doing now is I'm taking in some of my lighter teal, and I like to just add— kind of like I was talking about earlier— I like some lights and darks in my background. If you're feeling anywhere where you feel like maybe you need more paint over some certain sections, or maybe your paper's showing, could add a little more paint here. And I just like the look of finger painting, so that's why I'm doing it that way. You can also kind of use your brush. It's almost like a dry brush, so I have very little paint on there, and I'm just kind of lightly dragging it to create that, that texture. Hannah said, such great values. I love that. I wish I was able to afford even a month of Tribe. So here's my advice to you, Hannah. Number 1, we have a 14-day money-back guarantee if you join with the monthly option. So you can jump in, you can hang out with us for 2 weeks. And if you don't think it's worth it, then you can email in and request for your money back. But the other thing I want to remind you is that you guys, there have been so many people just like you, Hannah, who thought they couldn't afford it. And then all it took was them slowing down, actually looking at their spending, like, go in, look at your spending for the last month. $47 a month is less than $2 a day. So, look and see if there are things that you can carve out— a trip to get a coffee, fast food, a few things at the gas station, that extra thing in Target while you're standing in line. Like, we easily discard money without even thinking about it, and all those little things add up. So, if you could cut out a few of those things here and there, it would allow you to afford to be able to be in TRIBE. And in addition to that, when you are in TRIBE, you can actually make money selling your pieces. A lot of these women, that wasn't their intention when they joined, but they started posting their work on Facebook and then they had friends asking, can I buy that from you? Or can you make one of those for me? Some of them have their friends over, just 2 to 3, 4 friends, however many, and you're teaching them a lesson just like this. You could charge them $20 a person and then you've paid for almost 2 months of TRIBE. So there are so many ways that you can use the resources inside Tribe to make money and then cut out a few extra expenses that— what are they really doing for you, right? Like those little things here and there. What if you could give up those few little things and trade that for a community of women where you feel uplifted in a safe, positive, happy environment where you're filled with joy because you're able to take this time for yourself and give, give yourself something back that you know is going to benefit you? So I think it's just, you know, weighing how much, how much you want to do it and then trying to figure out a way. You know, when it makes me always think back to when I joined, it was also called TRIBE with my business coach, Stu McLaren at the time. And I mean, we're saying a much bigger expense, but it was a very expensive course for me. To become a part of. And I made a goal like, okay, what do I have to do to be able to afford this, right? Like, Cory was like, I don't know if we need to spend that much money on that. Sounds like a lot. And I was like, I just really feel like this is what I need. Like, I was passionate about it and I wanted to do it. And I found a way. I looked at my budget. I cut some things out. I figured out how I could make some additional income. And that ended up changing my life completely. I wouldn't be here today. I wouldn't be talking to you guys today if I wouldn't have taken Stu's course, because he was the one who taught me how to be able to do this as a business. So, you know, I mean, sometimes we just— if we want a different outcome, we have to do some different things and change what we're currently doing. And I wanted that bad enough that I was able to find a way to make it work. And there's been so many women in the group who have been in the exact same situation. So that's my encouragement for you today, is to look at those things. And you have the weekend to play and work on these projects and, and see what you think. Okay, what do you guys think of our pumpkin so far? The next thing I'm going to do is, um, I think I'm going to do a quick blow dry on this just to make sure I don't drag my paint pen through anything. And then I'm going to start adding in, um, some of my paint pen work. Actually, you know what I just thought of? Just kidding. Um, I was going to cut out one of these leaves and add that in, so I'm going to do that first. Okay, so I tore this little guy out. This is when I do use scissors. If I'm actually cutting like a shape out of my scrapbook paper, then I'm going to do that. So I'm going to grab my scissors really quick. Oh, Mary, I just saw your comment. We must have both realized I didn't add my leaf at the same time. Now I am adding it. So I'm going to cut this shape out of this scrapbook paper. But do you guys like the pumpkin so far? I think it's looking pretty. I like the more vibrant colors in this one today. Oh, excuse me. Sorry, you guys, that was probably really loud in the mic. Um, Betty said you didn't let the paste dry, but mine says allow to dry 15 to 20 minutes. Well, is that talking about to be finished, or— I'm just telling you what I've always done, and I've always mixed while it's wet, and it has never been an issue for me. Maybe it's talking about to let it dry to touch at the end. You may want to let it dry that long. So I'm thinking maybe here. I can't decide which side I want it on. I think there. No, not when I look in the camera. Then it just looks like a big black block behind it. Maybe have it go down. I always have them go up. Maybe we'll have this one go down instead. Okay, I'm gonna, I'm gonna go with that. Christy said break the rules and see what happens. I do it all the time. Me too. I'm like, I don't know, I just play and test things out, and nothing blew up on me, so I'm good. I'm definitely not one of those, uh, I'm not a rule follower. I always tease my mom. My mom— I, I'm like my dad. My dad is, you know, rambunctious and willing to do whatever. Mom is such a rule follower, and she would— if she watches this later, she'll probably giggle because I tease her about it all the time. I'm like, Mom, it's okay, it's okay. You don't have to follow the rules on the container. You can try something different. Okay, now that I got my leaf on there, I'm gonna go blow dry this really quick, and then we're gonna come back and start adding in some of the detail work with our paint pen. Um, Wanda said, how do you rejoin Tribe each year? So, Wanda, it's a membership subscription. So if you do monthly, it renews on whatever day you sign up. So today's October 4th. If you signed up today, on November 4th, your next payment would automatically come out of your bank account. If you do the yearly option, so it's $47 a month or $470 for the year. If you do the yearly option, it will come out that next year on that same date unless you decide to cancel ahead of time. We do send out reminders starting 2 months before that annual notice just so you're aware that it's getting ready to come out again, and then you can just email customer service back and let them know if you want to keep your membership or, or if you'd like to cancel it. Nancy said, are any of the Tribe Zoom paint parties in the evenings or the weekends? Yes, they are. So we try to— because we have people all time zones, so we have people all over the world, Australia, UK, Canada. So there's never like a perfect time. So we try to space things out. We do usually like a morning or late morning paint party, and then we do one in the evening. So I'll share when we're done with this. I'm going to share with you guys everything that we have coming up. In TRIBE for October, including for everyone. We were talking about this the other day, how it's hard for us to carve out time for ourselves and how we kind of need to take control of that too, right? It's all about making a decision, making priorities. So we're going to have an organizational-like session, and we're also going to give you guys a paint planner to help you start blocking out time. For yourself and your work to take notes in. So we've got a lot of fun things happening next month. I'll be right back. I'm going to blow dry this. And I'm going to get a little water on my brush here. And I'm just going to kind of wipe a little bit of that off. Once that polka dot to show through just a tiny bit more. Okay, so I'm gonna grab my white. I have all different colors of Posca pens. This is all optional, but this is what I have. So I'm going to use my— this is just like the medium point Posca pen. Vicki said, that's me, I'm a rule follower, and my brain is like, what can I do different than what this it tells me that I can do. Okay, so I'm just going to start coming in with some quick, quick lines. You'd be amazed how these little accent marks just start pulling things together too. I'm going to do white first, then we'll do some black. And since these are paint, like, you can even like smudge. This is just paint coming out in a pen, so if you want to smudge it, you can do that as well. I'm not going to do that on the actual pumpkin. And then I have, like I did on this one some of these teal paint pen marks. I think I'm going to incorporate some of that in here. I love the contrast and color. Sometimes I just do some little scribbles. Scribbling in your art is very freeing and fun to do. And grab my black. Debbie said, could you put glitter on the leaf? Yeah, you definitely can. You can put glitter on anything. Um, Peggy said, does the DecoPodge mat give that sheen? Yes, that's what's giving it that sheen. So again, I'm doing this real like sketchy, like, right? I'm not holding down and pushing down super hard. We just want these to be little quick accent marks. They don't have to perfectly line up with your pumpkin. Let's go around our leaf here. I think I may add a little green paint to this leaf too. Hey Maggie, she said, I want to rejoin Tribe, am I too late? You are not too late, you can rejoin us. We are open right now and we've extended it through Sunday night because I had to reschedule some things yesterday, so You are good. So I'm just mixing myself a little green here. I've got some different blues and greens on here, but then I'm going to pull a little yellow into it too to make it greener. Maybe a little bit more yellow. And I'm going to add some water to that because I don't want it to completely cover up I think I still want more yellow in that. I kind of like the vibrancy of that, and then I'm just gonna kind of dab a little off here. And then I'm gonna take my gold paint pen and just do a couple Little spots of gold. Okay. What do we think? I think we're about done. I think the only thing I'm going to add is a little bit of the black edging. So when I do my black edging, I'm just going to get a little bit of my black paint, and it can be watered down too, and you're going to just hold it along that edge, that hard edge of your canvas. Now I will be painting the sides too, but I'm not going to do that today. You can paint the sides, you can add more paper to the sides like I did on this one for this look. I just love that extra edging around the side. Can you tell the difference? Like the side with black on it and the side without? I just think it looks more finished. How do I finger paint and not mess up my manicure? It all just comes right off. I mean, there's always paint on my nails, and then I just wash it off and rub it off, and it'll, it'll come off. It doesn't ruin the fingernail polish. Okay, so after— what's the verdict today? After watching today's lesson, how many of you think you would want to try some mixed media out? Um, Brenda said, I find my tissue paper tends to bubble. Is that a problem? It basically, Brenda, it just means that you didn't have enough of the Mod Podge underneath it to like fully adhere to your board or your canvas. So that's why I always go back through and I rub it with my finger and make sure that it's smooth. If it's not, I'll kind of lift it up a little and push some more Mod Podge under there and then push it back down again. All right, we got some people stepping out of their comfort zone, ready to try this. And like, I just— I love the look of the black around the edges. I just always have even pull it in more in some places. All right, so that is how you do mixed media pumpkin style. Show our finished ones. So today is more of— I love the one from today. I'm totally taking this home. I'm going to finish the edges. This one's going in my house. Um, but it was so much fun. I, I love, I love this style. Um, it pushes you out of your comfort zone. It forces you to really get creative, and it forces you to play, which is what I love. Okay, so before you guys go, um, I am going to do a quick kind of behind the scenes of TRIBE. I'm going to take you guys into the TRIBE Sister Facebook group. I'm going to move this stuff out of the way so I can pull my laptop closer to me, and I'm going to share with you what our calendar is for next month. So you can see everything that we have in store for October. And then, of course, we have fun things planned for November and December. That will be coming as well. So let me get that all pulled up here. Okay, everyone can see this. I'm going to move things around really quick so I can get the laptop closer to me. Yes, you guys are welcome. I'm glad you enjoyed Paint Week with the pumpkins and learning all the different ways that I teach inside a Tribe. We're always playing around and having fun in there. Okay, so here is what we have coming up. Making sure you guys can still hear me, right? I didn't take myself off the screen. Okay, um, Vicki said, how did I do the writing on the other pumpkin? Um, that was The, the word thankful. Here, I'm going to show you this again. Hang on. So I cut the word thankful out of this paper and then drew a rectangle around it. So what she's asking about is this one. So I cut thankful out of here. Made it a rectangle, painted it brighter teal around that, and then I just traced over top of that with black Posca pen and then finished it like it was a little tag on the side. Okay, so here's what we have coming up inside of Tribe at the beginning of every month, on the first of every month. Megan updates our header of the Facebook group, and we found this to be super helpful for Tribe Sisters because it's always at the top. Like, you never have to wonder what's going on, what day something is. It's always here for you. And of course, all of these you have continued access to. These are not one and done. I mean, even the Zoom calls, if you can't make a Zoom call, but you want to go back and watch it, we share the replays of the Zooms. But this gives you your whole schedule. So as a new Tribe Sister, if you guys are new and you just joined, always pay attention to the header of the group. So this week was all about Paint Week. So Tribe Sisters have just been joining me here with you guys. On Monday, we are doing our welcome ceremony at 3 PM, and this is where I'm going to welcome all the new Tribe Sisters to the group, and we're going to do a walkthrough of everything in depth. So, you know where everything is and how everything works. And then on Tuesday, I will be doing my devotional for the month. October 10th, we're going to do a studio session all about getting organized. So I'm going to be sharing the new planner that I'm designing with you guys next week. And then on the 10th, we will be talking about how to use that planner, how to make like a 3-ring binder to keep track of your work and stuff in. And we're just going to talk about time blocking and getting organized so that you can get the most out of your membership and the most out of your time. Because if, if you're watching, you're— you probably are a creative like me, or you want to be a creative. And sometimes our minds get scattered a little bit, and it is always good to tap back into a little organization, a little reboot, and a little planning, because it's amazing what you can get done when you actually commit and decide to give that project, that painting, whatever it is, give it time. But we have to carve that time out. So we're going to do a whole session about how to, how to get organized and for other tribe sisters to share their ideas of how they have organized their spaces at home, how they organize their note-taking, you know, their paintings, all that good stuff. The 15th, we're going to do our little cozy cappuccino, which is a new painting I just finished. We're doing a paint party on the 18th. On the 22nd, I'll be teaching my second painting, which is the Fall Lake Over the Bridge. This is going to be done in palette knife style. Then on the 29th, we will be doing our second critique. Last month went so good, and they learned so much. These are insanely beneficial. I can't stress them enough. This is your chance as a Tribe Sister. If you're struggling with your piece of art, or you're not sure if you're done, or what could make it better, you can submit it, and I pick 4 to 5 paintings each month that I will critique and go over and give advice on. Um, but everyone learns from these. They're so, so beneficial, um, and it will help you apply that same technique to your artwork as well. Um, and then the 30th, we finish off our October with our Zoom pumpkin paint party, where we're going to be sharing our— it's kind of like a celebration. We're going to be sharing our, our pumpkins. We're going to do a contest this month where we are actually painting on pumpkins. We're going to take a painting from the Tribe Vault and do them on pumpkins. So that's a look at what is to come when— this is our Tribe Sister Facebook group. So When you come in here, anything important that you need to know, like when I had to make the schedule change yesterday, we come in here and we announce that all of that is always going to be under your featured tab. So this is where, you know, Megan will put the links to go back and review replays of things. I just added a new Tribe Sister starter kit to the store. So if you're wanting some supplies and some Tribe Sister swag, that is available to you. And then here is our monthly calendar and what's to come, all in a different view. So you can print this calendar off, which is what I would recommend, so that you remember where everything is. All of my live sessions are always taught here in our private Facebook group, and then they are added to our membership site where you log in and access the vault later in the month. So this is our Cozy Cappuccino, and then this is the beginning of the fall landscape. I'm not quite done with this yet, so I will be sharing that. Hopefully I get a chance to finish it maybe this Sunday. But this is where Tribe Sisters are also getting to share. You can ask your questions here. This is me just letting everyone know what to expect in paint week. So this is really where all the communication happens with our team. Um, but this is also where you get to be with your other Tribe Sisters and cheer them on. So everyone is just sharing their work in here, their weekly wins. This is so fun. Every week we celebrate wins that people are having, big and small. It's always fun to read what all the Tribe Sisters are doing, and just a place where you can share your work. These are super cool. I love the texture. On this and share what you're working on. If you go over to recent media, this is like kind of a quick way to just check out some of the newest photos. Christina shared some of her pumpkins she took pictures of. These are great for reference photos to get ideas. So we've been busy. We got some busy tribe sisters with Pumpkin Week. This was our Impasto floral that Susan did from September. Timber that turned out beautiful. We've got some of our scarecrows in here. Um, so look how pretty is this, Miss Nancy? That is gorgeous. Look at all that color. I love it. So this is, this is your way to come in and see what's going on inside a tribe. Um, and like I said, the most recent replays and all of that good stuff will be up at the top of the group. So let me jump back over here, make sure I don't have any additional questions. And then just in case, um, you missed it, I'm going to do a super fast peek into the Vault. Um, this is your artist library. So that was the Facebook group. That's where the community is. That's where I teach live. But this is your artist library. This is where your vault is and any additional workshops that you've done with me. So we're going to go in. Sorry, I didn't switch tabs. Now, now you see where I am. This is the website you created a login for, and we're going to go in to the new Tribe Sister vault. All the important links are going to be at the top. My Amazon store, the DecoArt paint set, which, by the way, is back in stock. Um, our welcome guide you can download and print off, which I recommend. So you kind of know where everything is. We've added the Tribe Sisters starter kit up here for you. We've already added in the Jump Start to Acrylics that I taught at the beginning of September. You, the public, will lose access to this on Sunday night, but Tribe Sisters get continued access to it. And this will also be this beginner technique videos. I think it's this one. Hang on. No, always get these confused. It is— sorry, went back too far— beginner-friendly tutorials. So we've got our 4 styles of poppies, which is very much like what we did with the pumpkins this week. We just did it with poppies instead. All of those are in the beginner-friendly tutorials, and this is where we're going to add all the pumpkins that we did this week. So as a Tribe sister, that's where you will continue to access those. And then, um, we just added in some other like super easy ones, um, inside of Tribe that we thought were great for beginners. Now my philosophy is you can pick any painting you want to in the Vault and you can start painting it, because I break every painting down the same way as I did this week with you guys. It doesn't matter how hard or complicated it may look, we're always going to break it down into easy, doable steps for you. Um, Ondine said, if we don't join Tribe, do we have access to replays of the pumpkins? You will only have access through Sunday night. So it was going to end tonight at midnight, but we extended it to Sunday, um, because I had to postpone things yesterday. So if you want to go back to the Vault homepage, just click that Tribe Sisters up at the top there, and it took me back here. And so that's all your like start here beginner, just get comfortable with everything. Then this is where it's like your Netflix for painting, and you can just start scrolling through and looking at some of the different animals that we have. Our farm animal series is probably some of my most popular animal paintings. We have a coastal section, florals for days because I love painting flowers. So, so many different techniques and varieties of floral paintings. These are not one and done. Um, there's lots of different styles for you to choose from that you can learn with. Um, landscapes— I love doing landscapes as well. So again, taught in several different varieties. We have some impasto style ones, we have palette knife, we have the ones with like the oceans and clouds is very blended. Same with Tuscan Road. So depending on what maybe you're wanting to focus on a certain skill set in October. Maybe you struggle with blending and you're like, let me find some of the lessons that look like they use a lot of blending. So that's how you start building those skills, is kind of going through and kind of picking those different things. So that's just to kind of give you an example. Obviously, we have everything seasonal as well. These are our newest fall ones, our last 4 that I've just recently taught. The impasto flowers. Sammy the Scarecrow was done very much the same as what I did the pumpkin today. They would actually look adorable together. We did a porch leaner, um, which was so fun that has just been a huge success. So many Tribe Sisters are making money with this, um, doing paint parties or selling them. We did the fall birch trees. So, um, these are just some of the different fall paintings But you can see there's lots to choose from. And then winter and Christmas. I love Christmas time, so we have lots and lots of different Christmas paintings. So that kind of gives you an overview of the vault. You can also click over here and scroll this way. This is where studio technique sessions are if you just want to work on techniques maybe and not a specific painting. We have devotionals that if you need some uplifting, a reset of your mindset, those are good for you. And then we also have filters where you can look at it through, like, if you're wanting watercolor, impasto, mixed media. So all of that is available to you. So I'm gonna X out of here. And then the other really cool thing that we have is this little magnifying glass up at the top. If you're wanting to search for something specific, let's say sunflower. You love sunflowers like me and you want to know what sunflower options there are. This will take you to all the different paintings that I have done with sunflowers, and then you will click on those and be able to access those videos step by step. Inside each one of these is your reference photo, your color list, your template if one is provided. So it's all in one easy spot for you. So I'm going to jump back over here to questions. Also, I'm going to get it off that screen, and these are some of the bonuses that you will be getting when you become a Tribe Sister. So I'm going to leave this bonus up while I'm answering some of these questions. These— it says 10-4 on there. Of course, that's been extended through Sunday night. So when you become a Tribe Sister, in addition to everything that you get for being in Tribe, you also get these bonus tutorials. These are some of my most popular ones that are not included in the Vault, and you get them in addition to that as well. Absolutely, Patricia, this is a great question. Um, she said, do people ever join Tribe and then customize their style? For example, your style is more whimsical. Can you adapt those techniques if you like more of a realism approach. So, um, let me see if I can pull it up. Give me just a second. So we actually have several artists in the group who do exactly that, and I'm gonna So I'm going to pull Linda's up. Linda is one of our tribe sisters. She's been with us for a while, but she has painted previously before painting with me and definitely has her own style. Like, I'm very like kind of bold and messy with my brush, brush strokes, and Linda is very smooth and blends everything beautifully, and just— she just has a different look to her paintings. I don't even have to see who posted it, I can tell you by looking at her photos that it was one of her paintings, just because she has that style. Christina is the same way. You like— look how this is beautiful. She painted this on a tote bag, but her style is very soft. So everyone has, you know, a very— every— I mean, everyone has their own unique style. And I feel like the more lessons you do, the more you find your style, and it may change over time. I mean, I think it's important that we know as artists, even if you've been doing it your whole life like me, my style has changed multiple times over the span of my artistic journey. And I think of like Picasso and the different stages that he went through as an artist. Like, it's so important for you to continue to push yourself and grow and try new things. Sally, you access the membership website by going to tribesister.com. I think that is it. So thank you guys again for being flexible and joining me today. Replays are up through Sunday night. Um, we'll make sure and share the hub page again on the Social Easel page, and it will be included in emails going out to you. So you can access all of these replays through Sunday night at midnight, and that will be your last chance to become a Tribe Sister as well and earn those additional bonuses. So I hope you guys enjoyed it. It was such a fun week of painting, and I will talk to you soon. Enjoy your weekend, and I can't wait to see everyone's work. Be sure to come back to the Social Easel page and share them under our posts where we are showing off the work that you guys are doing. Alright, talk to you soon. Bye.










