Live with Kasey from P'zazz Art Studio || The Social Easel
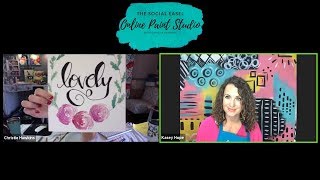
In this live YouTube session, Christie Renee Hawkins (The Social Easel) hosts guest artist Casey Hope from P’zazz Art Studio to demonstrate a quick hand‑lettering project that combines simple flower sketches, faux‑calligraphy lettering, and watercolor. The duo walks viewers through four main steps: (1) gathering inexpensive supplies (watercolor paper, pencil, thin waterproof pen, Sharpie, watercolor paints, brush), (2) sketching three loose flower shapes and adding interior C‑shaped lines and foliage, (3) inking the sketch with a waterproof pen, thickening downstrokes using faux‑calligraphy principles, and (4) applying watercolor washes for subtle shading. Throughout, they share practical tips—using tracing paper to plan spacing, warming up the hand, using hard‑lead pencils for easy erasing, and adjusting line weight for contrast. Casey also answers live audience questions about material suitability (e.g., wood vs. watercolor) and demonstrates how the same design can be adapted to other media. The session serves as a preview of Casey’s "Whatever Lettering Club," a subscription‑based community offering a 4‑week boot camp, monthly projects, traceable templates, "happy mail" scripture cards, and occasional bonuses such as glass‑ornament lettering tutorials. Pricing ($35/month) and membership benefits (live Q&A, starter supplies, quarterly meet‑ups) are highlighted, with a call‑to‑action for viewers to join before a deadline. The tone is informal, instructional, and promotional, with frequent audience interaction to ensure technical clarity.
Chapters
All right, I believe we are live.
So I want to jump on really quick. For those of you that are watching today, this is Christie Hawkins with The Social Easel, and I have my friend Casey Hope on here. And you guys have probably seen pictures of me and Casey together, but we're in the creative club together that we're all part of. We're all different creatives doing different things, and she does hand lettering, and I've been in her membership for a little over a year. I believe, because even though I've dabbled in it before, I'm no pro at it, and she is. And she has all kinds of fun projects that are going to teach you about lettering. So I'm going to pull you up really quick, and hopefully I can see the comments on here. Let me know if you guys will do me a favor really quick and just comment and let me know you're here. That would be awesome, just so I can make sure that the streaming is working for you because As always, we're having a little bit of technical difficulty. Hey, Helen, what— how does it sound? So I may have to— we're testing something out because every time Casey and I were talking back and forth before we went live, every time I would speak, then there would be this delay and it sounded like someone tapping on a keyboard every time I would talk. But it wasn't happening when Casey was talking. So I may end up muting myself part of the time and letting Casey kind of lead this. So I'll be talking a little less than normal today, and Casey's going to take over for me. Okay, so Lynn says it sounds good. You guys let us know, because when I have Casey muted right now— we were kind of testing this out— it's muted right now. You guys can hear me fine. When I unmute her, let, let us know in the comments. I'm keeping track of you over here on the iPad and We'll adjust accordingly. So I may have to mute myself, or we may just have to go back and forth on doing that. But Casey is going to do a fun hand lettering project with us today that is from our membership, or her membership. It's not mine. And, and then we're going to share that with you so you can kind of get a taste of what it's like. And then I'll be posting in the comments my link. So if you're interested in becoming a part of Casey's membership and you want to learn how to hand letter yourself and use it in projects that you're working on for your business or for personal, then you can have that link to sign up. So I'm an affiliate with her because I love it and I want to share her with you guys. So I'm going to unmute Casey and let her talk and kind of introduce herself for those of you guys that don't know her. And if there's background I'll mute myself. Okay.
All right. Well, hey, hey, y'all. I'm Casey Hope from Pizzazz, and we have been rocking and rolling here at Pizzazz for like 12 years. And about a year ago, we started the Whatever Letter Lettering Club. We saw so many people that wanted to learn lettering, and I had been on that journey myself. I had wanted to letter, and here in the studio, people would always want me to letter. And there was a time where I couldn't. I was embarrassed because I couldn't. And so I just decided, you know what, I'm an artist, I need to learn, I need to learn how to do this. And so I started teaching myself. And through just looking at letters like drawing and going slow and teaching myself, I kind of came up with a way to teach other people in a really step-by-step way how to learn to letter better. And so that's what we do in our club. We have a 4-week boot camp where we teach you that, but then we do Like Christie was mentioning, we do projects that enforce the lettering. So it's not all just lettering. Like today, we're going to be doing some watercolor because I'm an artist. Art gets into everything that we do. We have done lettering on wood, on door hangers, on canvas, watercolor. We've done some alcohol inks. We— coming up, we're going to be doing some embossing next month, which is really fun, really pretty. So we do all kinds of different art, but we also work our lettering into it because the more you practice your lettering, the better you get. So, um, so yes, today we are going to— we're using just some watercolor paper. Um, I'm going to take this off and I'm going to be putting it on a clipboard so that you can see it a little bit better. Um, because along with those technical difficulties, it's a little bit hard for us to flip it and get it the right angle with lettering because it does all the letters backwards. This may too, we'll see. I don't know, I don't know. Um, so anyway, I'm going to be teaching like this. Christie's going to be going along with us, and I would love for you to do it too, even if you don't have watercolor paper right in front of you, you can do the drawing portion of this and then transfer it to watercolor paper later. You can just kind of play around with it right now. So we are going to do 3 flowers down here. It's going to look like a floral border and then some lettering on the inside. So we're going to draw, we're going to ink it, and we're going to letter it and then watercolor it. So we got 4 steps, but it's not going to, not going to take us too long. So you ready, Christie? Okay, you're not used to not hearing her, are you? Let's see, I don't— I can't, uh, I'm trying to look to see if people—
okay, I unmuted myself for a minute, so if you guys hear some background noise for a second, I apologize. I am— I tried to post my link in the comments, but I can't tell if it came up or not.
I see it on my end, I see it. Okay, okay.
Yeah, just want to make sure that link was there so they had that.
I'll go back over here. I'll test it real quick and make sure it's going to the right place. Yep, you're good. Okay, I have a delay on mine.
Come on. Okay, there we go.
You are gathering supplies. You— what I was going to be talking to anybody else who, if they're gathering supplies, if you want to do this and you're at home right now and you've got these supplies, it's watercolor paper. Pencil. I'm going to be using a small, thin waterproof pen, a Sharpie, and then just some watercolors and a watercolor brush. So I'm just using this one from Michaels. So that's what we're going to be using today. You just tell me when you're ready because I'm ready whenever you are.
Well, let me grab my Sharpie.
Okay, that's for the lettering. So we will, we will do the drawing with pencil and then the inking with our small pen and the lettering will be done with Sharpie. And if you cannot see when I start to do this with my pencil, then I'll swap to the pen. But I would suggest always at home doing the pencil first. Alright, so you— I know, Christie, you love doing these little small flowers. So we're going to do 3 small flowers right down here. And to begin with, we're just going to do like a very loose shape. So like right here in the middle, I'm just going to do like a very loose shape so I can see. Can you see what I'm doing? Or not.
Yes.
Okay, so I'm doing 3 really loose shapes of flowers. And then after that— okay, good deal. Then after that, I'm going to do— we're not going to do a complete circle, but we're going to kind of have like from coming from here, just kind of a curve and a curve. Okay, because we're going to write our— that's kind of a little wonky. Why do I keep forgetting my eraser? You're going to do two curves like this, but I'm going to get an eraser because mine's a little wonky wonky and I need to erase it.
Hey, Christie's on here. Christie, if you're on here, will you— if you have access to my link that doesn't look all crazy like— I don't know if that affects anything, but when I copied and pasted it, From where Casey shared it with us because it was through Facebook, added all those extra letters and stuff, and I don't know if that affects anything. Can you guys— when I'm talking, do you hear that echo weird noise?
I do.
I'm kind of fixing my lines too. I don't think I have it quite centered the way I want it.
Okay, now for the inside of the flowers, I just do what we call like C's and backwards C's. So it's going to look like this, like a little bitty C and then a backwards C and then a bigger C and then backwards C. And obviously they're not perfect C's. That's just kind of the direction that we like to— that we like to have our brain think about. Anytime you can relate things to things that you already know. You already know how to do a C. If you can relate these lines to that, it makes it a lot easier. So I'm gonna do those little C's and backwards C's and all of these. Yeah, yeah, okay, perfect, perfect. All right, now we're going to do just a little bit of foliage kind of coming off the lines that come up. So I, I don't want anything to look perpendicular, like it's sticking straight out. It's going to kind of come up a little bit. So I'm going to do lines coming up. Off of each side. But they're all going up, and I'm going to do that on both sides. They're not coming out at it in a perpendicular— is that the right way? The right word? Perpendicular. And then from there, now you could leave it like this if you wanted to look woodsy, like this is like a woodsy branch. But if you want to add some some green foliage to it. You could also just add the little— let me say a couple of different things. You could kind of come and add these little lines on either side just to make it like little leafy type things.
Yeah, they're saying we need to use the pen instead. It's that your light is so bright when you hold it up, it's hard to see the pencil.
Okay. All right. So here we go. Let me— I'm going to go over what I've just done really quickly with the pen. Okay, so we talked about kind of coming around, pulling these off. So what you can do, you can have just little bits of the Just a shape of leaf around it. Or if you wanted to do all— I would do all of these similar. So you could do it like this, or you could just kind of come on either side to where it was a leaf, just a regular leaf. Okay, so just choose something to add to all of these that are kind of coming up and off. So you did your curve like this. All of these little lines came up And off. And now you are just going to add foliage to them however you'd like, whether it's very specific shapes or just looking like leaves, however you'd like on that. Can y'all see that better? Let me know if you can.
It looks better to me. I'm going to hold mine up. No, I'm far away.
Oh yeah, yep.
Okay, Lynn says much better.
So, okay, good deal. Good deal. Don't you love face— like doing it live? I know, feedback immediately. I would hate to do the whole thing and everybody not see it.
Should we go ahead and just line everything then with the black ink that we already have drawn on here?
Sure. Yep. So I'm— because I'm going ahead and doing that. So if you're doing at home, though, I would— you might— they might want to do pencil first. Right. But if not, you can go ahead, add your black waterproof pen first. Okay, so make sure that it's waterproof because we are adding watercolor to this. And if you— if it's not waterproof, then it's going to bleed all over the place.
So the ones I got, just to give you— I grabbed these at Hobby Lobby. They're called Pencil It. Have you heard of that brand?
What is it?
Is that backwards?
Nope, I can read it. I've not heard of it. Like, I have a pack of pens with those different tips, but I've not heard of that.
So this is just what I— because I was looking, and it'll say waterproof on there. So this is the brand I got. It was at Hobby Lobby. Water-based ink is acid-free, fade-proof, and waterproof. So just to give you an idea.
Okay, now I've gone ahead and inked all of that, and then what I'm going to do on these flowers is I'm going to— I'm going to go ahead and kind of COVID what I've already done, but then I'm going to do a little extra on one side. So we're not— it's not going to be like a perfect shade, but I'm going to start adding more of the little lines on the left side than the right side. So it'll just, you know, it's just more of them. I'm not coloring in solid. I'm just going to put a little bit more over here because just the more lines, and I'm not— they're not complete C's. It's just like very, very loose. Okay, then we do the same thing over here on all of them. Okay, so in all 3 of those, I'm going to outline what I did. And then we'll put just a little bit few more lines on the left side than I have on the right side, just to give it a little bit of an illusion of that with a little bit of value, a little bit of shade. So there's that one. Do the same thing on the other. And then that's all for our drawing. Okay, so that's, that's not hard. It's just 3 very simple, very loose flowers.
But will you hold yours? Will you hold yours up again for just a second? I want to look at it again too and let them kind of get a closer—
okay. Okay, when we are done with that, this is when we are going to add our lettering. Now let me tell you one little tip. If you are creating a piece and you're about to add the lettering, but you are a little bit scared about how big should it be, you know, how does it— should it feel the format, if you will get tracing papers. This is just tracing paper from any craft store. You can lay it on top of your piece. And this is a really good way just to play with how you're going to letter it. So for example, I'm going to grab my marker. You don't have to have this, this is just optional. So I'm going to write the word lovely because our Whatever Letter Club is based off of Philippians 4:8. This is think on these things, and it goes through the list of everything to think on. And one of those is think on whatever is lovely, whatever is true, whatever is pure. So we're going to letter the word lovely. Again, you do not have to do it on the tracing paper. The tracing paper is just a fun way to, um, to like not commit completely just yet. So I'm going to kind of get it up close to you. And so I am going to do the L-O-V-E-L-Y. L-O-V-E-L-Y, that's how you spell it, right? Whenever I'm thinking of letters, if I know that it's L-O-V-E-L-Y, that's 6 letters, I'm gonna kind of think 3 on one side, 3 on the other. It's not going to be an obvious division, but I'm at least not going to do like L-O-V and N-V over here. I'm going to kind of be thinking the L-O-V needs to fit right in here. So I'm just going to practice. So L— going to pick that pen up— O-V-E-L. And then on the Y, you can really have some fun. Like, you could And because this is a practice paper, I don't— I'm going to just play and see if I like this or not. And I think I do. Okay, you could let that tail just kind of feel the bottom there. Okay, now if you don't like it, if you do something that you're not digging, guess what? You just throw the paper away and then you do it again. So the only thing that I don't love about this is because I was standing up, it's a little bit crooked. So I'm going to— now that I like this, I'm going to take this off. I'm going to write it with pencil. Now if you have graphite paper, you could put graphite paper up under there and just trace what you have. Um, but that's not— some people don't like using graphite paper with watercolor because they say that some of it transfers. Um, usually it doesn't necessarily transfer unless you are too heavy-handed, but it In any case, I kind of practiced what I was going to do. Now I'm going to pencil it in. I know that I like the Y like that. I know that I've got my lettering, and this is not really super fancy lettering. It's just going straight across. It's no bounce to it, but that Y is a fun, fun little something something for the Y. I'm erasing mine because I want to scoot over just a little bit. I am using this Mono eraser from Tombow. It's a really good eraser. And if you will use a pencil that is a hard— um, when I say hard pencil, you know how drawing pencils, like some of them are labeled with a B, meaning that they're soft, and some of them are labeled with an H, meaning they're really hard. The harder they are, the less smudgy they are, which means that's the easier that you can erase. So there we go. I'll do it one more time. I'll scoot it over just a little bit. Now, in the Lettering Club, we break this down a little bit slower. So, um, we go one letter at a time. But for today, I think the two kind of tips— well, three tips that I want you to take away from today. One is to think about your spacing, how I told you, you know, we kind of thought about it's three— it's six words or six letters, so three and three. That's one little tip. Think about that spacing. Second tip is, um, pick your pen up or your pencil up. You saw that I picked my pencil up after every letter. Don't think it all has to be connected. You can pick your pencil up after every letter and really think about what you're doing, because lettering absolutely is drawing. And then the third tip is to have fun with your Y. Okay, but Y's are fun to do stuff with. You can— in this case, we came down. You could have went up and around. There's all kinds of different things you can do. And once you have it like you like it, then you're going to grab your Sharpie. You're going to head back I'm going to show you guys mine really quick. It's not as pretty as Casey's.
You can kind of—
it is very pretty. I like it. I like, I like it. But it does help.
I will say it does help to do it on the tracing paper first, just because I was able to— and I have it because that's just what I had, but you can at least kind of get an idea of how it's going to fill your space. And I was able to look at it, you know, like decide I wanted my loops on my L's to be fatter and bigger, or, you know, just little things like that that you can kind of figure out before you commit to it.
Hey, right. And a lot of times, a lot of people will suggest— and I am probably bad about doing this— but a lot of hand letterers, they actually warm their hands up, like, kind of like you would when you're working out, you warm your muscles up. A lot of times they will just get tracing paper or scrap paper and just start doing drills. And so there is something to be said for getting your hand warmed up a little bit, and that tracing paper allows you to do that before you go straight to connecting— I mean, to committing to the paper. Alright, so now I'm just erasing my pencil lines that are still showing.
And I have a Sharpie now, right?
Yes, I'm sorry. Yep, you go over in Sharpie and then erase any pencil lines. And you can only erase— like, I'm going to also— while I've got my eraser out, I'm erasing down here too, because once the watercolor gets on there, it kind of binds the pencil lines in. You can totally erase them now, but once the watercolor is on top of them, you would not be able to erase any— they'll be under the watercolor. Unless you— hey, good deal. All right, so now we're going to thicken them. Yep, thicken those down strokes after you erase, thicken your down strokes. So I'm going to show— well, wait for you. I'll wait for you to do that and then I'll show you. Ashley says that's what she does, warms up the hand and muscle memory. For sure. So, so, so.
And just to tell you guys, the more you do this, and even like the traceables that Casey sends us every month. All of that is like— she's talking about muscle memory. Like, when I first started, I was like, I cannot get these letters the way she does them.
But the more I did it, the more your hand gets used to moving like that.
And it seems weird, but it's the same thing I teach, teaching brushstrokes, or, you know, like, my wispy outlines that I do around, like, my trucks and all that kind of stuff. Same, same concept.
You get your Get it, get your arm, your hand used to doing that, right? And it's, I mean, it's just like anything. Like, you think about anything that you want to get better at, the more you do, the better you get, period. I mean, I used to teach, um, I used to be a classroom teacher and teaching reading, you know, that's the more you read, the better you get. And so they'd read, read, read. Um, the more you do anything, the better you get. It is impossible to keep doing it and keep doing it and not get better. Awesome. Awesome. All right, we're gonna downstroke. Okay, so for anybody who does not understand what the downstroke is, you see this is going up and now this comes down. So when it's coming down, I'm going to thicken it. This is a technique called faux calligraphy. So like, this is up, that comes down. Making sense? So we're going to thicken it. We're just going to draw the lines next to it. This comes up, that goes down, up, down, down, and down. Okay, so we have thickened those down strokes. And then after this is when we are going to color it in— the thickened part, we're going to color it in with our Sharpie. And then that's going to give you that thick, thin— that's the same The same thing, the same look as if you were using a brush and just putting more pressure on the down strokes. That's a lot harder to do that. So you're gonna—
I'm going to show you guys mine before I fill it in, just so you can see. And sometimes, depending on your lettering— and Casey talks about this in the group—
like, depending on the spacing in between my lettering, sometimes when I'm thickening those, I may go over my line, like my initial line that I did, and thicken it on both sides, or maybe on the right or left.
So like, you can change it according to your spacing, right?
Yep.
But I did this, my kids love doing this. And you know, this is something that, you know, you can teach your younger ones too. And they love feeling like they can do pretty handwriting. And when they start doodling and they can write their name all pretty, you know, especially I have 3 girls, you guys know. So girls want to know how to write their name pretty.
Sure, for sure. Like, we had my daughter Chloe, her 12th birthday was this weekend, and to see all the cards the little girls gave her were precious. They were all like very cute lettering her name on all the cards. It was really, it was fun.
And going into holiday season, this is like the perfect time to start learning how to do this. Think of all the cute little gift tags that you can make. And do hand lettering on their gift tags instead of just slapping a sticker on there from the store. It makes it look so much nicer.
And the embossing technique that we are teaching next month in the club is perfect for that. It's perfect for little tags or for, you know, addressing envelopes. Like, it's just— it's cool. You're gonna love the embossing. Love it. You do have to buy an embossing, um, like that little heat gun type thing. Those are inexpensive. I'm also, I'm also doing some of my loops, thickening those up too.
And then after this, okay, so going down.
Yep, all the places that are going down. Yep. And then it will be time to add the watercolor, but we really don't do a whole lot of fanciness with the watercolor. It is simply adding color. Like, we're just going to add— we're not, we're not doing fading or wet into wet or anything like that. We're just adding some color. Yeah, I will— we will leave on down here on the flowers where we did some darker on one side and the other side a little bit lighter. We will leave some of that a little bit white. But, um, but yeah, so we've got our— yeah, we got that. So now it's just time for the watercolor. Now I will say this is going to be a little challenging holding this straight up. I will show you very quickly. So I'm getting some watercolor. I'm just adding my water to my palette, just using plain green. I'm not doing a ton of the water. And I mean, like, we're not trying to fill in every little something something. Do you see this?
Are you using a round or—
I'm using a round size 6.
Yes.
Okay. But yeah, I'm just— and I have several greens on this palette, so you can use any of them. You can combine some of them.
So you're going outside the lines and just kind of—
yep. Okay. Yep, I'm just doing quick, quick and messy, just adding bits of color.
Do you go along the vine or just on the little leaves that you did?
Um, you can do either one. I've done both right here. And I, I'm kind of like, yeah, I should have done the vine, but I needed a little bit of color. I would go a little skinny on the vine. Yeah, I'll show you mine just as soon as it's not drippy. Just don't do it too fat.
And Betty is asking, can this technique be used on wood?
Um, that is so interesting. Somebody just asked that before. So what— it depends on what you mean, Betty, because watercolor, no, I wouldn't do watercolor on wood. But could you draw this and paint it in? Like, yes, you could totally take your pencil on wood and draw it and paint it. The difference would be Right now, when we are adding this color like onto this, you can see the lines. With paint, acrylic paint on wood, your paint would cover the lines and you would need to come back on top either with a paint marker or some more darker black acrylic paint to add the details in. So that's the difference. But this picture, you could do this exact picture on wood, but I would not use watercolors. All right, so we've got that. And then down here for the roses, you can use whatever red or pink or combination of the two that you want. And when we add those on, we are going to stay on the left side where we did the C's. We're going to stay primarily over there. Looks good, good, good. And we are going to— I'd like to like shake my brush. So like, I'm not going to do just these like this.
It's been—
if you were looking in slow-mo, it's gonna be like a curve, like wiggle lines. Okay. Yes, yes, yes. So I'll come over here and yes, we're going to add it onto the other side too, but I want to have a lot more on the left side. Okay, so when you get ready to go to the right side, Just do a few. Again, it's just gonna be working with value. Now, if you want that darker, once it's dry, you can use the same color and come back on top, and it's gonna be— it's not dry enough yet, but it'll be even, you know, a little bit darker. So I'll come over here. Now, this project that we did in the library, there are a few other steps that are a little bit more in-depth with shading with your pen. But for today's purposes, I wanted to show you quick and easy. This is a quick and easy way. So I predominantly did it over here, just a little bit over there, and then over here. I'm just going to shake that brush. I'm doing those C's, but they're kind of shaky C's. And then a little bit more. And because I can barely see what I'm doing, I'm going to turn it around and look at it. Let's just a little bit more.
I think my pigment's a little bit stronger, but I like it though.
No, I want to get to that. I like— because I always like a good amount of contrast. If there's dark darks and light lights, it's really good. So what I'm going to do is where mine is hopefully drying here in a bit, I'm going to use the same color and go back on top. To give it more of the dark so there is more contrast.
And I'm just going back and my— the pigment in mine happens to just be super, super strong. So I'm just going back and adding more water to it just to dilute it down.
That's funny, you're making yours lighter, I'm making mine darker.
But that's what I love working with watercolor.
I don't do it enough.
But so you can kind of—
yeah, that looks good. That's great. I love it. I think you're done. I like it. I'm adding a little bit more dark to mine over here on the left side. And yeah, so— oh, you know what, I did forget one thing. That we did in the original. All my little leaves down here, I forgot that. Original, I have little leaves. So here's the only thing with that is that you don't want the green and red to like combine. That's good. It really doesn't look awful without the leaves. I'm trying to think, do I want to add them still? Okay, this is what I'm going to do. I'm going to draw them in. But you can see kind of where I would put them if I put them. But nothing needs to happen right now.
And you can also like go along your vines at the top and add some flowers or little berries or something if you wanted to.
Yeah. So I went in and just drew in some leaves. That should have been done to begin with if I was going to add them, but I'm not going to add any green to it until that red is dry. And, and I should have done that when I was doing my green. I just forgot. But anyway, so that's really that. That is the, the complete project. Just one way that you can take lettering and just add it to so many different art forms. That's what's so fun about it. So today was with, with watercolor. You can look on, you know, all over the place. We've got some free videos on our page that we've done it on canvas, on wood, on all kinds of things. So we will be— we'll be going live all week long showing different techniques. But today is the best day to sign up. So if you are watching this right now and you're thinking, I would like to, you know, I'd like to do lettering, I'm not sure, I would say— I would say sign up today. You can cancel anytime, so there's no risk. Use Christie's link, sign up today, and you will get 3 bonuses. I don't know, have we talked about the bonuses?
We have not. And while you're talking about them, I am going to try to pull the photos up really quick so I can show them.
Okay. Okay.
Yeah.
So the bonuses that you immediately get— we don't start the boot camp until next week, but the bonuses that you immediately get are from 3 of our past guest teachers. One of those is Carmen Brunson teaching us how to letter on some glass ornaments, which is awesome for the upcoming holiday season because you can— I was talking to Kara Williams earlier today. She said she got some, um, like a thing of glass ornaments, I think she said from Hobby Lobby, maybe from Michaels. Use the coupon, they ended up being 50 cents each, and then you letter on here the way that Carmen teaches us. Yes, add some bows to the top of that, and what a great personalized gift for all of the people that you need to buy a little something for. And you can save a ton of money. That's awesome.
So that's one of those.
I can't wait to learn to do that.
I want to have her little technique.
Yeah, we're adding it. Everybody who is a— if anybody's watching this and you're already a member, you're like, I don't have that. We're adding it to everybody's, okay? We're adding it to everybody's. We are also doing Crystal Witten. She does Creative note-taking. Um, so there's still the ornament. Yep. So that is the Crystal Witten's Creative Note-Taking. Like, how cool is that? Those are her sermon notes. But look at the way that she like puts things in boxes and shadows and arrows and banners. She is teaching all of that in this fun little tutorial on creative note-taking. You can find her— Crystal Witten does a lot of really cool lettering stuff. She's got a book called Faith in Lettering, or Faith Oh gosh, I always forget her book's name. Lettering Prayer Journal, I think is what it's called, the Lettering Prayer Journal. So she's got a lot of awesome stuff out there too. And then the last one is going to be from Danielle Springer from Imperfect Dust. She letters on wood. She also letters over hymnals. But do you see how simple that right there is? She's showing you the pens that she uses. She's going really slow. This is on wood, that's painted wood, and a paint pen, and she goes really slow. To show you how she forms it. She, um, you know how I taught you about thickening the downstrokes, or I showed you that real quick? She has an interesting way of teaching it. She says, you know, she's putting the skeleton on when she just sketches it out, and then she puts the meat on when she goes around it. And so that's what she teaches in an interesting way that will make you look at it and you get it, and you are able to use that Choose Joy on anything— on a wood piece like what she's doing, on watercolor. We've seen people in our club put it on little small magnets. It's just a fun, fun tutorial. So all of those when you sign up before midnight tonight are going to be there waiting for you, for you to start watching.
And how much did you already say? I may have missed it while I was looking at that. Did you already say how much it is per month? Did I miss that?
It's $35 a month. So $35 a month, that includes— you get 2 lessons every single month, sometimes more, but guaranteed for 2 projects every month. You get— we send you the traceables that you can download as many times as you want. We have live Facebook kind of Q&A. And then we also send you the happy mail. So $35 includes all of the video stuff plus the happy mail. The happy mail always includes 4 scripture cards. So it's lettered scripture cards. They're pretty. Yeah, that's one example of the happy mail. Sometimes it's boxes like that, and sometimes it's envelopes. Just depends on what, what we're doing and how big it is. But I see you got the scripture cards right there. Yep. And so people use these in all different ways. They have their letter big and they have a small scripture underneath. Some people use it for scripture memory. Some people use it for bathroom cards, so like to put like bathroom cards. Do you know what I mean when I say that? I mean put it in your mirror at the bathroom. Some people, I've seen some kids put them in their lockers, like they take their mama's and they have them in their lockers. You can use these. I'm, I'm horrible about not remembering like tags on gifts. And I always be like, what's for me? But if you have a bunch of these, you can just write that, you know, to so-and-so from so-and-so, and that can also be your little cards to people. There's lots of ways to use those. So every box has 4 scripture cards, 2 traceables that you may have seen me and Christie do before, that she always adds so much coolness to her traceables. You have those close? You do? You have it all here. Okay, they start out like that so that you can just trace it if you want to, and then you can also paint around it like Christie does. And we were talking to Kara earlier today, so many people say they just sit down and this is like their just 15 minutes of just de-stress. Look at that, isn't that awesome? So that started the way that you saw that other one, the gray background, and then she adds all of that funness with paint and gold pens and all of that. So there are fun ways to make little pieces of art. And then you get an art print every month. So that's something that you can either frame and give to people or keep for yourself. And then you get starter supplies. So when I say starter supplies, I don't want people to think that everything comes in the box, because at a $35 price point, like, we can't send you the embossing gun that you're going to need for next month. Yeah, that was one of our— one of the prints that we send. We are sending out— we're doing door hangers next month, some small little door hangers. So yes, you're gonna get the door hangers, but we're not sending all the brushes and the paint. So we think we try to send things that you don't have, and then you can— most people who are artsy and creative, look at there, that, uh, most people already have the paint and the different things. And if you're wanting to do more of a certain project, You're going to want to buy— you're going to want to invest in certain pieces. So we do send you the starter pieces of things that you can kind of play around with it before investing in more. So that's, that's it. That's what your $35 gets. You can cancel anytime. We also have meetups once a quarter, which are super fun. So it's all a lot of goodness happening in the club.
Awesome. Well, thank you so much for coming on. Did you guys have fun learning how to do this one? So this is something you guys can just get some watercolor paper and try this at home. And you can get cheap like watercolor pads at Hobby Lobby or Michaels, you know, like every other week they'll put them like 50% off. So I got— this is a 6 by 8, which is just a fun size to do little projects on, and it's regular $3.49 and I got it for half price. So this is not expensive supplies. You don't have to spend a ton of money. On buying these, these types of things.
And I've seen that Target even has— if you're like, oh, I don't— I can't get to the craft store, we have seen Target and Walmart both have watercolors and watercolor paper. So awesome.
Well, thank you so much. I hope you guys enjoyed that. And I'm sure I'll be back on here later this week. I don't know when, so I'm not committing to that yet, but you guys will see me later this week.
All right, well, thank you so much. All right, bye-bye.
See ya.










