Mini Palette Knife Pumpkin Painting! Step-By-Step || The Social Easel
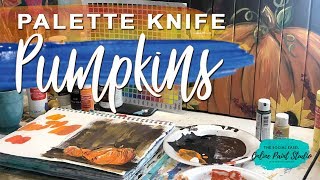
In this live, overhead‑view tutorial Christie Renee Hawkins (owner of The Social Easel) guides viewers through a quick, interactive lesson on color mixing and palette‑knife painting of mini pumpkins. She begins by introducing herself, explaining how viewers can receive Messenger notifications for future live sessions, and engages the audience with real‑time chat. Hawkins demonstrates how to tone down a bright orange using limited paints (adding burnt umber, red, mustard yellow, etc.) and references a printable color‑mixing guide available in her Amazon store. She then shows how to thicken craft paint with gel medium to make it suitable for palette‑knife work. Using a mixed‑media pad, she creates loose, textured pumpkin shapes with a palette knife, adding layers, highlights, shadows, and occasional metallic accents. Throughout, she shares practical tips (e.g., flattening mixed‑media pads, framing options) and promotes her Inner Tribe membership, upcoming live classes, and a waitlist that grants a free full‑lesson tutorial. The session blends instructional content with community building and product recommendations.
Chapters
Hey everybody, so a little bit different view for you today. I'm not gonna paint at my easel. I'm gonna paint overhead with you guys today so I can show you a few things. So if you haven't painted with me before, my name is Christie Hawkins. I'm the owner of The Social Easel. I'm gonna get some things going here and pull you up so I can watch you on my iPad. And make sure I'm seeing your comments. So say hi when you're popping on, let me know you're here. Hi, Miss Christie. And we're gonna get going here in just a second. When you comment, you will receive— just so you're not shocked when it happens— you will receive a post. I'm sorry, I'm reading the word post while I'm talking to you. You will receive a message from my Messenger bot on my Facebook page. And if you respond back with a yes, then that will, that will send you messages when I go live. So you know when I'm going live so you don't miss any little lessons with me because over, over the next few weeks, once the girls get back in school, I'm going to start going live twice a week teaching you guys a few things. So it'll be fun. You're not gonna want to miss those. So make sure that you reply back yes, and you'll get a notification before I go live each time. So while I am doing this, just let me know you're here. Let me know you can see okay, where you're watching from, whatever. And I'm gonna pull you up so I can see you. So I just got done, and some of you women may be on here. You can let me know if you're on here too. Heidi Easley and I from Texas Heart and Soul partnered together for our fall workshop, and I just got done teaching day 1 of this in that Facebook group, and I thought, you know what, I have everything set up. I have everything ready to go and my lights all ready, so why not jump on— why not just jump on here with you guys and and do a little quick lesson. So a lot of people have been wanting to know a little bit more about color mixing, so I thought we would play with that a little bit today. I'm gonna grab a few different paints here. Hey, Paula! Hey Naomi. Naomi was in the group this morning. Hey Marlis, thank you. I'm glad it was awesome. Hey Miss Becky. All right, so can you guys see okay? We're good. Okay, this is driving me crazy that Facebook will not fix this. I don't know what the problem is. I can't switch the camera around the right way for you guys to— I am not left-handed. I am right-handed. So you guys are seeing everything opposite of how it normally is. I know technically that doesn't really matter, but I'm just telling you so, so you don't think I'm a lefty. I'm a righty, but Facebook won't let me turn things the right way. Move my coffee over here out of the way. You guys are kind of tilted a little bit. I'm gonna move you down Just a little bit more. Okay, so we're gonna do some color mixing today, and then I'm gonna show you how to do some little pumpkins with a palette knife, and we're gonna use gel medium. This is one that I have. I also have like squeeze bottles of it. I may use this. This is from Michaels. So I'll set those back, but I was talking to my group this morning in the workshop about not always having to have— like, I had told them one of the colors I wanted them to get was Spiced Carrot, but apparently Walmart doesn't carry this anymore, which is a shame because it's a fantastic color. But it's just a muted down orange, okay, versus this really bright orange. Can you see the difference? Maybe that doesn't show up too much on screen, but see how this one's a lot more muted and this one's really bright? So I thought it would be good for me to just kind of show you guys how we can work with what you have. So if all you have is a regular bottle of orange paint, how you can take some other colors and and add to it to get a muted color like you want. And there's, you know, a few different ways you can do it. This stuff is in my store on Amazon, and I'll post that link here shortly. But this is a color mixing guide. The women inside my inner tribe have been working on this, and it's been so awesome to see them. They've really had fun with it too. Color mixing is fun. but you can kind of get the idea. You've got these main colors that are like straight out of the paint bottle, okay? And then when you mix them, you get all this variation of colors here in the middle. So we're not painting with these exact colors, but I want you to see— where's the yellow I'm looking for? Okay, this one. So this yellow is pretty close to this cadmium yellow light right here, right? And then this is pretty close to that orange. So I can look at those two things and see that if I take this yellow and that orange and add them together, I get a lighter yellowy orange. Okay, so those are kind of obviously self-explanatory. You would get that. But what I want you to notice is that you can get all different shades of that. And so they were amazed just by taking two paint colors, all the different colors you could get, because it depends on the portion of the paint that you put in. So if I put a whole lot more yellow than I put orange, it's going to be different than if I put a whole lot more orange and a little bit of yellow. So two colors can make a variety of colors. But this is something really important if you're wanting to learn more about painting or how paint works and just to get more comfortable with it. I highly, highly recommend getting a color mixing guide. I highly recommend taking, you know, 20 minutes— it's really fun— and just start mixing some colors and seeing what you can come up with. Linda inside my group did this the other day with some purples and pinks and blues and came up with these gorgeous colors, and she ended up painting our hydrangeas painting with it, all colors that she did on her own. Um, and it was really, really cool. So I'm gonna kind of show you guys that today. So let's say all you have is a bright orange and you want a toned down orange. Let me grab my angled brush here. I think I need another paper towel too. How many of you— let me know, those of you watching— it's my paper towel holder. How many of you have done color mixing before? Let me know if you're familiar with it at all, or if you've only painted straight out of a bottle. Doesn't matter, there's no wrong or right. So this is My regular orange. This is my spiced carrot. And I'm gonna show you this one too. This one is ripe tomato. I love this color too. I don't know if Walmart still carries it or not. I love that little bit of red in there. It's really rich color. So we're gonna try to get— this is really bright. I want to try to get more toned down, and I'm also gonna do like show you like mixing like maybe like this is Golden Sunset, like more of like a mustardy yellow with your oranges, and let's see what kind of colors we can get. But this is really good practice for you, especially like this time of year, painting pumpkins or what everyone wants to do. You can have some gorgeous pumpkins with all different colors of oranges, um, and it's just going to be so fun, and they're all going to look different, which is what I love about it. I am missing my brown. Hang on, I need brown. I might need a little bit of white. We're gonna use this burnt umber here. A little bit's gonna go a long way because this is dark. Oh, I could have just used my leftover brown. You think I have plenty here from my previous class? So we may jump back over to that. So we're gonna start with color mixing, and I'm gonna show you guys some different colors we can make, and then I'm gonna show you some palette knife painting, and we're going to just do some mini, mini little pumpkins, and they're going to be messy and fun and kind of a loose style. Okay, so this is just my regular orange straight out of the bottle. Let's grab a tiny bit. So see what a little amount I get on there? It doesn't take a lot. And this is exactly how I mix. I just kind of pull color to the side and kind of mix a new color here. So it's getting closer. So see how just a tiny little bit of that brown— let's put it right next to this— just a little bit of burnt umber mixed with that orange, and look how much more toned down that is. So you no longer have like this neon orange, right? So that's getting closer to this color. Then I wanted to do— see, I don't think I have the red I want here, but we're gonna use this as an example. Okay, good, it's already open. This is— I would just use a craft paint, but I don't have a red here right now, so I'm just gonna use this thicker artist's one. But so that's trying— that's taking that orange, trying to get closer to the Spiced Carrot. Okay, so now I'm gonna take a little bit of just regular red, and I'm gonna mix it with the regular orange, and just a little bit of that red. Scoop up a little bit more over here. Maybe a little bit more red. What do you guys think? We're getting pretty close to this color here. So my hope is that What you guys will learn from this quick little lesson on color mixing— this is very quick— is don't get caught up in worrying that you have the exact same color as me for, you know, whatever painting you're working on. It doesn't matter if you are stuck with just yellow and blue and red and orange, you know, like the very basic colors. You can mix your way to get the colors that you want. I'm going to add a little bit more red because I think we're pretty close. Look how close I'm getting to that. And I think it's more interesting in paintings for your color to not all be the same, like having that exact color all the way across my painting. I think it's more interesting to look at to have mixtures of colors. What do you guys think? That's pretty dang close to our ripe tomato here. Look at that. That's almost identical to that color. Can you guys see that? Okay, shoot me up some hearts if you can see how close that is. And then, so now this is dried a little bit. We can see a little bit of difference here. I think that maybe has a little too much brown to it, so we could do this. I've got this reddish color in here, maybe add a little bit of that to that toned-down orange. Let's see what color we get then. So a little bit different. Now what if we take this Pull a little bit of this mustard color into it. I don't know if I'm gonna like this color. It's an experiment. We'll see. It's a little bit different. Or what if we did this? What if we took a big clump of this red and then this mustard yellow. Let's see what those two colors do together. That's pretty. It's definitely a deeper orange. Let's see what this looks like. So again, just different variations. That's a little more toned down. So you can use all of these. Can you— oh yes, Jerry, it's in my Amazon store. Here, I'm gonna post that link really quick. Give me just a second. You do not have to be a member. I have that if I can get to it. I think I'm on the right page. Okay, hopefully this works and I can post this in the comments for you. This is my Amazon store and You can go to like getting started. I have several sections, but I think it's like getting started supplies, and you'll see that color mixing guide. I really like this color. So this— I would actually say that red and that mustard yellow together make a really close comparison to this. Maybe it's got a little bit more orange in it. I don't know, but I like it. So that's just kind of playing around with some colors. So you can kind of see that that is just taking a basic orange and then adding some colors to it, and you get all this variation of nice muted oranges. And then I took some red, and that was called Golden Sunset, and was able to almost get the exact color of Ripe Tomato. So super fun. Okay, you can do this with everything. Now I'm gonna take— we'll take some of this color that I have. This is my gel medium. You can also get that in my store, or you can buy it from Michaels. Look, that's so cool. It's just literally like a solid gel. But I'm gonna add this, and the reason I add this to my colors So I'm just gonna— it looks white, that's gonna go in clear. It doesn't change the color of your paint. Okay, so that's adding gel medium to it. The reason I'm doing that is because it's going to make craft paint thicker. So if you want thicker paint like this red tube here, this is thicker. You can see how much thicker that is. It's not runny at all. Then you can add gel medium to any craft color, so you don't have to buy that specific, like this type of paint. You can take any craft paint you want to and turn it into thick paint. And then when you do that, it makes painting with a palette knife much, much easier. So we're just going to mix these together and see how much thicker that gel medium is making that craft paint. That was just runny craft paint, and now it's nice and thick. So I'm gonna do that with each one of my colors. How many of you have worked with a palette knife before? So we did color mixing, now we're moving on to a palette knife. So let me know— good morning, Nikki— if you have worked with palette knife before. Got some orange mixed in my yellow here. I actually kind of like that better. Kind of tones it down. I don't want it super yellow in my pumpkins. You guys like the palette knife? Shirley and Nikki have both done palette knife painting before. I'm gonna grab a drink of my coffee real quick. Awesome, awesome, awesome. Okay, I'm gonna do this really quick. I think I want— I've got all this brown paint over here I had from my lesson in my workshop this morning, so I'm gonna take a little bit of this brown and just put us a quick background on here. Then we're gonna put some little pumpkins on top of it. I'm gonna get a little bit of white with that, I think. So I'm gonna kind of make like a— kind of make it look like there's like wood behind our pumpkins that we're gonna paint on here. So I'm just loading this up with brown and white, and I'm painting on a mixed media pad. If you don't know what that is, it's kind of like a sketchbook for painting is the best way I can describe it. It's awesome. Because it allows you to practice and play like what I'm doing right now without committing to painting on a canvas. So a lot of my students in my Inner Tribe, which opens September 15th if you want to learn more about painting, a lot of my students inside my membership paint in their mixed media pads first before they paint on a canvas. And it's a great way to practice and not feel like it's you know, the finished piece. But a lot of times they end up better in their mixed media pad and they love them. And here's what you can do. I'm going to show you one of mine. They— it's on paper like this, and then I— this is an 11 by 14. Then you can just frame it. And so let's say you make a really pretty piece of art in your mixed media pad. It doesn't have to stay in your sketchbook. It has perforated tabs. You can just pull it out and then frame it in an 11 by 14 frame. Becky said, "I love the looseness and messiness of palette knife painting." I do too, Becky. It's just relaxing because it's really not about, like, perfection or trying to get it exactly right or being realistic. It's just fun. It's, you know, a rough, loose interpretation of what your subject matter looks like. Okay, so that's my quick little background here. Let's start with this color. So when you're working with a palette knife, you want to load up on the back and then you flip it over to use it. So let's just— I'm gonna add a little one back here. And I'm just gonna start like— think of it like a C shape or parentheses, however you want to think of it. Just a nice little curved shape here, a little bit of separation there, and just kind of connecting those two together. So we got a nice little pumpkin shape here, and then I want to add some variation in this. I don't want just a glob of orange, so I'm gonna take some of that Ripe Tomato, that darker orange color, kind of throw some of that in. Then I'm gonna go in a little bit of brown on here. I'm just using the side of it. I'm just kind of dragging it through. And again, these are messy, messy little pumpkins. You can just kind of move that paint around, decide how much you want to blend in there. Maybe grab a little bit of this yellow and a little highlight towards the top. Take a little bit of this brown, add a little stem there. So quick, messy little pumpkin. Let's do one a little bit bigger. I'm going to use this deeper orange this time, and I'm going to overlap the edge of that just a little bit. We got a great big pumpkin here. Got a little bit of glop, a little bit of dried paint there. I might need a little bit more. So when you're working with mixed media pad, it will, you know, warp on you a little bit. So painting on canvas with palette knife is easier than painting on mixed media pad because it's kind of— you know what I mean by warping? So it's kind of moving around. A little bit more on me than I want it to. So I'm just kind of coming around, getting that curved shape again. Grab a little bit of this other orange here. I'm really got a lot of thick paint on there, and I'm just kind of gently moving that around. I don't want to push down too hard because if I do, see, you see that brown coming through behind. So I'm kind of holding this to where it's flat. Now I've got my edge up there. I'm gonna have to make my pumpkin bigger. Let's fix this shape over here. We'll just pull that edge out a little bit more. So you really change the way you hold your palette knife a lot to get the angles that you need, so I just keep kind of rotating. That edge keeps picking up there because that— it's warped in the middle. Jerry, I am not letting it dry in between. Palette knife painting, you've got really thick paint that you're working with, and you kind of just move it around. I really like that red in there. And I just kind of play with it and see what colors I like. I forgot to stick that back in my water brush. I'm gonna grab a little bit of my brown over here. Oh, let's turn that off. What do you guys think so far? Can you see what I'm doing? Am I blocking you? Do you like the messy look of the pumpkins? I think I'm gonna add a couple little leaves on to some of these too. So it's completely, completely different style, and working with a palette knife is something that you just have to practice it. It takes some getting used to holding the knives and getting, you know, the strokes the way that you want them. But I would really recommend just keep going, keep working with it, because it's really fun once you get the hang of it. I want a little bit of— let's wipe this off. I'm gonna get a little bit of yellow kind of as my highlights now that I've got some of these groove lines on there, I can start giving a little separation to my colors. And I'm gonna grab a little bit of white to add in there, do a quick little highlight here. Sometimes when little pulls like that happen and you're like, "Ah, I didn't mean for that to happen," sometimes I just go with it and it ends up turning into something that I like better. Then let's add just a little color kind of scraped underneath here. Give it some shadow. Maybe some of this darker orange here. Cindy, after you paint it and it's dry, then you're gonna want to— she asked if it will ripple in the frame. You're gonna want to lay it between, you know, like two really heavy books or bricks or, you know, whatever you have, and flatten it for for a few days and then it'll be fine. It usually doesn't ripple as bad as this. This is because I'm using thicker paint and palette knife, so it's usually not quite this bad. I'm gonna get a little bit of this dark green and add some leaves on here. Messy little leaves, so I'm just gonna mix it a little bit. I also like there to be like different colors that are not all the way mixed, so you kind of get those built-in highlights. Just kind of add a couple little leaves to the top of our pumpkins here. We're fading in and out. It's looking fuzzy for a second. And then sometimes I like to throw something fun in, and I love metallics, and I'll add some little gold metallic highlights in my paintings. I just love that little accent of gold in there. Scrape it underneath. Maybe I want a little scraped up here too, so you could make it look however you want. I love the texture of palette knife on backgrounds. So we've got some just metallic little fall pumpkins hanging out here. Maybe a little bit more. Maybe I want a little gold in my pumpkin there. So that, that's it. I just wanted to show you guys some color mixing today. I want you to not feel like you have to paint straight out of a bottle. Just some quick little palette knife pumpkins. You can obviously do this— this is a mini scale. It gets easier the bigger that you do them, but you could do this on a much bigger scale. You could even paint the background shape of a pumpkin first and then go back in with a palette knife and add that texture that way too. But just have fun playing. Don't get caught up in rules. Just have a messy palette, have a messy sketchbook, and just have fun creating and playing with the paint. You know, embrace that inner kid inside of you and just relax and have fun. It's good for your brain. It stops you from thinking about whatever else may be your concern at the moment. It kind of pulls you away from that and just allows you to have fun. For a little bit. So that's all I got for you today, guys. If you comment, you will get a message from me, and you can get on the waitlist for my membership when it opens again. And when you sign up for the waitlist, you also get a free full painting tutorial from me as my gift to you, so you can see what it's like to learn from me, a full lesson. So anyways, you will get that in your Messenger. Just make a comment and it'll send it to you, and you guys will be good to go. I put the link up for my Amazon store if you want to know where to get the color mixing guide, palette knives, all that good stuff. So that's it, and I will be back on next week, um, with something else fun for you guys. So have a good weekend, everyone. Bye!










