MY INNER TRIBE IS OPEN! || The Social Easel
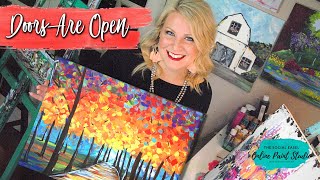
In this 21,642‑token live stream, Christie Renee Hawkins announces the opening of her Inner Tribe membership, a women‑focused painting community. She greets viewers, sets up a live chat, and guides participants through a step‑by‑step painting of an Autumn Road scene while simultaneously describing the structure, benefits, and pricing of the Inner Tribe. The video blends a live art tutorial with a sales pitch: the membership offers three new paintings each month, guest artist or business speaker sessions, a library of over 45 video tutorials, templates, and a private Facebook group for support. Christie highlights community testimonials (e.g., Linda’s progression from beginner to business owner), the mental‑health benefits of painting, and her personal philosophy that everyone has a creative spark. She details the $47/month price, limited‑time early‑bird bonuses (Cactus Trio, Bird’s Nest, Abstract Flowers tutorials worth $90+), and the next enrollment window in March 2020. Throughout, she provides practical art tips—supply recommendations, color‑mixing tricks, brush‑care, layering techniques, and troubleshooting live‑stream issues—while encouraging viewers to comment, ask questions, and share their progress. The session ends with a recap of the painting steps and a final call to join the Inner Tribe before the price increase.
Chapters
Hey guys! All right, it's happening. The Inner Tribe is officially open. So if you are watching this, the link is posted in the description at the top of this, and I'm gonna get you guys going. I'm gonna pull up my mini chat, so if you're watching and you need the link, it's gonna be sent straight to your Messenger. So all you have to do is comment and it's gonna go straight to you. So let me get that set up. How's everybody doing tonight? Are you ready for our PJ paint party? I do actually have PJs on. This is my Mahomes shirt, but I've got my plaid PJ pants on, on the bottom, because painting in your PJs is the best. Am I right? All right, I'm gonna get this set up. Make it active. We're good to go. Let me know you're here. Everything looks good. Caitlin says we're super excited. Hello, Char. Hey, Tamara. All right, I'm gonna pull you guys up on my iPad so I can try to keep up with the comments as we're going. I'm so excited, you guys. Like, it's here. It's finally open. I haven't opened the doors since March and Yeah, it's just crazy. There's been a lot of buildup to this moment. So I'm super pumped. When you're hopping on, yeah, just let me know that you're here, where you're watching from. Are you painting with me tonight? Are you watching and then you're gonna paint later? If you are gonna paint later and you don't want to try to keep up with me— hey, Miss Marlis! Hey, Debbie! Hey, Cheryl! You can go back and watch this later. So don't feel like you have to, one, keep up with my speed. If you're worried about that, you're gonna be able to go back and replay this. Okay, so we're gonna have fun tonight. We're gonna paint. I'm gonna show you everything step by step, and we're gonna talk about my inner tribe. So hey, Mom! If you guys don't know about it, you can ask me questions, but I'm gonna give you a brief overview of how all this works. But I'm trying to like strain my eyes to see you right now. So I'm gonna get you pulled up here on my iPad so it's a little bit easier. Debbie says easel and canvas ready to go. All right, I just thought of one thing I might need to do. Tell me if— I think we're okay right now. If it starts getting glitchy, then let me know. Because I think it's connected to my Wi-Fi, and if that starts acting up, then tell me and then I'll turn my Wi-Fi off. I'll have to get out of the video for just a second to do that, but I think we're good. I think we're good. Angela says, painting with you. Julia, her and her daughter are painting with me. Ruth is gonna watch and paint later. Linda said, I'm not even in my PJs yet. Watching, and then she's gonna paint. She wants to be able to chat with everyone. So, um, you guys may have seen— if you watch a lot of videos with me and you see Linda pop up on there, Linda's one of my star students. She's been in my inner tribe for a few months, and it's been so exciting to watch her grow. I believe— Linda, you can correct me if I'm wrong— but I believe Linda started with a Facebook challenge with me where I do a short little challenge with you guys and I teach you a painting over the span of 4 days. And then she did my spring boot camp and then she joined my inner tribe and she did my kids' summer art camp and now she, you guys, she has her own business. She's teaching kids paint parties. So like a few months ago she wasn't even painting. So this is, this is what can happen. This is what I'm so excited about. And that's just one story of one of my tribe sisters in this group. We have close to 300 women in the group right now. We cannot wait to welcome more of you in, and the Inner Tribe is all about learning to paint and bringing joy and encouragement into your life with a community of women just like you. So this is all about community, it's all about being with like-minded women and learning to find that inner artist in yourself that you don't even know you have yet. And if you've never painted before, no worries. I've taught thousands of women just like you over the past 6 years how to paint, and I'm watching things happen in this group that are just amazing. So if you've always wanted to paint and you've never done it, now's your chance to jump in and try, and you won't be sorry. So, um, girls that are on here, I already need my water. I'm so excited. I already need my water. I gotta take a break. I'm getting, I'm getting overexcited here. But girls, all my Tribe sisters out there, you may have to help me in the comments, okay? So if you see a lot of comments and questions coming through and you can answer them, please do, because if I'm teaching a step, I may miss those questions. So feel free to answer some of the questions that you may see come up. One person said the video is showing interrupted. Is anybody else having a problem? Do you think I should jump off and switch before we go any further? Because I don't want to get in the middle of the painting and then you guys lose service on me. Teresa says painting but catching up on the weekend. Hi, Tyria and Carrie, Teresa and Gail and Becky. All right, Elaine says it's blurry. Okay, give me just a second. I don't even know what you guys are gonna see while I try to do this, but I am— get a little close-up of me real quick. I'm going to fix my settings really quick and switch off my Wi-Fi, and I'll be right back. Hang on, give it a second. Connection good? Hopefully this looks good to you guys. Okay, no problem yet. I switched it just to be on the safe side. So we're connected to AT&T. As long as nothing goes wrong with AT&T, we're good. All right, so I'm gonna prop you back up here so I'm not holding you while I'm trying to paint. Sorry, give me just a second, get you propped back in here. Okay, everyone's saying it looks good. Yeah, let me know where you guys are watching from. When you comment on this live, it will automatically send you a message to your Messenger. So if you are interested in the Inner Tribe and you want the link, Christie, if you're on here, you can go ahead and post that for me. I'm gonna see, I don't know if I already had it. Let me try this really quick, see if I can get to it. So who's excited to paint tonight? This is— so we're painting Autumn Road, and I bet I have probably taught this class, I don't know, 12 or 14 times. A lot. This is by far my most popular fall painting. I just posted the link to join my inner tribe, so you do have time if you are anxious and you want to hop off and join and then jump back in. You definitely can do that. Carla says she's from Oklahoma, interested in joining. Who else we've got on here? Mary from Minnesota, Tina from Oklahoma. I love seeing how spread out we are. Okay, so before we get started painting, I'm gonna give people a few minutes to hop on, and I'm gonna talk to you about Inner Tribe. And then while we're painting, if people have questions, then we'll talk about it then too. So what is my Inner Tribe? Basically, this is a painting membership with me. So if If you've watched my lives or some of my YouTube videos and you like my style, um, and you like what I paint and you want to learn how to do that, that's what I do inside my membership. So inside the Inner Tribe, I teach 3 new paintings every single month, um, the first 3 weeks of the month. And then the 4th week we either have a guest artist or guest speaker. So the guest artist is usually someone that teaches a different medium than me. So, um, some of you know Miss Tamara Bennett from Southern Adornments. She's going to come in and teach us a door hanger. Casey with Pizzazz Art Studio is going to teach us hand lettering. Cindy with Art Shattered is going to teach you glass art. So I have all these artists come in and teach you different mediums that are not my specialty because they're just better at it than me. So instead of me teaching you, I'd rather bring my friends in to teach you. So that's what the fourth week of our month is. And when it's not a guest artist, it's a guest business speaker, like my friend Christie Wells, who does my website and helps women start small businesses. And she helps people who, you know, want to start selling their stuff online. Then we've got Heidi. You guys all know Heidi Easley. I've done a collaboration with her, and she teaches women how to do paint parties. So those are just a few of the business speakers that I have come in there. So that is our monthly content inside the group. And then as soon as you become a member, you get access to over 45 full video tutorials in my library that you can go to whenever you want. So all the videos that I teach are available 24/7. So one of the best things about it, um, sometimes people say, well, I don't have time, or what if I can start the painting and then I miss part of the live? That's the best part because you have access to these whenever you want. So you can stop them and pause them and rewind them and go back if you missed a step or there was something you didn't catch. You can go back and just keep reviewing that part of the video until you get comfortable with it and hit play again. Or maybe you only have 20 minutes that you can take to paint and then you want to come back to it later and break a painting into sessions like I do in my 4-day challenges. You can do that too. So they're accessible whenever you want. And one of my favorite things when I'm teaching the weekly ones, the new ones that you get every single month— hang on real quick, Pam says it keeps freezing. Pam, if you want to jump out and jump back in and see if that helps it, because I believe— let me know if it's freezing on everyone, but, um, I believe we fixed the connection. My connection says good on this end, so just let me know what you guys think on that. But inside my tribe, when I teach the live classes, number one, you're going to get an aerial view. So instead of me teaching you like this, like I've been doing on the lives, I have this handy little camera holder that goes over my canvas and you get that aerial view and you get to see up close what my brush strokes look like and how I do everything. So this is better than coming to a paint night with me because you're getting a better view than people who are sitting at a table farther back. So you're really getting a bird's eye view, exactly what I'm doing, and I teach them live. So I teach them live inside of my group. So that means if you have questions and you're with me live, you can ask and talk to me while I'm painting. And if you go back and you watch the replay, you can still post those questions. And then I'll come back and answer your, answer your questions for you. So you're not at it alone, and that's the best part. How are we doing? Good here. Okay, Pam says good now. Linda says good. Okay. Diane, do the same. Went out and came back in. Try it one more time. It seems like we're good. I think so. And the other thing— so you've probably heard me talk about this a ton— is just the community itself. The best part to me of being a part of this tribe is the community of like-minded women that you have in there. We have our own private Facebook group where you get to post your art in a safe place. You don't have to post it publicly. For the whole world to see, but you're posting it in a group of women who are doing the exact same thing you're doing. So everyone's at a different level. We have people who have never picked up a paintbrush before, and we have people who teach paint parties or might be selling it on Etsy, and we have everything in between. So wherever you're at, Tribe is a perfect fit for you because I teach at a level that anyone can pick up on. And even if you have painted, you might learn new skills along the way. Or you might just want access to those paintings so that you can teach them or sell them. So, um, that's another benefit. If you teach classes locally, you do paint nights like I do, then you have the rights to the paintings inside my tribe to teach at your local paint nights. And we have templates for a lot of the paintings, so you're not having to freehand things. We have an entire section on inside the membership hub that is just templates. So you can transfer the images on to what you're painting. So like the witch's kettle that I did last week with my tribe, you could either do that on an 11 by 14 or 16 by 20, and you can transfer the image on there so you can use it for your paint nights or for yourself. So those are just a few things that I'm trying to think what I'm, what I'm missing. My girls that are on here, you can tell me if I'm missing something. And you get all of that for $47 a month for 3 full paintings with me plus the expert the last week of the month. And just to give you an idea of the value of that, one paint class with me is $40 to $50 per person for one session, and you're getting 3 full paintings plus our guest speaker for only $47 a month. And I will say, if you're on the fence, this is the very last time it'll be offered. At this price. So if you're debating and you're not sure, this is the last time you're gonna get all everything that I talked about, everything included for $47 a month. I only open the membership a few times a year. The next time I open it will not be until March of 2020, and it will not be the same price for the same amount of material. So, um, it's the time to get in, but Here's what you get. If you're excited and you're ready to do this, I've got some early bird bonuses for you. So here's what you're gonna get if you join tonight within the first 24 hours, okay? So you have until today or through tomorrow at 8 PM tomorrow night. So the first bonus tutorial is my Cactus Trio because cactuses are super popular right now. My friend Sarah with Framed Monogram Box just had this as her theme in her last box, so you get the Cactus Trio as an early bird freebie. You get the Bird's Nest as an early bird freebie. This is one of my favorite favorites. This is in my kitchen, so if you like that farmhouse style, that more rustic look, you're gonna love this one. And then my new one that I'm giving you guys. I've never given this away as an early bird special, is my abstract flowers. So I did this in the spring boot camp, um, back in March or April. I can't remember when we did it, but we did the spring boot camp, and this— these are some of my favorite flowers to paint. And obviously these are two separate ones. One's my original, one's the one I redid when I taught the class, and I hang them together as a pair. So you could do that, or you could do 3 hung together. But you're going to learn so much in this, this floral technique class. Um, this is a huge bonus. So this is the first time I'm ever offering that. You get all 3 of those tutorials, which is a value of over $90, just if you join early. So just as an early bird special, if you join tonight or if you join tomorrow before 8 PM. So as you're joining If you have joined, some women joined a little bit early because they took the fall challenge with me. Let me know in the comments and say you're in. I'm so excited to have you, and we're so excited to welcome new tribe sisters to our group. So I'm going to give you guys a chance to comment and ask me questions while I'm starting to get some of our paint colors together. Linda had a good point. She was saying, um, because you guys get to paint with an overview, you get to see me mix colors and see my palette as I'm working, which that really is helpful. I know this is a messy palette. I reuse my palettes all the time, but while I'm teaching, I can show you exactly what I'm doing when I'm color mixing. So if you got the video series, we talked a little bit about color mixing in that, and you know what I'm talking about. But I do a lot of color mixing while I'm painting, and you get to see me do that live while I'm creating something, which I think it's always helpful. The other thing about going live is, you know, sometimes we make mistakes. You guys get to see me make mistakes and then figure out how to fix them. So nothing is definite. When you are painting. What I tell my girls, one of my number one rules, if you do something you don't like on your painting, don't stress out about it or try to fix it while it's wet. One of our sayings is just let it dry, because with acrylic paint, once you let something dry, you can paint over it and it's like it never happened. So you don't even have to worry about it. All right, Vicki, Peggy, Becky, welcome! Amy's in. Patty, Cindy. Cindy was an early bird. Yes, let it dry and paint over it. Thank you, Diane. I do. I really— my goal— listen, here's the thing. I've been doing this as local paint night for 6 years. and I love getting to do the live classes, but what I really love about teaching online is that I can help so many more people, and I love getting to teach you guys something that for a lot of you, maybe you thought you couldn't do because I hear, I don't have a creative bone in my body, or I can't draw a stick figure. If that's you, you can raise your hand. You don't have to, but a lot of people have that thought process. And they think they're not creative, or they think they're not artistic. And my philosophy is God was the original creator, and he created us in his image. And because he did that, he put that creativeness inside each one of us. A lot of us just haven't discovered it yet, or maybe don't even know how to. And that is honestly why I feel like he put me here. He knows how much I love art. I have been painting since I was a kid. My mom is an artist, my grandpa was an artist, and now he's given me the ability to reach more people and help more people learn how to paint, and it makes me so happy. And to see what it's doing in these women's lives, whether it's just for themselves and the self-confidence that they've gained in doing this, I did a survey with my members last week and I asked them, what, what did painting change for you? Like, being a part of Intertribe, how has painting changed your life? And I was, you know, I kind of printed off all the comments. The number one thing they said was it built their self-confidence. That's huge. That in itself is huge because as women, I think we're naturally hard on ourselves. And we tend to tear ourselves down. It's no different when it comes to art. We create something and we're like, well, it's okay, it's not really that good. And then they post it in the group, and then they have these women build them up and say how awesome it is, and they love this particular thing about the painting. And all of that, that joy, that encouragement, that, that fellowship with other women, that builds you up. And that's so important. It's so important to have a community of women like that to support you and love you. And on another level, just a little bit personal about me, I have struggled with depression my entire life. And that may be something a lot of you don't know about me, but I have. and one of the comments that I read was that it helped pull them out of depression, and that's huge. And that is what art does for me. If I'm feeling down or overwhelmed with life, I can turn to painting and I can turn to art and I can lose myself in that, and it is therapy and it is helpful. And it allows your brain to rest and reset. It's so good for you. And the more you give to yourself and the more you take care of yourself, self-care, the better you are for the people that are around you. The better you are for your husband, the better you are for your kids, um, your coworkers. It doesn't matter. It's okay to invest in yourself and it's okay to find that creative side in yourself. So I got on a little bit of a tangent there, but I did want to share that. And I do want to share that, you know, if you struggle with depression, one, that's nothing to be ashamed of. And I spent years being ashamed of it, but it is— it just is what it is. But this has helped me. And when I wasn't painting, there was a part of me missing. And finding that part of myself and me watching other women find that part of themselves and it bringing them out of it and bringing them joy and happiness in their lives is a huge, huge thing. So this is so much more than learning to paint. It's taking care of yourself and it's finding that thing that can give you that, that inner peace and that hope that, you know, I think a lot of us need in this, this day and age. So Anyways, a little bit of a tangent there. I'm gonna go back and read some comments, but I want to tell you what I'm doing too. Real quick, let me read these now. Thank you, Ashley. There was— sorry, there was a ton of comments coming in while I was on my little tangent here. What I've done so far, I've just taken a bright blue, like a turquoise, and a white, and those are just the 3 colors that I'm starting with. So if you are painting along with me, that's what I'm starting with. Thank you, Diane. Thank you, Elizabeth, for posting those colors for me too. Cheryl, you are not alone. You are not alone. Bonnie, if you scroll up in the comments, someone put the list down. I'm kind of going over them with you as I put them on my palette as well. Ashley, good one. I am gonna, I'm gonna use— that was funny that you said that. I hadn't thought about that one. So Ashley's a part of a bigger tribe that we're a part of that teaches us memberships and how to run them. And Heidi and I— Heidi, who runs Paint Party headquarters and is one of my very good friends who's one of the guest speakers, will be one of the guest speakers inside of the group. We got to go on stage together at TRIBE and I'm naturally a crier. If you've watched enough of my lives, you probably know that. But yeah, when I talk about something I care about, I tend to cry sometimes. And we were talking about it on stage and all the girls were like, you're not going to cry on stage, you're not going to cry on stage. Heidi was like, I have a trick. If you ever feel like you're gonna cry, then you just pinch your butt cheeks and you won't cry. Like, you can't cry and pinch your butt cheeks at the same time. And so we were all talking about this the night before, like before we were on stage. We were talking about this because they were all like, Christie's gonna cry, she's gonna get up there and be a hot mess. And so Heidi tells us that and we all just die laughing. And then sure enough, we get on stage the next day and Heidi and I are sharing our story and we're talking about our collaboration together and how amazing it it was and just how collaboration over competition— this is about building women, building women up. Okay, we don't need to be tearing each other down. We don't need to be competing. There's enough to go around for everyone. And I was talking about that and how special our friendship is, the 5 of us who were on stage. There's, there's a bigger group of us, but we were talking about how special our friendship was. And of course I start getting teary-eyed and Tamara looks over and she goes, just remember Heidi's trick. And Stu looks over and he's like, what's Heidi's trick? Stu is like the leader of our tribe. He's the one interviewing us. And he's like, what are you talking about? What's Christie supposed to be doing right now? And Heidi starts laughing. And so she's like, well, if you feel like you're about to cry, you're supposed to pinch your butt cheeks together. And of course we all die laughing. Everyone starts laughing. And Stu looks at me and he goes, well, I did think you started sitting up a little bit and we're just— I mean, we're hysterical. It was so funny. So that's what Ashley was talking about. I just thought I'd share that with you guys because it was a funny little moment. All right, you guys are like, quit talking, let's get to painting. Here's, here's the first thing we're gonna do. All right, so this is a 16 by 20. I've got my angled brush and I've got bright blue turquoise and and white. So I'm going to show you the original painting. I can pull it out over here. So the first thing we're going to do, we're going to do this painting in chunks. Okay. The first thing we're going to do is this back background section here. We're going to do the sky first. So we're using those 3 colors that I just mentioned and we're going to keep it kind of like the bright blue and the turquoise out on the sides. And as it gets down in the middle part, it's going to go more to those lighter colors. So we're going to mix in a little bit of white here. So we have kind of the light at the end of the tunnel, right? The light at the end of our path, my friends. So we are going to start with some turquoise, and I get several colors on my brush at the same time, but I do want to— let's say we want to go up maybe about 5 or 6 inches here. So I'm just going to give myself like a little, maybe a little bit higher than that, a little line right here. Now this doesn't have to be super specific. Okay. I don't want anyone getting all type A on me and pulling out a ruler. Everyone's path is different, right? Everyone's journey is different. We're just getting a base idea here. We just need some foreground, We need the background and then we need the trees. So I'm giving myself a little section that I'm dividing off. Messy lines doesn't matter. All of that's going to be covered up. Okay. So that was with the turquoise. I'm going to pick up a little bit of blue with my turquoise using my angled brush. And we're going to start making these little— I call them like, think of like mosaic little pieces. You've got plenty of paint on your brush. Can you guys see that okay? And we're just gonna start filling in that section that we made. Now this is what I call the art of not blending. We do not want to blend these colors together. We want these colors to overlap each other, but we don't— here's what we don't want to do. Because look, it just becomes a big blob of color. We want there to be separation. We want to be able to see the brushstrokes so that it's not all the same. And I'm purposely breaking my lines because I don't want them to end— I don't want to see that horizontal line when I get done. So I'm going different directions with my brush strokes, and this technique that I'm doing right now, this is kind of how we're going to do the whole painting. This will be the same for those trees that we get to later. So I'm going to jump to the other side and do the same thing. So I'm hoping by me spacing them out, you can kind of see what these brush strokes look like. So all all different angles. Think of them kind of like little rectangles or triangles. Some of them are more triangular shapes, some are rectangles, different widths, different lengths. We don't want them to look too much the same. I don't want you to go too slow. Um, sometimes people think I'm saying that because I want them to paint faster. It's honestly because I don't want you to overthink your brushstrokes, because when you do it looks like you did. We want this to be messy and free and fun, so have fun with the paint. Load your paint up, put those brush strokes on there. You want to cover to where you don't see any of the white canvas anymore. So I did darker on both sides, and then as I get towards the middle, it's going to start getting a little bit lighter. I'm going more to my turquoise color, maybe picking up a little bit of white in here because we want at the end of this for our focal point to be at the end of that pathway. So by making it lighter in the middle like that, that's where our eye is going to be drawn to. And you can go into the white with a little bit of that darker blue too, and it makes a really pretty like periwinkle, almost like baby blue color. Again, we want a mix of colors. We don't want everything to be the same or like a perfect transition or any of that. Not just pure white. The white's mixed in with different colors of blue. But you guys see how quick and messy I'm doing those brushstrokes? So the faster you do this, the better, in my opinion. So now I have to go back and fix it because I'm painting upside down. Now I have to add my white out here a little bit more because my path is going to come over in the middle more than I have it right now. So I'm just brightening it up a little bit. Now if I want this to be— let's say I want it more white over here in the middle. If I kept adding white to it right now, it's just going to keep blending with these wet colors, right? So what I could do is just let this dry for right now. If I still decide I want that to be brighter white later, I can come back and add more white to it after this has dried a little bit. If I try to do it right now, it's just going to start mixing together and we're going to lose all these brush strokes that we have in there. Does that make sense to everyone? Wendy says more upside-down painting. We are gonna paint our trees upside down tonight too. I'm sharing— I do not prep my canvas. I just buy— I don't think you need to buy expensive supplies to be creative, to do your art. I buy the value packs from Michaels and Hobby Lobby, and I just take regular craft paint and This is craft paint you can get from Walmart or Michaels or Hobby Lobby, whatever you want. Um, there's different brands, but it's just regular craft paint, just a variety set of brushes, no prepping the canvas. So now I'm just kind of making sure I've got all that filled in, and it's okay for you to have some lighter brush strokes out here too. So again, I just kind of want you to look at what I'm doing now and the original. So you can kind of see where we're going there. See that light at the end of that pathway. Every time I do this, I gotta move these canvases. I need to set those down flat. All right, so step 1 done. Now we're going to— I'm gonna set these down really quick. We're gonna go ahead and do our trees, the first layer of our trees. There's lots of layers to this painting. This is where I tell the girls in my tribe, you have to trust the process. Sometimes while you're painting with me, you're like, I don't know where Christie's going or what this is gonna turn out like. It turns out, I promise. You just have to trust the process. That's what our t-shirt is going to be, is trust the process on the front of it. So the background of these trees is going to go from a red to an orange. Okay, same brush strokes of what we did there, but I'm going to show you a little cheat for that too. So it's going to go from red to orange and we're going to let that dry a little bit. Then we're going to jump down here and put our path and our grass down. So we're going to be bouncing kind of back and forth. With this painting. So I'm gonna grab a little bit of my red, squeeze that on here. Of course, this one has a thick glob of paint in it. I call these paint boogers. You see this? This is what I'm dealing with. It's clogging my paint bottle. That was a big glob of dry paint stuck inside my paint bottle. Good thing my fingernails are red. They're Chiefs red. Who's a Chiefs fan out there with me? We had an awesome game today. That's what I've been doing all afternoon is watching my Chiefs play. All right, let me get a little more red on here. Then we're going to get some orange, and then I'm going to show you a cheat so you don't have to do all those brush strokes all the way up. So who's having fun so far? You guys like, like watching this, like seeing it happen? Let me know if you have any questions about the Tribe. So again, you get 3 paintings per month with me. I'm gonna have to stick my hand in some water here to get this red off. 3 brand new paintings every month. This month we did the Truck Full of Pumpkins. We've done the Witch's Kettle, and this Thursday, after everyone joins, is when I'm gonna do the painting this week. And this Thursday we're doing the Fall Birch Trees, which are super fun. And then Christie Renee Hawkins, my website designer and our community manager in the group, is coming in as a business speaker the last week of the month. So we have a great month planned ahead, and then we're going to be moving to all that good fall stuff. Fall and Christmas and holiday, my favorite time of year, usually when I give a ton of bonuses to all my girls in my group. All kinds of fun stuff for you, Molly. Yes, you can just go back to my page. I'm going to switch brushes here. You can go back to my page whenever, and this video will still be up. For you to go back and watch. Okay, so I was gonna use my angled brush, but it's gonna take too long. So this is my little cheat for you. We're gonna put some background color on there, and then we're gonna do those brushstrokes on top of it. Hey, Miss Vicki, newbie from Arkansas. I went to high school in Arkansas. Linda, what? I didn't know Patrick Mahomes was from your school. Well, you let me know when he's gonna be there for some special occasion and I'll be coming down to Texas to visit you. All right, I am loading up a flat brush with my red and here's what I'm gonna do. So again, I want you to kind of look at this. This is more red at the top and then we transition to orange. Ignore the yellow right now. We're not doing yellow. That's gonna come later. But we just want to fill this canvas in really quick. We don't want to waste any time here, so we're just going to load our red up and just go back and forth. Just fill this in. You can go side to side, you can go up and down, you can do whatever you want to here. Everyone see what I'm doing so far? This red, I think, was a little bit dry, giving me a little bit of problem right now. Vicki, I went to high school in De Queen, Arkansas. Down in the bottom of Arkansas, right by Texas and Oklahoma. And then I went to college at U of A, so I'm a Razorback. So you guys see, all I'm doing is just loading up my red and filling this in. Who's painting with me right now? You guys painting or watching? If you have joined the tribe too and you're new and I don't know it yet, make sure you leave that in the comments for me. I want to welcome you, and we're gonna be doing a fun sign later this week that I started working on today. I am making a painting that's gonna say Tribe Sisters, and I am adding everybody's name to it that is in my tribe and that joins my tribe, and it's gonna be a piece of art that hangs over my studio workstation. I'm so excited about it. I came up with my idea today. I've been thinking about it for weeks and couldn't figure out exactly what I wanted to do, and then it just clicked with me today, so I'm super pumped. So as you guys are joining, I'm going to be going back to my list and getting everybody's names, and it's going to be like graffiti style, and I'm going to be adding everybody's name to that piece of art. It's going to be so cool. And I'll do that live with you guys so you can watch me do it. Hey, Terry. I'm glad you could join. Ashley said she just finished painting and now she could sit. Awesome. Welcome to Linda. Julie said she's laying in bed. Hey, that's the way to do it. Most of the time I'm watching stuff like this, I like to watch first and then go back and create what they're doing. All right, so you guys see I picked up a little bit of orange here, and I'm just transitioning. Doesn't matter how this all overlaps. What I do want it to do is come over that blue section, so where it's not a line, you can still see the blue through there. I'm not worried about that right now because I know it's going to be covered up when I add more layers to it. But we want this to be— we don't want a straight line across there. We want this to be like the rough edges of the bottom of the tree line coming across. All right, I'm trying to read this one comment. Watching, but seriously thinking I might need to get Some paintbrushes and a sketch pad. If you are wanting to like paint in a pad instead of on canvas, it's called a mixed media pad, and that link will come to you in your, your message from me. It's in my Amazon store. I recommend a mixed media pad to everyone. Everyone in my tribe, I recommend them having one because that's where you're gonna do all your practice work. Do you guys want me to go over my top 5 things that you need to start painting at home? Let me know and I'll go over that with you. It's not as much as you think. You do not need a ton of supplies to get going. Awesome! Watching from Canada. I've got another tribe member in Canada. I don't know if Deborah's on here or not. This is a 16 by 20 that I'm painting on right now. Aren't these fun colors so far? Right now, I always think at this point it is very like Americana to me. It almost looks just like red, white, and blue. You can't really see too much of that orange in there. Donna says she's painting now. All right, so the next thing we are gonna do is put our path and our grass down. So I'm gonna get a little bit of my dark green. This is just like a grass green, or if you get it from Walmart, it's called Christmas green. They're literally the exact same color. And I'm gonna get a little bit of my Apple Tart. This is a Michaels color. You can also get like lime green from Walmart. It's basically like a lime green color. I'm running out of water. I brought myself an extra cup in here. I might have to bounce back to it. All right, I think I made my ground. Let's look at these. I think I I made my ground a little bit shorter in the one I'm doing tonight, but that's okay. Let's hold these side by side. It's not too bad. It's pretty close. So you guys see how we're building this so far. Awesome. Barbara's a new tribe sister. All right, you guys want me to go over supplies. So let's talk supplies really quick while I'm going to I'm going to tell you what I'm getting ready to do. And then while I'm doing it, I'll tell you about my top 5 things that you need. So all I'm going to do, I am not rinsing this red out. And that may seem crazy to some of you. I'm going from red to green, but here's why. I'll give you guys a chance to answer because I got lots of you on here tonight. I like to do these little pop quizzes while I'm going live. What happens when I mix red with green? I want you to think about the color wheel. So if you painted with me the other day, we talked about this. I can't remember if it was inside my tribe or if it was on a live. I've painted so much lately I can't keep up. So I'm gonna give you guys a second. So top 5 supplies. Number 1, I would say mixed media pad. I highly, highly, highly recommend them. I tell everyone in my tribe to get them. Number 2, paintbrushes. I have a set in my Amazon store called Addie's Art Set that I love. You can also get, if you go to Michaels or if you want to order from Michaels online, their Artist Loft brand. It's a 10-piece set and it's just a mix of brushes. That's the angled brush that I'm using right now. They have this blue handle, gold metal, and then they're white bristles. Synthetic. You always want synthetic brushes. Not— you don't want natural hair brushes. Um, so those are two different brush sets you can get depending. All right, so remind me, that's where I stopped. Mixed media pad, number one. Number two, brushes. All right, so a lot of you are saying brown makes it darker. So red and green are opposites on the color wheel. When you add them to each other, they neutralize and they give you more of a neutral. Or if you have just a little bit of red and then you have a whole bunch of green, it's going to tone it down. So this is a really, really bright green I have on here. Can you see that, how bright that is? But because I'm mixing it with red, it's going to tone it down for me. See how that red mixing in there— I'm going to hold this up in just a second so you can really see it— you get like this darker green color. And I want my grass to not all be just one color. We're gonna have a mix of colors in there. So I'm just gonna load this up. We're gonna go ahead and go all the way across. I'm gonna make this easy, and I'm gonna show you my trick for getting a nice smooth horizon line. I'm trying to see how I can hold this and not get a crooked line while showing you guys what I'm doing. You're gonna really load your brush up. You're gonna start on one side. Now I'm right-handed, so I start on my left side and go right. If you're left-handed, switch it. My brush, plenty of paint. I'm going to start over here and I'm just dragging it across, back and forth, so I have a nice horizon line there. And then we can go back underneath here with our green. Now this is just a base coat. Again, trust the process. It's not going to look like this. I'm going to do that dark green, pick up some of that Apple Tart, mix that in a little bit. But we are— this is not supposed to be all pretty right now. It's not going to get pretty until later. We're just getting our canvas filled. These are base coats, nothing that you're really going to see too much of in the final piece. We just want that coverage on there. We want this first coat of green to dry before we put the second coat on, because if you just keep adding wet paint to wet paint, then it's going to get real gloppy on you and it's not going to do what you want. It's not going to give you more coverage. You're just going to end up dragging your paint across your canvas. So what you want to do is let paint dry and then put a second coat on, and then it will cover more because green is naturally a little see-through. So is orange. So you can see that. You can see though the blue brushstrokes from behind there. So those paint colors are naturally more transparent, but I want to let them dry before just loading paint and paint and paint on there. Because if I let it dry first, it's going to cover a whole lot better when I go back. Does that make sense, everyone? Okay. So we've got it covered. My top 5: number 1, mixed media pad. Number 2, brushes. I told you 2 options for those. Number 3, paint. Craft paint. We don't need to spend a lot of money on artist-grade thick tube paint. DecoArt, Apple Barrel, um, where— I don't think I have a small Michaels one. Craft Smart by Michaels. These are the big 8-ounce bottles, but you can also do the 2-ounce Craft paint. That is what I teach you to paint with. So we're not spending a ton of money on paint. These are like, they start at 50 cents a bottle. I do have some sets in my Amazon store, but you can just go to your local craft store or Walmart and get these as well. So that's number 3 is paint. Number 4 is the brush cleaner. You want to take good care of your brushes. And I did have someone ask earlier this week about me kind of showing how to clean the brushes and taking care of them. I'll probably do that. Later this week on another live. Hey, Miss Sarah! Um, but my favorite brush cleaner, I can't remember the name of it offhand, but it comes in a, uh, like a little jar and it's like a hard soap. It's in my Amazon store, so that's where the link is for it, but it's my favorite one. I've used all kinds of them, but this one's my favorite. All you do is damp, dampen your brush and you take your wet brush and kind of swish it around on that hard soap and you just wash it with your— I just wash my brush in my hand like this and then rinse it until it's clean. Um, and then rinse it, rinse it good. Make sure no color's coming out, no milky looking water, because that means the soap is still in your bristles. So you want it to run clear when you're washing it, and you want to lay your brushes flat to dry. So that's number 4, is a good brush cleaner. Number 5, canvases. Don't spend a ton of money on these. Get the value packs at Hobby Lobby. They're always $9.99. You can get a 5-pack of 16x20s You can get like, I think 7 come in the 11 by 14 size. So don't spend a lot of money on canvases. These are just the cheap value packs that I use. You can spend more, but when you're first getting started, I don't want you spending a ton of money in supplies. I want you to just enjoy the process and get creating. So those are my top, top 5 things, and you can go to my Amazon link to check those out and even just use it as a list if you don't want to buy from Amazon. You can go to your local store and get it. All right, back to the painting. So we've got our background on here. Let's go ahead and get our path on. Thank you, Cheryl. Yes, it's the Master's Brush Cleaner. This is why I have these ladies on here with me, because they help me out. I'm gonna let that big brush soak. Cindy says, on your original paintings, when alone, do you paint on an easel? I— it depends, honestly. Sometimes I paint flat, sometimes I paint on an easel. I have these tabletop ones that Corey made me that I paint on. Sometimes if I have it in here, I paint on my standing easel. I kind of do it both ways. I'm really used to painting flat now because that's how I teach inside my membership. It really just comes down to preference. All right, so let's get our path on here, and I want to kind of point this out before we go straight to it. This is only about an inch at the back here where it sets on the horizon line. This angle is coming way far out, right? So it's coming towards us like this, and it's more at this angle. This one a little bit shorter. So you see how much wider that one comes out? This one's a little bit shorter. Now everyone's path is different, right? In this painting, in real life, they don't all have to be identical, but I'm going to pull mine kind of like curved out, leave a couple inches on my side over here. This one curves just a little bit like that, and then I have a lot more grass over here, so So it's not like perfect and symmetrical on both sides. Welcome Karen, another new tribe sister. I can't wait to get off here and welcome all of you. I can't wait to do that piece of art and add all your names to it. It's going to be so fun and be patient as far as being added into the Facebook group. Okay. We have to manually do that. So make sure you check your email when you join tribe, check your spam, check your promotions folder. You'll have an email from the Social Easel that will have a link to our private Facebook group. That's the most important place to be. You want to be in that Facebook group because that's where all the community is. That's where all your tribe sisters are, where you're going to talk to each other, post pictures, all that good stuff. So you'll, you will request to join, and I need you to put in your email address that you registered with so we can easily go find you and find your registration, and then we'll approve you to the group. So be patient while we're painting live, because we'll— myself or Christie, my assistant, is gonna have to do that manually when we get off here. Okay, I gotta get the right color paint. Hang on. Let me get some burnt umber. We're gonna do our path in burnt umber. Might have— I'm gonna go ahead and get a little bit of black too. I like to— most of the time I usually mix my burnt umber and and black together just because I like a really dark brown. If I can get my black to come out. There we go. Number 5 was the canvases, Julie. Linda says she usually— she does— she usually paints everything in her media book first and then she goes to canvas. She needs to literally frame like half her media pad though, because they're always so awesome. All right, so I'm gonna start with my path again. I'm gonna do this line first, and I'm gonna pull it out this way, and then I'm gonna turn it towards myself so I don't mess it up, and then add this one in. And I only want about an inch at the back because we want it bigger closer to us and smaller towards the back. Now I will tell you— widen that just a little— there's my, my first line. The more angled out you make it, the easier it's going to be to put your trees on. I will tell you that. So that's part of the reason also why I have this one kind of curve out a little, because it's going to make it easier when we get to the trees. So again, I only want it to be about an inch back here, but then it's going to be wider towards the front. So I'm going to kind of curve it out like that, so it kind of looks like a triangle. Okay, does that make sense? And then I'm just gonna— this is just a round brush, like a number— what is this? I think it's a number 4. Yeah, it's a number 4. So I've got brown and black on here at the same time, and Brown and burnt umber, and I'm just real quickly— this is real messy again— just getting our base down here. I don't even care if a little bit of that green showing through. We're gonna add so many colors to this path that it's not really gonna matter at the end. And you could use your round brush for this, you could use your angled brush for this, whatever you want to fill it in with. I'm frozen up over here. Hang on. Hopefully you guys are not. All right, now I'm unfrozen. Let me know if you guys have any questions as we're going along about the painting, about tribe. Alright, so we've got our path filled in. So this is one of those points I love taking pictures along the process too. One, because it helps you better see things. This is another thing I recommend inside my tribe when I'm teaching them is during the process of painting, it's really important to take pictures of your work because you see things differently in a photo than you do when you're just painting. When you're 6 inches away from your canvas. Everything to us seems super important when we're this close to our canvas, and we're like, oh, that's going to look terrible. Well, when it's hanging on the wall, you're not even going to notice most of those things. So take a picture with your camera because it may help you see that, well, maybe I should have my road a little bit wider. Maybe those trees don't look as big as they need to, or whatever it may be. It gives you a different perspective. So remember to do that. During your painting process. All right, now we're gonna go back up to the trees for the second layer, and we— I'm getting more red because mine was mostly dried up and all gloppy, so I got to get some more red on here. I think I have enough orange to do it, so I'm gonna do red, orange, and yellow. Yes, Stacy, you can rewatch this whenever you want. And I'm gonna go back to my angled brush and we're gonna do those same brushstrokes that we did in the beginning on our sky. Let me show you this really quick. I show this in my paint classes. When you are rinsing your brush, okay, so just rinse this. My paint water is super dirty. You do not constantly have to clean your paint water. As long as you wipe your brushes off the way that I'm going to show you, you don't have to worry about your colors mixing. So I've rinsed my brush really good. Now I'm going to take one of my paper towels, take my brush, and I'm squeezing it, making sure all that excess water gets out of my brush. And that's also helping me reshape my brush. So this is really important to do that with your brushes so they keep their shape, especially your round ones, your skinny ones. You don't want to take your brush and wipe it on the table back and forth like that. It's going to flare bristles out. So make sure you're doing it that way. It's gonna protect your brushes and make them last longer, and it's gonna make sure that no matter what your paint color— paint watercolor looks like, it won't go into your next color of paint. Jesse said the farm animals are her favorite so far, and I haven't even painted them yet. They are fun, the farm animals. So last month we're doing like fall stuff this month. Last month, that farm animal collection that I showed you guys that's hanging on my dining room wall, those were our 3 paintings last month. They were so much fun. So you get immediate access to those paintings as soon as you join Tribe. Teresa said hers is the Easter Bunny with the— she said Easter Bunny butt truck. But yeah, basically little Easter Bunny booty sticking out of the truck. All right, I've loaded my brush up with red. I'm gonna start with that. Same brushstrokes. You're gonna start seeing those brushstrokes we want to build in the background like we have over here. And I'm focused on the top. You may not see a ton of difference right now, but it's all adding layers to our painting. And notice how I'm not worried about filling in. Can you kind of see where the wet is versus the dry? Barb says she loves the cow and the pig. They were fun to paint. They are fun to paint. And those— all the farm animals have templates for them too. So if you're watching and you're like, that's cool, I saw those, there's no way I could paint that, the templates are there for you. I did them on 18 by 18s. You can shrink the templates, you can print them off and, you know, minimize them or make them bigger for whatever canvas you're wanting to do them on. But that does help you out so you're not having to worry about freehanding that. So I'm just doing these messy little brush strokes. I did red, now I'm gonna pick up some orange, left the red in my brush. See how that's starting to mix? And I don't have to— don't think you have to stay at levels. Like, it doesn't have to be like a whole section of red, then a whole section of orange, then a whole section of yellow. We want there to be a mixture, and we don't really necessarily want to see where one starts and the other stops. I'm gonna hold this up in just a second so you can see this. And I'm bouncing back to the red again because I can start layering these, and I love it when you get the red— that light is so bad. Hang on, I don't want to knock my water cup over. Can you see that? That's a little bit better angle without the glare. But you see how the red and the orange are starting to overlap and pick up? You don't want to keep mixing, so I don't want to keep my brush attached to the canvas. I constantly want to pick up and be moving, but it is good and okay for them to pick up each other's colors. So you get that really pretty mixture of the reds and the oranges together. The Tuscan Landscape Westman, that was one of the very early ones too, and I love that one. Yes, Julie, the rooster is part of it. So that is one of the paintings that you get inside Tribe, and we have I mean, so I've been doing this for over a year and a half now, so we have a whole season from last year, a whole fall season, a Halloween painting from last year. We have Christmas paintings from last year. So if you're ready to like jump to that stuff, we have paintings like that already inside the vault. So you can go back to those and paint them if that's what you're in the mood for, or if you're prepping stuff to sell. In a booth or on Etsy or schedule your paint classes, you already have those that you can go choose from and they are inside the membership hub. So we've got all of that filled in. Now I'm going to get a little bit more orange and then pick up some yellow here. Yeah, the bingo challenge was fun. So I do challenges inside the group and you earn prizes. So we're always doing something fun in there. There's contests and giveaways and freebies and all kinds of stuff. But I did a bingo challenge with the girls this summer, and part of the challenge was for them to go back and pick 4 paintings that they've never done before, because everyone's joined at a different time and everyone's at a different place. And I tell them there's no such thing as being caught up because you can go back and pick whatever painting you want to. So a lot of people were, you know, keeping up with what our new monthly stuff was, but you learn something new in every painting that I teach you inside Tribe, and then you take all those lessons from all the different paintings and they stack on each other, and that's how you start gaining that technique and gaining that perspective and learning how to paint on your own, because the more you do it and the more different ways you do it, the better you learn. So that was my challenge to them. And it helped a ton, and they learned so much during that process. So, you know, and I tell them sometimes maybe the subject matter is not something that you're like, oh yeah, I'm dying to do that painting, but you may learn a technique in that painting that is essential for you learning that you can apply in other paintings, if that makes sense. So see what I'm doing here? We're kind of transitioning red, orange, yellow. I'm keeping the yellow towards the bottom. I want to make sure I'm overlapping that blue so it looks like trees coming over top. And you don't want to go too heavy with it. We want there to be that transition, and we're going to be coming back and adding more and more to this. So don't feel like— don't get stuck on this part and feel like I've got to get this looking the way it's gonna look in the finished painting right now, because you don't. We're gonna come back and add more to this. This painting is all about layers. I like to do a little bit more yellow right here in the center, again towards the end of my path, kind of make that our focal point. Our eyes are kind of drawn to the center of the painting. I'm even gonna pick up a little bit of white with my yellow. Tiny bit. It just lightens it just a little bit. And I'll turn this around so you guys can see it a little bit better. See how that's starting to come, come together, starting to look a little bit more like this guy? Layers to the process. Evelina, jump, jump out and jump back in and see if that helps. Tell me if anyone else is having the blurry problem. Sometimes it's your connection, sometimes it's my connection, but I switched mine off of Wi-Fi, so it should be a clear connection now. Awesome, Cindy got her September box from Sarah. Shelly just joined tribe. Welcome, excited to have you. Okay, so we talked about how we don't want this to just stay solid green down here. I've already got these colors in my brush, so I'm gonna go ahead and use them down below. I'm gonna show you again in the original kind of what that looks like. See all those different brushstrokes? Down here in the grass. We're going to pop around and put these little pops of color in there. Now that just made me realize I don't think I have my like citron lime green. I'll mix— this is where color mixing comes in— I'll mix a little of my lime green and yellow to get that color. So this has some orange and red in it, and I'm just going to use what I have left in here, just do these quick little brush strokes, maybe grab a little bit more red. I want to bounce around. I want to do this quick, okay? I don't want you overthinking this part. I want to do it quick so it doesn't look like you thought about it too much. Just these different little areas of color where these fall colors have hit the ground. And here's the thing to remember: if you get too much of something, don't stress about it. Let's say you do this and you're like, oh my gosh, I put way too much red and orange down there. It's fine. Let it dry, you'll be able to come back and change it. You're not stuck with something just because your paint is on the canvas. You can go back and change anything you want to. And I don't want all of my streaks of paint to be the same size or the same width. I want some of them to be skinny lines, some to be thick lines. Can you see how that's starting to come along there. Pat, it is so many cool things. We've just got so much creative fun stuff going on. I love Sarah's monogram boxes though. In fact, I did— she only had 6 boxes left for her kids' monogram box, and it's only quarterly. And she showed me what she did a live last night. By the way, I'm talking about framed My friend Sarah, who owns Framed— you can look her up, Framed Monogram Boxes— but she has a kids one too, and it's only quarterly, and she only had 6 September boxes left, and she showed what was inside of it last night, and I frantically got on there and ordered one for Sophie because she had to have it. So cute. Okay, so right now one of these colors I have in my grass is like— it's called Citron, but it's like a yellowish lime green color. I forgot to grab it before we got started, so I'm just going to take some of my yellow and some of my Apple Tart green, and I'm just gonna make my own. You can't see that. I wonder if I get closer. Now you can see. So I've taken my yellow and my green and making more of like a citron color and just add a little bit of that in here and there. And this is all gonna look a whole lot better— trust the process— when we start adding our trees in. Right now it just looks like big blobs of color, and you're like, I don't know if what she's doing is gonna work. It'll work, I promise. Let's go ahead and jump in and add— since I'm already doing this, I've got some blue down there. I kind of keep my darker colors towards the bottom. Because our light is coming from that path. Maybe towards this, a little darker on the outer sides here. So think about where your light source is coming from, where you want to add those colors in. And then we can jump back— see how I just kind of jump back and forth with my colors? I don't mind that they're mixing. I kind of like it because it works on toning down the brightness of some of the colors. Now we're going to jump in our path. The background of my path has more of the reds, yellows, and oranges, and then later we'll come back and add some blue and stuff over top of it. So I'm just going to do the same thing here, just real quick. This is red right now, then I'll pick up a little bit of orange, streak that in, maybe a little bit of yellow. So starting to come together here. I don't have purple on my palette yet, so I'm gonna grab a tiny bit of that. I don't have a ton of purple in this painting, but I do have a little bit, but it's going back down here where some of these blues and stuff are. I'm gonna throw in just some purple here and there. If you really love purple, you can add a bunch of purple. You're painting. You don't have to use these colors either. Maybe you want some with more traditional fall colors. You could definitely do that. So that's where we're gonna leave our ground for now. Can you see by looking at these two how it's starting to come together? See how we're building this? Let me know, shoot me up some hearts if it's starting to come together to you, make a little bit of sense. Good question, Christy. Thank you, Miss Cindy. All right, I'm trying to decide what I want to do with you guys next. I think I want to go ahead and jump to the trees. It's actually been a while since I painted this. I'm trying to think of what order I want to do this with you guys in. We are gonna go ahead and do the trees, so then the last thing that we'll have to do is add all these fun colors on top. So I'm switching back to my round I can find it. I got too many brushes over here. I'm trying to find my number 4. Is that my number 4? Here it is. So Christie had a good question. How many, how many of my Tribe Sisters do I have on here with me? Some of these ladies are on the fence right now about Tribe or wondering whether they should be a part of it. So what would, what would you say? What would you say to these women who are on the fence of whether they should join our inner tribe and become a tribe sister with us? You can post in the comments. Diane says, please recap how you got to where you are in the painting. So I'll do a quick recap, but you can go back and watch this from the beginning once the live is over. We started with our sky first, then we built our background level of the trees, then we did our grass, just a quick coat of green grass, drew our pathway on, and then we started adding these accent colors into our ground. So that's where we are right now. Now I'm going to start showing you guys the trees. So the trees— here's a funny thing. For some reason, when we are doing trees, especially along a path with perspective like this, because things are getting smaller the further away they get. When— and again, how many— I've taught this probably 12 or 14 times, this particular painting. What happens is women will start painting this and their first couple of lines will be straight, they'll be vertical. And then as they get further down their path, their trees start leaning and they start angling away. From the path and they look like they're all like fallen over sideways next to the path. And it happens because in our brains we want to say the trees can't touch and they're getting too close together over here. And so we try to avoid the trees touching. So in turn we end up turning our trees and making them go sideways. Um, and we obviously don't want trees falling down on the sides of our path looking like they're blown over. We want to make sure these are vertical lines. So one, you have to tell yourself in your brain, you're not making trees you're just making vertical lines. Okay, that's number one. But what I found is a way to combat this, and I don't even remember how I came across this, but it worked every single time. We're gonna make our first two little skinny trees back here. Okay, so we're gonna do these first two skinny trees, one on each side of our path, and then We're going to flip it upside down and we're going to do all our lines from our path to our trees this way. For whatever reason, I don't really know why it helps us, but it stops our brain from wanting to like angle these trees out. Instead, it's giving us a focus point, point A, point B. I need to connect those two with a straight line and all I'm doing is just scooting over a little bit at a time. Along my pathway. Okay, so that's how we're going to do the trees. Now I'm starting with the ones along our path, and then we've got these other ones that you're just going to stagger. I don't want all these trees at the same spot, so I don't want them all on my horizon line. I don't want them all right here. A couple start here, then here. See how they stagger throughout the grass? Different starting points. Does that make sense? We don't want them in one cluster. We don't want just a solid row of trees. I really should have gotten more water. Gina, if you scroll up in the comments, you will see the, the link. And speaking of bonuses, because we had some people join late, if you join Tribe tonight, Within the first 24 hours, there's an early bird bonus. So you get everything in Tribe, which is 3 paintings per month with me, 1 guest artist teaching you a different medium at the end of the month, which could be glass art with Cindy if she's still on here. Tamara, who teaches door hangers with Southern Adornments. Casey teaches hand lettering. Those are all guest speakers in my group, or it's a business coach who's going to help you learn to sell online or teach paint parties, whatever it is. That's our 4th week of the month. And you also get access to my full library, which is over 45 full tutorials, a whole section of templates for you to draw onto your canvases, a whole section of live Q&As from our past year and a half full of information. And then we have some technique videos in there. So you get access to all of that. Um, and it's only $47 a month. And if you join tonight, You also get the Cactus Trio bonus tutorial. You get our Bird's Nest. I don't think I'm holding that the right way. Where's my initials? Maybe it's this way. It doesn't matter. You could turn it whatever way you want. Bird Nest. And then my Abstract Flowers, which I love. I don't remember which one's my original. So I hang them next to each other because I love them. So those are 3 full extra paintings you get that are valued over $90 if you join in the first 24 hours. And feel free to ask questions because there's ladies in the tribe that can answer them for you while I'm showing you the painting. Yeah, Paula, I turned it upside down. Thank you, girls, for commenting. It is an amazingly supportive tribe of women. So much better than painting by yourself. Much better to be in a community of women instead of trying to go at it alone with everything. It's no different, like, if you're trying to lose weight or whatever you may be doing. Piper's joined me now. It's always better to do it with friends, right? And these women have become friends, and they're spread all over the United States, and we have one in Canada. We may have more by the end of the night, I don't know. So the first thing I'm gonna do— I'm gonna try to do this upside down to you guys— I'm adding the ones at the end of my path. Now I don't want to press down super hard. This is my round brush, and I've got black paint. I want these ones at the back to be pretty skinny because they're further away. And I do want— I'm going to hold this up close so you can see that's going into my trees. Don't stop your black line before you get into the leaves. We're going to come back and add a layer over top of that. So you want to just go all the way up in there so it doesn't look like they're stopping before that. Yes, lots of discounts. I do different boot camps and challenges and stuff throughout the year. If you're a tribe member, you get a discount on all of those. If you are close to me and you want to come paint with me, you get discounts on local paint nights when I do those. Okay, so I told you we're gonna do this upside down. I'm gonna hold it this way. So now what I want to do is I've got my back trees and my starting point. Now I just want to scoot over a little bit. They're going to look closer and clustered together the further away they are. They're going to start spreading out a little bit more the closer they get to us. Okay, so I'm just going to hold it like this, just straight down. And I do one side at a time. They're gonna get a little thicker and a little wider the closer we get to the bottom of the canvas too. I think I'm just gonna make that my final big one, so I'm gonna show you this at the end. This is where you kind of have to decide, what do I want to do with this last one? Because look how thick they are. The ones that are closer are a lot thicker because they're closer to us. So it'd be really hard for me to fit another one in here. So what I'm going to do is take that skinny line that I already have there and I'm just going to make it thicker and make that my ending tree at the end of the path. Now I'm going to show you this too. Let me make this a little bit thicker. I'm just going back and forth. When you are making tree trunks, one of the number one problems I see that people do is they make them way wider than what they meant to. So the easiest way to combat that, instead of saying, okay, well here's the right side of my tree, I'm going to jump over here and make the left side. It always ends up bigger than what you meant for it to. So instead of doing that, you're just going to keep going back and forth. With your brush. Can you guys see that? Until you get it about the width that you want, and then I'll keep thickening that all the way up. So I could flip it over right now because I've got that perspective. See how that's starting to look there? So we'll do this one side, I'll show you this, and then we'll do the other side. If I'm missing some questions, I'll come back and check them in just a second. I just want to get you guys to this point really quick. I'll flip this back over because I kind of want to show you— tilting it the wrong way— how it's starting to starting to look. So we'll come back and thicken these towards the bottom, and they'll go right into our path. And if you were late joining, we talked about everything that was included with Tribe. This is the last time you will get everything that I talked about at the $47 a month. So if you're on the fence about it, you're going to want to join now because it's going to be a different price when we open again in March. So what do you guys think of this so far? See how that's starting to look? We've got our nice big thick tree at the front. We'll pull that up a little bit more. Taper that in. So we've got one side done, and see how that was easier for me to get those straight lines? None of them are leaning away from my path. And I also want you to notice they're not perfectly straight, so it's okay for them to wobble a little bit. What tree in nature is perfectly straight, like a stick straight up and down. You're not gonna see that. Julie said when you're painting the trees— yeah, I think so. Yeah, I think so, Julie. Like, you just see it, you see it opposite. Yeah, the bird's nests are awesome baby shower gifts. I didn't even think about that. Miss Debbie's on here. Debbie Hightower, if you guys see her in the comments, She's been painting with me for a while and she just started her own paint party business, so I'm super excited for her. Ashley, I'm using a number 4 round right now for that. I need a little bit more black paint before I do the other side. Yes, Theresa's right, you get input. I'm glad you brought that up because I let the ladies in my tribe help me make the decisions. So I'm constantly asking for their feedback and what they want to paint, what they don't want to paint, what do you want more of. So you get a lot of feedback inside of the group as well. Alright, so let's jump to our other side. I'm going to do the same thing, maybe make this just a little bit thicker. And I start out just getting the line on. I can come back and thicken them up as I go. Right now I just want to get my placement on there, and then you can decide how thick you want your tree trunks to be. So all you're doing is just separating those lines Maybe it starts like a quarter inch, then a half inch, then an inch as you're going. So that's what it looks like first. They're just skinny. And now I'm going to go back, I'm going to flip them over because I don't need that for my perspective anymore. I'm going to flip it over and then I can go back and thicken them as much as I want to. Sorry, I missed some questions here. Hey, Miss Kathy. Karen, you can join from anywhere. I don't have any from the UK yet, but you can definitely join. We would love to have you. I have one member in Canada so far, but so far everyone else is in the United States. But you can most definitely join us. So this one— see in the original how that one on the side that I'm doing right now goes all the way to the top? I had one that was different just for some interest in a painting, and I'm gonna take that all the way off the top of my canvas. I'm going to turn this to where you guys can see it in just a second. We'll thicken these lines up really quick. Cindy, Piper is a Jack Russell, and then we also have a half beagle, half coonhound named Paisley, and she's about the sweetest thing in the whole world, even though she destroys all my stuff. But she's been better. We've gotten her a little tamer. She's not destroying as much as she was. What do you guys think of this painting? Like, isn't it fun to see the process of this? This is definitely, I think, one of those where as you're going along, you're like, I don't know about this, and then all of a sudden you're like, oh my gosh, it's so cool. So I'm coming down into my path, and you can kind of pull some of that black in into your path, and look how that kind of creates like the shadows on the path just by— all I did was pull that brush down and then streak it over. Into the path, and it instantly looks like shadows. So just quick little things that you can do like that to add to your painting. I'm gonna go back and do it to the other side, add a little bit of black coming in there. And again, we can come back and add more color if we think we need to. So I've got all of my trees along my path. Now we get to add the ones out in our field a little bit. Awesome, Shelly! Shelly's been waiting anxiously. Glad you got to join. Debbie said, "I have way too much coffee. My trees are dancing or something." And that is even like, so I know we're using black and sometimes black can be scary, but you can still like let it dry. If something gets too out of control, you can paint your grass back over it and then just pull those black lines back on top again. There's no such thing as something you can't fix in your painting. I have painted over entire canvases before because I've started something and then I get mad at it and I hate it and I'm like, I just want to start over. You can paint over the entire thing. And you'll never know what was underneath it. So just keep going. Don't give up. All right, so we want to start adding in some of these little trees, and I want to stagger them. I can pick my canvas up, so I might want to have like a couple skinny ones kind of in between here at different spots. Maybe one that comes down a little bit lower. Can you guys see that? Different thicknesses. If they're, if they're further back, they're going to be skinnier. If they're closer, they may be a little bit thicker. And then you can do the same thing, just kind of pull that black at the bottom, and it just kind of creates that little look of a shadow there. So we've got one side all filled in. See how that color in the background of the grass kind of fades back, and now it's just these cool little pops of color you can see back there. Now we're gonna do the other side, and we got a lot more over on this side. I might have a few that just go on the horizon line, maybe a little bit below. That's a big string of paint there. So see, I didn't necessarily mean for that one to be as thick as it was, but that's kind of where the paint went. So I'm just gonna go with it. I'm gonna pull it down closer to the bottom, so it's just gonna be a bigger tree that we're closer to. How we doing so far? Good? I think I need to add maybe one more. Let's do a bigger one right here. Maybe one skinny one in the back. So you can add as many or as few as you want to. Make it your own. It doesn't need to look identical to mine. So we've got all our trees in there. Look how it's coming along. We're almost there. So I want to add a couple little quick black streaks, really random, just pulling my brush all over. And all the Type A's are freaking out right now, right? Look at what she's doing! It's so fast, it's totally random. You want it to be. These are just little branches that are gonna peek through. So you don't need to go overboard, just a little bit. I love paint pouring. I haven't done it in forever, Paula. I'm, I'm really missing doing it. Okay, let's go back. I'm gonna let that dry a little bit. So I don't want that black to drag into my— Elizabeth said I did just freak. I know, because I literally have people when I've taught this in class gasp when I do that because it totally freaks them out that I just like drug black all over my trees. So we're gonna let that dry and then we're gonna jump down here on our path and we're gonna start adding in some of that white and blue that's in the original. So I'm just going into my white first, and we'll just do a quick kind of outline, not solid, just wispy little lines along that path. See how that instantly makes it stand out a little bit more? Do a couple streaks of white inside here. Now I'm just using a round. I think this one's a number 2. You can use whatever size you want to. Push down harder in some areas, lighter in others, so you have some variation in your brushstrokes. Then I'm going to grab maybe a little turquoise, throw that in there, some of that blue. I'm going to take some of that dark blue and mix it with my white. So I get that baby blue color that I like. It looks really pretty. It's good contrast on our path here, and especially towards the back, I want that to be a little brighter because that's where the sun is hitting. Maybe just a little streak of yellow. It's okay if the yellow mixes with the turquoise or blue. You get those little pops of kind of a teal in there. Maybe a little bit orange or red. You can decide what colors you want in your path. I just kind of bounce back and forth. You don't want it to look like a rainbow, but I want some variation in there. Maybe a little bit darker blue towards the bottom. It is fun and messy. That would be a fun guest speaker or guest artist to have in our group would be a paint pourer who— I've done it, but again, there are people who do it a lot better than me. So that's when instead of me teaching you, I just have an expert come in who does it a whole lot more than me and is probably going to show us something really cool. Okay, so we did that on our path and then I want to add just— I've got some white with a little bit of that dark blue. So again, it's kind of like a baby blue on my skinny. This is like a 1 or something and I'm just very lightly— look how I'm holding the brush and I'm just going to kind of drag alongside these tree trunks, just to kind of give that little highlight on that side. Then jump over into the other side. Think about where the light is hitting, so it's going to go on whatever's closest to that light source. We are almost done. We've got the bottom half of our painting is done. Don't you guys love this? It's so much fun. All right, what we're doing tonight and the original, so you can kind of see we're super close to getting there. The last thing we have to do is add all those fun colors, so we're going back to our angled brush for this. Squeezing this so I get all my paint color out of there. I don't have to worry about it mixing. So we've already got a little mixture of like our reds and our yellows in here, but then we put our black on, so we want to overlap that a little bit. So we're going to jump straight back into those same colors. I told you guys, lots of layers in this one. I'm going to go with orange first, and we can overlap this tree a little bit. You can leave it more on top, whatever you want. But we don't want that black to look like it's just stopping right at our trees. We want to cover it back up with some of these paint, paintbrush strokes. And I'm really getting a lot of paint in my brush, so I'll try to hold that up to the










