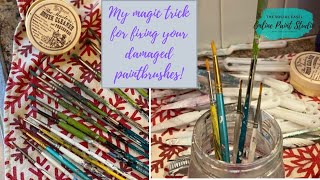
In this instructional video, Christie Renee Hawkins of The Social Easel demonstrates how to clean, condition, and rescue acrylic paintbrushes that have become bent from prolonged soaking. She introduces her preferred cleaning product, the Master’s Brush Cleaner & Preserver, and walks through her step‑by‑step washing routine: wetting the bristles, working the waxy cleaner into suds, hand‑scrubbing until paint is gone, rinsing, and laying brushes flat to dry. Hawkins then reveals a “magic trick” for straightening bent tips: briefly submerging the brushes in boiling water, which restores the original point shape. Throughout, she offers practical advice for teachers of paint‑party classes, emphasizing how to set brush‑care standards for kids, avoid common damaging habits, and save money by extending brush life—an insight she wishes she’d known six years earlier when she started her paint‑party business. Links to her Amazon store and blog are provided for viewers seeking the cleaner or additional resources.
Chapters
Hey guys, it's Christie with The Social Easel, and normally I am teaching you how to paint with acrylic paint, but today I am going to show you a trick on how to fix your paintbrushes. So you may have seen a post I did probably about a month and a half or so ago, but But there's this little trick that you can do if you let your bristles get bent, and that happens by leaving them in your water container for too long. So if you are a well-behaved artist and you take care of your brushes, then you won't have this problem. But if you are like me and you get busy or you're in your studio all the time, I tend to leave my brushes in my water cup. And that's a no-no. So I'm not telling you that's the right way to do it, but I'm going to tell you a trick that I just recently learned a few months ago on how to fix all those bent bristles. I wish I would have known this 6 years ago when I started my paint party business, but I'm going to share that tip with you today. So, um, the first thing I wanted to show you guys, because I get this question all the time, is how do I wash my paint brushes. So my preference— everyone has a different preference, this is just mine. This is what I've used for all the paint classes that I've done. It's called the Master's Brush Cleaner and Preserver, and I believe that's backwards for you guys, but it's the Master's Brush Cleaner. This is in my Amazon affiliate store, so I'll put that link up when I jump off of here if you're not familiar how to get to my store, or You can go to my website, which is just thesocial easel online paint studio dot com. Go to the blog, and then when you're on the blog, over in the column, you will see a link to my Amazon store. So if you don't want to wait for me to post the link, that's how you can get to it. And there's all kinds of awesome stuff on my blog you can check out. Okay, so this is my favorite brush cleaner. This is like a hard wax like if I stuck my finger in it, it would kind of be like candle wax. So what we're going to do— I don't usually add water to this. However, I'm going to see if I can angle you guys down here. Okay, so if you missed my live last night, um, I was talking about how I did not realize, um, after my last paint night that I left— this is my big water pitcher Okay, so this is what I take to all my paint nights, and I fill it up with a little bit of water at the end of the night, and then I put my paintbrushes in it. And I could have sworn that I took them all out and washed them after my last paint night a few weeks ago, and then I realized I didn't. So I've got all these brushes— I'm gonna try not to drip water everywhere— that are all bent. See how they have those curved tips on them? You can still use them, but it it just makes it a little more difficult to get those, um, those points that you want. Okay, so these are all already wet. I'm just gonna get a little bit more water on them. Now this is what I'm doing if I'm washing several brushes at the same time. Now these are all the same length, so it just makes it easier, but I get like a handful— what do I have, 5 here? And I got the bristles wet, and this is what I'm doing. I'm putting them in— just, they're, they're damp, so it's turning the soap into suds. And then I get plenty of soap on there, and then I just wash them on my hands until I don't see any color coming out anymore. Okay, so just like that. And then I'm just gonna rinse them. Now when you are properly taking care of your brushes, ideally you would dry these off and then lay them flat over here. So usually I let mine sit over here and dry next to the sink after I've washed them. So did everyone kind of see how I'm doing that? This is a cleaner and preserver, so it actually helps condition your paintbrushes too, but you don't have to wash them all individually. Usually this is what I do. I'll grab a handful like that, lay it down in the sink, grab another handful. Now you do want to make sure that you get the soap up here right next to that gold part. Because that's where the paint gets stuck sometimes. Let me know if you guys are watching, where you're watching from, if it's your first time, or if you are coming back, if you're a Tribe sister joining me. And I would actually love to know if any of you teach paint parties. So more and more of you have started doing so. There's some glitter in this one that I've got to get out. Okay, my water is boiling. I'm about to show you the trick. But more and more of you have started teaching paint classes, which is awesome because this is a great way to make extra money for your family or build a business out of it. And these little tips that I'm teaching you right now are gonna come in really handy if you teach paint parties. Okay, let me grab another handful. So these are these super, super skinny brushes. That I left, so they're all bent and I want to get these straight again. They don't need a lot of soap. But so all those are, are washed. Now I'm just gonna rinse them. Try to look back at Linda said some of my bristles get wonky. Do you have a remedy for that? Oh yeah. So yeah, kids will absolutely destroy your paintbrushes. However, I think I have told you this before, Linda, too. I'm a little stricter at my kids' paint parties, and I'm very specific about what they can and cannot do with my brushes. Because listen, it's expensive to keep replacing brushes for a mass amount of people. So I tell them right at the very beginning— this is exactly what I do at the beginning of my classes when I'm teaching kids. I have them, I'm like, okay, you got your brushes, here's how you rinse them. Here's what I don't want you to do, because this is what kids do and some adults. They will take their brush and they have a paper towel on their table and they will take it and and just go back and forth like this. How many of you have seen people do that with your brushes? If you're the teacher, you're cringing inside because you know it's destroying your bristles. Um, so I tell them right at the beginning, that is not how you're going to clean your brushes. And this is what I have them do. Everyone has a couple paper towels at their station. I'm like, you rinse your brush, you wipe the water off on the side. I want you to grab one paper towel, and I want you to take your brush and I want you to squeeze it like you're reshaping your brush. That is how you switch out the colors in your brush. So from one color to the next, that is what you're going to do instead of wiping it on the table. So hopefully that helps you, Linda. All right, so I'm going to move you over here. Yeah, it's okay. Remember that you're the teacher and you're taking care of your stuff. So it is okay to set those standards and procedures. I accidentally touched the side of my phone. She thought I needed her. All right, so I've got a boiling pot of water. I've got these wonky brushes here. So can you see, especially this little orange-handled one? So all you have to do is just pay attention what you're doing. And I don't have a ton of water in there. You're just going to take your brushes. I just do like a handful at a time, and you're just going to stick them in that boiling water. All right, you saw what they look like before. Look, they're straight. That fast. And now they don't have that curve. This one's got an itty-bitty curve, not too bad though. You can just do it again. Look at that perfectly straight, beautiful point again on your brushes. So hopefully that tip helped you guys. Did you guys see the difference? I'm gonna finish doing them here. Let's do some of these smaller ones. Share— I know I'm not supposed to say share— sprinkle, sprinkle the love. Let other people know about this because this is gonna save people tons of money on their paintbrushes. Okay, again, see the curve in them? Magic and straight. Is that not the coolest thing ever? It is, it is a magic trick. You don't have to take small handfuls of them either. Like, if you're like me and you have a big class or classes and you do this on a regular basis, look at all these wonky brushes I've got here. That is my tip for the day. Yeah, let me know if you guys love that tip, if that is going to help you. Leave me some hearts, sprinkle it with others so they can have this awesome magic trick. I know for me, the second I learned that and I tried it and it actually worked, I was like, you are kidding me right now. I mean, I would have given anything 6 years ago to have known this and saved several hundred dollars on buying new paintbrushes. Yay! All right, thanks guys. Have a good weekend and, uh, Merry Christmas early. Bye!