New Products - Let's play!! || The Social Easel
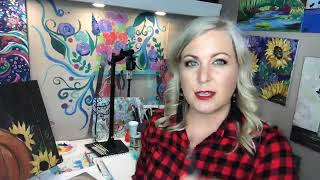
In this live‑stream, Christie Renee Hawkins introduces a batch of new DecoArt supplies—modeling paste, metallic paints, shimmer/glitter paints, and stencils—while demonstrating how to use them in mixed‑media acrylic projects. She walks viewers through creating 3D texture with modeling paste, shaping poppy‑style flowers with a palette knife, applying a medallion stencil, and layering metallic and glitter finishes. Throughout the demo she references her Amazon affiliate store where the products can be purchased, mentions where else they’re sold, and promotes upcoming collaborations (a joint offering with Heidi Easley) and a free dandelion tutorial with a Facebook group contest. Christie also shares practical tips on color mixing, brush selection, and using decoupage to turn textured paper into birds or other mixed‑media elements. The session is interactive, with live chat questions, announcements of future weekly “product tester” and “tip of the week” streams, and encouragement for viewers to experiment and share their own creations.
Chapters
Hey guys, so I have something fun to show you today. I got a lot of new products from DecoArt and am finally having the chance to play with them and experiment with them. So I was testing them out the other day and found them to be really cool, and I thought you guys would want to see what I was working with. So I am going to show you that today. If you're wondering why I am dressed in plaid in the middle of summer when it's 90 degrees outside. I have a little sneak peek of something that may or may not be coming your way very soon. Um, so that's something fun. I am recording some promos today, um, for that. Thank you guys. I just got my hair done. She did really good today, so I got my platinum blonde back. Um, it was getting dark. The girls were telling me it looked brown when we were in Florida. So new hair day, one of my favorite days. Thank you, Sonya. But yeah, so I'm in a flannel shirt right now, but I wanted to be dressed appropriately for all these fall promos that I'm getting done today. But I'll let you in on a little secret. There's something coming with this painting and one of my very good friends, Heidi Easley, and we are partnering up together for something really fun that we're gonna offer you guys. And we're gonna tell you about it in just— I think it's next week. I think you guys are gonna get all the details next week. So stay tuned for that. But I'm gonna show you a couple of the products before I flip you around because I'm gonna give you guys an aerial view. Thank you, Teresa, of what the project is gonna look like. So, and Gretchen is going to post the link below. I made a special little page inside my Amazon store that I put these products so you can find them super easy. This is— see if I can get this right— this is DecoArt. That's backwards to you guys. Hang on just a second. I'm gonna make it easier for you to see here. Thank you, Miss Deborah. Is that better? Did I switch it, or did it not do anything? It didn't work. Facebook is being a little glitchy today. Oh yeah, I hit the button. It didn't do anything. Okay, so I'll just tell you, Facebook's not wanting to, to work with me today, but it's called DecoArt Media modeling paste, and I'll show you again when we are facing the actual paint. And then this is DecoArt metallics, and this is just in a bright gold. So you can find both of those— Hobby Lobby carries DecoArt. I have them linked in my Amazon store so you can shop there and get them. And then you can also go to like Blick Art online. So any of those places you can find these products. But yes, this pumpkin and sunflowers it actually has very special meaning. So I don't know if you read my blog post this week. If you haven't, go to thesocial easelonlinpaintstudio.com and go to the blog and you can read all about it. This is— I'm just gonna show you again. That's the very first painting I ever did on pallet board, and who knew that would, like, it made my business blow up all over again. So people love painting on pallet boards. So we decided to include that in a challenge— not a challenge, a workshop coming up for you. So you guys are gonna get to learn how to do that. It's one of my favorite fall paintings. I set it up on my shelves every fall and decorate with pumpkins and fall leaves all around it. So super fun. If you missed my post earlier today and you want to give me any feedback on what you want to see coming to the Social Easel for the fall season, there's a separate post on my page and I want you guys to go comment underneath that post and tell me what ideas you want to see me paint this year. They may be in my membership, they may be for lives, and they may be for local paint nights. So you never know where they're going to end up, but I want your ideas. Um, Terry, yes, uh, she was asking, is the modeling paste different than what we use to thicken our paint? Yes, what we use Inside, I think I put all my, my mixed media stuff away. What we use inside the group, or if you're thickening paint, is gel medium, and this is different. So this finishes stiff. So I'm going to show you, and again, I'm going to flip you guys around so you can really see this. But do you see this really cool texture that this created? So it literally gives a 3D effect, and you can add this to your paintings. Let me make sure I'm not missing everything. Hey Linda! Hey Sherry and Kim and Jesse. So that is something I did with a stencil, and then I don't know if you can see this. This was just a poppy. I was just playing with— I again literally just out of the bottle testing this out, and then I got done with it and I thought, I bet other people want to see what this does because it's pretty cool. So this is just me with a palette knife kind of making like the shape of like a poppy, and again, it has that 3D thickness to it. I'm gonna try to hold this on the side so you guys can see that, but you can see those ridges in there. But so then all these ideas popped into my head of like, oh my gosh, all the things you could create with this, all the different stencils you could buy. So this is the stencil that I use to get that design, and I love this. This is such a pretty background for so many things. But I'm gonna show you guys— I let some dry, which is what I'm gonna show you today. So they had to dry before I could go live because you can't paint on it while it's wet. There are different kind of paints. I don't have that up here right now that you can mix with this medium if you want the, the color to be your texture. But what I did is just put it down clear, let it dry, and then painted that really pretty metallic gold over it. So then I took my— and this is just in my mixed media pad— so I wanted to try it with a background of color first. So I just did some streaks of some different teals and then put that texture over top of it. So how cool is that? And then we're gonna paint that and see if we like it painted or if maybe we just like it left the way that it is. And then I have another— I don't think that's gonna show— there we go. I have another one here that I did the stencil with and just let it dry. So I'm gonna flip you guys around —and let me get my palette knife ready. I was using a big one when I did that poppy, but this is my favorite palette knife. It's a number 1. You can really do a lot more with this one. So we're gonna flip you around here. I believe that— yeah, the Amazon link is pinned in the comments. So if you want to know where to get these supplies that I'm going to show you, and I'll show them to you again when we flip the camera around, you can get them in my Amazon store, and that is my affiliate store as well. So I'm just going to swing you guys around here. Try not to notice the mess as I do. We'll see how quickly I can get you flipped around. If you get dizzy by this, close your eyes because I'm going to turn you so that you're right side up. So how's that view look? I'm going to pull you guys up on my iPad so I can see what you're seeing. And then we're gonna start painting, and I need to put an apron on so I don't ruin my shirt. All right, so if you are just now joining, just comment and let me know you're here. Let me know where you're watching from. We're doing some new product testers, and I literally have a whole box of supplies from DecoArt because I kind of partner with them. And I'm gonna start showing you guys some of the different products that I get and how you can use them in your artwork. So we'll be doing this like once a week. I'll, you know, kind of show you some different stuff, and then I'm gonna start going live twice a week. So once a week we'll be showing you a new product and and how to use it, and then the other may be like a tip of the week type of thing. So start, start planning on catching me live and make sure you have your notifications on if you don't already. My internet is giving me all kinds of issues today. Sorry, I'm trying to pull you up here and it's not letting me, so I'm gonna disconnect connect from my Wi-Fi and see if that will work. I see a Springfield— I'm looking upside down now— Alabama, Missouri. Hey Debbie! Hey Jean! Oh, did I miss it? The stencil is also in my store, so all of these supplies, while I'm trying to get this going, You've got your modeling paste, which gives the 3D effect, the metallic, which is just a— you could use any metallic paint. This is what I use specifically though, and it is super, super bright and metallic. I love it. And the stencil. These are all from DecoArt, and you can purchase all of them in my Amazon affiliate store. So if you want those, they are all there in an easy-to-find section for you, which is why I love having that store, because anything I talk about, I can just show you guys and put in there. and it makes it super simple for you as well. So those are the 3 products that we are playing with today. And then I haven't picked my paint out. We'll just grab— this is Watermelon Slice, just kind of a bright corally red. Oh, Jean says the internet is nuts today for her too. Yeah, I don't know what's going on. It's been messing up for me everywhere I've been. While I was getting my hair done, I couldn't connect to anything. So really awesome when you, you know, run an online business. Very convenient. Okay, so we've got some of that, and then I'm just going to use my palette knife to scoop some of this gold. You could just pour it too. I don't want, I don't want a ton, just a little dollop of paint there. And we'll go ahead with this since I have it on here. Let's just put a really pretty gold background over here, and then I'll show you. We've got our dry ones that I can show you what to do, and then I'll show you how to do it wet. And it doesn't require a ton of the product either, so a little bit goes a long way. And I don't have any kind of thickener or anything in this. I'm just putting this on as a background. But the possibilities are endless with this if you like abstract or just kind of playing around. That's what I was doing. You can see I didn't like make an actual painting or anything with this, but it's given me lots of ideas. And that's why I love having this pad because I can practice a lot of different stuff and then decide what I want my final piece to look like. All right, see if I can pull you up here and leave it. So we're gonna let that dry, and then I'm gonna put one over top of it with the stencil to show you. So while I'm waiting on that, this is just— I'm just using an angled brush and any, any flat or anything is fine. I just like angled brushes sometimes. They get enough paint, more than a round but less than a big flat, so sometimes I just use those to fill in. So just to see how pretty this starts looking once you start adding the color to it. And you could do this on your paintings like this and fill them in Solid, like meaning the background and the front part. I don't know if you guys can see that enough. I might need to lower you down. Is that better? Can you better see that texture? So I'm just real quickly just going in, and it's getting in all those grooves. Those little bristles on the angled brush kind of help with that too. But you could go around and kind of smooth it out on the edges and either, you know, try to get it like a perfect circle, or you could do some like wavy lines around it, and then even just from there kind of radiate out with color and have the medallion design be the center of your painting. That would look cool in itself, and I'll kind of show you what I mean by that. We can just do it with adding some white to it, and we'll just do shades of this watermelon color that I have. So let's say this is my— this is going to be the center, and then we'll just grab a little bit of white really quick, and I'm just going to start picking up a little bit of my white with that. And this is good practice too if you haven't done this kind of blending before, circular blending. This is a great thing to practice on if you're new to acrylic painting. So I'm just constantly blending. You can see me, I keep going back and forth around that. And you can't really see where one color starts and stops. We can go a little bit darker here, and then it starts kind of fading into more of a pale color as we're going out. So that's just one idea of how you could use that medallion design. Of course, you could do it as a full circle right in the middle of your canvas and go out from there, or you could do it like I have it and have them all over, and they could kind of go out and, and meet each other and kind of meld in the, in the middle. Or you could just leave them as separate shapes on the background. So for this one, I thought it would be neat to just use the metallic gold and see what it looked like if we used a little brush. These are my detail brushes. You can also get these in my store, this set of detail brushes. Um, these are awesome for, for small stuff just like this. And even if it goes off the edges of this raised pattern a little bit, it's still going to look really cool. This is what I wanted to experiment with you guys live, is to see what this would look like with a painted background and then adding the medallion on top of it. So depending on your personality, this could be either really fun to you or feel tedious to you. This is definitely more of a detailed piece, but I think it could look really, really cool when it's done. Can you guys see that okay? I need to check and see if that's showing up okay for you. I feel like it's a little dark. Let me try— I think that's going to help brighten it up for you. But again, I'm not trying to do this perfectly. If you look really close, I'll show you in just a second, I'll lift it up so you can see. This is going over the lines a little bit. And going on to the teal, but it's not affecting the look of the design. It's still gonna look really cool going all the way out. And DecoArt has all kinds of stencils, so this one is in my store, but if you really like the idea of this and want to play with it, I think this would even be cool on a wall or furniture to give it a raised pattern. Don't you guys think that would be neat? So I'm just going to pull the brush around those edges, and you guys know when I paint, I'm not worried about things being perfect. I'm not going to go back and try to fix little edges that may have more than another. This is what makes it unique and what makes it yours. Oops. Alice said, just tuning in, how did you get the rays in the stencil? What did you use, modeling paste? Yes, ma'am, and I am getting ready to show you guys how I do that. So these were done yesterday, and I let them dry so I could show you today how you can paint them once they are dry. You cannot paint the modeling paste while it's wet. It'll just, you know, kind of make a mess. So these were done yesterday and they are dry, so I am painting over top of them today. And I'm not going to finish this whole thing with you guys on here because it will bore you to tears. But can you see how it's starting to come together and how pretty that gold is against the the teal background. I think that's so pretty. So that is super fun to me. And then this one I just did solid And then just decided to add some white to that color and just kind of radiate it out just to kind of see what that would look like. So again, there's tons of ways you can use this. So this is dry. Let me show you how we're gonna do the stencil. So you're just going to lay it down wherever you want. This is my modeling paste. This is DecoArt. You can find it in different brands too. It does not have to be this brand. This is just what I use from the company. And it's the first time I've ever used it, so I didn't know what it was gonna be like. And I was playing with it first when I made this flower. That was the first thing I did. And then I flipped the bottle over to read the back on, like, different ways people used it, and then I read that you could do it with stencils. So I pulled my favorite stencil out, which is this medallion shape here, and and I thought, oh, I'm gonna test it out and see what it does. And then I came back like 30 minutes later and I was so excited and thought it was really neat. So all I'm gonna do is just scrape it over. And you do not have— like, you don't have to be super neat with this either. Like, I wasn't like really, really careful or anything, just kind of spreading it out and scraping it over. So if you guys are watching and it's the first time you've joined me, or maybe you've joined me before and just haven't taken advantage of this yet or didn't have the link to do so, I do have a free video tutorial to my dandelions painting that is available right now, and I'm gonna have that link posted in the comments so you can sign up to get your own free painting tutorial. And this is with acrylic paint, and it also is going to give you a link to join our free Facebook group. And I'm telling you about this because I may or may not be having something fun coming up having to do with that dandelion painting, so you're gonna want to get it. And you're gonna want to paint it. And then there may be something coming soon in the free group having to do with that. Denny said, could you put this stencil back over it and paint it? Let's try. I'm not sure. So that would probably work, or at least be less tedious than doing that. So I'm just gonna Pull it off, and there we go. So obviously this is still wet, but you can see how it looks. And I love the gold background. Isn't that pretty with the metallic gold background? So cool. So let's try Here, we're going to try this. We'll do a little more experimenting over here. So if I was a good art student right now, I would rinse all of this off before it, before it dried on there, but I'm not going to. Now what you could do, and I did this here just to add, like let's say you just wanted some crazy texture in your paintings and you didn't necessarily care about it having a pattern. You could do this on anything like a turtle, a bird, and you just want it to have some cool texture. I'm just flipping over the leftover of my stencil, the messy side. I'm just kind of using up what's on there, and it's just going to give me kind of a rough texture. Maybe you would want that if you were doing like a wall or something like that, anything you want to add texture to. But you can use this however you want. So she had the idea— who was that? Going back up here. Denny. Denny asked if we could just paint over top of this. So we're gonna do a little test and see if we can. Let's try— I grabbed this silver metallic. I'll show you another one of my little things that I do sometimes when I don't want to necessarily put it on a palette. Kind of eyeball how much paint I'm gonna need and just drip it on there. All the Type A's out there are cringing right now. I can't believe she just did that. This is the medium modeling paste, so I'm just gonna go over with this silver. Maybe get a little bit more. Smells like fingernail polish, and I'll show you this bottle in just a second. So I'm gonna spread this out. This is Dazzling Metallics Shimmering Silver that is available from DecoArt. And then I found this this morning and I was like, oh, I didn't even know that was in there. Ultra fine glitter paint, glamour dust. So we've got our metallic gold, we've got our metallic silver. Let's see what this looks like. Maybe we can try it over top of this one. With the shimmer dust and— moving my phone all over the place— so we're gonna try this with the shimmer dust and see if it picks up those edges at all. So if this is like the other kind I've tried before, this should dry clear but leave sparkles behind. So that's what I'm hoping it does. So do you guys like this, kind of seeing me experiment with some products and seeing what they do? Let me know if this is fun, if you guys want me to keep doing this each week, trying out some new stuff. Now I did leave— there was a tiniest bit of silver left in there, so we might see a little bit of that silver tint, but I think this is gonna do what I want it to do. It's not leaving any white behind. It just looks really iridescent, and then that's gonna dry clear and just leave some sparkles behind. All right, I'm getting a lot of hearts, so this is fun. I think it's fun. This is what I want people to get to— get to the point where you just have fun playing. Doesn't have to be anything, just play. So we're gonna let that dry. We're gonna do some drying. I'm gonna come over here and show you how I did my— you like how I can't talk and look for things at the same time? Show you how I did my flowers. And I did— remember that video I shared? It wasn't my video, it was like one of those videos that I share with you guys, and it's always other people doing cool things with art. And one of them had this really thick modeling paste like this, and they were doing those big fat petals. I have to go back and find that video, but I went to Home Depot last week and bought a tub of spackling so I can try to do that and do like a really cool 3D painting, which I'm really excited about because when I was in art school, I loved sculpture. I love reliefs. I love all this kind of stuff. So I'm anxious to play with that and see what it does. So I'm just loading up this modeling paste here, and I'm just gonna start kind of scooting it around. You can decide how thick you want it. So I'm just using my palette knife and pulling down to the point. So maybe this is one of our poppies that hasn't opened yet. And if you've been with me a while, you may notice this is my go-to flower. I love poppies, and I like them because they don't have these big seperate petals like sunflowers do, and they're kind of floppy. So just kind of scoot that out, give it kind of a rough rounded edge here, and just use your bottle and scrape off excess. This to me is really similar to— if any of you are bakers, you know, I used to bake cakes too— this feels like icing to me. So this is like icing a cake, except I get to paint it later. So picture just a bunch of these all together. In a big group or in a vase. That would be really, really pretty. Or maybe you just had just some fun— like if you had a field of flowers and you wanted to add some 3D texture to them. I wish I had my field of poppies down here. I could show you what I mean. And you could just put a little bit of this modeling paste over top of some of your flowers and then come back after it's dry and add some color to it. So these will obviously take quite a bit longer to dry than this other stuff. —so this would be really fun. And I have been wanting to do another chapel, and I always put flowers in front of my chapel, so maybe I'll make some 3D flowers now that I have this. But then, so what I did—so that's showing you how I did it, and then this is kind of like my after. And then I just added some red to it and pulled in—I actually pulled in a little bit of green. This is a little hint for you guys that were asking about color mixing. So I had this green on my palette. It was actually this dark green from yesterday, and when you mix green and red together, you get a neutral. So by mixing green with red, it gave me, it gave me these toned-down colors and more of like a burgundy red. So hint for all of you on color mixing. And do you guys— leave it in the comments just in case I miss the hearts— do you guys want me to do a lesson, a Facebook Live on color mixing and how to do it? Because I love playing with colors and I think that would be fun to show you guys. So that's kind of my after. But so if you can picture like a big group of these with 3D, that would be really fun. And then you can come back once it's dry and I'm just gonna grab a little bit of orange here and we're gonna play with this poppy. These are some fake poppies that I have, but see how big their petals are and they have like these rough edges like that? So just kind of picturing it open kind of like this, okay, and it's kind of like a little bit like that shape. Yes to color mixing, I see. So what I was thinking is it would be fun to just add some of these brighter oranges, give that separation a little bit of those petals. Look how pretty that is immediately just by adding that little bit of color in there. Just kind of smooth it down over the sides. Maybe do like a big bunch of orange right there. And that orange on there, pretty. I love that. I don't know, are you guys close enough to really see this? I feel like I've got you Look at that, so pretty. And then I'll just show you a tiny little bit of color mixing here for you. So I'm just going to take just a dot of my green. See how it starts making it darker? Now this is obviously like a pinky red that I'm using, but see how it makes it more of like a now a mauve type of color? And then I could add a little shadow look with that color on the bottom to give it some darkness but not too dark. And then the bottom of poppies are always pretty dark, so I always like to get a little bit of black. And I haven't rinsed my brush yet, so I just kind of keep moving. I pull a little bit of black, just kind of using the point. Kind of fade it in to that flower a little bit. Maybe a little bit, a little bit more on the bottom where it comes in. What do you guys think? So fun, right? And for those of you that kind of struggle with, you know, like shapes of the flowers, if you get your shapes on with your modeling paste first, I already knew where those edges were gonna be, so I knew that's where I wanted my highlights. I knew that's where I wanted my orange, if that makes sense. Okay, so let's see what I have dry here. Thank you guys, I'm glad you're enjoying this. It's fun. You guys are just getting to see me play, basically. Not really a lesson, but hopefully to get you guys thinking a little more right-brained. Let loose a little bit. Just have fun with it. All right, so I'm gonna wipe off my stencil just a little, just so it doesn't add any more texture. And we're gonna try Denny's idea of using this, and I'm gonna try to match up on here. That's gonna be the challenge, getting it lined up, because it is a little hard to see. Okay, I'm getting there. I think I just about got it. Okay, so this one was already raised underneath, and now I'm just gonna use the stencil again, and we're gonna use her idea. And I've got this really stiff brush I can use, or you can use a sponge. And I'm gonna load some gold on here and do some good old stenciling. I could play with mixed media stuff all day. I could add scrapbook paper underneath here for texture and design, hymnal paper, then do some cute little birds or anything on top of it. I love birds because they can just be so simple and there's so many different ways you can do them. They don't need to be anything intricate. All right, so we're almost done here. We'll see if our experiment works. A little bit more down here. All right, so This was already raised. We already had this texture from our modeling paste, and I let that dry. And instead of hand painting it like we did this one— you guys see, or do I have you too close now? I think I have you too close. So instead of hand doing it like this with a small brush, someone suggested what if we laid the, the stencil back over top of it again and tried it. So I tried to get it lined up as best I could. We stenciled, and there you go. That is really pretty. Now, is it perfect everywhere? No, but pretty dang close. And again, we're not trying to be perfect here. I think it kind of looks cooler for it to fade in and out in some of those areas. But Denny, thank you for that idea. That was awesome. What do you guys think? Pretty cool, all the different ways you can use this. All right, so these are the products I used. We did Dazzling Metallics in Silver, That is this finish. And then of course the metallic gold. Our modeling paste was our medium today that we used. And then we tested out some shimmer, which it's very faint. I'm gonna put a little over here. Let's test this out. I can find a brush that's cleaner for me to spread this out with. This is the shimmer, and again, this just leaves kind of like an iridescent look. So you can see it faintly. See that little bit of glitter it leaves behind? So I believe that's it. Those are the products that I used today. You can find them in my store if you want, or at your local craft store. And then I'll come back in and paint this, this flower once it's dry. And here's just one more thing. Let's say you're doing something like this and now you have all these pieces and you're like, well, I really love this, but what do I do with it now because it's just on a piece of paper? You could cut this medallion out and then use Decoupage or a gel medium and adhere it to another piece of art as a medallion on its own, just like you would scrapbook paper. So these are not just trash. I could cut a shape of a little bird out of this if I wanted to. Remember how I talked about having texture. See, I always think I'm done and then I think of something else to show you guys. So let's just do this really quick. I'm going to show you what I mean. So we've got this cool texture on here, and then I just want to make a quick little bird here. Try to get my angles right. That's not quite the shape. Now it just looks like a piece of paisley, which is fine too. Still something cool you could add to another piece of art. I'm gonna round that edge a little bit more. Trying to find somewhere I don't have wet paint that you can see this contrast. Here, we're gonna flip this up. Can you guys still see? Okay, so I've got this little guy Hold on, it's gonna be loud. Sometimes you have to do that to loosen the jars on this, the lid on the jar. So this is some Decoupage that I'm getting, and I'm just gonna coat the back of my little bird shape. Slap it on here. Could go back over top of it so it gets those edges down really good. I always use my finger when I use Mod Podge because it really helps you make sure it's adhered to the paper. And it gives just a nice little finish on our little bird here. So this, if you guys haven't seen, this is one of my mixed media birds that I did. So we're just gonna do something similar. I pulled out all this scrapbook paper and pieced it together for this one. So for the one I'm doing today, I We've used our textured paper that we've already made, and then let's see, let's give it a silver wing. I'm just going to cut a little bit of this off the corner here. Maybe a little bit smaller. You guys still with me? Is this fun? Oh, that's cute. So she'll get a little silver wing. We'll slap that down right there. So here's my challenge to you guys: get messy, have fun. Oh, look what just happened! And this is one of those happy accidents. I love it. So I was rubbing this on with the decoupage, and look what happened on the raised surface of that pattern. It took the silver off and it made it white, and then it left the background silver. Check it out! That's so cute. So now I'm gonna use— I've already got orange, so I can use orange for my beak. I need a little drop of black here, and I actually want my little itty-bitty fine brush again for this because I want nice skinny legs. Those of you that struggle with the skinny lines, get these itty-bitty detail brushes. You'll love them. Just think of it like you're doing a little triangle. Just a cute little walking bird. Thank you, Karen. Then we're gonna grab— gotta do some little triangle beak here. And you could paint this stuff on, or you could use more paper to cut out little shapes like this. Come in and do our little eye. And then I always like to come around with a little bit of some wispy little lines around my shapes. Just makes them stand out just a little bit. I'm still using this very small detail brush for this. And then I'm going to grab some white. And I'm gonna do the same thing, and then I'm also going to take my white. Now I'm gonna have to create a little world to go around my bird. Can you guys see that okay? It's so small. So think of all the things you could do with this now and add this little world around this bird we just created. So I think I've about used up my— all my examples that I can for this project, but I hope you guys had fun. So we got a little bird out of it that has this really cool texture. Check out this wing that it has. And then we've got all this prettiness on the other page, different ways you can use the medallions. And what the flower looks like once it's dried and you can add paint to it. So hope you guys had tons of fun, and I'll be back next week. I'm gonna play with some new products and see what I can show you guys, and we're gonna try to make Tuesdays like tip of the week. So I'm gonna give you guys some tips each week that you can use in your paintings. So if you haven't grabbed the free tutorial yet, if you haven't gotten the dandelion painting, make sure you grab that. The link is posted. And we're gonna be doing a fun little contest with it inside our free group. So you're gonna get the link to your free painting tutorial and a link to the free Facebook group so you can be a part of that. So make sure you let your friends know and have fun creating, and I can't wait to see what you guys come up with after seeing this. I'll talk to you later. Bye!










