Paint a Patriotic Gnome with Christie
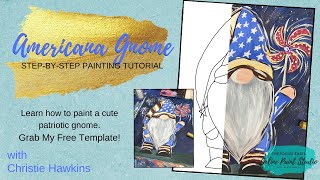
In this live Facebook‑Live (later posted to YouTube) Christie Renee Hawkins of The Social Easel walks viewers through creating a Fourth‑of‑July‑themed Americana gnome. She begins by sketching a rough design, explains how she will later turn the sketch into a PDF template that viewers can opt‑in to receive, and invites audience input on design choices (day vs. night sky, colors, details). Throughout the session she teaches acrylic painting fundamentals: selecting and mixing colors, applying base coats, layering, drying times, and using specific brushes (large flat, rake/wisp brush, liner brush). She highlights the benefits of mixed‑media pads for practice, demonstrates how to blend, add highlights, and incorporate decorative elements like glitter, gold paint pen, and stenciled or freehand stars. Christie also addresses copyright ethics, urging viewers to use Pinterest for inspiration only, not to copy directly, and to give credit when sharing. She promotes her Inner Tribe VIP membership, explains the template opt‑in process, and provides links to her Amazon store for supplies (acrylic paints, mixed‑media pads, transfer paper, rake brush, glitter). Community engagement is emphasized: viewers are encouraged to share their finished gnomes in a free Facebook group, ask questions, and receive feedback. The tutorial concludes with final detailing, sealing advice for outdoor display, and a reminder of upcoming themed live streams for the holiday.
Chapters
Hey guys, it's Christie with The Social Easel, and we are doing a lot of painting this week. So I am doing a stream of 4th of July Facebook Lives with you guys, and we're doing something different each day of the week this week at 11:30 Central Standard Time. So So, um, today we are gonna do an Americana gnome. So, um, I'm super excited about this one, and I added a little bonus for you guys too. We are going to, um, have an opt-in so you guys can sign up to get your own template so you don't have to freehand the gnome. Okay, so can you guys see this? This is my rough sketch. So what I'm doing is, um, sketching it today and then painting with you guys, and then when I get off here, I will trace my design out and make it into a PDF. And then if you sign up to get the gnome template, it will be emailed to you. So I was looking at all kinds, all kinds of different cute American gnomes on Pinterest. And I was teaching this lesson the other day inside my Inner Tribe. And when I talk about— someone asked the other day on my Facebook Live, what is Tribe? The Inner Tribe is my VIP membership group where ladies get to learn to paint with me every single month. And I was doing a lesson with them the other day on creating your own artwork and how to not copy. Because in case you guys don't know this, it is not okay to just steal an image off of Pinterest and then make it your own and then say that you did it. That's taking someone's art. So I was going over with them and showing them how to get inspiration from other people's art on Pinterest, on paper, you know, everywhere. Take inspiration from everywhere. Look at elements that you love of each thing that you're looking at, compile them all in one page, and then make it your own. Do a different background, pick a different pattern, but you're getting inspiration from multiple pieces instead of just taking one image off of Pinterest and copying it. Okay, because we want to give credit to the artists who are doing the work. And if you're doing it for just your personal self and you're not posting it or selling it or whatever, you know, that's one thing. But if you're taking people's images from Pinterest and then using them for business purposes or to make money off of or claiming that you did it, then that's not okay and you will get in trouble. And those businesses can contact you and force you to take it down. So don't do that. Come up with your own, own ideas just to save you from getting into trouble. Okay, so I think I kind of want the arm like this. Maybe just have this one— I don't know, I may have that go down. Bias side. I'm not sure. So I'm sketching this in Sharpie, but because I'm using acrylic paint, I can go over this, so my lines don't have to be exact. When you guys get the template for this though, they will be exact. You're not going to have to sketch this and freehand it. What do you guys think of the design so far? Is he cute? Do a little— I thought a fun little pinwheel would be fun. So there were lots of different styles of you know, gnome hats and everything else. So, and usually when I sketch, it was really hard for me to not do this because I wanted to use this with you guys today, but, um, when I'm like coming up with designs like this, I will like write on my sketch paper. And sometimes I do like little mini ones. I'm just giving you guys a behind the scenes, like how I come up with stuff. Um, and I'll have like little lines, like I would have drawn a line out here and said this is going to be navy blue with stars. This is gonna be, you know, rustic red and white stripes, and then this is gonna be navy blue with stars again. And this is gonna have stripes inside the little rim of the hat there too, just to give you ideas. Okay, so I'm just— I reuse my plates a lot. Did I switch this? I didn't. Hold on, you guys are watching me do this backwards. I'm not left-handed. Hang on, I forgot to switch this over. He will not have eyes. His hat is covering his eyes. It just goes from nose and beard. Anyways, I was talking about, um, I reuse plates. So these— this is all dry, but instead of just getting a new plate, I'm just going to reuse the same one. And I didn't do a background on the painting I did yesterday, but I am going to on this one. But now I'm trying to decide, you know, originally I was thinking I want to do it— you guys help me out here— I was thinking like a sky blue, like daytime. But then as I was doing this pinwheel, I thought it would kind of be fun to do like a night sky and maybe like a couple little fireworks and stars. What do you guys think, daytime or nighttime? Jessica said, I'm so new and can't paint yet without instructions. Can we paint this and share? Yes, any lessons that I do like this on my page, these are for you guys to learn from and paint and share and all the things. It's when you are taking someone's image off of Pinterest that's not yours and it wasn't a lesson being taught that is taking someone's art. Does that make sense? So anything I do on my Facebook pages, you guys can, and you can, you know, it's— I think it's nice to give credit to the artist. You can say I learned this from the Social Easel, but you're not required to because it's free information that I give out there. Can we paint this and share with others, not for money, but give credit that the template— yes, and they can get the template from me as well. Absolutely show people what you're learning. So I hope that answered your questions. Anything I share on my Facebook page, you are allowed to share with others and paint and all the things. That's my goal, is to help you guys that are new to painting and haven't done it before. I want you to get comfortable with it, and I want you to learn the techniques and practice. And yeah, if you would tell them where you learned from, then that would just be awesome. But you are certainly not required to. Um, Anita asked, when does the Inner Tribe open back up again? It will not open again until September. Okay, so let's do that kind of— I put a bunch of white paint on there because I was thinking I was gonna do a sky, daytime sky color, and then I changed my mind. So I'm gonna use a dark blue here. This is Ultra Blue Deep. Okay, so I'm gonna do that blue, and then I'm gonna move my plate. I'm just putting paint on it. You don't need to see the gnome right now. I'm showing you what paint I'm using. So I'm getting some black and some dark blue. So we can have a night sky here. And I want it to have enough contrast that when I put the blue inside my gnome hat, that it has enough of a difference there. So this is— by combining these two, you get like a really dark, like navy-like color. And I'm doing this in my mixed media pad, so if you don't have one of those, the link to that is in the message we send you, and you'll get a link to my Amazon store where all my supplies are. You will get the link to sign up for your gnome template. This is one of my older pads. I was going back and trying to use up all my spare pages, but I love mixed media pads because when I'm done with this, if I love it, then I can take this out. It's got perforated edges here, and then I can frame it and I can put up my little gnome every Fourth of July. And when this is over, like if you join later, you want to come back to this video later, all you have to do is go to my Facebook page and go to the videos tab. Sometimes I can't remember if, depending on the device you're on, sometimes it says videos or sometimes it says photos, but the videos are also there. And I have playlists, all kinds of goodies for you guys to learn from. How many of you watching today are new to the Social Easel, or maybe new to painting? Let me know what, what experience you've got. So I'm just loading up my brush with plenty of paint here. I still haven't decided how I want this arm to look over here. So again, this is— I kind of sketched this yesterday, and then I'm kind of just coming up with the ideas and creating with you guys as we go. So you'll kind of get some— get to give me some of your opinions as we're going, what you think I should do. Maybe when we get to like his outfit and stuff. I haven't figured all of that out yet. And you can use— I'm sticking with my big brush right now just because it's a little faster, but if that's too hard for you to get in those little spots, this will be part of the template too. I'll draw that pinwheel on there for you because they can be a little wonky sometimes. You can switch to a smaller brush if that makes you feel more comfortable going in these lines, and I may have to here shortly. We'll see how close I can get. And you— I don't know if you can see from your view, but like, uh, blues in general are sometimes streaky. So you may see a little bit of like brush strokes showing through, um, and like streaks and a little bit of like it's whiter in some areas. I'm not gonna mess with that now. I want to go ahead and get a base coat on When you're working with acrylic paint, you always want to let your layers dry before you load up with more paint to get better coverage. So if I was to just keep putting more and more paint on here right now while it's still wet, it would just like clump up and not cover any better for me. It basically is just going to like move the paint around. So I'm going to let this dry. Before adding more on. And because I'm in a mixed media pad, it will actually dry pretty fast. So like, this is already dry up here. Can you see the difference of how much better that coverage is with the second coat? I'm gonna pick up a little bit more blue in some areas. And it doesn't all need to be one color. I'm even gonna pick up a little bit of white with my blue, change it up a little. Have some areas where it's a little lighter, a little darker. Hopefully you can see that. It's always kind of hard with dark colors. Can you guys see how adding a little bit of white to that changes it? Um, Diana said, did you add water to— no, I never add water to my paint unless I'm wanting it to have like a watercolor type of, um, feel to it. So I have some videos where I do that on purpose and I treat acrylic paint like watercolor, but if I'm just painting acrylics, then I do not add water to it. So again, I'm able to go over this now just because it's dried. I'm gonna switch to a little bit smaller brush so I can get in here a little easier. Once we get the background done, then we get to move on to the fun part, filling in our little buddy here. And I am purposely kind of angling out from this pinwheel because it's going to kind of give it some motion in the background. See how it's kind of spinning? Those brush strokes are kind of spinning out here, like we've got a little movement, and you can kind of see the wind blowing through it. Kind of Van Gogh-y up here. Hopefully when this is drier, you guys will better be able to see that. Can you see that okay? Yes, Teresa said it's just paint, and if you mess up, you can let it dry and paint right over top of it, which is why I love acrylics. And if you just really, really don't like something and you've done it in your mixed media pad, just take that piece of paper out and throw it away. But I would highly, highly recommend everyone who is beginning to paint, and even if you're not just a beginner, if you— I did not know about a mixed media pad until a few years ago, and I wished I had known about it much, much sooner because it is like a sketch pad for painters because it can handle paint and drawing and sketching, like all the things. And you don't feel like— number one, if you don't have a lot of space, you're not filling up your house with canvases, which you should see my basement and how many I have. Now they're just all in this little book here. I'm not going to try to show you that one because it's wet. So see, I just— I practice in here. I come up with little thumbnail ideas. And it's just one big book of painting. And then you don't feel like— there's something about painting on canvas that can be intimidating. And so painting in a mixed media pad is not nearly as intimidating as painting on canvas. So it's okay to make mistakes. You learn by making mistakes. Diane says yes, get the mixed media pad, best thing to do. I agree. Yeah, it's a game changer for being creative because there is like a mind block. It's like writer's block, you know, for authors. Sometimes that's how we feel when we stare at a canvas. But if we're just doodling and sketching, then it doesn't feel as serious, right? Let's make sure I rinsed this enough. I'm gonna go ahead and start with his beard and get one coat on there. Sorry, I'm looking for my silver or gray. I'm gonna add silver into his beard. So we're just going to get a little bit of silver next to our white, mostly white, just a touch of silver. You guys see how much paint I have on there? How many of you have friends or family you're getting together with for this Fourth of July. Maybe you guys have time to do a fun craft before it's time to do fireworks. This would be something fun you guys could do, or you might want to do the mason jar flowers from yesterday. We'll have lots of options for you, but this would be a fun one to do as a family and everyone make their gnome completely different. You guys all have— we'll have a template that you can trace onto your paper or your canvas, whatever you decide to paint on. This is an 11 by 14, by the way. I didn't mention that size earlier, so this template would fit on 11 by 14 canvas. I did a St. Patty's Day gnome and he had an orange beard. He was so cute. What's the next gnome I should do? Once you guys paint these from any of the Facebook Lives this week, in the free Facebook group that we have here, we are making posts for you to share your artwork, and so many people already posted yesterday their mason jars, and they turned out awesome. I love seeing those, so please share them in the free group so we can see what you're working on. Now I'm grabbing just a touch of black here. This looks like a lot right now, right? But I'm gonna blend it in. When you're blending, make sure that both your colors, the you're blending together are all wet. This won't work if you let your paint dry. I like it to be a little bit darker under his nose. Andy says, I've never done a transfer before, what supplies do I need? Um, you just need a printer to print the paper off, and then you buy this transfer paper. It's called carbon paper or transfer paper. Mine is in a roll because, um, of when I taught paint nights. This was more cost effective for me to buy a big roll of it for all the canvases I had to do, but you can also get it in sheets. Also in my Amazon store. All right, so I'm digging, digging the beard. So once it's dry— can you guys see this? So again, this dries quickly because I'm in my mixed media pad. Once it's dry, you can add some streaks back in if you don't want it overly blended. I kind of like my brush strokes to show through a little bit more. Okay, what do I want to do next? I think I'm gonna save the nose for after. Ooh, Marty, that's a good idea. She said I use my rake brush for the gnomes. I have to try it now. So if you guys don't know— thank you for sharing that— if you don't know what a rake brush is, let me show you. Also in my store, um, so you don't have to go searching for them. This is a rake brush. Some companies call it a wisp. But see how those bristles are separated? So if you want brush strokes and added texture, this would be super cool. So I'm going to try it. Let's get a little bit of white paint on here. So this is what it looks like with the paint in it. Add some little wispies here. So if you're scared of the fan brush, which I don't blame you if you are, this is a fantastic alternative to it and much more user-friendly. What do you guys think of the addition of that? That's pretty cute. Yes, the rake brush is a game changer for any grass, plants, beards, hair, all that kind of stuff. It makes it so much easier. Easier to paint. Okay, so I want some red, obviously, but very rarely do I use paint straight out of the bottle. I usually alter the color just a little bit, which I'm going to do with a little bit of black here. I want to tone it down a I like more of like rustic Americana than like neon bright red. It's just my preference. Okay, where do I— now I'm trying to decide. Okay, so this is gonna be a dark blue, and then either the bigger section or the smaller section of the hat is gonna be red. I guess it would make sense— red, white, and blue. I'll do red, white, and blue, right? That would make sense, Christie Renee Hawkins. So I added some black to my red. That was Cherry Red by DecoArt, and I'm just using a round brush now. And generally reds are going to take a second coat also. You might be able to get away with it with this one because I added some black to it. It's going to tone it, tone it down. It doesn't— I'm not seeing the streaks as bad. But you may want to go back and add a second coat. Okay, I'm just mixing up a little bit more, and again, I'm mixing this on my palette as I go. It's not necessarily going to be that exact color, which I am going to need a second coat of. Now I can see that once it dries, you'll be able to tell. Maybe a touch more red in there. And then I'm gonna go in and do my stripes over here while I'm already in this paint color. Okay, enough talking. Let me jump back over here. These are gonna be my stripes in the hat. I just love this little stocking cap. Apparently our gnome is not in the South, because he would be dying if he wore a hat like this. Mm-hmm. I'm sorry, I'm trying to decide what colors I want to do down here while I have this paint in my brush. We're gonna go ahead and do some in the pinwheel. Maybe make this one brighter red. Now you can see I'm being a little bit messy here. I'm not worried about getting those lines exact because I can come back with my liner brush later and fix those edges. Trust the process— it's one of my favorite sayings when it comes to painting. Keep moving along. You can come back and do— I really recommend this too if you have a tendency to be like a perfectionist, a little OCD, when you're painting, instead of getting stuck on the details as you're going along, which can really hold you up and get you stuck in one area of your painting, which can lead to frustration, get your base coats down. Save your detailing for the end of the painting. Because a lot of the things that you're like super worried about right now, you're not gonna notice when you get to the end. So I just want to kind of fill this in for now, and then I'll come back and make that nicer and neater later. Would his twirly work if you put glitter on it? Yes. I'm loving your guys's ideas. Okay, glitter. White polka dots. We're gonna have to add some gold to it. Okay, what I was thinking originally, I kind of wanted to add these little— I'm gonna need a smaller brush. I wanted to add these little stripes in his leggings down here. And I'm not trying to make these lines super straight or anything. I don't know if they'll go up this high or if I'll have his, like, long shirt come down. He's kind of like an '80s— these look like '80s leggings or something right now. So let me get— yesterday I used like a light buttermilk color, and I don't want this like super, super bright, so I'm gonna get— it's basically like a vanilla, like an off-white. This one is Light Buttermilk by DecoArt. I'm gonna switch brushes again. Have I showed you guys how to make sure you don't end up with paint from a previous color going into your new color? So obviously my paint water is going to be dirty, right? But you want to squeeze your brushes like this. You're going to reshape them, but make sure you squeeze your brushes if you're going from like a red to to a white because it'll get all that paint and water out of this section where it goes into the paintbrush so it doesn't leak. You're not start painting white and then it starts leaking red into your paint color. So we're using this light buttermilk instead of white. Oh, Beth, I have most definitely ruined some paintings by putting my arm on my painting when I don't mean to. So again, I'm not worrying too much about getting my lines perfect right now because when we come back and add our accent lines on at the end, they're gonna cover this. Ever have a hard time talking and painting at the same time? It's very hard to concentrate. Which is why I'm all over the place with you guys. Make sure you guys have sprinkled this with your friends so they can get the free template and video. Spread the love for Fourth of July. That got a little bit of red in it, but that's okay. Maybe I'll make his— I was originally thinking navy for this, but since I made the sky so dark. I think I might make it a little bit brighter. We're gonna try this. We're gonna try a new color, but here's the thing: if I don't like this, I can just go back and paint over top of it. So this is what I want you guys to get comfortable with— trying things and not necessarily having a plan or an exact color for it. You can just kind of play with it and See what you think. That's too close to the sky, so let's pick up a little bit more blue. Maybe, maybe I'll do blue with a little bit of white in it. Yes, Mary, I want to do fireworks in the sky. That was why I decided to— that's why I decided to do a dark sky, because I thought it would be super cute to do some fireworks. What do you guys think of this color? I think I'm gonna brighten it up even a little bit more. I'm thinking I like this color. Yeah, I had a little bit of black still in that. This is more of just cobalt blue with some white pulled into it, and I think I like this color. So that helps me decide what— I couldn't decide what color I wanted to do the close. I'm gonna come back and brighten this up once that's dry, but I'm liking this blue color, so I think I'm gonna stick with this. I could always get crazy and add some stripes or polka dots to this too. Yes, stars are gonna be up here in the hat, but I may add them to the sleeves and shirt too. And I'm not worried about overlapping my beard. I can come back and pull that color over later. You know what, this— I don't like that. I'm gonna have his hand just kind of come over here, I think. Instead. He kind of looks like he's wearing pajamas right now. All right, let's give him his black shoes. He does look like he's wearing pajamas. Should I change it? Maybe I should make his beard bigger, come down more. I can't tell if it's the shirt that I don't like. Maybe it's the hat. It's like a night hat, you know, like the olden days night hat that people used to wear. What do you guys think? I don't know. I'm gonna get some gold here. And I just realized I forgot to fill in the sky color down here, so let's do this really quick. And it may come together as I start adding to it. But this is what I mean, like, you guys were gonna get to kind of be with me in the process of figuring this out. Ground underneath them. He kind of reminds me a little bit of my FolkArt Santa that I did in my group. Maybe it's just the navy background. I keep dragging my black into my green. We'll come back and shape up those shoes a little bit. Also. Beth, this is Hauser Dark Green, and then I mixed it with a little bit of the cream. Okay, I'm gonna get a little bit of a peachy color for a skin. Oh good, I'm glad you guys like the lives. I gave him a little bit of a rosy nose here. He's getting there. So I added a little bit of white to this peach just because white helps with covering a little bit more. So if you're covering a darker color, like I was painting over top of the blue, so adding a little bit of white to too, that helps. Um, it is Sunkissed Peach. This is an Apple Barrel one mixed with a little bit of white. He's getting cuter, cuter and cuter. Yeah, that arm may actually— it's kind of coming in at a weird angle now that you mentioned that. This one. I think that angle is better on the arm. What do you guys think? If you don't have Peach, what would you mix with it to get a skin tone? So you could do orange and white. And then just a little bit— a tiny red is powerful— a tiny bit of red to kind of get that peachier tone instead of just like a light orange. Or if you have a coral paint, this is ideal. Just a coral, a drop of it with a bunch of white gives you a really good skin tone. I think I'm going to leave the stripes on the leggings. I think he's cute. We are going to come back and pull this beard out a little bit more. And I can come back with my rake brush again if I want to get some of those brush strokes going. Or what do you guys think? Debbie said, what kind of paint would you use to do this as a welcome sign to display outdoors? Is it just like hanging on your house? You can just use this and then seal it with an acrylic sealer to protect it. Or you can find outdoor paint, but the colors are going to be a lot more limited. Any acrylic sealer. And then, like, DecoArt has varnish that you can— it just, honestly, so many different things work. The simplest thing to do is just to get an acrylic sealer, and you can get that from any craft store, Walmart, anything like that. I think I'm going to add a little bit of white to this red. And I apologize if you guys are commenting right now. I'm not looking. I'll look back up in just a second once I kind of get this going. I like the lighter color in the pinwheel. What do you guys think? All right, so we need— I need to do another coat on this skin tone here. So, you know, these kind of paintings, they're a little more detail-oriented, so you come back and do a lot more touch-ups than some of my more freestyle abstract paintings, but I enjoy doing both. They're just a little bit different. Okay, so we're gonna add some polka dots in our windmill— windmill, it's not a windmill, y'all, pinwheel. So I just flip a brush over. Add these in, and it's gonna have a center too. I think I'm gonna do a gold or maybe a navy center. I'm not sure yet. Then it definitely needs some little white accents. I'm starting to like it. Yes, I'm gonna do fireworks also. I'm just trying to look at all the detailing on here and figuring out what I want to add to it. Give him a little star at the end of his hat. Trying to decide where I want some gold accents at. Maybe just there. I like the little gold accents. You guys like the gold on there? One more stripe on the hat. Are you guys talking about over here? We could add another one. I'm just filling this in because I can see that it actually needs a second coat that I never went back to do. And that is my DecoArt Color Gold paint pen, one of my favorite products, also in my Amazon store. Let's add another one here. You think— see what I mean, how you can just change your mind in a painting? I agree with you guys. I think it needed One more. I like it. Good idea. I'm looking through my stencils really quick. I don't know if any of these stars would fit with this. Or if I want to just do like freehand ones. Yeah, I'm trying to— Terry, I can't decide if I want to do freehand little stars or the stencil. I think I'm going to try freehand with a little itty-bitty liner brush. Yeah, I'm thinking freehand too. I think that looks cute. Even— and I'm gonna show you guys up close— these are not perfect little stars, but they kind of give the idea, right? They're not perfect. They're not anything special. Yes, I think freehand gives it a more rustic look too. Let's start at the top. See, I've got this really wet spot in the middle of that pinwheel. I'm gonna have to be careful to avoid I don't like this brush. That was not one of my better ones. I like my liner brush. Are we liking the stars? This one's kind of squatty. Those two are a little close together. I kind of like how they're just— I don't want it to have a super obvious pattern, so we'll just say it's okay that some are closer together and some are not. That's what makes it rustic, right? And okay for the stars to be a little wonky. It definitely adds a pop. I love Fourth of July because of all the patterns you can use— polka dots and stars and stripes and It's so fun. All right, so I'm going to do some quick white outlines and then probably come back with some black too. And I like to use the white just kind of all over. I just think it adds to the cuteness of the painting. I love the white around it. That's true, Jessie. She said it's a fabric hat, so the stars are random. Do you guys think the white makes everything pop a little? I love it, especially against the dark background. Okay, I'm gonna add some A little bit of white stars up here, and then we'll maybe do a couple fireworks. Sorry, that cut that off a little. All I'm doing is just a little dabbing. I'm trying to decide, what do you guys think? What did someone say? Sandra said, is that red above his nose, is that part of his beard, or should it be white or gray? No, that's part of his hat. That's like his hat draping over his nose. Should I do the gold paint pen for fireworks, or should I paint the fireworks? And should they be a color, or should they be white? Lots of choices for you guys. I'll let you comment on that while I'm doing my black outlines. Oh yeah, I forgot about the glitter. Maybe gold and glitter. When you're using a liner brush, you're just barely putting any pressure on there. I think the black helps a lot too. White and gold fireworks. Gold and glitter. I can't decide. I think it will be cool to just add just a little bit of glitter back here, only at the top where the fireworks are gonna be. The glitter kind of looks like stars too. Maybe just kind of fade it and let it come down just a little bit, not too heavy down below. Just kind of what I'm thinking. This is called Craft Twinkles Brush-On Glitter, and I love it. I'm gonna try a couple little fireworks over here. Yes, that is a DecoArt brand. What do you guys think? I'm doing a big no-no now and putting this on wet paint because I'm being impatient. A little gold, a little white, a little glitter. I always have to touch up with my gold at the end. So I hope you guys had fun. So I think that's it. So happy early Fourth of July, and I'll see you guys tomorrow. Bye!










