Paint a Spring Path with me tonight!
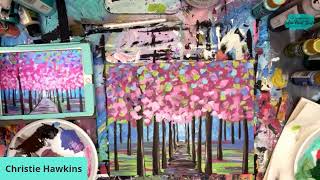
Christie Renee Hawkins paints a spring landscape live, showing her "Art of Not Blending" technique and flipped-canvas method for trees. She answers chat questions about colors and brushwork while explaining her Inner Tribe membership options: monthly subscription, Painting of the Month Club, or single tutorials.
Chapters
Hello everyone, we are going to be painting the Spring Path tonight. This is, um, one of my paintings from a few years ago, and I did Autumn Road back in September, and this is kind of like the spring version of that. So we're going to use some fun spring colors that I'm going to show you here in just a minute. And then I'll kind of go over what brushes I'm using and what canvas I'm using. And then my community manager Megan is here in the comments to help me with any questions that come across the screen as well. So for this one, I'm going to show you on my iPad what the older version look like. Try to get that to where you don't see a glare. So this was the original Spring Path, but I think I want to just change the colors a little bit, so we'll see. I'm just going to see what happens tonight. Rhonda says she's so excited. Hey Linda! Hello Mary and Susan. And Rita. So if y'all have friends who love to paint too, go ahead and be sure to share this video with your friends. Let them know that we're painting tonight. And yes, you guys can always go back and watch the replays, so they will be there for you anytime you come back to the Social Easel page or our YouTube channel. So I'm just going to show you some of the colors that we're going to use tonight, and I may change my mind throughout, but I've got Caribbean. This is just an Apple Barrel one. Again, I use all different craft paint. You don't have to stick with a certain brand. I've got white for my DecoArt. We'll use some burnt umber for our trees. And then Apple Tart. This is like a pretty lime green. And I'm trying to decide if I want to use a different— I might use this light, um, Hauser Light Green as well. And then we've got a Bright Magenta, which is just any hot pink. And then Purple Rain. And this one is Light Orchid. I haven't decided if I'm using this one or not yet. I just kind of have them sitting out here. And we're going to be doing some color mixing with this like I always do, because I love to mix my own colors. Um, but this is a really fun one that, again, you don't have to have any experience for this. It's completely different than the one that we did last night, which was a mixed media piece with, um, our little bird. And I'm going to use 3 brushes for this painting. Let me rinse these really quick, and I'm going to lay them out here for you. And while I'm painting and prepping, if you guys have any questions about my Inner Tribe membership, be sure to ask those while we're painting. Doors close tomorrow at midnight. I'm pretty sure in last night's Facebook Live I said Wednesday, and that was incorrect. We closed doors tomorrow at midnight. So it's, um, your last chance to join up and become a part of our tribe, and we do not open doors to new members again until the fall. So I'm getting, um, a large flat. I've got an angled brush, and I'm going to be teaching you a technique in this one called the Art of Not Blending. You may have read my blog post about it, um, and then we're going to do just a basic round. So we're going to use 3 brushes for this composition. I'm doing an 11 by 14 canvas board, and you can do this on a 16 by 20 as well. So the ratio of a 16 by 20 and 11 by 14 are the same, so it doesn't matter which size you do it on. Of course, you can do this on any size canvas that you want. You can do it on square or a circle or whatever your heart desires. Um, yes, we are live now. Awesome. Joni says she's brand new to the Tribe Sisters and she's so excited. Welcome! We are so excited to have you. We have welcomed over 600 women into the group so far, and we are just so excited. And they're all jumping into the group and jumping right into things, so we're super, super excited. And again, if you have any questions about that, just ask us. While I'm teaching. But really quickly, I'm going to give you an overview of what my tribe is. So my tribe is my VIP membership, and you get 3 paintings per month with me, and then you have a guest artist, speaker, or business coach each month. So that is your monthly content. It all happens inside our Facebook group where we have our amazing community of women. And then in addition to that, You get immediate access because we're celebrating our third anniversary this year, our third birthday, whatever you want to call it. And you have 3 years worth of content in our membership hub. So when you log in to our website, we have a website, we have Facebook group. When you log into the website, you have over 85 tutorials to choose from. So this is your last chance to get in. We close doors tomorrow at midnight. So if that sounds like something you want to be a part of, make sure you grab that link. It's posted in the description up above, and then Megan can post it again for you. While she's doing that, I am looking for a certain blue. This one's pretty. This is different than what I did in the original, but I think I'm going to use this one tonight. I want a little bit of different blue in my sky colors. Awesome. Welcome. Susan is new to Tribe. I'm just shaking this up a little. And just a tip, so you guys know, whenever you get craft paint, sometimes if it's been sitting on the shelf too long at the store or at your home, um, it can separate a little bit. So you just got to give it a good shake. To get those colors ready. Thank you so much, Liz. Okay, let's see if I got it good enough. And I don't think I'm going to grab too much here, so I'm going to— let me change the settings on my iPad because it keeps going dark. I'm gonna kind of leave this down here as reference so you can see what I'm basing the painting off of tonight. And hopefully you don't have too much of a glare. I can mess with the lights if it's if it's a little much.
Christie, Tammy said it's her first Tribe anniversary.
Oh, awesome! Congratulations, Tammy! One year as a Tribe sister. I love that. Okay, how's that view look to everyone? I think we're pretty good. So again, I'm just picking some different colors than what I used in the original just to change it up. I don't always like painting things exactly the same. So this one, um, that blue was called Blue Harbor from DecoArt. This is Caribbean. And the first thing we're going to do in the painting is the background in the sky, and we're using these 3 colors. And every painting I teach is different. So sometimes people say, well, how do you know where to start? And like, do you start at the top? You start at the bottom. It is different depending on the painting you're doing. For this particular painting, you can see that this blue sky back here, that has to be the first thing done because it's behind everything else. So that's what we're going to do first. And this is one of those really fun paintings to kind of see come to life, because as you go through each step, you're thinking, what in the world is she doing? And then it all comes together at the end. So it's super fun. We're going to do like a little strip right here of where we want our sky. So I'm just looking at this and just deciding how much foreground I want, and then how much sky I want, and then how much of the trees. I want. So I'm going to start with a little bit of both. Again, I love to mix my colors. I like to get both on there at the same time. I'm using my angled brush and I'm gonna come— and I can always change my mind if I want to, but I think I'm gonna say this is our horizon line, just about. And then about right there. It's going to be where we put our sky. Um, Jean is asking, how do I get the picture to stay in place on my iPad? Um, I do that— I just pulled it up in my photos. So this is just a saved photo that I have, so it just stays there. And then I turned the display off so that it doesn't go black on me. You can just change that in your settings. So what we're going to do is we're going to start out with a combination of these darker colors. And I'm going to show you, I'm going to separate these brushstrokes a little bit so you can better see what I'm doing. This is what I call the art of not blending. You're making these angled brushstrokes like this. I'm only showing you this to show you kind of what the brushstrokes are that I'm doing. But we're overlapping and we're making them crazy. And but what I'm not doing is this, just this constant staying connected, okay? Because all that does is blend it into one color. So we want to have some areas where you see a little bit more of the blue, a little bit more of the turquoise, and we're just overlapping those brush strokes. But you see how I keep picking up and touching down? I am not staying connected to the canvas. And I want it darker on these outer corners and then lighter in the middle, because that's where the light from our path is coming from. And then I'm going to start picking up a little bit of white. It's going to get a little bit lighter.
Christie Renee Hawkins into it.
She's liking those colors. They're very calm, relaxing colors. And then you can pull a little bit of white out here and there, but we kind of just want our focal point to stay here in the center. And I don't want this— so like I drew those lines on there, that was just to give myself a guideline. When you're painting this at home, I don't want you to make that one straight line. Because that will show through a little bit when you get to your trees. So if you keep all your brushstrokes messy on those edges like I have here, then that's not going to happen, and you're not going to fight that, um, covering that quite as much.
Steph says, like in the lovebirds, I think, or, uh, the birds painting you did last year.
Oh yeah, the abstract birds.
That's probably—
yes, yes, very similar to that. These are just fun backgrounds to do. I'm going to get a little bit more of— I think I might try some of this Bahama Blue. I want a little bit brighter teal in there just for some more contrast. All these colors are pretty. Can you guys see the difference? That shows up a little bit more, and you can be as thick as you want with this. So I'm not really pushing in to my canvas too much. I've got a lot of paint on there. And leaving it a little bit thick, it will absorb in. But you really just— the main thing I want you to focus on is not staying connected to your canvas and just continually blending, because you won't have that same look. So I'm going to hold that up just to let you guys see that texture and those brushstrokes a little bit closer. And then the next thing we're going to do is the grass. So I'm going to grab some of that lime green color, and I'm leaving the blue in my brush because I want it to mix with the green that I'm getting ready to add.
Christie Renee Hawkins, um, Gina was wondering, do you only paint with craft paints?
Um, not all the time. Most of the time I do, but I do also use some artist-grade academic level paints inside my Tribe membership. So this is an Apple Tart color from Michaels. So I'm just going to grab a little bit of this. I've still got the blue in my brush. I think I might pull some of that Caribbean and white over there, just kind of play with these colors. And I want to go ahead and start my grass down below. So first, just to get a smooth horizon line here, I'm going to take this and just pull it all the way across. And I'm still using the same brush. You know, I said in the beginning you need a large flat, but this, for an 11 by 14, I think I may be fine. With, um, just my angled brush. And that's what I want people to realize— you can interchange a lot of brushes out. They don't always have to be exactly what I use. Can you guys see how that blue in there kind of tones it down in the back, creating more of like a shadow in the back part of the grass right there? And then I'm going to go ahead For this one, we can draw our, our path on here, but I am going to kind of make the lines messy again, similar to what I did there. So this is kind of like our center. I'm going to take this and I'm going to kind of curve it out a little bit. And then again, we want— when we're adding the perspective into the painting, we want our path to be smaller back here at the horizon line. So it's going to be smaller there. And then bigger in the front.
Hey, Christie, um, Jackie was wondering if— she said, could this be easily done in a mixed media tablet?
Yes, always. Actually, any of my paintings can be. I think it's a great place to start. We have some women say, well, what do I do if I don't have space to hang all these paintings? You can paint them all in your mixed media pad, and it kind of just becomes like an art journal for you. And when you're doing this green, you will probably notice when you get to this point, um, that you are going to need a second coat. So if you're new to painting with acrylics, you do not want to really keep loading the paint on to the canvas. So you're going to notice it's going to, it's going to be thin. You're going to notice brushstrokes in there. I want you to leave it, and I want you to let it dry and not mess with it. Once it's dry, we can come back and add a second coat, and then it will cover those streaks up and you won't see them anymore. And I'm going to pull just a little bit of white in down below. And when you do your second coat, you don't always have to do it everywhere either. You'll, you'll see that some of the coverage is more in some places than others. But we want to create kind of the further away we are, it's a little darker back there. And then of course we'll have the light kind of shining in on the path through the trees here. I'm going to go ahead and grab a little bit of my burnt umber. This is going to be what I use for my path and my trees, but I don't want it to be that dark for my path. So I'm going to take this again— I haven't rinsed my brush yet— we're just going to mix that with what colors we have in there. See, it's already making a nice soft brown. I can lighten that up even a little bit more by pulling some white into it. And then I'm going to start here. So I'm not pushing down hard, and I'm just kind of dragging this. This time I am staying connected to the canvas. So we don't want that to be too definite of a line there. I want this to be a little softer, kind of like off the beaten path, not like in the middle of a park, maybe, you know, where it's a little more natural and we don't have the lines around the edges like I did in my original. I think I want this to be a little bit softer today.
Christie, I think we have someone new who is wondering, do you mind just sharing what is a mixed media pad?
Sure. So a mixed media pad, I'll show you mine here. This is the one I have. This is an 11 by 14, and I'll just kind of show you some of— this is one of the paintings inside my tribe. So this is a full painting. I did it in my mixed media pad. So if I wanted to, I could take this out and frame it, but it's also just a place where I can practice brush strokes and practice, you know, ideas that I come up with. So think of it like an art journal or like a big sketch pad for painting. Here's what we did last night. Um, so that is what a mixed media pad is, and it can handle acrylic paint, watercolor, um, pen, markers, all that stuff, which is why it's called a mixed media pad, because it can have— handle several different mediums. Okay, so we want this part to dry, so I want to move up to the trees, but But here I have a question for you. I need your opinion tonight. This is the original, and you can kind of see like my base coat was kind of like this hot pink. Do I want to do that, or do I want to put a little green underneath it first and then some of the spring colors? Give me your opinion while I grab a drink of water. Carol said mixed media pads are great. Um, oh, the comments are moving too fast. I'm trying to show that one. Um, Joni said, I love my mixed media pad. They're awesome. I highly, highly recommend. It's one of the first things I tell you to get if you become a Tribe sister and join the membership. Is to get one of those, because it takes the pressure off. You don't feel like you have to, like, make a piece of art, so to say, because you're not painting on canvas. You just allow yourself the freedom to make mistakes. That's how you grow. That's how you get better. And if you paint something in that mixed media pad and you hate it, then rip it out, throw it away. You know, it's just a piece of paper, and you haven't committed to anything.
It looks like green's winning, I think.
Is it? Okay, I'm trying to scroll. Yeah, Kelly said if you add green, it'd look like the Ozarks do now. Pink dogwoods, white dogwoods, red buds. I know Missouri is so pretty right now. I like— this is my favorite time of year when everything starts blooming.
Some people are saying pink looks like cherry blossoms.
All right, we're going to try something different. And here's the thing, and this is what I want you to realize. If I do green on here and then add pink over top of it and I hate it and I think it looks ugly, I can fix it. So that's what I want you to realize with acrylic paint is it's super forgiving. You are not stuck. You are not committed to whatever is on your canvas. You can always come back. And change it. So I'm going to go ahead and grab some of the hot pink. And here's just another little tip for you. Um, hold on, this is— this is gonna let me—
okay.
So I talk a lot about the color wheel and knowing your colors and knowing your opposites and all that kind of stuff. So with the green and the red— sorry, the pink. They're opposites on the color wheel, especially this brighter version of green. This would be the same as like Christmas green and, you know, Santa Claus red. This is like a different kind of color combination, but similar thing, because I want to show you what happens if we mix these two together. Let's come over here, take some of my pink. And some of my green, and it tones it down. So it gives you more of like a neutral. So we can play with that. It can be to our benefit. Sometimes when you're playing with opposites on the color wheel, they complement each other, but you can also use them to tone them down. If my pink is too bright, I could pull in just a little bit of the green and see how it just kind of gives me now more of like a rosy color, more of like a— maybe even like a mauve. And that is just using the opposite on the color wheel. So we can do several different colors mixed in, and it might turn out really, really cool. So I'm going to wipe that color off. That is a really pretty color though. This is why I want you guys to play with color mixing.
Jill says, that's what I love about this class. We step out of the box and run with it.
Absolutely. So we're gonna start with green. And again, I want these same brushstrokes. We're repeating the same brushstrokes we did in the sky. Our ground is blending, our sky is not blending, and our trees are not blending. And again, I'm even going to pull some of this blue in because all that's going to do is add depth to the trees by pulling in some of those darker underneath tones that are going to be, you know, underneath the shadows of the tree. And I just want a nice rough edge. I don't want a perfect line.
Okay, Christie, I've got an important question. All right, do you cover your table or is that table art?
This is table art. I can't imagine what it's going to look like in a few years because This is 3 years in, and it's— there's some thick paint on here too. It started off white, and then I just decided I wanted it to just be fun. And sometimes I even get bored and just paint over it all over again and then have the messiness on top of it. It's kind of like that freedom, like it's my studio and it's my little corner, and it's my one place in the house I can be messy and literally do whatever I want to, and no one can tell me no. Nobody else has to like it.
Um, and Leanne's wondering, when do you decide to use canvas or canvas boards?
Um, I decided to use canvas board tonight because I don't plan on hanging this up in my house. I'm using it to teach you guys on, so it's easier to store. Um, so that's why tonight I'm using it. Some— like, I like using canvas board for mixed media projects. Um, but mostly just for saving space if I know it's not something— because you have to understand, I've taught some of my paintings several times, and I have a basement full of multiples of the same painting. So, uh, that's why I like to paint on the canvas boards. They're easy, and then if I decide to give them away or ship them to someone, it's even easier to ship as well. So we've kind of got all different colors up here in this green. It's not just the bright green. You can see some of the blue mixed in, in some areas, some of the pink, just to kind of get that base coat down.
Christie Renee Hawkins, Jackie wants to know, are you just pulling in the blue from the sky, or are you putting another color on your brush?
I am pulling it from the sky, and then like right here on my palette, some of it was touching, so some of that got pulled in on the brush as well. And you can even have, you know, keep in mind, like when you're looking at trees, it's not just like they're just dark on the bottom. You can have some of those points where it's dark throughout everywhere up there. Okay, I'm going to get a little bit more green. I might even pull in kind of like a minty green. Let me look over here. We'll see if I like this. So this is pretty dry. I can go ahead and put a second coat on here, and we want to do our ground before we can add our tree trunks in. So again, I'm going to pull a little bit of blue back here just to kind of create some shadows. Loading up my brush with green, coming back for a second coat of that.
Christie Renee Hawkins, that green was, was that the Apple Tart?
This is Apple Tart, and then I just added that lighter color one, and that one is Mint Julep Green. So just kind of have them next to each other, kind of picking up a little bit of both. So you can see how the coverage is starting to get a lot better with that second coat on there. We're going to pull in some of that blue over here. This is— I love this part of doing the ground. So in the original, you can see there's a lot of like purples and pinks in there that are kind of like the idea of like those colors reflecting down onto the ground. I'm going to use— because this is a different color blue than I used in the original, and it's kind of like a periwinkle, so it's got a little bit of that purple in it. So I'm gonna do some little bold areas, but again, I'm keeping with this motion when I'm doing it, and I'm just lightly dragging them here and there. And this will all make more sense and kind of come together once I start adding the tree trunks in, but you'll see where these shadows kind of play in and really add to the painting. So I think I like that amount of green. I'm gonna go ahead and grab some purple. My tab broke off in the in the lid. So now I'm going to grab some purple. We're going to throw that in, in a few spots. I'm still using the angled brush, so it shows you all the different things you can do with one brush. I've even taught some classes where we only use one brush, just so I can show them all the different techniques that you can accomplish with one. Just wiping off the excess. I'm gonna get some of that periwinkle color and some of this purple, make myself a new color.
Jill's into the purple.
I love it. Purple and green are always pretty together, I think.
Leanne was wondering if your girls paint.
Um, yes. I, I say it like that because they've all changed, like, throughout the years. Um, Kylie, my oldest, is, uh, she's the one who even basically helped start the Social Easel because she asked for a paint party, um, for her 10th birthday. And now she says she hates painting and she's no good at it, which is not But that's what she thinks, and she's 17 now, so, you know, no point arguing with that. And then Emma is my middle, and she's 14, and she had a— she used to come to all the paint nights with me and paint with me, and she loved it and loved it and loved it. And now she's kind of fallen away from it. And now Sophie's my creative one. So I think they've all— and Sophie likes to draw. She likes to draw a whole bunch more than paint. But I think if, like, we plan something and we sit down and do it together, they like it a little bit more. But just like a lot of you, they get frustrated and feel like they're supposed to be able to just sit down and come up with an idea. So we're trying to just break those patterns and those thought processes to, you know, remind them that's not how it works. And you, you gotta learn first, and then you can sit down and come up with your own compositions, and it's not so stressful.
Oh, this is kind of a fun question, Christie. You decided you wanted to start over on the same canvas. Do you paint it one color first or go for it?
Um, do you mean like start— like, do you think she means like paint over the entire canvas?
I do. Like, would you paint it all white or would you just start?
Oh no, like if I decided I didn't like it, I would just paint In this case, for this painting, I would just paint over the green and I would just make that all pink, um, because there are things I already like about it. Like, I like my sky. I know I don't want to change that, so I wouldn't want to paint over the whole thing to do that again. Okay, so now I'm going to pull in some of the hot pink because we're going to have that in our trees. And again, you can see it even kind of mixing with some of those colors I already have on there. And I just want to be careful that I'm not making, you know, a pattern. Like, I don't want this side to look identical to this. Have some different areas where we have some different colors. And then, um, we want some of that lighter pink, so I'm just going to take white and pull my pink into it. Maybe back here where we've got a little bit more of that light shining on the path. It's probably going to be lighter up against the path and darker back over here. But you're just playing with it, and I think you'll, you'll see when once we add the tree trunks on how this kind of comes together and creates a really cool effect. And then I do want to add just a little bit of that blue from the sky in. I'm going to mix it with a little green so it tones it down just a bit. So we've got all these different colors down here. So the next thing we're going to do— and I don't have to let this dry because I'm okay if it pulls into the, um, into the paint, into the tree trunks— we're going to flip this over. And we're going to paint upside down to do the tree trunks, and there's a reason why we do that. So I learned this, and I don't really know how I learned it, but I learned it through the process of teaching multiple times, because the autumn version of this, my fall version of this, was by far my most popular painting ever that I taught at local classes. I can't even remember how many times I taught it, like probably 20. Um, and the first time I taught it, I noticed that people's tree trunks were like leaning away from their path. I'm going to show you one here. I'm going to show you the wrong way to do it, and then I'm going to show you how we're going to do it tonight. So let me move this really quick, find myself another We'll use this next to this palm tree. So let's say they have a path here. I'm just making a really messy path. And then they— then it's time to do the tree trunks. And so we're going to start at the back and we're going to have like these little short ones because they're the furthest away, and they're going to be skinnier and smaller the further back we are, and they slowly get bigger and thicker the closer we come. So what I saw happening is it just really freaked people out for their trunks to be close to each other. So they paint this one, and then I'd watch them paint this, and I would, I would verbalize it. I'd say, make sure you're making vertical lines. And even though I'm saying that, we all know what a vertical line is. It's straight up and down. The— their eye was so bothered by it being close to this, and they didn't want it to touch, that it would start doing this. And then the next one they would do would do this, and then they just got bigger. And then by the end of it, and I'm coming around and they're like, what's wrong? Why does mine look like this? Like, they couldn't even see that they were making those lines at an angle. I don't know why, but it's just something weird about our brain. So then I was like, okay, let's flip it over. There's something about when you are coming down from something that helps your brain keep it a straight line. So same thing. This is our first one. This is our second one. You just pull that line down, scoot over a little bit, pull that line down. And you're able— you're like, you don't have the same tendency. It changes that you're no longer looking at that as a path or looking at that like something that those trees need to go away and they can't touch each other. And I'm telling you, when I switched to this and switched the way that I taught it, I did not run into that problem anymore at all. So does that make sense to anyone? Has anyone ever painted a path with trees and had that happen to them at a paint night?
Maybe.
But that's why we're going to do it that way tonight.
I have to pipe in, that's so cool.
It's just like one of those crazy things I learned, and I'm like, how funny. Like, I don't know why our brains do that, but it totally clicked with everyone and that problem just stopped happening. So that's what we're gonna do tonight. Um, now I'm realizing my sky is really big compared to my other one. So I could do 2 things here. See what I'm talking about? I'm going to show this to you guys. This is like a really little space on this painting, and on here it's really big, which isn't necessarily a bad thing. It would just mean we're kind of closer to that. So I think what I'm going to do is pull my trees down more because my tree is not covering as much of the page. So I'm gonna go back and fix that. I just noticed it when I looked at it.
Sue said, I did what you said and it worked.
Oh, awesome. So we're just going to pull my trees down a little bit more into the blue.
Oh, this is cool, Christie. Linda said maybe that would work if you were painting a dock on the water.
It would. So like anything like that, that when you paint it and you're like, what the heck is going on? And why are my lines going, you know, sideways? Flip your canvas over and paint it upside down and see what happens.
Oh, Patty said she does portraits upside down, so you don't draw what we think it should be.
There, that you You nailed it, Patty. I think that's part of what it is. And I tried to tell people this too. Same thing I'm going to tell you guys. Don't think of these as trees. The second you say to a room full of people, or in your case to a virtual room full of people, we're going to paint a tree. Everyone gets in their head about that and they're like, a tree, a tree, a tree. What's a tree look like? Okay, I have to make it like— no. So when I would teach this class, I'd say, okay, now we're painting vertical lines. But they still— if it was facing this way, their head was saying, no, it's a tree. And so they kept— they, they just got in their own way. And the second I flipped it over and I said, you are just painting vertical lines, that's all they are, don't even call them trees. And yeah, Patty nailed it, that's exactly what it is. Okay, trying to decide if I think that's low enough or I want to come a little bit lower. And they don't all have to be the same all the way across. You can have some areas where the leaves do come down lower and somewhere it's a little higher. So I think I'm going to leave it about like that for now. All right, now we're gonna do our trunks. So I'm just getting a little bit of my burnt umber and a little bit of the white just to lighten it up a little bit. I don't want it super, super dark contrasting too much. So again, I'm going to start at the back of my path. And I'm not pushing down hard. This is just a number 2 round. If you need to use something smaller, if you tend to be heavy-handed, then pick a smaller brush. And we're going to go ahead and pull these into the tree branches. So they're not tree branches, into the leaves, so they're not stopping right at the bottom. So those are our first 2 at the end of the path. And then they're going to be closer together at the back. So pretty close. We're going to add another one in, then come out a little bit, maybe get a little bit thicker on this one. And again, not all trees are the same. These do not have to be the same size. Maybe that just happens to be a really big tree back there. So I've kind of created my space here. This is gonna— and this is gonna make more sense when I pull this down. I stopped at the horizon line. I actually am going to pull it down to the path though. So this, this is the second one. These two belong at the horizon line. This one we're going to pull down just a little bit. Same with this. The next one is going to pull down. It's just going to meet the path. Okay, then I can just kind of keep pulling that up. We'll jump over here to this one. So just keep pulling it straight until you hit the path and then pull it back up. And we're just going to keep going out until we get to the end of our path.
Christie Leanne was wondering if you could do, um, use a palette knife for the ground. Like for the grass?
Oh yeah, you could. Yeah, you could actually turn this whole painting into a palette knife painting. It would give it a completely different look. It looked really cool. So what do you guys think? Does this make sense going along the path the way that I am? And then when I flip it over, I can still change these. I can still make them wider if I want to. And then this last one, I kind of want to be pretty, pretty decent size. So this one, I'm going to come from the end of my canvas up here and pull that up.
Kipperly wanted to know, do you make the trunks less straight As they come closer to the foreground?
Um, not necessarily. I'm honestly just kind of pulling them down, and then when I flip it over, I'll kind of tweak that. And if I need to straighten them out, I can show you guys how I do that. So I'm just kind of pushing my brush down. You can see that brush kind of spread out a little for the width of that trunk, and then I'm going to do a bigger one over here. For kind of our final tree trunk from the path. We're going to be adding more trees in, but that gives us the trees along our path. And then while I'm here, I'm just going to come— I've got this darker color. We're going to create some of these little A little bit of shadows along the path here, and we'll be adding more colors to the path as well. Just kind of blend that in a little bit there. Okay, so that helped me get those straight. It's mostly for when you're doing the perspective part. Now I'm going to flip it back over, and now I can kind of finish tweaking them. Like, if I want them a little bit bigger— like, I think I want these front ones larger, but I've already got my baseline, and then I can go back and play with it and decide if I want to add anything to it. Now looks kind of funny because we don't have any other trees in our forest, so we want to add some more in. I tend to make the bases of mine a little bit thicker and then kind of taper. Um, you don't have to do them that way, but we're going to add some more in throughout the, the woods too. For this first one, I'm going to get a little bit more burnt umber over here. Actually, I'm going to change what I'm going to do. We're going to do the little ones first. So we want to have some more small ones in the back. We're just— think of it as like connecting the trees to the grass. Honestly, the less perfect you can make these lines, the better it's going to look, and it's not going to look so stiff. If they're all just perfectly straight, that's not realistic because trees are not like that. In nature. And then let's stagger one here because I'm going to put a big tree right there. I want a little guy behind it. So I've got a few that are sitting right on the horizon line like that, and then I want to stagger. So that one's on the horizon line. Let's make this one just come down a little bit more. And pull that up. And then let's have— I'm gonna go ahead and do my big one. So I want one big one like in this that's gonna go from the top to the bottom. I'm just gonna load up my brush and go back and forth to decide the width of my tree. What you don't want to do is paint one side and then jump over and be like, okay, here's my right side. Now I'm going to jump over here and do my left side. 9 times out of 10, you're going to make it way thicker than what you meant for it to be, and you're going to get upset. Trust me, I've seen it. So when you're deciding the width of your tree, the best thing to do is just kind of keep going back and forth until you get your desired width.
Christie, Angela has a paint party question. When you teach a paint class, do you put the paint on each person's plate or let them do it?
That will depend on who you ask. Heidi and I differ on this, and you can see our personalities come through on, on this. I put all the paint on the plates when, when I taught paint nights. These were the same plates we used. We'd have all these lined up. I'd have all my colors lined up. I have all my plates lined up, and I had an assistant with me. And we would put the appropriate amount of paint on the palette for each part of the painting. So like, if we were doing this, for instance, I would have given them— it would be like a rainbow plate, but I would probably put a whole lot more green than I would put pink and purple, that kind of stuff. Um, Heidi, who owns Paint Party Headquarters, um, it just literally cracked me up. I went to her event in Texas and she had all the paint up there and all the plates, and she was just letting people go up there and squeeze bottles onto their palette. And I thought I was gonna have a heart attack. I was like, oh, oh, there's no control! How do you control how much paint they're using? That's funny. I know, I tease her about it all the time. I think Tamara's more like me too. She's like, I want to make sure— because they don't know, they don't know how much paint they need. We know because we paint all the time, and people always, always think they need more than they do.
I'm like that with my kids. Yes, like just for regular things that I think maybe I have some control problems. I have a hard time with them and like condiments. I'm like, no, I'll do the ketchup.
Oh yeah, I'm the same way. Yeah, it must be the controlling part of us. I'm like, I don't know, I'll do that. Or, you know, they flip the ranch bottle over and the whole thing spills out on the onto the plate.
Exactly. Oh, um, Gail, back to painting. Gail's wondering, um, she said her paints are drying before she's done. What can she do?
Um, which section are you talking about, Gail? So that will help me better answer your question if they're drying before you're done, because some of this we want dry before we move on to the next step. If you're talking about down here where you're blending into the grass, then you're going to want to make sure you have more paint on your brush and that you are moving faster when you're blending. Can you guys see how the shadows are starting to play in now that we have this left side done? How cool that looks to have all those colors streaked underneath there. It kind of looks like the lights and the shadows going through The forest. I just love it. It's so fun. I'm gonna make this one a little bigger.
Oh, um, Gail said in general she means on the palette, so I guess her palette's drying out.
Oh, on the palette, you probably are not getting enough paint if it's drying out that fast on you, because I mean, like, these are still plenty wet, and, and they— I mean, they stay that way. When I used to do these for paint nights If there was a color we weren't going to use until the very end of the painting, sometimes I would hold those off, but otherwise people got their full palettes, um, like this. So just make sure you have enough on there that it's not drying out too fast. So do you guys think you can do this and treat these like vertical lines instead of calling them trees and start adding them into your paintings. I'm trying to decide where I want to put my last tree over here. Maybe another little baby one in the back over here.
Oh, okay. Beth said, when I first saw this painting, I thought I would need a lot more practice, but that tree technique has made me braver.
Yay, that's awesome, Beth! And that's the thing, um, I want people to realize with all of my paintings, um, if you're thinking about becoming a Tribe Sister and joining the membership, um, sometimes people will ask me, well, do you have a section inside tribe that like the best ones we should go to if we're brand new to painting. And the answer is really no, because it's different for everyone. Again, I have been teaching for almost 8 years. All the paintings that you see on my page that you've ever seen the Social Easel do, I have taught those to people who have never painted before. So I do break down all paintings in a way just like I broke this one down. That don't cause you to have that fear and that anxiety. If you just follow the steps that I'm showing you and trust the process and don't jump ahead and just believe me when I say this is all going to come together at the end, then you will be able to do the painting. So, um, yeah, I think you can do all levels, all, all the different paintings that I have to offer. Now I could get more technical with this, and I could add some— because our light is coming from here, so I'm just going to show you some things I could do. I could come in with a little bit more, um, white and kind of just drag it down that side of the tree where the light is coming. Even just a lighter brown. It doesn't have to be like pure white. So that creates like a little highlight along that side. You can already see how that kind of changes the painting, just that one simple thing of adding That lighter color along that edge gives the idea of light shining on it. And we can do that on all the trees. We can add just a little bit. It doesn't have to be bold on all of them, but just that little bit of lighter brown here and there. It doesn't even have to go up the entire trunk of the tree. So I can't see thumbs up or anything. Can you, Megan? Do they show up on our StreamYard, or do we have to be looking at Facebook to see those?
No, I don't really see a lot of thumbs up. I just think I just see comments.
Okay, so it is just comments. So, um, normally I would say like, shoot up a heart or shoot up a thumbs up if you see what I'm talking about. But if you would type it in the comments and let us know if that makes sense to you, kind of what I'm showing you here. And the other thing I want you to realize, let's say you do this and you're like, oh my gosh, I added way too much. Again, anything can be fixed in acrylic painting. So what if you added way too much white? You can come back. And add some dark.
Oh, Christie said— Allison said there's so many hearts and thumbs.
Oh good, well good, I'm glad it makes sense. And then to even take this a step further, so we've added highlights on that side. The other thing that I could do is take just a tiny touch of black, and we're not going to put black directly on the canvas. We're going to mix it with our brown first, and we're going to make a dark brown, just like I made a light brown. And again, you're not going to use very much. Black is a very, very strong color. You do not need a ton of it. So just kind of pulling it over off to the side here, making a little bit darker brown. And now we can create more of a shadow, maybe a little bit more on some of these.
There's lots of comments that this is like really just transforming it.
Awesome. It's really cool to see how simple, like, one or two little brushstrokes can change a painting. And these are not hard, and that's what I want people to realize. Like, when, when you say the word shading and you're like, oh, well, I don't know how to shade— well, yeah, you do. I just taught you. Like, all it is is like one skinny little line on one side and one on the other, and it's something as simple as that that can add that depth to a painting.
Jackie said, I promised myself I was gonna watch first, but it's killing me.
I can't wait to start. You can always pull out your mixed media pad if you're dying to start, and you can start practicing and then start thinking about how you can take this technique that I'm teaching you in this and apply it to some other paintings that you're learning. You apply the same technique to flowers. So it's really all about finding not finding, defining where you want your light source to come from. So I've chosen to say my light source is coming from the end of this path and radiating out. Therefore, these sides of the trees are going to be where the highlights are. The opposite sides of those trees are going to be where the shadows are. So let me know if you guys can see the difference in adding the shadows in. The way that we added the highlights in. Or Allison, you can let me know if there's a lot of hearts.
And I'm trying to multitask here. Sheila was wondering why you chose to have the path centered.
It's actually not quite perfectly centered, but it was just the way that I designed it. No, no reason. And I love this painting because I always say everyone's path is different, so make your path your own. Oh, do it, do it your way.
That's cute.
So what do you guys think of the shadows? I love the shadows on there too. And maybe even a little bit more in this front corner because it's like the furthest away from the light.
Oh, Twila's helping us out. She said so many thumbs up and so many hearts.
And I think I am liking the green trees on this one so far, so it'll be interesting to see what happens when we start adding some of these spring colors in here. But right now it just looks so, um Live, it looks like first blooms, you know, it looks like the beginning of spring to me. All right, so I'm going to get some little brown and white. I'm going to go back over my path just a little, add some of this brown back in, maybe a little bit darker. So same thing with the shadows facing this way. I can add, you know, a little on the bottom side of some of these trunks. All right, when they're—
everybody's into the green now. Helen likes it. Sally said yes.
And then I'm gonna grab some white because we want this a little brighter at the back. So I'm going to lightly drag some of that white through there, and then here and there you can still have light hitting the path in different spots. But we do want it pretty light at the back, and I may even pull a little bit of that blue in there, get some of our sky color. And then down below, we're going to pull in some of our other spring colors, maybe a little purple and some of that periwinkle. And I'm using the round brush for this, just lightly kind of dragging it across. Let's grab a little bit of pink. I don't want to completely cover the brown, I just want little accents of these colors popping in here. I need some more of that light pink.
Christie, is it really cold where you are?
Um, not today. Today was in the 70s, but the rest of this week is going to be stinky and cold.
Sheila says you should add some snow on the trees.
Oh no, snow. I'm tired of snow, and I think we're actually forecast to possibly get some, which I think is insane. What is going on? We should not be having any snow right now. Okay, so looking at this again, I tell you guys, I want you to take pictures of your artwork while you're working to look at it and be like, I want to change that, I don't want to change that. Right now I'm looking at this in my video and that is like too light, so I want to break that up a little bit and add some of the brown back in. Just to break it up so it doesn't look like just a light blob there in the middle. And then I'm going to let it dry a little and decide if I want to change it. I'm also going to make sure my trunk comes over top of my path, not my path over top of my trunk. Okay, we're gonna leave that for now. I like that better. I already like that softened where it wasn't super, super bright there. I do want to add— I said I was done, but since we're doing more green in this, I actually want to add a little bit of that green into the path as well. Okay, now we're going to go up and we're going to see how this works. We're going to start adding the pink in and decide whether we like it or not. Is everyone taking a deep breath? I am. So I'm going to start at the bottom and then move up from here, and I want to leave some of that green behind showing through. So far so good. I think that's looking pretty.
Oh, Nikki says, oh no.
And you have to remember, this is your own forest. This is your own woods. If you like the green, make yours green, and you don't have to add all these crazy colors. Like, I have yet to be in a place that looks like this, but I'd like to go. It's pretty, it's crazy, it's filled with all these pretty colors, but I kind of think I'm liking a little bit of the green showing through with the pink. And again, I'm just doing these quick angled brush strokes. I'm even going to get like a little looser at the top, not so tight with the colors.
All right, I don't know if this is a good time, but somebody was just asking, um, about the different ways to paint with you.
Okay. Yeah, I can talk about that while I'm doing this, because it's a pretty repetitive motion.
Okay.
So there are 3 ways that you can paint with me. The highest level is the VIP membership, and that is called my Inner Tribe. And with that, it is $47 a month, or you can do the yearly option, which is $470 for the year, and that gives you 2 months for free. If you do the yearly option, it is a 1-year contract. If you do the monthly option, you can cancel at any time. And inside the Inner Tribe, you get all the things. So let me pull, I think I'm gonna pull this up really quick and share this screen. Screen because we're gonna let this dry anyways. It'll be easier for you to read this and for me to not accidentally forget to tell you something, which sometimes I do. Okay, so I'm gonna go over here. Oh wait, that went to the wrong— that went to the wrong thing. That was not the screen I wanted to share. Hang on, wrong screen. This is the one I wanted. Okay, there we go. That's the correct one, because when you scroll down here, you're gonna see the different ways that you can paint with me. So the Inner Tribe is my VIP membership. I only open this a few times a year, so that has been what we've been talking about tonight. Night because doors close to accepting new members tomorrow at midnight, and then you won't be able to join until, um, the fall. So I'm going to make that bigger. Um, so inside the Inner Tribe, you get 3 new painting tutorials with me each month. Um, you have a guest artist, speaker, or business coach each month. You have unlimited access to the videos while you are a paying member. You get a full membership library with over 85 tutorials to choose from, technique videos, live Q&As with me. So I'm pretty much like your personal art teacher inside this Facebook community. Inside our tribe community is where I teach and I go live with you, and that is also where this amazing community of women is, and you're all learning together and you're all encouraging each other. Um, and that's really what we want the group to be about. It's a happy, joyful place with no drama, no stress, no negativity, and it's all about good vibes in there. Also, as a Tribe Sister, you get bonuses and freebies like my challenges that I do throughout the year. Tribe Sisters always get those for free. You get exclusive discounts, you get 50% discounts off of things I do outside of Tribe. Um, you get free access to the Painting of the Month Club. So, um, that is huge because normally that would be $20 extra, and that is included in your Tribe membership. And then we also do weekly devotionals inside the group as well. So, and I like to be very upfront with this, that I share my faith inside of the group. Um, so that's what my devotionals are going to be about— Jesus. If that's not your cup of tea, you don't have to listen to those. They are on Mondays um, and you can skip that part and you can just go to the painting. All we ask is that you don't cause any drama about it. And if it's not your faith, doesn't mean you have to agree with me, but we just ask to have everyone respect, um, each other in that way. And then the, um, other way you can paint with me is Painting of the Month Club, which is open right now, and I'm going to scroll down and show you that. This is the Painting of the Month Club. This is our birdhouse, and the Painting of the Month Club is only $20 a month, but it does not come with a Facebook community or anything like that. The Painting of the Month Club is one exclusive painting that is delivered to your membership hub at the— on the first of every single month. You get the full color and supply list, and then you get a template if it needed. So those are my two memberships. And then the third way is if you're new and you just want to start out and just buy single tutorials, you can go to my store and shop all the tutorials and try them at $37 apiece. Um, and you have lifetime access to the single tutorials and lifetime access to the Painting of the Month Club tutorials that you paid for. And that stays the same. That's what you keep if you were to cancel Inner Tribe You keep the Painting of the Month Club tutorials that were there while you were a member. You only keep access to all this other stuff with TRIBE as a paying member. So think of it like Netflix for painting. As long as you're paying for Netflix, you have access to everything. As long as you're paying for InnerTRIBE, you have access to all those goodies. So, um, that is kind of the gist of the different ways that you can paint with me. So let me know if that answered those questions or if I need to go over anything else further. And now we've let our paint dry a little bit. I'm going to grab a little bit of white here with it. Megan, was that good on the, the question?
Yeah, absolutely. I think she was wondering on this page too, like how sometimes you paint here.
Okay. Um, yes, so every once in a while I don't stick to a strict schedule because it's just not my personality. I can't do it. Um, so I won't even give you like a certain day or time because I don't paint like that. Um, it's when the mood strikes me and I have something fun I want to show you guys, I'll pop on Social Easel page, just like I'm doing with you right now, to do some fun small techniques and paintings with you. They're nothing as intense as what I do inside, um, the Tribe or the Painting of the Month Club membership, but they're still fun things that I teach you and show you, um, that can further your painting journey. And then I also have a YouTube channel. I also have a blog. So if you're new, um, to all of this, be sure to check out my YouTube channel and then just socialeasel.com and go to our blog post, and you're going to find all kinds of information there.
I just put up the number for text alerts too.
Yes. Yeah. And if you want text alerts for when I go live, then yeah, text that number and, um, that'll put you on our live alerts. So what's everyone think of the pinks? I didn't get a consensus on this. Do we like them? Or not like them. And you guys still may need to see me finish it to decide whether you like it or not. I'm going in and adding some of the lighter color that I'm mixing with my white now. I do like having a little bit of the green coming through though. I want to concentrate a little bit more of that light pink towards the center, kind of brighten that up a little bit, maybe even pull a little bit of white in there with it.
Christie Megan was wondering, do you do different mediums in Tribe, like watercolor and palette painting?
Um, I— yes, I do both of those. So I do mixed media, I do some watercolor, I do palette knife painting. And then I do craft acrylics and academic level acrylics with paintbrushes and palette knives. So there's, there's a mixture of things that you will learn in there. And I do like pen and ink, like I show you how to draw and then fill that in with watercolor. So pretty much the only thing I don't teach in there is like oil pastels and oils. All right, I think I'm liking how it's coming together. Now we're going to start— let's add some of the purples and blues and maybe even a little bit more green back in if we feel like we want to. So I'm going to switch to my purple, and I left those colors in my brush. I kind of like the darker colors towards the top here and there. These are not going to be— this isn't the dominant color, so this is more like accent colors that we're doing with the purples and the blues and the greens that I'm going to pull in here.
Sharon's watching from YouTube. She said, I loved your first path, but This one is awesome.
Awesome. Thank you. I love that periwinkle color. It's so pretty. This is just one of my favorite colors, Blue Harbor and Periwinkle in DecoArt. They're almost identical, um, but they are just beautiful colors. And we're gonna get some of this Teal blue, throw some of that in.
Got lots of hearts going now.
All right, good.
Odessia is really liking the purple.
It's just fun to kind of watch it come together with the different colors that you add in there. And then I do think I want to go back and add a little bit more green and have some of that green come back out. So I'm going to grab some of that, and then I think we're about done. So this will be your last chance for any questions that I may have not answered, um, about Tribe or about this painting that we're doing. Again, the link for all that information Sometimes it's easier to read it than try to listen to everything that I'm saying. When you guys click the link in the description, um, or click the link that Megan's put in the comments about Tribe, you're going to be able to see a clear layout. Allison's done a beautiful job on our page of clearly explaining everything that is included when you become a Tribe sister, and we would love to have you. It almost looks like confetti. I love it. It's a little happy, happy little painting and happy little trees.
Kathy was wondering, why did you paint the green and then cover it up?
Well, you— I didn't cover it all up. This is all about doing layers and paintings. If I didn't put the green in there, you wouldn't see it peeking through all those spots in the pink. So it still served its purpose. It's still showing and peeking through in those areas. Maybe you can see that being a little bit closer. If I would have just done it pink, it would look just like this, and there's no green coming through in that one. So it changes it just a little bit, and it tones down some of those pinks too because that green is coming through them. Um, Catherine, that is a good idea. She said this would make a beautiful breast cancer awareness painting. It would indeed. Oh, and someone says they like the colors in this one more than fall. Sorry, I don't have your name on here, but I know so many people were like, well, I don't think I'm gonna like anything more than that fall. So that's fun. These are definitely different colors, but I think my favorite part of this painting is the bottom half of it. I love all the colors and the highlights that are coming through in the grass and the pathway there. Um, Gail's saying, are you using the same brush for the tops of the tree and the trunk? No. So I use the angled brush for the trees up here, the, um, all the leaves, and we use the round brush for the tree trunks. Thank you, Kelly. I love pushing you guys on color because it's so fun, so fun to play with. All right, ladies, I don't think there's any more questions. Megan, unless you have anything else for me. Um, I don't think so.
I guess I would just say, right, that we close tomorrow.
Yes, thank you. Um, yeah, so we close doors tomorrow. Um, uh, April 20th, Tuesday, April 20th at midnight is when doors close. I was saying the wrong day all day yesterday. Um, and, um, yeah, we'd love to have you. You can also email support if you didn't get, um, your questions answered on here, then you can, you can email us and we can help answer those questions for you as well. And I think that's it. So with that, I will say goodbye and good night. And you can go back and catch this replay tomorrow, so— or not even tomorrow, sorry, you can go back and catch it in 5 minutes from now whenever I end this broadcast and just go to videos on the Facebook page, or you can can go to YouTube to access this. So I can't wait to see them, and I hope you guys have fun doing it. Good night.










