Paint an Owl with Palette Knife with Christie
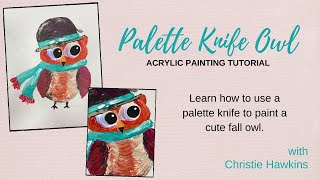
In this instructional YouTube tutorial, Christie Renee Hawkins of The Social Easel walks viewers through a mixed‑media, palette‑knife acrylic painting of an owl. She begins by outlining a rough composition with a palette knife, emphasizing the loose, abstract style that the tool creates. Christie explains the range of supplies she uses—craft paints, Artist Loft/Michaels paints, gel medium to thicken paint, various palette knives, and brushes—while noting optional alternatives. Throughout the demo she shares practical technique tips: how to load and press the knife, controlling pressure for texture, layering thick paint, managing longer dry times (including using a blow dryer), and fixing mistakes with wipes or by letting paint dry. She demonstrates color mixing on the fly, adding magenta, orange, teal, and other hues, and shows how to combine knife work with brushwork for details like eyes and beak. Christie also ties the lesson to her online community, describing how the palette‑knife approach aligns with the “Polished Painter” level of her Tribe membership, following earlier “Excited Newbie” and “Budding Artist” stages. The video concludes with suggestions for finishing the piece—flattening, cutting out, or applying Mod/Deco Podge for mixed‑media effects—before transitioning to a watercolor version of the same owl.
Chapters
Hey everybody, it's Christie Renee Hawkins with The Social Easel, and I teach women how to paint with acrylic paint. So today we're gonna change it up a little. This is a mixed media palette. I think what we're gonna do first, I think we'll do palette knife first, and I'm just gonna do a very rough outline of this for my palette knife. Because I'm not gonna do super, super fine detail in here. So this may change a little around the eyes. Palette knife, if you haven't done it before, is a little bit— well, I shouldn't say a little bit, it's a lot of bit messier. So it's a very abstract, loose style that we'll be doing, but it's so, so fun. I just started doing it probably about 2 years ago, and I really, really love it. It's one of my favorite things to do. So we're going to do a palette knife version, and then I'm going to show them to you, all the different styles that we've done. So how you can take one template and do so many different things with it. And I am not— in the last two, I have been outlining them in black Sharpie. I'm not going to do that today with palette knife. So I thought I would do some different colors today with this and possibly some different, different paint. So most of what we use inside my tribe is just the normal craft paint, okay? I use this on almost all of my paintings. But like my farm animal collection that I have in there, we used some of these paints from Artist Loft. This is a Michaels brand, but you can go buy these Artist Loft paints from them, or you can just add gel medium, which just makes your craft paint thicker. Now I'm telling you this, you don't have to do these things. These are options. You can also just use craft paint. You've seen me paint multiple times on Facebook Lives. With just craft paint and a palette knife. I just really like these, um, to work with palette knife with because they are a little bit, um, thicker. And these are some fun colors, and I thought I just kind of wanted to make this completely different from my other owls. This is a new color I bought. I haven't opened yet. This is, um, Unbleached Titanium. So we'll do— this is like a cream color. I love this paint. Yeah, this is just Academic Level 1, and they always have them on some kind of sale. Oh, I already had one over here, didn't I? That's Parchment. That's a little bit different. This is like a deep magenta, beautiful color. This is Vermilion. So we're just playing with these. There's no color list for this, guys. No specific colors. We're just kind of playing around. And I may even add in some craft paint with it too. Maybe I'll get— this is already open. Let's get a little bit of yellow on here in case we want to do some color mixing. And I am using a recycled palette, so if you're seeing a lot of colors, on there, um, that's why. Okay, we'll start with that. I may change my mind and add something else. I might put a little bit of white on here just to have it. All right, so those of you guys that are already Tribe Sisters, if you see some comments and questions come up while I'm talking and I miss them, if you'll answer them for me, that would be great. Uh, Mary, it's Depends on how thick you want it. So I usually just put a little dot of gel medium in my paint and then just mix it. If I want it thicker, then I add more. There's not a certain ratio that you have to use. Um, let me see, turn this off. There we go. So I know the Social Easel is still there, but that's not even gonna cover that part of the painting. We're not going down that far. So I have this palette knife set in my Amazon store. I'm going to use my number 1, which is my smallest one, and I think I'm going to start with like this almost kind of tan color, maybe a little bit of white. And again, this is going to be a completely different style. Can you guys see that? I think I might zoom you in a little bit. So we've got some nice texture there. When you're using a palette knife, you want to scoop it up on the back and then see how little pressure I'm kind of putting down here. So you don't have to push down very hard, very light touch. And I'm just doing like these little curved shapes just to kind of give like a feathery look to his belly there. And then actually, let's go— let's just kind of spread that all the way across the whole belly. And then I think I'm going to pull in some more color. Let's add in maybe a little bit of this orangey color I have here. So palette knife painting gives you a lot of texture. You're going to see the definition come off your canvas or paper. I think I want to pull that out even a little bit more, so I'm just doing kind of like these little, almost like little wave shapes. And I don't have a specific plan for this, so you guys are going to kind of get to just see me create as I go, maybe come up with some different ideas. We may play with it a little. Let's see, I think I want to do— oh, didn't I bring a burnt umber over here? I think I did. Well, this one says raw umber. This is like a dark brown. I'm jumping all over. I want to do the hat now. So you guys can see how much thicker those paints are. So these are the ones that we're using today. Now I could wipe my brush off, but I just don't care. I don't care if it has a little bit of that color in there. I like it like that. Palette knife again. This is where I tell you, embrace your messiness, trust the process, it all starts coming together. So I'm doing a brown hat today. Now I'm not doing the background on this one today, but if I was, I'd come back and touch that up, and I wouldn't worry about— like, I would be covering that up later. For this today, I'm just showing you kind of the technique, not a full painting here. So see how I'm using the back of the palette knife, just kind of dragging across here. So with palette knife painting, I don't really stay super, you know, concerned about having exact straight lines or anything like that. it has a rougher look, a rougher texture. It's definitely a style that will help you loosen up. Let's add a little brown down here. Why not? So when you're working with the thicker paint and the palette knife painting, also there is more of a dry time because because the paint is thicker. So if you're wanting to do layers and you're worried your colors are going to blend together a little bit because the previous layer is still wet, then you'll want to either let this air dry on its own, or you can use a blow dryer to paint— or to paint— to dry it. So even in these little spots, you can just kind of either hold your palette knife on the side, use a little tip. And I really recommend when you start with palette knife painting to practice in a mixed media pad first. Get used to just holding it how to apply paint with it. Once you get used to it, I really think you'll love it. Most people end up loving it. It may be a little hard in the beginning, but this is the level of painting. So each painting we've done, we've kind of talked about different levels inside my membership. The first one we did was very basic and simple. That was called the Excited Newbie level. Then we did the shading and the background last night. Taught you guys some extra techniques and methods. That was for our Budding Artist level. And then when you get into the palette knife painting— not that you can't do this right from the beginning, but it kind of correlates with people who have been in Tribe longer or have painted for a longer span of time— tend to be more comfortable trying new techniques out. So that's why I chose to do this and the watercolor version to represent our level in the group called Polished Painter. It's when you are comfortable with the basics in painting. You've probably been a member or been painting for, you know, 9 months to a year. You've been with us a while and you are ready to try new things and explore new things, maybe even start selling your work. Or teaching classes, that kind of thing. So that's kind of the level that this painting and the watercolor painting are going to represent today. I like his, uh, I like that orange color around his eyes. We'll start with some yellow and white here. I don't know if I'm going to want to leave it that way. I really want to get some of this magenta in here. I love this color. Isn't that so pretty? Let's do that with a little bit of that orange. So sometimes I like to get two colors on at the same time and kind of scrape them together. And when you're using palette knife, it also doesn't mean your entire painting can only be palette knife. A lot of my paintings, I jump back and forth. And I'll use palette knife for some areas and then come back with the brush for more detailed areas. We did a lot of that in the Funky Fall Flowers. That wasn't all palette knife. We used a little bit of everything in there. So you can decide kind of what these brushstrokes look like, or I say brushstrokes. Palette knife strokes, whatever you want to call it. I kind of like these to kind of curve out like that. You can't see it probably too much from where you guys are, but we're going to kind of have these curved lines come out on those wings. So I think I'm liking that so far. Can you guys see those strokes in there a little bit? And we're gonna grab a little bit of black here and do the eyes, and I think I'm going to use a brush for those eyes, and then we may change the texture a little bit. And I can leave the texture a little bit, um, higher with this. This eye needs to come over more. I don't know why that one seems so far away today. I'm gonna let that dry before I add any white on the inside there. And sometimes I do stuff like this, so I'm gonna pick, um, like this brighter color just to have the contrast. We're going to throw in a little bit of teal. Sometimes I will paint on first with my brush, and then once you do that, you can come back with the palette knife and add that texture in. So I'm going to pull that beak back over this when I'm done. I kind of like it when it pulls in that color. I'm going to pull in a little bit of that magenta color into the scarf there. So don't be afraid when your colors mix, just kind of play with it a little, see if you like it. I'm liking that contrast. I may not always be Type A in my painting, but I can definitely be in my business and other things. So that's why in painting I try to be a little bit looser and messier, because I think it's fun. So I'm going to come back up here on the nose. Let's pull a little that yellow back down. Maybe make that a little bit bigger. We're just going to go ahead and blend this together, and then I'm going to use a little black and do a little triangle on the bottom part to kind of give them a little mouth there. I just think he looks so cute with that little mouth. All right, what else do I want to do? We can go ahead and try to add some white up here. We'll see, hopefully we don't pull in too much color. But even with palette knife painting, if you do something— I know it seems so different than just painting with a brush— but if you do something you don't like, you can still fix it with this. If it's just fresh and you just put it on there and it's really thick, you can wipe some of it off. Some people like to keep, um, baby wipes at their station. I never have. Um, I did when I used to paint door hangers because everything was so precise. On door hangers, um, but with painting I never did. But it may be what you need to do to kind of help you with that. So you can wipe it off or you can let it dry and come back to it. So I'm just using a number 2 round Any round is fine, whatever you're comfortable with for filling in your area of the painting you're working on. Don't get fixated on those numbers. Whatever size brush is working for you to fit in the space that you're in, that's what size you need to use. I'm not gonna let that bother me. I actually kind of like it. Maybe I'll put a little bit of orange over here. Maybe we'll soften that, make that not such a strong edge up against that white. So this is when you're just playing with your painting and you kind of just like let things like that happen. Keep going. It's what Bob Ross would call a happy little accident. I wasn't planning on pulling that orange in there, but once I did, I actually don't, don't mind it too much. Kind of softens the edges a little. Maybe make him a little fluffier around the sides. What do you guys think so far? So see how I pulled a little bit of that orange in there, but I really don't mind. I haven't added any pink in. I've got this hot pink here. I'm gonna have to use this in the next painting because I have all this paint. Maybe we'll try some of this. Hmm, maybe— no, that blends in too much. I don't want it there. Now again, for something like this, if you were not comfortable doing palette knife in a really small area like that, just switch to your round brush. It's not gonna matter. You can use a combination of both. See that texture that you get kind of coming through a little bit here with me adding those colors into the hat? I'm just going to pull a little bit down here along my wings. And I'm still trying to decide what I want to do with that scarf. Do I add anything to it? Maybe I want a little bit of blue in his eyes. I think I just want a tiny, tiny bit. What do you guys think on the scarf? I like that little bit of blue in there. Let's give them those little dots. Maybe I'll just add a little bit of white to the teal. So don't forget, just make some other colors if you want them. A lighter teal, just pull some white over there, mix yourself another color on here. Give a little separation between these two sections of the scarf. And then let's give them some little feet here. Let me come back with the brown. He's so cute. Good idea though. How cute is that? I like the fringe idea. Such a good idea. Anything else we want to do to this guy before we switch over to watercolor? You guys know I like color. The hat's a little boring for me. I gotta add some color in it. I don't know if you guys can see that, but we added a little bit of that magenta to the brown. It's kind of hard to see while it's wet. Okay, we're gonna switch over. I'm actually gonna peel him out of here. So what I would do if I wanted to frame him, I would let it dry completely flat. Once it's all the way dry, I would put something heavy on it to flatten it. Now another thing you could do— I'm gonna hold him up a little higher so you can see him up close— another thing you could do is let him dry and cut him out and use like Mod Podge or Deco Podge and put him on another piece of art. That would be kind of like doing a mixed media piece. So there's our palette knife version. That's all I got for you guys right now, and I will see you later this










