Painting a Peacock Feather today while I share about something close to my heart!
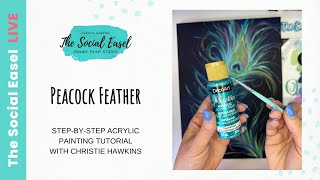
Christie Renee Hawkins paints a peacock feather in mixed media while discussing her mission work at Good Shepherd Children's Home in Honduras. She's running a pop-up paint-party fundraiser on June 23-30 where $20 tickets go entirely to Rice Bowls and the children's home, with matching family tattoos marking her commitment to the "Be the Light" philosophy.
Chapters
Hey everybody, it's Christie Renee Hawkins with The Social Easel, and we are live today. Um, if you are new to following me, we're going to be going live on Wednesdays at noon for some quick painting lessons with me, quick tips. Um, today we are going to paint a peacock feather, which I have an older painting from years ago that I did when I did paint nights, and I haven't painted it in forever. And I love peacock feathers, so I thought this would be a fun one to do again.
I was going to make a new version for my studio.
So, um, that's what we're painting today. So let me know when you are here in the comments, um, everything looks and sounds okay. We'll obviously be making, um, the screen bigger once I start painting, but I wanted to jump on and say hi first before I switch to just the overview. Hey Stacy! Hey hey! Okay, good, it sounds good. So we're gonna obviously be painting a peacock feather today, but in addition to that, I am just going to be, um, talking and sharing with you guys a little bit about Honduras and my connection with Honduras, um, and a little bit about the trips that we have had there and what we are doing when we are getting ready to head back. So, um, if you haven't heard me—
this is driving me crazy that it's all crooked—
if you haven't heard me, um, talk about Honduras before, just a quick overview, um, if you are new. We have gone on two ARC trips out to Honduras to Good Shepherd Children's Home, and, um, we absolutely fell in love with these kids, and we are headed back in June. So, um, this opportunity came to me, um, probably about a year and a half ago with my friend Casey Hope, who owns Pizzazz Art Studio. And she's been going there for years. And, um, I messaged her one day and was like, do you think there's any way we could do like an art camp there? I just feel like God's telling me like this is, this is my time to kind of take art and, um, go bless some children with the joy of creating, because obviously I know how much joy it brings me. Um, and I talk a lot about the childlike joy when you're creating. Um, and I just want, um, kids everywhere to be able to experience that. And that opportunity opened itself up, um, for me. And, um, so we went last March, which is crazy. That was only a year ago because it feels like so long. Um, and we fell in love with everything so much that— and, and my whole family goes, so it's me, my husband, um, and our three daughters who are 19, 16, and 12. And, um, all of us just fell in love with those kids. And before the end of the trip, we were already talking to Johnny about when, when can we come back again, because I don't think I can wait an entire year to to get back here and be with them. And we ended up planning another trip in 2022, and we went over Thanksgiving break, and it was even better the second time. And now we're going back again in June. So I'm going to be talking a little bit about that while we're painting today and just wanted to share a little bit with you guys about what we do over there and why we do it and why it's important and how you guys can be a part of that. Um, so I am doing a pop-up paint party, um, and this is truly a pop-up, meaning I just had this idea last week and I was like, I think we can fit it in before Corey and I go on vacation to do this pop-up paint party, um, that is going to be a fundraiser for Honduras. So it's not only, um, to support our travel there, but it also is going to provide supplies for us because we put on an art camp with them. So it's going to help us cover the cost of supplies. It's going to help us cover the cost of gifts. We usually make new shirts for them. I've designed 2 and they absolutely love them. So I'm hoping we can do something again like that, and it makes them feel special when they have a brand new piece of clothing instead of something that's handed down to them that was made especially for them. Um, so, um, it's just an amazing opportunity, um, and I thought we will do a paint party fundraiser for this, and I thought this would be the perfect thing to do for it. Um, so this is my Be the Light little birdie, and that's a saying that you'll hear me speak of a lot because of my faith. And God calls us to be the light in a dark world. And I think that's important for those of us who are creatives and artists to share our love of art and creativity, to bring light to the world, to make it prettier, to make it happier, to bring joy. And that's what this painting is all about to me. So this is a mixed media piece that I am going to teach you guys next Thursday in a pop-up paint party. If you text the word Honduras to the phone number that you see on the screen, it will put you on a waitlist for when that link is open. So per my personality, this is a last-minute idea. So I'm in the process of creating the sign-up page, and it's not quite ready yet. But I wanted to get the word out, obviously, because it's next week. And then, of course, if you can't join us live, then you will be able to go watch the replay too. But I'm going to do a 1-day pop-up paint party, teach you guys step by step how to do this painting. It will include the template and your complete supply list for only $20, and 100% of those proceeds are going to go to Honduras for our trip. They're going to go to Good Shepherd's children's home in Honduras, and it will also be going to Rice Bowls, which is who we go on these trips through. So Rice Bowls feeds kids all over the world in orphanages, and, um, I have partnered with them for the last year and a half. It's an amazing organization, um, and this is kind of my partnership with them. So part of our proceeds from my members. A dollar for every member that I have that paints with me goes to Honduras every single month, or I'm sorry, goes to Rice Bowls every single month so that they can continue to feed children all over the world in those orphanages. So that is a little bit about what is coming up. So text the word Honduras to that phone number that you see on the screen, and I am going to pull this up full screen and take myself off so you guys can see better. And Tammy is on here too. Tammy actually went to Honduras with me twice. She went on both trips last year. So Tammy, feel free to jump in the comments and share a little bit about your experience there as well.
I'm gonna scoot this back.
Um, so today we are going to paint this. I brought my real peacock leaf just to have as inspiration here. I started sketching earlier So I'm just going to kind of show you guys this, and we'll sketch it, um, onto our, our painted— our canvas as well. But I kind of wanted to go over kind of the construction of the, um, of the peacock feather. So you kind of start with a teardrop shape, and then it's got some of the inner shapes inside of it. So we'll do kind of like— we'll do the teardrop, we'll do like a kind of sideways oval shape. And then I like to think of the middle of the peacock feather, it kind of looks like— this one's a little hard to see, but it kind of looks like an upside-down heart is how I like to think of it. But these are such fun colors. I'm not going to make mine exactly like this real version, um, I'm going to make it a little bit more colorful and bold, but that's kind of what we're going to do today. And then whenever I'm sketching, I just kind of draw myself little notes of like, I know I want the out— outside line lime green. This is going to be kind of like a greenish brown, and then of course teal. And then the inner color, I'm going to do like a navy and purple with that. Hey, Sheila said, I love the t-shirt you did last year. Thank you. Yeah, hopefully we're going to be able to get some new merchandise together too, and those proceeds will also go to help, um, the children's home as well. Hey, Miss Karina, I was just talking about Rice Bowls and our partnership with you guys. Karina is with Rice Bowls, and we're talking about gearing up for our trip to Honduras. And I'm getting excited. So now is like the planning stage where I start coming up with the ideas of what we're going to do with the kids. We try to do something different with them every time we go, um, and we've got a few ideas that we're working on. Um, and I would love if any of you have any experience with kids or doing activities with them, I'd love to just get your ideas in the comments as well. Um, so I picked out a few colors. That I think I'm going to use. These are all DecoArt. I might use— I think this is a new lemon yellow that I got from them. It's very different from the other yellows that I have. It's really pale. Um, and then I also have— I figured I had to grab it. It's called Peacock Pearl, and this is a metallic paint by DecoArt as well. So I'm going to leave those there for just a second. I'm going to go grab a purple and maybe like a dark blue off my paint wall. And then of course I'm going to use black as well, because I want this to have a really dark background so that the peacock feather really is vibrant and shows up on the page.
So give me just a second. And I'm going to grab those colors.
So I just grabbed a few. I've obviously got my white and my black. We'll set over here. Um, again, I don't know if I'm going to use all these. I'm just grabbing what I think I want. So I've got Purple Iris, which is just a really dark purple, Ultra Blue Deep, and Perfect Perry. This is one of my favorite colors, kind of matches my nails. Um, so I think these are the colors that I'm going to start with— I may end up grabbing another hot pink or something. Pull these over here, and I'll show you guys my palette once I start, like, mixing colors and stuff as well.
Okay, I am going to grab—
got my pencil and I've got a Sharpie. Sharpies are waterproof, so you can use these when you're kind of sketching out your design. I'm gonna put a loose sketch on here and then we're gonna paint the background, but I want to do it this way so you guys can see me actually sketch the design of the feather. Instead of me doing it over top of the dark background with a piece of chalk, because I think that's just going to be a little bit harder for you to see. So this is the way we're going to do it today.
Who on here has painted a peacock feather before?
The first thing we're going to do is our kind of teardrop shape, and I'm just kind of thinking about how I want this to go across the canvas. So I am painting on— I believe this is a 12 by 16 canvas today, so in portrait, so we've got it nice and long vertically.
But I'm going to start with my kind of teardrop shape, trying to decide if I want it to go that way.
Maybe more like this, so kind of allows my, my feathers to kind of flourish up in that corner. I always make mine a little, little extra. So we've got our basic teardrop shape, and then we want the stem kind of coming down from there. So you can see, like Obviously on the real one, just kind of has like a slight curve to it.
I kind of want mine to have a little bit more.
So when you're doing stuff like this, these light sketches, all these different lines don't really matter. You're just kind of getting your loose ideas down there. I recommend having a kneaded eraser handy so that you can erase any lines if you want to.
Although we're painting over this, so it's really not necessary, but maybe just for your own, your own sake. I'm trying to decide, do I want the peacock feather to go across that way or this way?
I think we'll just make it kind of more whimsical and have it go across in more of a curve because we can make it however we want. So a kneaded eraser is, uh, fantastic to have if you do any drawing or sketching. This is the number one eraser I would recommend using. So we've got our teardrop shape in there, right? So now I'm going to do kind of like a sideways oval. It's going to start with a slight kind of arch at the top.
It just kind of curves on the bottom, so this shape. That turquoise shape is kind of what I'm doing there.
It's a kneaded eraser. I got that off of Amazon.
It was like a 6-pack, I think.
And then I'm going to do kind of like an upside-down heart here. It doesn't have a point really on the end, but you kind of have that heart shape. And then to help you guys kind of see this a little bit better, I'm just going to go over with a Sharpie.
So even with my Sharpie, you can tell I'm still doing kind of a sketch-like shape here.
And I'm going to do a little outline around this edge. So that's where I'm going to put that lime green over here. It's kind of in this skinny little border. Then this will be more of like the brownish green color. Then we have our teal and then our navy, like cobalt blue, in the center there. And then for the feathers, they, um, you don't have to draw these lines on. This is really the only shape we need, but the feathers are going to come out kind of like this, all the way around. So for today, after I get the paint on, I am going to go ahead and do those lines. We'll do some with paint and we will do some with paint pens, which the first time I did this painting years and years ago, I didn't even use paint pens. So I'm really anxious to add that element to this painting. So that is kind of like your, your your base sketch for a peacock feather. And now we're gonna get some paint, and we're going to start with the background, and I'm gonna get some black on here. So there are a couple different ways that you guys can participate if you are interested in learning more about Honduras. We actually do still have some spots left on our trip, so if you want to go serve and be a part of our team out there, um, we will put that link in the comments for you to go check out that information. We are going to be there June—
oh, I'm messing up on my dates— June 23rd through the 30th.
Okay, it's a 7-day trip. That's Stacy that I'm talking to.
She's going back with us too.
Um, but yes, we do have some spots left. I just got an email from Johnny this morning, um, saying they have a few more, um, spots from airports. Where he can get the, the group rate that he got for the rest of us who have signed up so far. So, Lynn, if you will put that link— perfect. That is the informational video, which I will show you here shortly. But there is a link, Lynn, that it was the other one that I sent you that takes them to the actual application page. So if you have questions about that, feel free to text me or email in and ask me whatever you want to know. You can ask me questions here on the live and I can talk about it. So you obviously will need a passport. We don't have any COVID restrictions anymore. Those have all been lifted.
Thank goodness.
We are excited about that. But it is a week of really just going and loving on kids. We are working on what exactly we're going to do with them this time, but just to kind of give you an idea of what a typical day looks like, we wake up on— we get there Saturday again, so we'll go, right, our first full day is Sunday again, right?
Yeah, because we get there Saturday. Okay, and then they usually get to like The kids will meet us at our little— the, the, yeah, our first full day we go to church.
Yeah, so, um, our first— we usually get there on a Saturday, get situated. The kids are usually meeting us at Casa Verde, which is where we all stay on the property, and they do a little song for us and they're so excited to have people come see them. And then Sunday is one of my favorite days there. On the property they have their own church, and we walk up the hill and go to church with them on Sunday. And then it's just really a day of hanging out and playing with the kids. This is our— this will be different for us this trip. Usually they have school Monday through Friday, and so we work on projects while they're in school. But this trip is our first one that we're going on through summer. So we get all kinds of extra time with the kids, which means more fun projects and activities, outdoor stuff. Last time we went, we painted a mural on the side of their library that turned out so cute, and I have a feeling we'll be doing another one, if not more than one, while we're here on this trip as well, because it's It's so fun to, you know, just add that, that fun element to their buildings instead of them just being a plain color, something happy and colorful. And the kids had so much fun just being a part of that with us and getting to participate and paint on that mural as well. Yes, um, yeah, Stacy was just saying, um, Johnny was mentioning that there is a $250 scholarship, um, for those last few spots, um, out of those airports as well. So if you are interested, um, you will fill out that application that Lynn has put in the comments, and then you will go ahead and submit it. And then he has to check flights and make sure that there are flights from where you are from that are within the Rice Bowl's budget. But yeah, if there are, then he also has a couple scholarships available to help go towards your trip as well. Okay, so we've got just a really nice dark background here. I took some black and that Ultra Deep Blue, some of the purple, and I'm just kind of mixing it and laying those brush strokes down. I did darker around the edges just because I kind of like the way that that looks. So I'm gonna let this dry for just a second, maybe pull the blow dryer out to speed up that process. And I'm just using the big filbert brush out of my brush set too. I like the filbert because it has the curved edge, and I kind of like the brush strokes that it leaves behind like that. So it's tempting to just want to keep adding paint at this time because, you know, we're just not super patient. But all you're going to do is if you keep adding on wet paint on top of wet paint, you, um, you're just really spreading the paint around. It's not going to help with your coverage and help you get rid of these brush strokes that you see. So you want to let that dry dry first before you do that. Um, I am going to show you guys— while we're letting this dry, I am going to show you the video that shares a little bit more about what Honduras is like, what specifically Good Shepherd Children's Home is like. This was done by one of our girls at the orphanage. Lily is the voice that you're going to hear. Let me pull this up, and if you'll just let me know, I just want to make sure that you guys can hear it once I hit play.
Good Shepherd Children's Home is located in the mountains of Honduras. It's a safe place for children like me, Lily, to grow up and learn. There is a lot of land here for us to play and explore, with a cafeteria, school, church, and a clinic to meet all of our needs. You're going to love it here. We have 32 beds in our guest house with everything you need. We really like it when our friends come to enjoy a Honduran meal with us. It's a great time for us to get to know each other. There are many opportunities for you to come serve the children and assist our staff. Holding one of the little kids, playing a game with us, swinging us on the playground, or just helping fold a lot of laundry. You could even help me with my homework. Don't worry, I'll help. Take good care of you. Bring a team with you or just join one of our teams. You will have the trip of a lifetime. Welcome to Good Shepherd Children's Home.
Come visit with us. We are waiting to see you in Honduras.
I just love her sweet voice. Um, so that, um, gives you a little bit more detail of what it looks like in Honduras, what you can expect there. It is one of the most beautiful and peaceful places that you will ever go. I love it. It's tucked in the mountains, literally in the middle of nowhere, so that the children are protected and kept safe. And we get up in the morning and we have our coffee and we sit on the porch and, um, just soak in that view. A lot of you have asked about my tattoo, which from this angle might be a little weird, but that is, um, mountains. And my oldest daughter Kylie and I got matching tattoos after our first trip to Honduras last year, um, just as our reminder, um, to go and be the feet of Jesus, to go love on these kids And that's really what it's all about. When I think about them and the initial thing that made me, you know, want to go and share with them was art. And I wanted to share that with them. And then what I found once I was there, especially going back a second time, is art and painting and the crafts, all of that is just a vessel. That is the vessel that God has chosen to use through me, um, and how I can reach out to others and spread his love and his joy. But it is really just something to engage the kids so that we can build a relationship with them. And what it is really, really about is just giving them love, giving them love that otherwise they would not have if people like us don't go out there and show them what God's love is. And I think it's just such a huge opportunity for us to be able to do that. And they will just melt your heart, and you will fall in love with them, and you will want to bring them home. And, um, I just look forward to going back every year and continuing to strengthen our relationship with them and watch them grow up. It's It's just so exciting to be a part of it. And when we went back that second time, you know, it was so different because they're used to people coming one time and then not seeing them again. But for us to come back and for them to see familiar faces, the joy that they had on their faces when we showed up that second time, and the, the closer that we got because it built trust and they were like, oh, they really do care about me, they're back. It was just, it was just amazing. And I just want to say one, just a huge thank you for how supportive our SocialEasel community has been with this outreach. You guys have been an amazing support system. And even if you can't go, you can still be a part of this mission with us by joining the paint party that we have coming up for our cute little Be the Light. You just— by joining this paint party that we're going to do next week for only $20, 100% of that is going to go back to Rice Bowls and Good Shepherd's Children's Home and funding our travel and all the supplies that we need to do those fun things with the kids. You can help by just being a part of that paint party. And then the closer we get to the event, we will also have an opportunity to purchase items off of our Amazon wishlist. But I mean, the support that you guys give has just been so phenomenal over the years. and I can't wait to share it with you guys again, um, for this trip, how our house fills up with the donations of things that we're sending and bringing to Honduras with us. And inside the Facebook group, I can't openly share because we have to protect the children, their faces, and on public pages like the Social Easels. So what this Be the Light, um, paint party that we're going to do next week, um, inside that group as well as inside my Inner Tribe, which is my VIP membership for my tribe sisters, um, I will be sharing photos and videos. And we're hoping that we can even go live while we are there with the kids and let you be a part of that painting process, that creative process, get to see their beautiful little faces and see the joy that it brings them. But I can only do that inside of a private community so that we know that they're, that they're being protected. So if you join that paint party, or if you are a Tribe Sister, you will be part of that journey with me as well and get to experience it firsthand through our experiences.
So I'm very excited about it.
But yeah, just let me know if you guys have any questions. I'm just continuing to add a little bit of paint on where it's dried. I'm doing again darker around the outer edges, just loading up my purple and my blue and my black, just kind of brushing in anywhere that I see Maybe little white specks still showing through. And then I decided to add a little bit of like my Perfect Peri around here where I'm going to put the stem. And I think this is going to be really pretty and just kind of give it a little bit of a glow, so it's going to look illuminated up against this dark background. And then you can see I'm just continuing to blend where these colors are still wet. You get that really pretty transition. And there's really no right or wrong that your background has to be here. This is a really relaxing part of the painting.
You can just keep watching your colors blend together. And seeing where you want to add anything. Isn't that pretty? I love the colors already. I think I'm just going to go all along this edge here.
Just kind of fan that out. Another reason I like the filbert, just those round edges gives a nice soft look when you're blending colors. Um, someone asked how many children are at the home. I think we've gotten a couple new babies over the last year. I think— I want to say it's 52 or 53 right now. So where I'm blending right here, and you can probably hear it, it—
hear it touch the canvas.
It's kind of like a dry brush. So I've got some paint on the end, I'm just going against that edge there, and then I'm just kind of fanning it out. And the background is already dry here, so it's kind of like dry brushing this color. Over top. Sylvia's asking, is it better to get your background, then use a tracer and draw? It just depends on what you're comfortable with. I chose to do it this way today so that you guys could see my sketch easier. You could do the background first and then draw your sketch on with a piece of chalk for your outlines as well. So either way is fine. I don't always just have one way that I do paintings. It's usually— we're just going to have some purple in there. That was accidental, but we'll leave it.
I kind of like the way that looks.
There's one of our happy accidents for the day. So it looks kind of crazy right now, right? This is where you got to trust the process that it's going to start coming together.
I am going to get my number 1 from my brush set. By the way, oh, I'll just scoop that up.
Our brushes did sell out and we are waiting On our next shipment, they should be here and back in the store, we're hoping, this Friday.
So just a few more days and you guys will be able to order the brush set again.
It's a 15-piece brush set, and these are my signature brushes that I picked out the sizes and the shapes and all that good stuff. Um, what I use while I'm teaching.
So I'm just going to go around with a little bit of dark.
You really won't see this black once we start adding the layers in, but it's nice to kind of get your shape on there again.
I'm gonna go in with my perilingual color here up against this a little bit. I just want to see if I can kind of soften this edge. Maybe go in with some darker.
So I don't want that white showing through, so I'm just kind of smoothing out my lines here.
Of course, we'll be adding some feathers coming out of this as well.
And when you guys, um, do go on the trip, part of that trip that we spend as a team in the evenings once the kids go to bed is really learning more about what Rice Bowls does, about what the children's home does, and different ways that we can be a part of it when we are not physically there with them but continue to help them on their journey as well. I think this time I am— I have been looking with, um, my girls. I got them some new devotionals at Easter time, um, but looking for a few um, a few devotionals for girls. I'd love to, since we have the extra time in the summer, to spend some evenings with the girls where we can talk and they can ask questions and help them, you know, further their walk with Jesus and, um, just help spread that truth and help them see that truth in their lives as well. So that's going to be something different, um, that I'd really like to incorporate into this trip and maybe how we can combine scripture and art together, kind of like we've been doing in my group with our art journaling. So maybe something fun like that. But I'd love— always love fresh ideas if you guys have any recommendations.
We would love to hear them.
So this is going to be a little bit slower of a painting than I normally do with you guys on Facebook Live, just because I want to add some of this extra detail in here.
I could definitely paint this faster, but I want to add some different elements to this, so we're just going to kind of play with it and see where it goes today.
So I'm still just using that fine brush right now.
Oh, awesome!
Sylvia said she ordered a second set of the brushes because the kids love the brushes so they can paint with me.
I love that. That's awesome.
And again, even when you're doing—
there's a little bristle here.
Even when you're doing fine lines. A lot of times the mistake that people will make is not getting enough paint in their paintbrush, and then they can't make the brush strokes the same as I do. So make sure you're still loading up plenty of paint in your brush, even if you're using a small one.
I'm going to get—
since we're a little further away from that stem, I'm going to get my bigger brush here. I like the way it blends better. What do you guys think about the light next to the stem? I think that's going to be pretty.
So I'm just going to touch a little bit of this down. Got some stubborn spots out here that really don't want to fill in my little white specks. I love how these colors just glow. It's fun to be able to create that effect with our paint. So this is also great if you made your stem wide and you're like, oh, I wish it wasn't that wide, and come back with your lighter color around that edge and just blend it in. I'm just picking up a little bit of more of a purple with my blue just to kind of change the color in the background. In a few spots. I'm liking the way that looks.
All right, let's jump into the inside now and we'll start building our way out. You guys are awful quiet today.
Any questions for me while we're painting?
So again, this inside, what I'm going to call like an upside-down heart, is really, really dark.
So I'm just using a mixture of the blue and purple and black together.
You'll notice when you're working with these darker colors, especially blues and purples, that it's gonna look a little streaky on your first coat. So you most, most of the time you're going to need a second coat if that's going to be your main color, and you want to let that dry in between.
I think I need to change the angle of this just a bit.
We're going to rotate this, so I'm gonna grab some Peacock Teal.
Make sure that's shaken up pretty good.
I'm gonna put it up here on my palette next to my blue because I might mix them just a little bit.
So this is that oval shape. And again, you don't have to make this realistic as far as color choices, like your peacock feather that you may be using as reference, or if you're using mine as reference, you can change it up. Because it's your piece of art, you can make it whatever you want. It's already starting to look pretty.
So I'm just kind of—
since that inner color is still wet, I'm kind of just blending them so there's like a really smooth transition. Going to lower you just a little bit so you can get a little closer.
And I'm going to let this dry just a bit because you can see if I add to it now, it's just going to keep blending with that darker color. So if we let it dry, when we come back and add some more of this teal on top, it's going to be a lot more vibrant. So on my sketch, I kind of put that I was going to have this next section be kind of a greenish brown, but I actually don't know if I'm going to. I think I want it to be a little bit more vibrant, so we're just going to play with some different colors here.
This is Paradise Green. Trying to add that so you can see my— come on, camera. There we go.
See the colors on my palette as well. I know it's a little hard to see because I've got all these colors on the underside.
I need to scrape that off and I haven't done it yet.
And then I'm going to grab some of our lime green That one's Sour Apple. I want to show you guys my other peacock painting. So again, you can kind of get the idea. These don't all have to be realistic colors. Um, but this is the peacock that I have taught inside of Tribe. Um, so when you become a Tribe sister, you get immediate access to all of these past tutorials for the past 5 years. So this is one, one of the over 175 that I taught in there. But look at these fun colors, just vibrant, and I love them. So I thought I'd share that as a little inspiration as we're working on this, um, peacock feather today as well. Hey Angela, um, I don't provide printed, like, PDFs of color lists for my Facebook Lives. I just share with you guys what colors I'm using, um, while I am live. And, um, the best place— because a lot of, a lot of the colors that I use you're not always going to find in the store like Hobby Lobby or Michaels. Um, I like to order them directly from DecoArt. And Lynn, if you'll put the— if you have that, the DecoArt link, um, you can throw in the comments. That will take you to DecoArt's website where you can order the different paint colors that I'm using. Today, and that is my affiliate link with DecoArt. So she will share that, or if you'd rather have it text to you, you can also text all one word. You can text DecoArt to my text number, which is 417-217-7044. So there's two different ways you can get that, that link.
Let's go With— what do I want? Picking out my next brush here. Thank you. Okay, we're just going to play a little bit. I'm not sure, maybe I want more of a purple color in here. We're going to start with some of this Paradise Green. I love these cool colors together. So this is pretty translucent, so we'll probably want another coat on that. I think I like that color. What do you guys think? But I also think I may want to add a little bit of pink to it.
So a little tip that you may not realize, colors that you could blend together. I've got teal in my brush, or that Paradise Green, and it may scare you to think about mixing that with a pink, but because of where they are situated on the color wheel, if you mix those two together, the pink and that tealish green color, you're just gonna get a pretty lavender. So even if I add some strokes in here, I know I'm not going to get a yucky muddy color by letting those colors blend. But I'm going to add a little bit of pink for some vibrancy.
I'm gonna get my small liner and we're gonna start with that lime green. Around this outline. And you don't really have to worry about your edge too much here because this is where the feathers are going to start coming out.
So as I'm doing this part do the outline. I'm just going to very lightly start pulling some different feathers out of that shape. So these are going to be wispy. This is the lime green. But can you see how light I'm doing that and how I'm kind of doing like a flicking motion? You can have some short ones.
I'm going to bounce in between a couple colors, so I'm not going to have all mine be just one color here.
So you can have some short ones, and then if you need longer— and when you're using like a skinny brush like this, like I said, don't forget to load it up, but maybe you need to start like after you've made this brushstroke and you want it to come out further, start halfway up that stroke. And you can kind of extend it out like that.
It's starting to look kind of cool, don't you think?
It does look electric. I love it. So pull up a photo of a peacock leaf if you need to. Again, mine's going to be a little bit more whimsical than this, but I do want you to see how they are— those are just coming out of those colors there. And then down here along our stem, look at the angle at which they're coming out. Okay, so, um, a mistake that I would see a lot of people make— I'm going to move this so you guys can really pay attention to that shape. Um, when I would teach this at my paint parties is people would make their brush strokes come straight out. So instead of the angle like they are here, right, like what shape is that? That's the letter V. So I want you to think the whole way you're going down this, you're making the letter V. And what I would see people do at paint parties is instead of doing this shape off of the stem, right? So the V, the angles, they would come out and just do this, and it just doesn't look the same. It doesn't have the same kind of flow to it. That's what's so beautiful about these feathers and the way that they are. They just kind of start flowing together, and they're all angling up. Oh, almost got my peacock feather all in the paint. So coming down here, it's going to kind of flow in So you can see on the, on the peacock feather, they were not super long and crazy. I tend to make mine a little bit more, like I said, whimsical. So I'll kind of pull out my feathers. You can see how I'm holding the brush now, very lightly, tiny little bit of pressure.
Maybe have As you're going out, some, some different curves, maybe even some curls added in.
You can practice these shapes on a scratch piece of paper and a mixed media pad.
And don't feel like all of your lines have to be connected either.
We're going for an idea of, right? We're not trying to paint photorealistic.
So you can have some just random floating brush strokes.
Look, I can add these lines and just start filling in to fill that shape out.
Maybe another little curly Q coming out here. I'm gonna go back in the center here, get a second coat of this green now that that's dried a little. Looks like glow-in-the-dark paint, doesn't it? So fun. You can decide how much space you want in between your stem here. I'm gonna put a little blue over top of that stem, I think.
And I'm just going to keep going down. Don't worry if you get a little heavy-handed. I pushed down a little bit harder right there, so maybe that's just going to look like there's some closer together.
Remember, it's not about perfection. It is about playing and watching to see what happens and just enjoying the process of painting.
So I'm going to do—
you want to literally do V shapes, you can do one brush stroke over on this side And connect that line.
Do it over here.
Remember, our stem is kind of curved a little bit, so our V's are going to curve with the shape of our stem. I didn't use any yellow yet. Let's throw a little bit of yellow up here. I'm gonna add a touch of that lemon yellow up here. So you see how you can just kind of keep building and playing with it. I think I want a little bit more pink in too. Maybe we should call this an electric peacock feather.
Just some subtle little touches of pink. It's definitely an accent color, not one of the main colors. So if you're watching me over here on the palette, I've kind of run out of that Paradise Green, so I'm taking my Sour Apple and some of my Peacock Teal and I'm just mixing those two together and it's going to give me a very similar color instead of me grabbing more paint since Since I have plenty on my palette, I'm just going to mix what I have and make my own version of that Paradise Green.
I'm loving the way that it looks.
I love the glow that we did behind here. See how that, that periwinkle that we did up against the stem, I think that's kind of helping give that effect. Of the glow that it has. And then I can even take my yellow and mix it in what I just did if I don't want that yellow quite so bright. We're going to mix it with a little bit of that blue and the green, and now we just kind of have a lighter kind of citron yellow limey green color that we've created.
So you really just want to keep practicing these quick movements, because once you learn and kind of master this skill of doing your brushstrokes like this, you can use this in in so many paintings.
And if you're saying, I can't do that, whether you say you can or you can't, you're right. So be careful what you're, what you're saying to yourself when you're creating. Your brain's going to believe what you tell it.
It just takes practice. It's just a learned skill. Should we add a couple more curly Qs?
So another tip when you're doing like the curly Q shapes too, you probably see me move like my whole arm.
If we don't and we just move our wrist, we end up with more of an oval shape instead of a circular shape. Let's throw some pink in here. So I'm going to jump back up here.
I think I want there to be some more contrast between this oval shape and that green in the background.
Remember, we were letting that dry, so when we go back over top, we have a little bit more contrast here. So I'm doing a little bit of pink and green.
So when the pink and green meet, they are going to create kind of this— think of like a green and red, they're opposites on the color wheel. So pink and green are going to do a similar thing, and it's going to kind of tone down the pink and the green. So if I mix them, it's going to take the pink away from that.
Does that make sense? It's going to desaturate it.
So it's kind of giving me, with not using like a brown, but it's kind of giving me more of this kind of tone where that's like a greenish brown. So by mixing the pink and the green together, we can get that effect.
So you'll see like where they blend, it almost looks like a brownish color, but a pretty one.
And then you can still have some bold pink come on top of it as well. So your peacock feather, you can make it however you want, but I'm going to add those two colors together. And I like the contrast that, that gives that. Now that stands out a little bit more.
I'm gonna add a couple more. It's more condensed up at the top. I was talking about using paint pens in this, but now I really don't know if I want to. Let me, let me just test this for a little bit. I don't even know if my white one's over here. I'm prepping my black one. Let's zoom out a little. So fun.
And a lot of times people say, how do you know when you're done? So what I'm doing right now is kind of stepping back and looking at it from the camera at home. My tip for you is to take pictures on your phone And if you're happy with the way it looks on your phone, then I think you're done. If you see something and you're like, oh, I could fill in a little bit more here, or maybe I want—
maybe you want some long big feather coming out, it can be as flamboyant of a feather as you want it to be.
I like how they kind of just disappear, like they're fading into the background.
So what do you guys think? Paint pen or no paint pen? I also have— is this the one I like? I don't think this is the one I like. Let me see. Oops.
Let me see if I can find my other white paint.
Oh, I just thought we could add gold. Too. That was fun, little squeaky noise.
This is my white Posca pen.
I'm just going to come in. I just want to see if I like the few little accents. I don't even know if you guys can really see that from that far away. Let me get closer.
You always want to do these when your paint is dry.
It's a little bit wet in there. Got a little paint on my tip.
I forgot about that metallic teal.
Hold on, let's play with this.
This is just where you are just having fun.
I'm just playing with some final accent marks, seeing what I like, what I don't.
You're not going to know if you don't play.
Trying to see if this is my gold. Yes, it is.
So this is in my Amazon store as well. This is Art Owl, is the brand of this. It's a super skinny extra fine point paint pen.
We know I love gold, so I'm going to add a little bit of gold in here.
And it's just kind of making me want to scribble a little bit, so mine are going to look more like scribble accent marks.
I love this baby. How satisfying is that?
Maybe it's just me. I love it. Did we lose volume?
Someone mentioned not being able to hear.
Well, this black paint pen must be dried up. It doesn't want me to use it.
This one's not, so I'm gonna say no black. I think we're done.
So fun. So we will have a post made, um, over the next week, so be on the lookout on the Social Easel Facebook page. We will be posting a flaunt and share so you can post your peacock feather that you did with us. You can also text me your paintings if you want me to see your paintings. Um, now that is not for critique. I don't do any kind of personal critique over that, but if you want me to see your finished work from today, I would love to see it. And you can text those to that phone number, um, on the screen. And then last but not least, just in case you were late coming in or you want a reminder, if you want to join me next Thursday to learn this whole painting. This is a mixed media Be the Light little bird. You're going to have a template for the Be the Light, for the bird, and then I'm going to show you how to incorporate stencils, tissue paper, scrapbook paper, all in to your art. And this is our fundraiser for Honduras. So this is going to be $20 for this pop-up paint party that we're doing next week. Um, and you can be a part of that as well, and all of that will be included, as well as you getting to continue to be a part of the Honduras journey with me, um, inside that group and seeing what we do when we go out there in June. So that is what we have coming, um, up. And then still even more, we're just super busy over here at the Social Easel. On Friday I am going to be jumping on live yet again, and we are going to do our reveal for the newest painting of the month painting, um, and a technique taken away from that painting as well. So that will be coming on Friday. So lots for you to do and play, and I can't wait to see these. This was fun for me to do again. I just love the whimsical style of the peacock feather. And all these cool colors. So I hope you guys enjoyed it, and I will see you Friday. Bye.










