Painting Pumpkins || The Social Easel
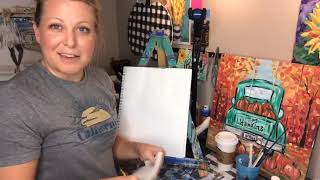
In this 90‑minute live YouTube session, Christie Renee Hawkins (owner of The Social Easel) demonstrates how to paint both small and large pumpkins using acrylics, covering basic shapes, color mixing, brushstroke techniques, layering, and adding depth through overlapping and highlights. She interacts with viewers in real time, answering questions about brush pressure, color choices, and composition, while also troubleshooting technical issues (Wi‑Fi, AT&T). Throughout the demo she promotes her upcoming Social Easel Online Paint Studio membership, explaining its structure (two full paintings per month, technique weeks, live Q&A, private Facebook community, and early‑bird incentives). She showcases her mixed‑media pad, camera setup for close‑up teaching, and provides practical tips on equipment, paint consistency, and workflow. The session ends with calls to action: share the video, join the waitlist, and attend future live classes.
Chapters
Okay, round 2, we're gonna try this again. So I hope you guys were able to switch back over. Hopefully you are getting the notifications. Sometimes technology is great and sometimes it's just not. So okay, my— mine's working again, so I don't look blurry on mine. I'm seeing people joining, so this is all good. All right, now we're— okay, good, much better. I'm seriously so done with AT&T, I can't even tell you. So if you live in Springfield, Missouri, and you have a good Wi-Fi provider, I would love to know, because we switched our AT&T over to a business line a few months ago, and ever since then it kicks us off of Wi-Fi constantly, and I am literally right next to the modem. So this is awesome for me. I'm sure you can imagine with how much I use it. And not only that, but we can't watch direct TV either. So I'm gonna wait for you guys to hop on here, and as you guys— okay, good, we're saying clear now. Hi, Lisa and Lisa and Lori. Okay, good, clear for sure. So this is good. All right, I'm getting my paints on my plate really quick. I think I may have grabbed two of the same. Now those are a little different. So as you guys are hopping on, now that we've gotten things straight, go ahead and comment and let me know you're here. You can wave, tell me where you're from. This has been so fun over the last couple of days. To see the broad reach that we are getting. So it's super exciting. We even had some people from Canada watch the one yesterday, so very cool. Right next to— thank you, Linda— right next to where you can make comments, there is a share button. So if you are having fun watching these tutorials and you want to share them with your friends, I would love for you to do that. So if you just want to hit the share button, it doesn't take you out of of the live and it just immediately shares it to your newsfeed. So that would be awesome. I'm having lots of fun painting with you guys and showing you some different stuff. So yesterday we did our buffalo plaid pumpkin. Oh, and I forgot to mention, type in shared after you do it. So I am gonna, I am gonna show you guys lettering on this. But the reason I'm waiting until tomorrow is because I have class tonight and I didn't have time to prep my stencil that I want for this. So it's a little faster for me to show you guys some pumpkins than it is for me to show you lettering today. So we're gonna do that tomorrow. So jump on here tomorrow and you can see me finish the pumpkin door hanger. So thank you guys for sharing. We've got Alabama. Tampa. I want to be in Tampa right now. Okay, so can you guys see the painting okay? I'm gonna move you just a little bit closer. So what we're working on— I'm gonna try to pull you up on my phone— is I'm gonna show you a couple different ones. I'm gonna show you these little pumpkins. These are super simple, not as hard as they look. So we'll do some that are kind of coming out of our truck and then the ones on the ground. So I'm going to show you a couple of those, and then I'm also going to show you how to do a larger pumpkin. You know, you can make these any size that you want, but some of my fall paintings have much bigger pumpkins on them. So I'm going to show you how to create the bigger ones. They obviously have a little more detail because you can work a little bit more with them. So I'm going to try to pull you up here and just prop this up so I don't miss any of your messages while you're watching me, so I don't have to keep turning around. All right, so there we go. I'm going to set this back, so I'm going to move this over here Can you tell I need to clean my countertop because it's getting a little unorganized again? So we'll still have this as a reference, but I'm gonna move my mixed media pad up here so you guys can see the pumpkins. So we're doing all these lives. If you haven't been on for the last couple, my name is Christie Hawkins and I'm the owner of the Social Easel and the Social Easel online paint studios. So this is a membership program that I have. So if you have fun watching these free tutorials and learning some of the tips and like my style of teaching, we have a private membership group where you can join, and we're opening doors September 16th. So these videos are leading up to that. So if you're interested in learning more about that, be sure to type waitlist below and We will make sure that you are notified when the doors open again. So inside our group, you get 2 full paintings per month with me, start to finish, and you get this— if you guys see this thing here, this is my little camera holder. So when I teach you online, this is more for interaction with you guys so I can kind of talk to you at the same time. When I teach our— and it aims straight down at the canvas, so you are getting a bird's-eye view, up close and personal, and you can really see the brushstrokes. You can really see exactly how to create your paintings. So that's what that is, and you'll get 2 full classes. And then you also get a technique week, which is anything from a new style of painting like paint pours, door hangers. This month we have a glass artist is going to be our special guest and show us how to do glass art. And then sometimes it's me just diving in deep with you guys on a specific technique. And then in addition to that, the last week of the month we have a live Q&A, and that is where you get to pick my brain and ask me any questions that you may have about your struggles or whatever it is that you are working through with your painting, or maybe somewhere where you have a hiccup, or maybe you don't even have that but you just want to pick my brain about, you know, my best things that I do. So that kind of gives you an idea of what it's like. And last but not least, the best part to me is our community. So we have our private Facebook group. A lot of the ladies are on here right now, so you guys can say hi if you're already in my group. But this is where I teach the paintings This is where we share our paintings and kind of build each other up, and we've already seen some awesome friendships kind of come from this because you're with a bunch of like-minded women who enjoy the same things that you do, and you guys get to see each other's progress and learn from each other in that process too. So that's really cool. So I'm going to scoot you in just a little bit. Is that a good view for you guys? Make sure I'm not missing any questions. If you are just now hopping on, make sure to hit your share button, share it with your friends, and also comment and let us know you're here and where you are watching from. So that's always fun. So I'm going to do this a little higher. Just so you guys have a nice good view. So when I make my little pumpkins, I kind of think of it as like making the letter C going one way, and then you're just reflecting it going the other way. So pretend it's just looking in a mirror. So I'm just going to come in like this. So I just got a letter C here, and I'm going to come right back and do the same thing. So I'm just kind of connecting mine. It almost makes like a little heart shape at the top, but my bottom is nice and round. And then I'm just going to fill that in with my orange. And then I like to have different sizes, so if I'm doing several next to each other, maybe this one's a little lower, or and a little closer on the ground, and we'll fill this one in. And I have a couple different shades of oranges and yellows because when you're doing these, if you just use one color, they just look kind of flat and one-dimensional. So by adding the extra colors that we're getting ready to they take on more shape and more character, and it just adds to them. Linda, you should just be able to just hit the share button at the bottom. It may only share to your personal page for now, but maybe you can share from that later. Kristen, super excited to see you tonight. And Nikki, you guys are also coming, awesome. So, so far so good, right? This one's a little crooked. This is what happens when you paint sideways instead of straight on. So this is a really big one. Okay, so you guys got the basic shape there. And then once I get that on there, I'm going to come back. I actually want just a tiny bit of brown. I like to have mine a little more, um, rustic looking and not too, too bright. So I'm going to come in with a little bit of my brown, can add a little stem up at the top like that, and then we want to add these little lines kind of going around. Okay, so the important thing you want to remember here is that all your lines should come from the same spot, so they should come from one central point. If it doesn't, then it doesn't quite look right. Then you've got your thing here and the lines are not all coming from the same spot. Does that make sense? So you always want to start wherever your stem is and then kind of pull down from there. And they don't all even have to have the same amount of lines. Some, some of mine only have 2 lines, some have more depending on how much is showing. These are not super solid. So I like them a little streakier. We don't want it to look like— I always say we don't want it to look like a kindergarten outline. So you don't want these big bold outlines around it. You want to use light brushstrokes, light and wispy. So just real quick, you see how I'm doing that? So I'm barely pushing down with the bristles on my pad. So a lot of people struggle with making heavy-handed marks. That all has to do with pressure. So I've still got a lot of paint in my brush, but if I don't press down hard, I still get those skinny lines. So hopefully that makes sense to you guys, and those are the types of lines that we are looking to add here in our pumpkins. So once I get those on there, then I'm going to come back in between each little division there And I've still got a little bit of brown in my brush, and then I'm just picking up some orange with it. And that way, if you do get a little too much orange— or I mean a little too much brown— you can go back with your orange and just kind of overlap it a little bit. So I want to add some— this is called Ripe Tomato, and it's more of like a reddish orange. So I just do these quick Again, same thing I was showing you over here— these kind of brushstrokes, quick little wispy brushstrokes. I don't want anything too solid. I want each little section to be a little bit different. And then I may pick up a little bit of yellow and just lightly streak that in, and it doesn't even need to be on all of them. Maybe I just put it on some of my outer edges, maybe just a couple highlights in between, and you can keep blending. This is where it comes down to preference, so I'm going to lower you guys and scoot you a little bit closer so you can really get a good view here. But as far as— that is totally a personal style as far as brush strokes. I have some students who love blending and it drives them crazy to see all these brushstrokes, and then I have some people who paint more like I do and like the brushstrokes showing. So there is no right or wrong. That is just preference. So, and I like to show people up close and I like showing you guys up close because— there we go— because when I teach in class, it's very deceiving when people are sitting honestly even 4 feet away from me unless you're this close where you guys are, like I would be painting in class, you can't really see my lines. I can explain the brushstrokes, but this gives you an up-close view. So what do you guys think? You like the little pumpkins? Not too hard, right? So it's all about just breaking it down into steps. and then you can keep playing with color if you want to. If you want to go back and add more, or maybe have a little bit darker on one side, so just kind of like that. So you can play with it as much as you want to, and then we've got just our tiny little leaves. And I'm just wiping my brush off. I don't care if my green gets a little bit of the orange in it because it's just gonna tone it down a little bit. And I'm just gonna hold my brush. You guys see that? I'm just holding my brush, not even doing a brushstroke. I'm just pressing it onto the canvas just like that. So super easy. Give me some thumbs up and hearts if you guys like it. If you think you can do something like this, we'll just put a little, a little bit of ground underneath here so you can stack your pumpkins. And a lot of times we talk about giving a painting depth. That's a question that I get quite a bit. How do I give my painting depth? If it all looks flat, if it all looks one note. See how that is overlapping? That immediately gives it depth. Anytime you overlap things, it creates that other dimension. So you actually want to try to overlap stuff in your painting because it moves things further back and things closer to you. Yes, this is a round tip brush, and I don't even know what size. This is probably like a 2 or 3, but any round any round tip will work. Obviously, the finer it is, the skinnier lines you would get. So this— I have a little bit of green still in my brush, and this is just optional. You know, there are those really— I love the pumpkins out there that have a little bit of green in them. So maybe you want to go back and on some of them, not all of them, add a couple of those brush strokes. Or maybe we want like maybe just the tip of another pumpkin kind of coming out here. So for this, I'm not worried about the bottom because it's not showing. This is kind of more of what you're gonna get up here in the truck. So see how these just, just the top of it is kind of coming in between those two curves. So just almost like a little heart shape. Ashley, hopefully that answers your question. I just saw your question, how do you stack them? So this is how. You could start with further back and build forward. I kind of am one of those, I kind of go back and forth all over the place with my paintings. So I'm just gonna fill this guy in and picking up a little bit more orange on there so it doesn't blend with my leaves too much. And typically I would not already have— like, if I was doing this like the one tonight, I wouldn't already have my stem and leaves on there. These would all just be— that would be our final touches where we add details so I wouldn't have to be fighting that right now. And then same thing, I'll just grab a little bit of brown just like that, add a little more green in there, and we're gonna brighten this guy up just a little bit. He's a little dull. So hopefully that makes sense as far as stacking. Does that answer your guys' question on how you would do that? And you could keep going, so I could add, you know, another one over here. So however many you want and feel like making, you can just keep adding them. So again, it's a C one way and then a mirror image of that C the opposite way. So very simple little shape, and then you're just adding the details to it. So this is just good for reference, and I tell my class this all the time. A lot of times when we're working through steps people will be at this step and then they're like, "My pumpkin looks stupid. It doesn't look like yours at all." Well, it's not supposed to look like anything yet. So it's just, it's just the shape. All those details that we add to it, that's what makes it turn into a pumpkin. So when you are painting, don't be so hard on yourself and so critical all the time. Understand that things have to happen in stages. A lot of painting is layers. So So you have to kind of get your base down before you can add all the detailing to it. So does that make sense to everybody? So hopefully you guys get that, and I'm gonna hold this one up kind of in reference to it so you can kind of see. That's how I do those. Sound good? All right, so I'm gonna swing this back over here. Ignore me in front of the camera. Thank you, Mandy. I love getting to share this with you guys. I'm getting to live my dream, so I am a happy girl. Never in my life did I think I would get to paint every day, but I love getting to break it down for you guys and making it where it's a little, little more feasible to you and not something that you're scared of anymore. Every single one of us has creativity and artistic talent inside of us. You just have to have the instruction to help you find that. So that is my goal. So I'm gonna make a bigger one here. But it's the same method. I'm gonna reach in and read these. Linda, yeah, they are both— so she was saying the truck with the pumpkins or Christmas truck with the trees. Would be very popular. I last year, I think I taught this class, we had, I want to say, 6 or 7 sold-out classes just for this one painting. And the Christmas tree truck, the exact same. So the last half of my November and December leading up to Christmas was doing these trucks. They have become ever so popular. So I will give you guys— this is just a little bit of a, I guess we'll call it a sneak peek of what is coming for the Social Easel Online Paint Studio. So again, the doors open— I'm using just a big flat brush now— doors open September 16th. That's a Sunday, and doors will open at 8 PM that night. But if you sign up for the Social Easel Online Paint Studio and you do it on either Sunday night or on Monday, there will be an early bird special. So if this is something you're thinking about doing and you would like to learn more about painting at home, that is what this membership group is all about. So stay tuned for that, but I'll go ahead and tell you what the early bird is gonna be. Because it has been so popular, I decided to make the truck. So if you love this truck and you want to know how to paint this at home, and have your own design that you can make any color you want, add whatever you want to in it. I have a truck for every season, so I've done one with sunflowers, market flowers, all that stuff. If that's something that you would like, the early bird is going to be the stencil of that truck image, and it's also going to be a short tutorial of me showing you exactly how to add all that dimension to the truck. So that is going to be yours free when you sign up for the early bird special. So the monthly cost is going to be announced that day. So September 16th, everything will come out. You will get notification to let you know it's open. But I can tell you this, it's a pretty dang good deal because a typical class with me is between $40 and $50, and you are going to pay a monthly fee. And I'll give you a little hint, it's between those two numbers. But you are going to pay one monthly fee and you're going to get two full classes with me in addition to everything else. So we also have— we already have 8 full paintings in our group. So when you join, you get immediate access to not only what our monthly content will be and continue to be each month, 2 new paintings every single month, but you have immediate access to 8 full paintings, all our technique videos, all our live Q&As, So it is a library of information that you have full access to 24/7 whenever you want. You'll have your own password and everything, so your own little account where you can access all of these paintings. So I'm super excited. Our members are so excited to welcome you guys in. Okay, can you guys see Okay, I'm gonna aim that down just a little bit because I want you to be able to see the detail better. All right, so we've got our little sideways pumpkins here, and now we've got our big one, so Lisa says she's signing up and cannot wait to make the new friendship. That is seriously— these women, it's the best part. That's always what I say. I mean, you guys are doing it to learn painting for me and art, of course, but you can't put a price on this little community that we have. It's so awesome. So again, if you are interested, make sure you type in waitlist and you'll get all that information sent out to you. Okay, so for this, I'm gonna kind of show you my palette. I'm just going back and forth between my different shades of orange and just filling it in. My initial coat, it does not matter. I'm going all different directions, whatever. As I start adding my second coats in, I'm continuing to go along with the shape of the pumpkin. Pick a little bit of brown. Up here. And I'm moving fairly quickly because I want my paint to stay wet while I'm doing this. Okay, so you're picking up some different colors, maybe a little bit of lighter mixed in, but see how I'm staying with that curved shape. So keep that in mind. Just add in all those little streaks. You guys see that okay? There's a glare because this is so wet, and I'm not sure if you guys are— hopefully you're seeing, seeing the lines fairly well. You'll be able to see once I start adding more detail. So that's gonna be our base coat. And then, oops, hit a button over here. I'm gonna pick up some more of my brown and So I'm just coming down here like this, so I'm filling in that angle there. Then of course I'm running out of room, but you could change— you could make a long curly stem if you want. Or you could make a short fat one. There are so many different looking pumpkins out there. That's what makes these fun because there's really no right or wrong. And I'm showing you with orange, but you could do the same thing with a white or creamish colored pumpkin or a green pumpkin. So that would be really pretty, like if you were making your own painting or collection or whatever, and you had some varieties in there. Nancy said, what kind of sketchbook are you using? I will show you, and this is in my online store, and I will post all these links below afterwards. Eventually someday I'm gonna have someone be able to do this for me while I'm teaching so you guys get it immediately. It's this mixed media pad, and I love this thing. My students love this. This is probably one of their favorite purchases. For the group because you get to practice all your stuff and work out your kinks on this before you go to your canvas. So a lot of them will practice, and some of them even do a full painting on their mixed media pad before they go to canvas. That is just preference or whatever you feel comfortable with, but I love it because I can just do all kinds of stuff on here and it can handle the acrylic paint. and then you can just keep working. So it's kind of like your little workbook. Okay, so I've got the brown. We've added our stem in, so I want to do the same thing I was doing on those little ones. Same kind of light streaky lines on there. Can you guys see how I'm doing that? Awesome, Marcia. Marcia's in our group. She said she's painting on her media pad with us right now. And, you know, going back to the group, we have— so I teach most of my lessons, I teach live in our group so we can do this and we can kind of interact and talk at the same time. Some will be pre-recorded over the holidays so that you guys have early access to them. All the December Christmas paintings that we're doing are going to be released at the beginning of September, so you have them— you'll have them right at the beginning, so if you want them hanging all of December, you'll have access. But a lot of times, up until now, we do our paintings live together, so they can ask me questions while I'm teaching the lesson too. And even afterwards, a lot of them, you know, don't necessarily get on there the same time as me, and you can go back and post comments underneath, so I can go back and address those afterwards. So see how I start streaking that brown in? I'm gonna turn this— I wonder if— does that help with the glare a little bit? I hope so. Because I see a lot of glare. Okay, so I did kind of my outside edges, some brown streaks around there. Now I'm going to come right back, remember always at the point here, and I like to do my outer ones first and then it kind of helps me figure out where I want my middle one. And they're just kind of coming down towards the bottom. And if you wanted to, you could kind of give your pumpkin a little bit more of like a curve and that bottom section kind of like a little bump there. So I'm going to turn this just a little so I'm facing straight on and I don't end up with some crazy-looking pumpkin here. So again, real streaky, and the thing I love about this— so I'm going to go ahead and say I want this line out a little bit further than what I initially had it. When you're doing this style of pumpkin, if you get your line on there not exactly where you want it, it's totally fine because you can just move it. And where that was, I can come back with some more oranges and yellows. And see how I'm going right up against that brown line? We'll do the same thing here. If you do something you don't like, you can cover it up, but this is how I go back and start adding my accents in. I switch back to my big brush. See how quickly just adding that little, little difference in color there, little streaks going right up next to our brown, starts bringing all the edges forward and gives it more depth. So I like there to be lots of variance in my colors in my pumpkins. What do you guys think so far? Do you like the bigger pumpkin or the smaller ones, or maybe you like both? So same thing here. If I want— I think I'm gonna blend that out just a little bit, and I'm gonna move that line. So what I want you to see by this is is that just like Bob Ross says, there's no such thing as mistakes, just happy accidents. Anything can be fixed in your paintings. With acrylic, normally I let it dry and then I go back and fix it. With this, because we're working with all colors that can be mixed together, I can fix it while it's wet and just move that line just a little bit. So hopefully it's looking good. I'm kind of working at a weird angle here, so I'm kind of checking it out through the video to see what you guys are seeing. And I think I want to have— do you see all those colors in my brush? So I've got oranges and yellows, I've got a little bit of green in there. So just have fun with it, just be creative. I'm going to streak a little bit of green in because I like a little green in my pumpkins. You can add as much or as little as you want. Same thing, if you get more on there than what you meant, you can either let it dry and go back, or if you want to blend your colors, you can do it while it's wet. So it's just kind of Kind of depends on your painting and how much paint you have on there. When you are working with acrylic paint, you don't want it super thick and gloppy. If you've got it really thick and every time you add a color it just blends back in and your paint's starting to kind of get sticky, that means you've got too much paint on there and you need to let it dry before you go back and try to work with it again. So does that make sense? I'm gonna come up here, just add a couple little brushstrokes into my stem. We don't want anything to be just one solid color. Mandy said you normally paint flat. And you've been wanting to try an easel. I paint both ways. So for my classes, my online classes, I teach flat. For my classes in studio, I teach on an easel. So it's whatever you're comfortable doing. Again, there's really no right or wrong. It's just people's preference. I think there's pros and cons to both. See how I can use this yellow as like a highlight? So I'm getting a fair amount of yellow. Back to my round brush because I'm making some skinnier lines, and I want to keep that yellow, and I'm real— do you guys see that I'm barely dragging that on there? I want those to be a little bit bolder, maybe a couple bold yellow streaks throughout. Not too much. I don't want it to take over, but see how that gives it— it brightens it up a little bit. So the last thing I'm going to show you here, I'm going to get a little skinnier brush and and I like to add these little curly-Qs to my paintings, especially my pumpkins. So I'm gonna start, pull it out, just kind of go around in a loop, and I'm gonna come back with brown over top of that. Maybe you have one that goes down over your pumpkin. So again, normally I would be doing this after my pumpkin was dry so that green really stands out against it. Maybe we'll add a little leaf up here at the top with our curly Q's. Give a little highlight here. All right, I think we're about done. Does anybody have any more questions for me? Do you guys like this? Did you like learning? This style of pumpkins, kind of two different ways. Hopefully you enjoyed that, and just stay tuned for the next few days. I already forgot. I think I have— what do I have, 7? I think I have 7 more, 7 more little quick classes to do with you guys. So make sure you type in "live alert" if you want to be notified of when I go live, so type that below. Share it if you haven't already. You can share with your friends, and then if you want to be on the waitlist, you can also type in waitlist and it will send you a link to be added to that. And I forgot to mention, when you guys add yourself to the waitlist, you get immediately— you get a list of all my favorite paint colors, and you also get a free 20-minute painting tutorial. So hopefully you guys are excited about that. I, I'm excited. Go back if you guys came on late. Go back and watch from the beginning. Be sure to let us know where you're watching from. We like to keep up with that. So everybody have a fantastic day, and I will see you guys tomorrow. Tomorrow, if you missed it earlier, we're going back to this pumpkin. Scoot you out a little again. So we're going to this guy, and I'm gonna do the lettering on here. So I'm gonna show you how I do that with my Silhouette, and we're gonna do it from a stencil, and I'm gonna do it in bright gold. So you guys have a good afternoon, and I will see you tomorrow. Bye!










