Painting the Winter Chapel on a plexiglass window frame
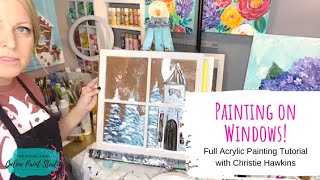
In this YouTube tutorial Christie Renee Hawkins of The Social Easel demonstrates how to transform a cheap $5 plexiglass window panel from Target into a decorative winter‑chapel artwork. She walks viewers through selecting appropriate DecoArt paints (Multi‑Surface satin, 24‑karat gold metallic, gloss enamels, Peacock Pearl, Glamour Dust, SnowTex), preparing the surface, and painting both the front and back to create depth. Key techniques include using a fan brush to render stylized trees, applying random metallic “stained‑glass” blobs for windows, layering black and white for shadows and snow, adding 3D snow texture with SnowTex, and finishing with a white splatter snow effect. Throughout, Christie emphasizes a relaxed, messy approach, encourages experimentation, and shares practical tips on brush selection, layering, touch‑ups, and cleanup. The tutorial serves both as a product showcase and a creative guide for viewers wanting to replicate the winter‑chapel look on glass or other surfaces.
Chapters
Hey guys, how's everybody doing tonight? It's Christie with The Social Easel. So I finally had time to jump back in the studio and work on a few things, and I started working on this window panel. So I'm gonna show you guys what I've done so far and then finish up what I am doing on there. This is what we're working on so far. Remember these windows that I got in the Target dollar store when I came in? Sorry for the glare there. I tried to avoid that. I got these for only $5, and they're plastic, so I had to look at DecoArt and figure out what paints would be best for them. So we're using the multi-surface satin paint from DecoArt tonight. And I'm also going to use— you guys probably heard me talk about this— my, my 24-karat gold metallic. We're going to add some of that in. And then I have these glossy enamels also that can be used on plastic, and they will— so the other ones are a satin finish. These are a gloss finish. So I'm just going to play around with it because we're going to add some stained glass to the chapel. So we're gonna see what that looks like. But you can do all kinds of things with these. And when I found them, I was telling you guys some different ideas that I had. And maybe, you know, like Rudolph or Santa kind of peeking through the window would be cute. But I thought a winter scene would be really pretty also. So you guys want to see how I'm doing this? And it's kind of fun. You have to think a little bit because I'm actually painting on on the front and the back of the window. So this is what it looks like so far. I'm not done with it. We're gonna finish up this chapel tonight, and I'm gonna add some more trees on here so you can see how I do the trees if you haven't seen me teach that technique before. So this is the front, and then this is the back. So you don't have to paint on both sides if you're doing this. You can just paint on the front or you can just paint on the back if you don't want to worry about paint getting on, um, the sides here. I'm just going to go back over this at the end anywhere where I have a little bit of paint that got on there, and I'm just going to touch it up and sand it down. So it's not really going to matter, but the trees are super fun and super easy, so I'm going to show you how to do those first. We're going to add them behind our chapel. So I've already got these two over here, and what I did is I did the blues on the back of the window, and then I did the snow on the front of it. And I'm also going to play around with, um, this stuff called SnowTex from DecoArt if you want to add more of a 3D effect to it. I just taught this one with my Inner Tribe. I'm going to get this a little closer. See that texture on there that looks like snow? Isn't the gingerbread house cute? So this is SnowTex, and I thought it would be cute to kind of add some to the window too. So we may play around with that. So I'm going to show you a couple new products today that you may not know about and how to do some trees and accent our chapel. Now, as you guys are watching, if you would like a free tutorial that is my Winter Chapel, which is a painting that I've done similar to this but a lot more detail, and it guides you step by step through the whole thing. I'm gonna grab a fan brush. That's what I'm using to do my trees tonight. So I know a lot of people are a little nervous about fan brushes, not sure how to use them, so I'm gonna show you one way I use them and We are using— I've got two different blues here. This one's called Turquoise Waters, and I'll hold these up in just a second. And the other one is called Night Sky. Okay, so I'm just gonna— this is what I'm doing right now, by the way. I'm just kind of fanning my brush out. This was already in my water. I don't want it all clumped together as one thing. So I'm going to flip this around. I'm going to kind of hold this up so you can see kind of what that looks like on the back side. But this is kind of cool because we're going to go behind this. So let's kind of decide where we want this tree. I'm just going to say I want it right there. Now I don't have to worry about overlapping because this is going to go behind my chapel because I'm painting on the back side of the tree. So I'm just going to start kind of going back and forth, just dabbing across here. And I put that vertical line there. Can you guys see that okay, or is that glare from the light right where I'm trying to show you where I'm painting? But I'm using that as like my tree trunk, my center. Okay, and so I'm just kind of loading my brush up, and I'm going into both colors a little bit. You could pick just one and then come back and fill in with the other. I've got mostly turquoise on here, and as I get more towards the top. I know this side is not mattering. Everything over here on this black is not actually going to show, but out of habit, I'm still filling it in over there. But I want these little branches to kind of stagger down a little bit, and I'm kind of just rotating my brush as I go. And then as I get to the top, I don't want it— see how these kind of come to like a triangle shape at the top? Well, I want the same thing here. So if I held my brush straight across, it'd be too wide. So as I get to the top, I'm gonna rotate my brush to make it vertical, and then just kind of— I'm only using like the corner of my brush. So I can go wide right here still, and then I'm gonna grab some more of that turquoise, and I'm just using the corner and dabbing along there. And now I'm getting ready to flip it around for you so you can see what it's going to look like, and then we can decide if we want to go back and add some dark blue behind it. Okay, so I'm going to show you the back side, trying to dodge that ring light. And then I'm gonna flip it around and show you what it looks like on the front. So we've got it kind of peeking out behind that chapel there. You see that? So I'm gonna keep going. I want to add some blue. I want to break up this a little bit and add some of that darker blue in here so you can't see that tree trunk in the middle quite as much. And this is going to kind of act as like our shadows in the tree. Just kind of filling that in. So it doesn't look like too much something special yet, right? But now I'm gonna go on the front and I'm gonna add the snow in here. So for the front, let me get the right brush here. You can use different brushes. Where's the one I used the other day? —here. Yeah, this is a 1-inch, or yeah, I think it's 1, maybe 3/4 inch. Anyways, this is from Michaels, the Artist Loft. They just have a cheap 10-pack of brushes and they work great. So I'm just going to use that and I'm going to go straight into my white, and I'm just filling the bottom part of my brush up, and we're going to start just kind of dabbing along here. And now obviously we're on the front side. Now I'm not worried about this going over my chapel right now because I'm gonna put another coat of white on top of it, so it will push all this behind. Let's start up here, maybe add a little snow. So I'm just kind of staggering across We don't want to fill in all of the blue, but we want to add some snow on there. Let this overlap, fill in just a little bit there. And like, the harder you push down, you can get some bigger brushstrokes, some smaller ones. So it just kind of breaks that up and starts filling in that tree. So now I've already got that white. I'm just going to go back over my chapel again. And if you want this to be a little more rustic looking, you know, you could do some scrapes of more black in there if you wanted. So I painted for my chapel, I painted black on the backside because I wanted it to have a little bit of that darkness kind of showing through. So there's tons of different ways you can do this. And I'm purposely painting over the door because I want the second coat of white on here. I didn't leave myself a ton of room for window up here. Oh, you know, I may do— I may do what I've done on— I think it was my Fall Chapel where I have a window kind of coming behind here. I think I'm gonna do that. So I'm just gonna switch over to black and just add a little window that's gonna come behind here. And eventually this will be filled in with some stained glass. Colors, but we're just gonna do some white— or some black right now, not white. And now when I paint my chapels, I don't get too worried about my lines being perfect. I think they have more character if not everything is just super precise, if that makes sense. Just kind of pull that roofline down there. So I'm just gonna make a really simple, like, arched doorway here. Kind of having to glance back at the camera because I'm at a weird angle. I can't tell if I'm quite centered. Now, as I said earlier, I'm not worried about the paint getting on here because I'm just going to come and paint over top of that later. And tonight we're painting on like a plexiglass plastic window that I found at Target, and I'm using DecoArt's Multi-surface paint in satin, and this comes in all different colors. This is in my Amazon store. Let's— I'm gonna switch to a smaller brush here and add a little cross at the top. Thank you, girls. And I know there's a little bit of a glare up there, but all I'm doing is just adding a little cross up here. Now we could come back with a little white up here and do some little accent marks, kind of whatever you want to do there. And if you want this door really, really black, you're just gonna let it dry first and and then you can come back and add a second coat to it. I just keep messing with it. I think I want to add a couple little skinny windows next to it though. And see, like, even my chapel on this one, it's not perfectly centered or even, but I don't think it's one of those things that you really notice at the end. I kind of like the messiness. Of these types of paintings. So I'm just making like a long rectangle-like shape, and see how messy I'm doing it? Not anything perfect, perfectly rectangular. I want it to have this type of look to it. And then we could go along our edges, and I'm just going to do just a quick little light touch around the edge. If you get too much black on there, you just let it dry. And go back over with some white. It is definitely different painting on plastic, but it's really fun, and I think I'm really gonna like the way this looks once it's hanging on a wall and we get all the stained glass on there. Okay, so I'm gonna play with a little bit of gold here, and I'm gonna start with some of my gloss enamels. If I can get this plastic off of here. Oh, this is another kind I'm gonna try. I use this in my gingerbread house in red. This one's called Peacock Pearl, but it's a dazzling metallic. So DecoArt has all these different kinds of paints that you can use for different stuff. So we're just going to play with them and see what we think, if we like them for our stained glass. And I'm going to use my favorite— this is my favorite metallic gold that is sealed shut. Sorry for the loud bang, that loosens the lid. I love this stuff. Super, super shiny. So I'm gonna take some of this and add some accents on my door here. And if you've been following me a while— you can't really see that, can you? Hmm. I was gonna say, if you've been following me a while, you know I love gold. I put it in just about everything. This gold looks so pretty on here. So I'm gonna do the same thing in my windows, and I'm gonna hold it up to show you guys. And I am just being super messy. I'm not even really thinking about where I'm touching down. I want this to be random brushstrokes so that it looks like stained glass. And then you're gonna start seeing how this comes together. Let's add some up here just because because, just because I love gold. So it does not take much at all. That's all the gold we're gonna add. Oh, you guys can see that now. That's showing up better. Now let's do— these are sealed. We're gonna try some of these gloss enamels and that Dazzling Metallic. And see what we, what we think of it. And I'm just getting like a little dot of this paint. I'm not going to need much at all. See if this one's sealed. Okay. But I love metallic paints. I love shimmer, all that good stuff. I can try. Let's see if I can— here, the only problem is maybe it will help if I put it back here. I can't put it on the easel because it'll knock my thing off. I've got red. I'm gonna do some of this. This needs to be shaken up more. Sometimes you gotta shake your colors up. Some metallic. Let's see, I already did gold. Maybe some bright blue. This one is called Glamour Dust. Why not? We'll just play around with this and see what we, what we think looks good. I'm thinking the gold's gonna substitute for my yellow, so we'll see here. Let's start with some red. So same thing, just kind of messy little blobs here and there. And then I'm obviously not gonna add that to the door because my door is not stained glass. Okay, and then let's— I'm just gonna wipe this off really quick. Let's try this teal color I've got here, and I don't want to cover up all my other color, and it's fine if they mix. If the teal and the red mix, we're just gonna get like a plum purpley color, but I want to leave my gold kind of shining through. And I'll hold this up in a second if you guys are having problems seeing that, but hopefully you can see the stained glass starting to come together. And this is that Oh, the green's pretty. I like that. This one was called Glamour Dust Limelight. I might have to go back with some more gold. I may have covered too much of it up. But what I want you to notice when I'm doing this is how quick I'm doing it. And the reason why is not to, you know, push people through the painting faster, but it's so you don't overthink it. Don't think too much about where you're putting down your little blobs of paint for your chapel because— or your stained glass— because then it looks like you overthought it. Does that make sense? We want it to be random. All right, let's hold this up. I'm getting the weirdest angle on here. There we go. So that's what it looks like up close, and then as you get back— that's so pretty. I love the shimmer that we're getting from that. So these gloss, the gloss enamels are really, really cool on this plastic. And then I'm gonna come back with some of my black, make my door a little bit darker. And if you wanted to, you could, you know, do some streaks of black throughout your chapel. I've had some people do where they kind of make it look like there's bricks. So if you wanted to, you know, do a couple little like horizontal lines and some verticals. So I'm not doing anything that is too specific. This is abstract, messy brushstrokes that we're adding in here. I'm just touching up some black. I like to go around the edges of the stained glass a little bit too, just to make them stand out a little bit more. But hopefully you're seeing messy is good. I am really, really happy with how this looks. What do you guys think? You want me to show you the Snow-Tex so we can add a little bit of texture to this if we want to? This is a little different. It takes a little bit to get used to. I'm gonna show you— okay, so I showed you the gingerbread house that I did with it, and let me show you this really cool truck that I did at Heidi's event. This— I love this thing, by the way. I'm obsessed with it, and I'm working on scheduling a local paint night for it. But all this on here, this stuff that looks like snow, this is SnowTex. And you just— like when we did it at the event, you can use your fingers and smear it on there. You can use a paintbrush. I did a palette knife the other day when I did it on my gingerbread house. So that's obviously on a ceramic. This is what it looks like on a canvas. See that thick texture on there? And then if you guys want, I can also show you kind of how to do splatter, the snow splatter. Do you guys want to see how to do that? I think I'm gonna do it on the back first and then decide how much I want to add to the front of it. So I don't want to do a ton of snow, but I do want to try it out and see if I like it on here. And you know what, if worse comes to worse and I don't like the texture on it, then I'll just wipe it off. So this is what it— I'm gonna hold this up so you guys can see. DecoArt SnowTex comes in this little itty-bitty container. You can get bigger ones, and it looks like this, like, cloudy, like, fluffy material texture. I don't really know how to explain it. So I'm just trying to get a little bit, and I'm just gonna scrape a little on maybe along my edge, have a little bit of snow down here. It'll look kind of fun. Let's do this. Let's add it in the windowsill, kind of piled up here. Might be easier with my finger. I'm not sure yet. So I'm just getting like big globs of it and just kind of pushing it around down here. I'll lift it up and show you in just a second. If you wanted to, you could come in a little bit easier with your finger. It kind of wants to stick to a paintbrush, so I'm kind of using my fingers and the paintbrush at the same time. And I don't want it on every white spot that I have on here, but it is like a fun little addition to have on some of the trees in some areas. Can you guys see that thickness where it's getting a little heavier white? So if you like getting messy, this is fun. I just encourage you guys to have fun with painting. Don't take yourselves so seriously. Don't worry about things being perfect. Just have fun and play with it and see what happens. You're not getting graded. This is for you. But I like some of these bigger sections of snow. It's wanting to stick to my finger here. So this is not a clean art project. This is a messy All right, let me know if you like the snow text. Yay or nay? Hearts or thumbs? I kind of want to add a little to my chapel, but I'm scared it's gonna mess up my— I don't want to mess up my paint. I might cheat and just put this snow across the bottom here, and then I don't have to go back and repaint it. Because I'm kind of liking it. And this will dry hard on here, so this won't like flake off or anything like that. Once it's on there, it's on there. So we're just gonna have a nice 3D snowy ground down here. And then I'm gonna hold this up so you guys can see a little bit closer. Check out that snow at the bottom and see it on the trees. So you get a little bit— turn it side— see that texture when you turn it to the side? A little bit, some on the chapel. I do like the snow at the bottom. It's a fun little addition to the painting. Okay, so the last thing I'm gonna show you is like a splatter technique that we're gonna do on the back. Look at this, I got red all over this, so If you painted with me before, you know I mess up on a lot of things, but I don't let it stress me out. I'm not worried about there being red blobs of paint on there. I'm just gonna scrape it off or sand it down and then paint over this. So not a big deal. So this again, this is what the back looks like. So I painted on the front and the back to kind of get that 3D effect there, and I'm gonna do the snow on the back, that splatter technique first, just in case. Because when I did my gingerbread house the other day— I'll show you this again— that's what this is, all this splatter to look like snow. But we did it, and one section of it got too watery, and, and it left these big blobs that I had to go back and paint over and touch up again. And now it turned out fine. You can't even tell where those were. But what I'm gonna do is water down my white here. I don't want it too watery, but I want it watery enough. I'm gonna test it on here. Okay, so this is how I want it. I may have to angle this down just a little bit to get this to do what I want to do. So I'm gonna hold my hand like this, and I get paint everywhere when I do this. I'm gonna move my cup. You can already see the white splatter on there, but this is the fun part of creating, is getting messy. I'm just tapping. I can feel this hitting my face while I'm doing this. I know you guys can't see much right now. You will in just a second. So I'm trying to be light. If you go too hard, like when you're doing this, if you go too hard, that's how you get those bigger blobs. And sometimes it doesn't look bad. On mine, on my gingerbread house, when I did it, it just did, and then I had to go back and touch it up. So I'm gonna show you what this looks like on the backside. Let's see what it looks like on the front. So we get a little bit of that snow behind there. Can you guys see that? I think it would be better— I wonder if I have anything here. Maybe this will help. And we've got some spots where maybe it's just pouring down a little bit more snow, and that's okay. So that's one way to do it. We can do a little on the front here. Let's test it. We gotta have a little bit coming down over our trees and chapel, right? I think I like it better on the front than I do the back, but you guys are getting to watch me experiment with this all at the same time. See those little splatter snow spots? So I think that's it for tonight, but you can do the exact same thing that I did on glass as well. So if you have some old glass windows, you can do that. So have a good night. So I will talk to you guys soon. Bye!










