Palette Knife Sunflower Painting Tutorial for Beginners | Easy Acrylic Art
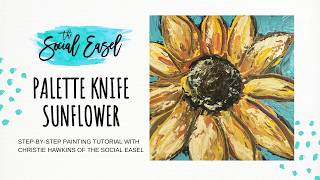
In this beginner-friendly tutorial, Christie Renee Hawkins demonstrates how to paint sunflowers using a palette knife. She begins by showcasing two example sunflowers—one made with craft acrylic and another with heavy‑bodied acrylic—explaining the common misconception that only thick, artist‑grade acrylics work for palette‑knife work. Hawkins compares the two paint types, highlighting differences in absorption, texture, and drying time. She then introduces gel medium as a clear additive to thicken any acrylic for impasto effects, emphasizing why modeling paste should be avoided. Throughout the video she walks through her palette‑knife technique: holding the knife by its back, using light pressure, scraping and dragging paint to form petals, and layering colors while allowing each layer to dry. Hawkins shares practical workflow tips such as being patient, avoiding perfectionism, embracing the "ugly middle" of a painting, and using color mixing strategies (adding orange, brown, white, etc.) to achieve desired hues. She also discusses equipment choices, recommending a set of five palette knives of varying sizes and noting that a simple plastic knife can work for beginners. The tutorial concludes with encouragement to experiment, share work with others, and enjoy the creative process.
Chapters
Today we're going to do a very popular, um, subject matter that lots of people ask about. We're going to do a palette knife sunflower. So this is an example that I did yesterday, just kind of playing around. This is just an 8 by 10 panel, and then in my mixed media pad here I've started on two different sunflowers, and these are obviously just very rough, basic one-layer sunflowers right now. So we're going to be adding, um, more to these, and I'm going to be talking to you about what supplies you can use to do palette knife sunflowers. So whether you have just craft acrylics that come in the little bottles like DecoArt or if you have heavy-bodied acrylic or a mixture of both. You can use any and all of them to make palette knife work. You don't have to have the thick-bodied acrylic. That is a common misconception. But I am going to show you the difference between the two, and then I'm also going to show you how you can make your paint thicker if you want more of an impasto style, which impasto basically just means thicker, like it stands up off the canvas. I'll show you an example of that. This was one that I did last year, um, on a burlap canvas, just kind of playing around. So this is more impasto style. You can kind of see some of that texture and grooves in the paint on here, whereas this one, it's pretty flat to the canvas. There's not a ton of texture there, but both are done with palette knife. So for this, I am going to be using my palette knives that are out of my store. I have put the link in the description of this video, so you'll see that there. I'm going to be using my smallest one for most of it, but the palette knife set comes with— you can see mine are covered in paint— comes with a variety of sizes of palette knives depending on the project that you're working on. So you get 5 different sizes of palette knives in that set, and that link is in the description. So what I have done here, just to explain first, the sunflower on the left is done with craft acrylic. Let me see if I can get this to— so this is done with craft acrylic. If you're not sure what I mean by that, craft acrylic is like DecoArt, um, Michaels has a brand, Craft Smart, Apple Barrel. All of those are craft acrylic. This sunflower is done with heavy-bodied acrylic. A lot of times you'll see it like, it'll be in that, the actual art section. Craft acrylic you'll find in the craft section. This is in the art section, and this is more like student grade. There's different brands. The brands don't matter. It's all the same thick consistency. So number one, I just wanted to show you that the difference between the two, and I'm going to kind of do a little bit of a close-up. You can see how the craft acrylic, okay, that one on the left, it starts kind of soaking in. Of course, I'm doing this on a mixed media pad. It starts kind of soaking in. It's not going to stay thick standing, so it's not going to have any raise to it, whereas the heavy-bodied acrylic, where it is thicker in some of those spots, it will stay that way on the canvas. So it's not going to kind of soak into the canvas, if that makes any sense. So that is kind of the difference between the two of them. Craft acrylic is also going to dry a lot faster than heavy-bodied acrylic will. And then that is kind of what I've got over here on my palette as well. It's kind of annoying with the ring light there. But so what I've done is all these colors on the left are craft acrylic, and you can see how they spread out, right? So they're more liquidy, they're more fluid. All of my colors on the right are thick, okay? So that's the heavy-bodied acrylic. So I put a variety of orange and yellows down, um, for both to use as an example for you. So I'm going to start with, um, my small palette knife like I mentioned. Um, try to get this example fit into the camera as well just so you can see a little bit more. Maybe we'll prop it Does that help to see a couple of examples on the screen? I know they're not fully on there, but it kind of gives you a better idea. So these that I've got on here so far, they don't have anything added to them. That is just one base mustardy color with some black and brown in the middle. So we're going to want to add a lot of layers to that. So before I do that, let's say you have craft acrylic or even your heavy-bodied acrylic and you want it even thicker than that, what you would use to add to your paint is called gel medium. I've got a couple different brands here just so you can see the difference. Sometimes they're just called heavy gel. Okay, so this one is gloss super heavy gel, so that means it's going to be even thicker and it's going to have a gloss finish. You can pick your finish out, there's no right or wrong. This one is from Hobby Lobby. This is Master's Touch Gloss Gel. So same product, one is a little bit heavier than the other. Both— it's called gel medium, okay? So it's called gloss gel, gel medium. That is really important. You don't want to use modeling paste because modeling paste is opaque, meaning it will add white color to your paint and change the color. Gel medium is clear. It is not going to change the color of your paint at all. Let's see if I can get this one open. It's been sealed. Okay, so even though this one looks more white than the other, because it is gel medium, I know it's not going to change the color of my paint. So either one of those are fine. I'm going to start with this big tub. That I have open. And let's say I want to make— on my palette over here, let's say I want to make this pale yellow thicker. That one's kind of runny. So all I'm going to do— get this where you guys can see it— is just scoop up some gel medium on my palette Okay, and I'm just gonna mix it with that craft acrylic. So simple, anyone can do it. That's it. Now we have— instead of it being runny, look how thick that is. It's not falling off my palette knife. It's nice and thick and going to give us more of a heavy-bodied impasto style texture to our sunflowers. So you can do that with any of your craft paints. You can do that with your heavy-bodied acrylic to make it even thicker than what it is. So I wanted to be sure to show you that, um, in case you prefer the thicker style. But I don't want that to stop you from creating or making you think you have to go out and buy one more thing before you can practice this, because you can just use whatever paint you have on hand. Okay, so let's start with this. I've already got my base down here, so you can see in this example that I did, I like to add a little bit of orange coloring into my sunflowers. I'm going to show you a couple more examples here. This one was done with a brush, but just to show you examples of sunflowers that I've painted. I like to have a lot of color mixed in. And then here's another one. I love sunflowers. I never get tired of them. So that kind of gives you an idea of how I like to do mine and the colors. That I like to put in them. So I've just got— I already did this warm, like, mustard color. I'm going to grab a little bit of this orangey— this one is, um, Sun's Warm Sunset. Warm Sunset. And I'm going in with the tip. Okay, there we go. Trying to get that camera to focus. So the important thing you want to remember if you haven't used palette knife before is you're going to hold it like this. You're going to use the back side of it, not the top side. Okay, and most of the time, especially when I'm doing like petals, I'm putting more of my pressure towards the end. And then I'm just— see how lightly I'm holding it? I'm not pushing down super hard. I'm just kind of lightly scraping in. Some of that color. We don't need a ton of it. I just like it a little here and there closer to the center. And then I'm just gonna wipe a little bit of that off, and I'm going to go into my bright yellow. So see how I'm loading it up, tapping it down on the back? So my paint is on the back side. Now, I— when I'm doing flowers, I rotate my canvas while I'm working on it so I can get those angles better. So I'm going to start at the tip of that petal. You're going to keep reloading so you have some control. But you see how I can push down once I have that tip laid in there? That's going to be my point, right? And then I can press down and it kind of spreads the paint out into the bottom part of that petal. The thing to remember with palette knife too is this is definitely not about perfectionism or making sure you're each petal is perfect. Mine are all kind of wonky. They're all different. We want them to be. Palette knife is a very loose style. We're not trying to make it photorealistic. So I'm moving a little bit quicker now, but I'm keeping my point at the tip of that petal. So I've got that undercolor coming through a little bit. You can switch directions if you need more control. Switch your tip to go more towards the center. Just play with and see what is comfortable for you. So now I've got a little bit more color in there. It's starting to look better. I am going to leave that and let it dry. The other important thing when you're working with a palette knife is to be patient and not rush through your artwork. This is not a speed contest. You're not being timed. Take your time. Okay, take your time when you're doing this. Allow things to dry in between layers so you're not making a big muddy mess. With all your colors. Okay, so I'm going to switch over to this heavy-bodied one, and I've got this really bright, almost lemon yellow. It's a little too yellow for me, so I'm actually going to take some of that mustard color, Yellow Oxide, and mix it into that just to tone it down a little bit. Oh, I forgot about my orange. Let's come over here with that mixture. Take a little bit of my Cadmium Red Light and mix that in to make my orange with my heavy-bodied acrylic. So you'll see a difference in this when I lift it up to the camera. Can you see how much thicker that is on the palette knife? So I'm not worried about it dripping or anything like that. But that is why I went ahead and put these base layers on as well, so that those could dry a little bit before me coming in and adding a whole lot more color to them. Drag a little bit of brown in there, that's okay. Try to train yourself to move on from getting really fixated if you make a little accident, a little goof, and you're like, oh my gosh, that's terrible. Just keep moving because chances are you're probably going to cover that up anyways, and you don't need to waste your time trying to go back and fix it because it's going to have another layer of paint over top of it. And how many of you have heard of like the ugly middle? The ugly middle is when you are working on your painting. Right now I would say this is an ugly middle. It doesn't look like anything great, right? But this is the exact same way that I did this one, and all done, it's finished and pretty. Actually, I could go back and even add some highlights to that I didn't do yesterday. But be okay with trusting the process and knowing it's not going to look beautiful throughout the entire process. Okay, so we're adding a little bit in. Now I'm going to test this over here. Obviously it's not completely dry, but now I'm going to go in with some of my thicker pale yellow that I added that gel medium to. I will say, I personally think the thicker paint is much easier to do with palette knife than the thin, but you can do both. And it's not— you're not trying to get the exact same amount in each petal. Every petal is going to be different. The light's hitting it differently. Some may have more orange or more bright yellow, some may have more pale. But the main thing I'm doing right now is not pressing down super hard. So my pressure— I'm holding on very light and I'm just kind of dragging it over those petals. Okay, so let's take a closer look at this before I add any white to it. Look how pretty that's starting to look with that lighter color. You've got your layers coming through. I'm glad you guys are enjoying it. Make sure you are sharing with your friends. If you have other friends who want to learn how to paint, make sure you're sharing this with them. That's how we grow. That's how we can reach others, share our love of art and the peace that it brings us with other people. Okay, so I'm going to go ahead and grab a little bit of white. I'm not wiping off my palette knife. I'm just going to Just drag a little bit of white and just here and there to add some highlights in. It's messy and fun and not perfect, and I think that is what I love about it. I also recommend, if this is your first time painting with me, to take pictures while you're working on it because you just see things different. Um, when you're looking at it with a naked eye versus seeing it through a camera lens. And it helps you kind of look at it and be like, I need to change that, or that looks a little weird there. And then we could add maybe some little texture inside the center here. I'm just kind of dabbing. So I've used the same size palette knife for this whole flower. Maybe a little bit of brown. It's mostly black inside of there, and I'm just kind of dabbing along. And I'm going to lift this up to the screen so you guys can get a closer look. How fun is that? There you have it. That's our finished sunflower with just craft acrylic. So let's turn this one into something pretty because right now it's pretty ugly. So we're going to keep on moving along. I'm going to wipe off my brown so I don't mix that in my yellow over here. See, that wasn't that bad, right? That little flower took about, what, 10 minutes, maybe less than. Somehow I've stuck my hand in teal paint. I must have grabbed the palette. I have one little section of teal that I was finishing up that background with down at the bottom of the palette, and I must have grabbed it. So let's go in with— I've got this yellow mixture I've created, right? But It's too yellow for me, so I'm taking a bunch of white, mixing it in. Good thing I have an apron on right now, is all I'm saying. You don't have to stick with the colors that come in the tubes. Make your own. It's just like frosting. Okay. And don't forget, just because you have one layer underneath and you're like, well, I already did the orange and now I can't add more because that was that layer— that's not true at all. If you feel like you want a little bit more orange, go grab some. Let's take a little bit of this orange color that I have. Let's add a little bit of white to it and make more of a lighter, like, coral color in there. Just kind of keep playing. Don't, don't feel like you have to stick to the rules. I'm showing you techniques, but I want you to learn to just kind of play with your colors. Allow yourself to make mistakes. That's how we learn. That's what this mixed media pad is for. This is for you to make progress in. Starting to come together. And again, if it's getting to where it mixes some and you don't like the colors it's mixing, then walk away from that part of the painting. Sometimes I skip around my paintings and go to different areas. Sometimes I walk away entirely from my painting to let it dry until it gets to a point where I can work with it a little bit easier. You can blow dry if you want. Um, sometimes if you blow dry heavy stuff like this too fast, it will cause cracking, so I prefer to just let time do the job there. So see, I'm holding it this way now. If you want to make your point points better. And of course, you can always cheat a little bit, go back in with a brush and touch up some areas if you need to. So let's take a look at these up close. What do you think? I'm liking it. I'm gonna go inside this one here, add a little bit more and a little texture along the side, those little— idea, representation of those little seeds. Inside of there. So I'm not doing a full painting for this one. You can do the background either way. When I did this I painted the whole canvas black. Hold on, let me drink. The whole canvas was black first, and then I scraped on some different colors of blue over top of it. So you see some of that black coming through. And I did that black first, painted my sunflower, and then added the teal later. There is really no right or wrong. I've done it lots of different ways. You could already have a background painted and then still come back and add background to it. So you can come in between all those petals. But that's why I like having that black underneath, because it gives you that little— kind of creates an outline for you without you having to do additional work. But even just this, like, scraped palette knife backgrounds are so pretty and a great way to fill in your negative space of your painting as well. So that kind of gives you a little example of what that looks like, and you just can't get this type of texture, um, with paintbrush. It's only possible with palette knife. So I hope you guys enjoyed that. Um, make sure— yep, you're following the Social Easel. You can also follow me over on YouTube. Um, and then if you need a set of palette knives, um, my set— the link to my set is in the description above. You can start— if you're brand new and you just want to start with something, um, cheaper, you can start with a plastic palette knife from the store, but they only come in like this one bigger size, maybe more like this. So I like having the variety of sizes in my set depending on what area you're working in with your palette knives. So I hope you guys enjoyed that.










