Simple Spring Florals with Brushes
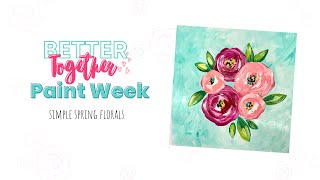
Christie Renee Hawkins paints simple spring flowers with acrylics and brushes, mixing quinacridone magenta and bright aqua greens to build loose, layered designs. She emphasizes sketching loosely and embracing imperfections over following templates, and discusses her Tribe membership with exclusive paintings and community access.
Chapters
Hello everybody, how is everyone doing tonight? Um, it looks like we are having a little bit of an issue connecting to Facebook. Let me see if I can fix this really quick. All right, we're going to try this again. Hopefully we get connected. Okay, it looks like we are connected everywhere now. Okay, Facebook is good. Okay, it was telling me we were not connected, but now we are. So we are good to go. How is everyone doing today? Are you excited for night 2? Oh, you know what, do we have the sound on? I just realized I don't have the other part of this mic in here. Hang on. Okay. Hopefully that sounds better. I know you could hear me right now because I'm like right next to the mic, but this way, if I do walk away or something, you're still going to hear me because I have the mic attached to me. Okay, so everyone had fun on night one. I thought I would show you guys from last night. Obviously I did the the one that I did with you guys here in my mixed media pad. So I've got my page flipped and ready to go for the next one. But then remember how much extra paint I had left over, and I didn't want to let it go to waste. And so I had these little wood panels that I bought online laying over there, and I was like, you know what, I'm just gonna paint another version of this really quick. So last night, after I got off the live with you, I just did a quick version of this on the wood panel, added some cute little birds in. Um, so anyways, I just wanted to share that with you guys. Use up your leftover paint if you have it. Make another quick mini painting. You can always sell it or gift it to someone. So, um, Ingrid said, I took your suggestion and painted with the recording because I couldn't keep up with you. My painting turned out amazing. Yay! I love hearing that. That's awesome. Yeah, if you guys are new to joining me, I always recommend watching first, taking notes, hanging out and talking with all of us here in the comments with me, and then going back and actually doing your painting during the replay, because it makes it so much more enjoyable for you and the entire process. Because if you're trying to keep up, you're focused on trying to keep up, and that's kind of like not the point, right? Like, it's not about speed. Speeding through this and checking it off your list. I really want you to be able to slow down enough to enjoy it, take your time with it, and then when you watch it on replays, you can of course stop and rewind it, um, as much as you need to. Um, someone's asking about can it be sent to your TV? Yeah, if you have a smart TV, you should be able to cast it to your television. Sorry, I feel something on my nail. I'm like, oh, a big chunk of paint on my nail. Okay, so tonight we are going to be doing these simple florals, and I'm going to be flipping the camera over just like I did last night. And then we are going to go ahead and get started. So tonight we are switching gears. Obviously, we're still painting, we're still painting with brushes. I'm going to go over the brushes that we're using and the colors that we're using. So the colors for tonight are the Liquitex Basics. So this is— was on page 2 of your of your supply list. Like, so page 1 was like all the DecoArt colors that I used. Page 2, I didn't print it off, is all the Liquitex Basics. So these are going to be the colors that we use tonight as well as tomorrow when we do the palm trees. Let's see, see if you have any other questions here. OK, so let me go ahead and flip you guys down. Oh, before I do that, I forgot to say, I just, I just looked at my email and then came back over here and then completely forgot. That's kind of how my brain has been working today. Not, not doing the best, but I wanted to welcome all of the new tribe sisters that we have welcomed in in the last 24 hours, we have brought in over 60 new members to the group. So we are so excited to have you join us. I have some extra things I'm going to share with you tonight that are coming up in Tribe. So if you haven't signed up yet, it is not too late. Um, if you join by tonight at midnight, you're going to get the bonus tutorials that are only available through tonight at midnight. If you join tomorrow, I will have a different bonus in place that everyone who is a current member will get. But if you haven't joined yet and you wait till tomorrow, you will not get these 4 paintings. So I'm going to quickly show them to you just in case you didn't see them yesterday. Hopefully I don't tumble down. Let me pull this over here ever so carefully. Okay, can you see? And then I have an extra one up there that we're doing. This month in May. So the bonus videos that you will get if you join tonight before midnight are the Spring Bicycle, the Spirit Not of Fear, the Lovebirds, and then the Spring Chapel, which again is hanging at my home, but it's very similar to that chapel except a spring version of it. So, um, and you get a Tribe Sister swag bag if you live in the U.S. So if you're thinking about joining and you haven't done it yet, you still have time to get these bonuses tonight. But I'm so excited to welcome um, all of our new members. It's always a fun time during our paint weeks like this. And then I am— now I'm going to switch over so you can see the other view. Oh, look, it even matches my little sign on the video. How about that? Okay, how's this view look? I think I'm going to leave the light off tonight. I think we have pretty good lighting and I don't want there to be glare on the wet paint. Yes, Ingrid said, hang on, we can sell what we paint with your direction. Yes, you can. So that is one of the perks of being in Tribe is that as a Tribe member, you have permission to use my designs and obviously paint your own version of them and you You can sell them locally. You can sell them online. You can do craft shows with them. You can do paint nights with them. The only stipulation is you cannot teach them online. You cannot do any kind of video version of teaching, since I teach online, right? So you can't mail kits out and include a video showing people how to do it, but you can take the physical painting, you can sell it, and then, of course, you can teach it as well at your local paint nights. Okay, so let's go over supplies first. Mixed media pad again, you can tell this got dirty, not going to worry about it. We're going to paint right over top of that. So I'm using several brushes out of my paint set. Again, the link to my store, some of you were asking yesterday, is on the hub page. It will take you directly to my Shopify store, and this is where you can get all of my custom supplies. So this is from my custom brush set. There's 15 brushes in there. Tonight we're using the number 15, that's the big filbert. We are using the 10, which is kind of like— actually, I think it's the smallest filbert out of my set. Then we're using the large round, which is a 5 in mine, the number 4 round, and the number 1, which is kind of like a round slash liner, just for some details. So those are the brushes that we're using tonight. If you don't have these, definitely still practice, paint along with us tonight. And before I forget, I need to grab my little sheet to put in between here so I don't make more of a mess than I already have. Alright, now let's go over the paint colors. Okay, first one is quinacridone magenta, and then we have rose pink. These are obviously going to be our flower colors. Titanium White. This is a different brand, but you guys, brand doesn't matter whether you buy Liquitex, Master's Touch, which is from Hobby Lobby, or Artist's Loft, which is from Michaels. They're all similar to this and will work for the painting. Then we are doing Bright Aqua Green, Brilliant Yellow Green, and then Cadmium Yellow Deep Hue. So these are— oh wait, I have one more. And Green Deep Permanent. So obviously those are going to be our leaf colors tonight. But as always, use the color swatches on the color list. Use what greens you have available. Use what pinks you have available. I even thought about pulling— I love this, is like an Ultra Blue Violet. I think I have it on the color list for tomorrow's class. But I thought about doing some purple flowers mixed in here. What do you guys think? Should we add some purple flowers tonight? I think maybe we will. So that is going to be what we are working with tonight, and I'm anxious for you, if you haven't tried heavy-bodied acrylic, just for you to try it and kind of see the difference of the texture of it. It's going to dry a whole lot slower than craft acrylic will. And it also is just going to give you a little bit of texture, and you can probably see, whereas craft acrylic dries matte, right? So this is very flat. There's no sheen to it at all. You can see a little bit of sheen with the Liquitex, so they have kind of like a satin finish to them, which I love. Okay, so, okay, we're agreeing with the purple flowers. I think so too. And this is just a reminder, you can always change it up. I am going to click this. The shadows are just bugging the heck out of me when I look at the screen, so I may change it once we get paint on. But for right now, I'm just going to loosely sketch out an idea of where our flowers are going to go. So again, I know a lot of you are like used to having templates or think that you may need a template to paint with. And my goal is to help you realize that you do not, and you can do this. These are super basic shapes. So I'm just going to start. All we're doing is drawing circles, okay, because we're going to be able to cover these up. So this is starting up here, and then I've got a bigger bloom over here. Now, as I'm doing this, I'm just using a regular pencil. These are sketches, meaning these should be light, loose lines. This isn't drawing hard concrete lines, okay? We're just kind of laying out an idea of where our flowers are going to go. Pay attention to your size as you're sketching these on. We want a variety of sizes in our blooms because that's going to add interest to the painting. So we wouldn't want them to all be the exact same size. And then we're going to come down here. I'm going to do another one. But you see how I have multiple lines sketched on here right now. It's messy, it's not perfect, and it does not matter. Then let's add our other one. The other thing that you may notice in this composition is that I have 5. I have 5 flowers. Um, whenever you're— if you are creating your own artwork, odd numbers are just more pleasing to the eye. So you always kind of want to stick with odd numbers, um, in your composition. And now I'm just going to start laying in some of my leaves. Again, these are just ideas. I can change my mind if I want to later, but I'm just going to kind of sketch out where I want them. And this is a great thing if you are working in your mixed media pad tonight and you're not necessarily keeping up with me, but you want to paint along, you want to sketch. This is a good thing to start doing to loosen yourself up. Go ahead and start sketching these shapes in your, in your sketchbook. You can see I'm like a little off-centered here with my flower, so I may end up deciding to come back and add 2 more in just to kind of keep with our, our odd numbers. Let's go ahead and do that. We'll just kind of expand this out over here. I'll add another bloom over here. Maybe another one over here. And just a couple other little leaves coming out over there. Okay, so this is kind of where you want to start out at. Again, don't worry about these sketch lines, we're going to be painting over top of them and you won't see them. Shelly said, could you use Could you mix gel into regular acrylics to make it thicker? Yes, if you don't have thicker bodied acrylics, you can use gel medium. And you can mix that into your craft paints. Golden, the Heavy Gel Gloss is one that I recommend. Also Liquitex gel medium. Those will both make your paints thicker and extend the color of them as well. So if you have that handy, you can do that if you want to, but you can also do this with craft acrylics. So the actual first thing that we're going to do is the background, and then we'll come in and fill our flowers in. So for the background, I'm going to be using— let me scoot this over just a little bit. I want you to be able to see my palette as well. We're going to get a little bit of the bright aqua green. And then I'm going to get some white here. Using up the rest of this tube, I may not have any left in there. We'll see what, what I can get out. I use a lot of the white because I mix it with all my other colors. All right, so right away you're going to be able to tell, obviously, these are a lot thicker than craft acrylic. If you did this with craft acrylic, they would start drifting down the palette. So that's just to kind of give you a visual of the thickness that you can expect with this. Okay, so the first thing I'm going to do is start just filling in this background, and I'm going to be doing— you see me kind of almost like doing X's and back and forth. See how my wrist moving everywhere, right? These are crazy brush strokes. You are blending but not completely blending, so you want to see the brush strokes. You want to see the difference in the white and the teal, and we want some variation in our, in our background, right? Alright, so I'm going to load up my white. I'm going to start pulling a little bit of that bright aqua green into it, but I'm not going to fully mix it. So I've got like some variance in my paint. But you can see that's a decent amount of paint, and we're just going to start kind of filling in this background. If you overlap your flowers a little bit, your petals, that's okay because we'll pull the paint back over top. You just don't want to go too thick. I can still see my pencil lines, so I know about where my flowers and stuff are going to be. And we're just going to start filling this backspace in. This is a nice relaxing way to start the painting. Don't have to worry about anything being too just right. Just have fun kind of putting that paint on there. But you will probably notice pretty quickly the difference in the coverage with the thicker body acrylic, the difference of the thickness of it. But you see how kind of quick and messy I'm doing this background. Remember, we're not trying to blend everything together. The idea is to allow those brushstrokes to show, and it adds to the interest in our painting and our background. Just making sure I don't have any spots I'm missing. And that is going to be it for our background. It's so easy. It's so simple. This is one of my favorite types of backgrounds to do, especially like in floral paintings when you're not quite sure what you want to have in the back. You want some, you know, interest back there, but we don't want it to fight with the flowers. So this is just a quick and easy type of background that you can do. So now I'm going to grab some of my rose pink, my magenta. We'll go ahead and get all our colors on here. My greens I'm going to put at the top over here by my teal. Um, Eileen said, would you be able to do the background first? Yeah, if you want to, you could do the background first and then you could sketch these shapes on either with chalk or just do it with white paint. It doesn't matter which way you do it. And I do it different in all my paintings. I don't stick with just one, one way. So I'm going to wait on the yellow and we have a little bit more teal in there. And then I guess we do have a little bit of black in the middle. So we'll add those little tiny accent colors on towards the end. But right now, these are like our base colors that we're working with. So let's start with our small filbert. Scrape the paint off here again. This is the 10 out of my set, and we're just going to start kind of putting base colors down of our flowers. So I'm going to grab some of this magenta. I'm going to pick up a little bit of white with it. So this is what my brush looks like right now. Okay, some magenta, a little bit of white, and then see what happens when we start kind of spreading it around. Now I am going outside the shape of my circle. I want a little bit bigger. Than what I drew on there, and that's okay. You can go out bigger than what you drew. And right now it doesn't matter, like if this is still— if some of that teal is still wet and it picks up in some of your flower, that's not going to hurt anything. When, when this teal and magenta mix together, it actually kind of makes like a lavenderish purple color, so that will just be a pretty pretty accent to have in there anyways. So this one has a little bit more magenta. I'm just going to do some quick brush strokes. I pulled a little bit more white in this one. I can come back with a little bit more of the magenta, and I'm going to leave those for now. I may come back and tweak them here in a little bit. How is the lighting for you guys? Do you feel like— I don't think there's much of a glare right now, but if you think I need to turn the overhead light off, I will. And there's no need to erase anything. So, um, yeah, it's totally up to you which way you do it. The paint covers all pencil marks, so you don't have to actually mess with erasing anything. So my next two are going to be like the rose pink. So I'm kind of following that. These two are magenta. But remember, I added extra blooms to mine, so I'm just going to come over here and I'm going to make those magenta just to kind of balance that out. And I think I'll do the same thing with this one. Maybe this one I'll have in front, maybe tuck the other one behind. I'm not sure just yet. So all I'm doing is basically going around in a circular motion. Okay, but again, I'm not trying to over-blend. You can blend where your brushstrokes meet, but you don't want to stay— the trick, the key is to not stay connected. Okay, you don't want to stay connected to your canvas. I'm going to show you why really quick. Let me set this aside for just a second. So if you say, just do the same thing, right, and put the circle down and you do this and then you grab some white and you want to mix some of that in. Well, if you stay connected the whole time, all that's going to happen is you're just going to keep blending those colors together. And now you've just got one color and you've just got a blob. Okay, so we don't want that. We want to be able to see some brushstrokes. The brushstrokes are going to represent the different petals in the flower, so we'll just quickly come in. Think of these like little parentheses. Okay, this is the best way I can think to explain it, is you're making these like parentheses-like shapes. So going around the curve of the flower, right? So that's with the magenta. We obviously have the mid-tone of those two mixed together. I could pick up some white. And throw that in. And you can see how much better that is looking than if we just stayed connected and then just kept blending and blending and blending. Now we're back to a blob again. Okay, so don't be afraid to lay a brushstroke down and leave it. All right, but you can also see you can keep playing. If you do over-blend, it doesn't mean it's too late. You can come back and you can add those brushstrokes on. Okay, so you can always come back and add more brushstrokes as you need. Obviously my flower is getting bigger just because I'm trying to show you this, but you wouldn't have to keep going out. You would just keep going over top of that and laying those brushstrokes in. Okay, so, um, I want to show you that so you can fully understand kind of what I'm doing here in the painting as well. That's probably going to end up sticking to that, but we'll worry about that later. Okay, so I'm just going to wipe off this excess here. You can rinse your brush out if you want to. I think I'm okay with like leaving a little bit of that in there. And now I'm going to switch to the rose pink, and we're going to start laying those in. And so this little bloom over here is actually going to go on top of the magenta one, so we'll pull that out a little bit. It doesn't have any other color in it right now, it's just pink. Just kind of wanted to get my base down first. And then I'm going to work in the purple flowers separate. They're going to be like little accent flowers. So what I want you to notice as I'm doing this— zoom in a little bit for you guys— as I'm doing this, you're going to see these two meet up and you're not going to be able to see that variation in between them. Okay, it's just right now, it's just going to look like pink blobs. That's what they're supposed to look like at this point. Okay, so don't let that stress you out or think that you're doing something you're not supposed to be doing. You can't see the difference between these right now. Kind of looks like a hot mess, right? But watch what happens when we start adding some color variation in there. I'm going to come in with the white and start kind of pulling this in to this top flower. Creating some separation there. Let's go over top of these guys. I think I'm going to tuck those behind. Now, right now, again, it's mixing a little bit of that magenta in here, but I'm not worried about that. And so now you can already see this flower has now come on top of this other one, but we can switch that and pull this one back out on top. And come in with a little bit more white over here just to give a little bit more contrast. The other thing you can do— about to stick that in my paint over here. I said we weren't going to grab the yellow yet, but I did want to show you how you can also change the color of your rose pink just a little bit to maybe make it more coral. If you want. So if we just take a tiny bit of this yellow, I'm just going to do a little dot on here because I don't need much of this in the painting. I'm going to grab just a touch of that. And I'm going to mix it into this rose pink. Can you see the difference? See how much peachier and kind of like coral that is now? And you could even lighten it up if we add a little white to it. You get an even lighter kind of peachy coral color. So one quick little change like that can change the colors, still keeping it subtle, still keeping it close to that rose pink, but it allows us to to put in some of those extra brushstrokes that start standing out and giving some variation in our blooms. And what you've also done is created a warm pink because we've added yellow to it. So it's warming it up. It's closer to orange and red on the color wheel, right? So that's a warmer pink, whereas pink and magenta are leaning towards more of a cooler pink. So now we have some differences in the warmth of our pinks that we're using too. Let's throw in a little bit more white. And the idea of these, if you tend to be a little bit more Type A or a realistic painter, this may feel a little out of your comfort zone. So I'm going to hold it up so you can— I knew I was going to dip this in the green paint. See if I can tear that off so I don't make a bigger mess with it. So this is kind of messy, kind of what your brushstrokes should be looking like right now. Okay. So now I'm going to leave these for the moment. I'm going to switch gears. We're going to jump over and start adding our leaf shapes in, and then we're going to come back and add some contrast and some details to our flowers. Before I move on to that, do we have any questions before I move on to the leaves? Ashley said, what brand is your favorite thick body paint? Liquitex Basics acrylic is my favorite, but they really are pretty dang similar. There's not a big difference between them. So I'm just going to move this here for a second. I showed you how to draw. Did you guys see what I just did? Do you see this? Alright. Set that aside. I showed you how to draw them. Um, basic shape, right? So again, with the parentheses, I'm going to use my skinny brush and the dark green to just show you on here. You're making a line this way and then you're closing it and you're making a line that way. Such a simple shape. And this is why I tell people, you think you need a template, you think you can't draw, but you are wrong. You can. These are very basic shapes. We were doing this shape and we're doing circles. Anyone can do a leaf shape and a circle, and that's how simple this painting is. So it's like learning these simple little things to help push you out of your comfort zone, make you realize that you don't need a template to be able to paint. Okay. All right, so, um, I am going— I'm not going to use my bigger brush. I think I'm just going to stick with my really skinny one here. I'm going to start with dark green first and just really quickly get a base coat down on these. Now I do want to zoom in on this part because I know this is going to be a question that we get. Is, is something wrong with mine? It's transparent. I can see through, like that magenta showing through there. That's normal, and there are certain colors that are just more transparent than others, and this green is one of them. So it doesn't mean you did anything wrong. It doesn't mean you need to, like, load your brush up and keep adding to it. We want to build layers when we're working with acrylic. So that's what we're going to do. We're going to put this on. Let it start drying, but before it's all the way dry, we're going to come in and add that lighter green in there. And you'll see immediately when we add that lighter green on how much it changes the leaf. So if you are wanting to do a handmade personal Mother's Day gift this year for someone, this would be a great painting to do. Or you could wait until we do the one on Thursday with the flowers in a vase, but both of these would be beautiful. I'm sure any mom would love to get them, or grandma. I'm liking it, and I like the layout of this one. It's a little different than the original, but I'm liking the way that it looks so far. I'm going to raise it up so you guys can see the difference between the two. Pretty. Um, Gayla said, what are painting templates? So templates just means like a traceable, like an outline. So sometimes I provide that, like if we're doing animals or like a building or something like that, where I really feel like you need the outline to go ahead and trace onto your canvas. You would get graphite paper and then trace the outline on there. Oh, Rebecca is asking about— forgot to click something when she signed up. If you'll just email customer service or just reply back to any email that you got, Rebecca, they can help you out with that. Okay, so now I'm gonna— I'm not rinsing. I'm going to go straight into that really pretty lime green and just start working this color in. So you kind of get like a mixture. The dark green is still wet in some areas, so it's not completely covering up what we did, but it's kind of blending and mixing together. But again, I'm just allowing those brushstrokes to show. I don't want to cover them. And again, I'm also realizing, even though I thought I was being careful taking that paint out, I have way too much on my palette. Might try to save this paint tonight. All right, so instantly changes them, right? But we're gonna, we're gonna take it a step further. Just gonna wipe off this excess here. Grab a little bit of my white. I've got to scoot further away from this palette or I'm going to do the exact same thing again, and I'm going to make a lighter green, even lighter than that. A really pretty pale light green, almost like celery color, and then we're going to work some of that into our leaves. But do you see how quick and easy these brushstrokes are? There's not a lot— like, you could overthink it if you really tried to, but you don't have to. You're just going to kind of lay some of these brushstrokes down. Again, as always, if you cover up more and you're like, oh, I covered up too much of the dark green and I really liked that, guess what? You can just come back. You can add more. Maybe you want dark green closer to the bottom. Let's add some dark green back in. Anything you do in your art, you can always change your mind in the process. Just because you put paint on your board or your mixed media pad doesn't mean you have to stick with that decision. So that's where we talked about— how many of you watched the morning mindset today? Let me know in the comments. But we talked about learning to just let loose and play, the importance of play and what it can do for you. When you allow yourself to, how much more enjoyable it makes your process. So you can just keep kind of playing with it until you're like, yeah, I like it. The other thing, I don't think I mentioned this last night, that I recommend doing is taking pictures of your process, not finished piece, but like of your process while you're painting. If you're not sure if you're done with a step, sometimes seeing it on camera completely changes your vantage point and just allows you to just look at it from a different perspective, and it helps you see whether you think you're done or not. I get the benefit when I'm teaching you guys to be able to look up at my camera and see what it looks like and whether I'm liking it or not. If I'm not teaching and I'm just painting on my own, I'm always pausing and I'm stepping away, I'm stepping back. I'm taking pictures of my process so that I can see it, what it's going to look like when it's like finished, when it's hanging on the wall. So instead of just— when we're working on a piece of art, we're like really in it, right? And we, we can get fixated on it because we're so close to it. It's really important to always walk away and then come back with fresh eyes. Let me grab a drink really quick. What do you guys think so far? Pretty fast, pretty easy, simple little flowers. You guys can paint these on anything too. This is such an easy, simple design but looks beautiful on the— I've seen people do these on the COVID of journals, on the COVID of Bibles. If you wanted to, you know, make a custom, you know, piece like that for your mom for Mother's Day, this type of simple painting looks so good on so many different surfaces. All right, so now we've allowed the inside to kind of dry a little bit, so we won't have to worry about mixing quite as much. So we can come in, start kind of playing around with our centers and adding in some more lines for detailing. I'm going to zoom in if you guys are good with this for the last part because they're smaller details. So I think this lighting in this view is going to be better for you. So again, what we're doing, I'm going to start with the yellow in the centers. We're going to go ahead and place our centers and you'll see that'll immediately kind of change the painting as soon as we put the centers in there. And then we're going to come back, we'll put some black dots in the middle for accents. I have a few accent colors I play with, and then we'll just add in a couple quick brushstrokes of variations of these pinks and magentas in here. And that's going to be it, you guys. When I say simple and easy flowers, I'm not kidding. Okay, so For our color, though, for our white centers, I am going to grab some of my white. I'm going to grab my yellow, and I don't want to use it straight out of the bottle. I want it to be paler, more of a pastel. Even that's still brighter than I want it, so I probably should have used a whole lot less yellow and more white. It's all about the ratio when you're color mixing. I like this color at the end much more. Pale, pale, pale, like buttermilk almost. So I think I'm liking that. And then you guys see how thick this is on here, but this is how simple the insides of the flowers are. We're just going to kind of push down some of this color. Messy little brushstrokes. All right, I'm trying not to be perfectly centered on them just to give them all kind of a different look. If you come to the side of a flower like that, it kind of gives the illusion of that one kind of facing sideways. All right, got our messy little centers in there. Yes, I'm glad you remember. I'm going to put the purple on my palette so I don't forget. I am going to do some little accent purples, but I'm going to finish these centers first, then we'll add those on. But now that I have the paint on there, I hopefully won't forget. You guys can remind me if I do again. Kathy said, when you are painting for just yourself, use an easel or paint flat like you do when teaching? I do both. Sometimes I like to sit at a table and paint, and I have like all my inspiration pieces out next to me. Sometimes I like to stand and dance while I'm painting at my easel while I'm listening to music. So I really don't have one way that I stick with. It's I'm a very like fluid, like whatever feels good in the moment, like that's how I'm going to paint. Sometimes I paint over here at my station, sometimes at a table, sometimes at my easel. Okay, so we got our yellow in there. Now for the black, I'm just going to use— if I can find it— oh, I'm just going to use my black craft paint. I don't have a thick-bodied one over here, and it really doesn't matter for this tiny part of the painting. I'm going to show you one of my little fun tricks that I like to do. So I've just got a little section of black here. I'm going to use the back of my brush. It doesn't matter what brush you're using, but we're going to put the paint on the handle. Okay, and then I'm just going to come in, and again, I mean for this yellow to still be damp and wet, so it's going to mix a little bit, and I'm just going to start dabbing in those centers. But by that yellow still being wet, I'm going to kind of get a little bit of a mixture messiness in there so it doesn't look too— like, I don't want it to look too perfect, like too polka dotty, right? We kind of just want this to be the idea of the, um, the centers of those flowers there. But this is a really easy way to get little dots in your painting if you don't want to worry about pushing the paintbrush down too hard. I like flipping over my paintbrushes and using that back end to do that. Okay, I'm gonna go back up just a little bit. So now I've kind of got that down. I'm going to start coming in. I'm using my large round now, the number 5 out of my set. I'm going to come in with some of my darker magenta, lay down a couple brushstrokes in those blooms. Again, you don't want it to be perfect, like all the way around the exact same size, so have some variation there. Some are going to be big fat sections of a darker color, some are going to be short lighter ones, but they're still just kind of that rotating around that shape. And let's pick up a little bit of white. I love this white and magenta mixed together, this pretty pale pink color that it makes. Maybe grab a little bit more white in there. So see how I'm just kind of sometimes pulling, kind of laying that in. I'm going to grab a little white, just a couple little pulls of white in there. I don't want to overdo it with the white. I think I'm liking the way those look. Now I'm going to rinse this. And I'm going to come into my pink. And basically just do the same thing. Let's get a little mixture of our white and pink together. All right, I think I'm liking how that looks. Now if you wanted to, you could come in again and warm that up. If you want maybe some almost yellowish-orange brush strokes in there, you could do that. See how it just changes that tone a little bit, makes it a little bit warmer? Or you could leave it more of like the cool pink. Alright, let's do a little comparison between our two here. This is what I love, is like no two paintings, even painted by the same artist, no two paintings are alike, and that is the beauty of painting. We're not trying to replicate, we're not trying to make duplicate copies. We want it to, you know, inspire. I want you guys to play with these designs, make them your own, but I also want you to see how you can make subtle changes, changing the number of the flowers, changing maybe some of the variation of the colors you put in the petals, and still both Beautiful, but we're not done with this one yet. We're gonna, we're gonna keep on changing it, but I just always think it's fun to see the difference between the two versions that I'm working on. Alright, so for those little periwinkle blooms. I'm gonna switch to my smaller brush. I'm gonna get some of my white and that periwinkle together, and I'm just going to start coming in and just kind of placing these around randomly. Maybe do a couple down here together. I do like that additional— having that additional color in there. Those are really, really pretty. Again, don't be afraid to like overlap in your painting. It's okay to cover up leaves. It's okay to let your flowers overlap. In fact, we, we want that. If everything's separated and nothing's overlapping, it doesn't look natural. So you want to make sure that you have some overlapping in your painting. One thing I'm just noticing really quick over here is I don't have enough separation between these two blooms, so I'm going to come back with a little white and make this flower in the front a little brighter right there next to where it's that other one. Maybe even pull in some warmth in that back one just to give it a little bit more separation here. And then I think I'm going to come in the center of these little periwinkle ones and just put some white little messy centers in there. See if I like it. I don't like it big. Maybe mix them just a little bit. Yeah, I'm liking this addition for sure. Pull this one back over top of here. So Tricia said, how do you know when enough is enough? There's so many layers. Well, one, we want there to be layers. So this is a layered painting and you have to kind of work to get to that point. But that's where taking pictures and stepping away from your art and looking at it through the lens, through being further away, your eye will start kind of telling you like, oh, something's off there, or I don't like the way those meet. And you kind of just start building, you know, that confidence. The more that you paint, the more that's going to feel comfortable to you. But definitely Definitely taking pictures along the way is going to help you make those decisions. Okay, so we want to come in and add some of these accent marks in here. I'm staying with my skinny brush. I'm going to go into my bright aqua green, and that's going to be one of my accent colors on the rose-colored blooms. Then I'm going to pick the lime green. I love the contrast of the lime green and the magenta next to each other. So these are just quick little brushstrokes. There's not a lot of detail to it. We're just kind of laying that color in there. And then I'm just looking. I think I want to add maybe like a little bit more White in some of these. And this just really comes down to preference. Like I said, there's not a true right or wrong. It's when you're happy with it, then you're good. Remember, this is your painting. You're not doing it for anyone else but you. All right, I think I'm liking the way this looks. What do you guys think? Yeah, I said sometimes for me it's after it dries and maybe even the next day when I come back and look at it and decide if I'm done. I do that a lot. And sometimes I'll even walk by a painting that's been hanging on my wall and be like, I want to change that. And that's the beauty of acrylic painting is that you always can. You can always come back and add to it. You can change your mind. I talk a lot about like reimagining your paintings. So actually, the— here, I'm going to pull myself back up here really quick. Oh, wrong thing. Okay, so this one, not that one, but this one, this was an original that I did, gosh, years and years ago. The original was before I ever painted with palette knife. This one has palette knife accents on it, and it was just a a very generic, um, basic blue background. Um, it didn't have any of these extra texture, and it didn't look like this. It was just a blue background, pink flowers. And then it was one of those things, I looked at it one day and I was like, I want to change that up. Like, that's not how I would paint that now, right? And so I went in, completely painted over the background, added all this texture and palette knife work to the bike itself, to the tires, And it completely changed my painting, and now I love it. It's one of my favorite spring paintings. It's actually sitting in the front window of my art studio. So it's never too late to go back to your work and make changes to it. It really is all about what you want and what you see. So, yeah, you'll just learn the more that you do. Okay, so that is it for tonight. For the painting lesson. So I'm gonna close out, follow up with any other questions that you guys have about Tribe, about if I missed anything in the painting that you wanted to ask me. And while you guys are typing those questions out, I wanted to show you what you can expect in Tribe for the next few months. So I have 2 more little surprises to show you. If you weren't with me last night, I'm going to show you what we're painting in May. So next week I am doing the hydrangea blooms with them, and then the week after that— come on, stay up here— there we go. We are doing our big landscape ocean. I can't even remember what I named this, Turquoise Waters and Coral Skies or something like that. Um, so we're doing this one later in May. And then I just finished two new paintings. One of them I just did today, and it was so funny. Like, I was having to do a lot of, like, computer work today, and I was like, I gotta step away from this and I just need to go paint something. And I came up here with a completely different idea in my head of what I was going to paint. I knew I was going to do sunset, but then I started doing it and I was like, I'm feeling something different now. And I pulled up one of my photos from Cozumel from a couple years ago. And gosh, that was already 2 years ago, and we had the most beautiful sunsets there. We didn't have a great beach, but we had beautiful sunsets. And so I'm actually going to show— I'll show you on my iPad my inspiration photo for this, and then how I turned it into this painting as well, because this is another important lesson. You don't have to necessarily paint what you see. You can make an idea completely your own by changing the color scheme of it. Okay, so you guys want to see what we are doing this summer? This is going to be for the month of June. And I know there's going to be some really excited Tribe Sisters about that. I'm going to, I'm going to hide that one for now. The second one that I show, people have been waiting for this one. So Let me check these questions really quick. And Gayla said, where is this hub you speak of? If you're, if you're talking about for this workshop, it's emailed out to you if you signed up for the workshop, which, if you're on this live stream, you should have signed up for it. It's where your supply list is. It's where all the replays are. All of that stuff is there for you. Oh, thank you, Lisa, on the earrings. So I'm just going to plug my niece really quick. You see these beautiful earrings? The ones I wore yesterday were from her. Also, actually, this shirt underneath my overalls is from her. It says Rejoice Always, Light of the Lamb. That's my niece's business, and she makes the best earrings. She— I ordered 3 from her and she sent me a whole box. I got like 10 new pairs of earrings, and I'm like, I'm going to wear a different pair. Every day of launch to show off this cuteness that she makes, and she designs them and cuts them all herself. So Light of the Lamb is the name of her business if you want to look them up. Okay. Let me see, make sure. Um, Sabrina said, so if we sign up tomorrow, are there any bonuses? I'm sick. I'm missing out on the bike and the girl, but today But payday is Wednesday. Yeah, so these go away tonight. So tonight at midnight is the last time to get these. So if you can make it work, make it work a day early. But tomorrow there will be different bonuses. Okay, so it won't be these 4. It will be something different. Oh good, Melissa. Melissa said I ordered a pair of earrings and I just love them. Awesome. She'll be so excited. Her and I are talking about— yes. It's called Light of the Lamb. She's this adorable little— she's not a little girl, she's a mom. To me, she's a little girl. She's my niece, but she's adorable. Her name is Olivia, and that's her business. But yeah, I was excited. We're working on it. We're going to work on a collaboration together this summer. Melanie said, can I change the background colors like the same color but different variations of the rest? With different depths of color. I would just play with it, Melanie, because you can always test it out. If it doesn't work out and it doesn't have enough contrast, you can paint over it with a different color. Actually, one of the paintings I'm getting ready to show you— we'll talk about that— I painted over that background multiple times before I got it where I wanted it. Ashley said, where do you get thick body paints? You can get them pretty much anywhere. Hobby Lobby, Walmart, Amazon. Michaels, they all have them. Thank you, Linda, for posting her link. Okay, so this is the new one that I just did today. Can you tell I'm like in my pink— I'm in my pink vibe right now. I have been for a little over, I think, like 2 months now. I get in these modes. Um, so this is the new one. How fun is this? Look at these palms at the top. And then I didn't want to do just a typical like black silhouette of palms and the palm tree. I wanted it to just really have that like tropical happy vibe to it, and I just love this. It was so fun to paint, it was so relaxing. So this is the newest one coming to Tribe. This will be in June. And then our next one, this is one I was working on Throughout my florals masterclass that I'm in the process of teaching, and I kind of gave them a behind the scenes of this, but no one's seen it in completion yet. They've only seen glimpses of it in some photos and, and videos. So this is my newest floral. Again, very similar, right? Kind of, kind of get where we're going here. You've already got a little glimpse of how this technique works. and this is that to the nth degree. So I love this painting. It's so bright and floral and fun and pink and all the things, but it has so many layers of paint on it. I did it with thick-bodied acrylics. I went back and forth. At first I had a navy background because I thought that was what I wanted, and then I made it navy leaves instead, and then I added in all the different green leaves and all the different texture and lines and dots. So these, these are our next 4 paintings. 2 flowers, 2 landscapes. This is what we're doing in June. I'm turning that the wrong way. And then the hydrangeas and the big seascape painting are going to be what we're doing in May. So let me know if y'all are excited. I'm excited about those. Those are going to be tribe paintings in May and June. So again, this is the last night. I'm going to throw it up really quick. You have 5 hours until— hold on, let me get back up here— until that first bonus ends. This is our fast action bonus, and it is available through midnight tonight. Let me get this pulled up for you. So this is your fast action again. The Spring Bicycle, the Spirit Not of Fear, the Lovebirds, and then that is the Spring Chapel, um, that you couldn't see, um, because I have it at home, obviously. So you get these 4 bonus paintings. Tribe Sisters, current Tribe Sisters get those as well. And then we will have some new fun bonuses. Starting tomorrow, but this is your last chance for these specific 4 paintings. So let me know if you guys have any other questions. Again, I'll throw up the price of TRIBE for you. So it is $47 a month. You can cancel at any time, or it's $470 for the year, and that is the equivalent of you getting 2 months class for free. And then everything that you get inside of TRIBE— so some of you are asking, well, what all does that entail? Again, inside of TRIBE is where I teach my new paintings every single month. So just like that, anything new that I come up with, that's going to my TRIBE sisters. So you get 2 new paintings per month with me, you get a devotional with me, and then you either get a critique or a live Q&A. That we do each month inside of the group. It comes with a private Facebook group community. So instead of just hanging out on a page in comments, you get your own private group where you get to share your work, where your Tribe sisters are there to give you ongoing support, cheer you on. They're going to be your biggest encouragers and cheerleaders. And we've had so many of the Tribe sisters let me know this week. We were like, what's your favorite thing about Tribe? And it was just an astounding community. Like we all came in to paint, but we had no idea we were getting all of this friendship and encouragement and positivity in addition to all of the painting. So that just gives you a glimpse of what you get inside. Tribe also includes my other membership, Painting of the Month Club, so there's no need for you to sign up for both. That's included with Tribe. And then, of course, you get access, immediate access to the vault that has over 200 painting tutorials in there. So I'm going to pull this screen back up really quick, and we are going to go down. When you go to this page to check out Tribe, you can scroll down here, and I don't want you to miss this. This is just kind of an example of like some of the newest paintings, upcoming ones. But what I really want you to see— that's the inside of the vault— is this fabulous this little lookbook that we have. When you— this is an interactive, like, flip magazine. When you click this, we're going to go through. Let me make sure you're seeing what I'm seeing. OK, I'm going to take myself off. So you can see all the different things that we have inside of Tribe. So hundreds of paintings to choose from, landscapes of all kinds, spring, summer ideas, fall ideas for days. I'm obviously doing this fairly quickly, winter and Christmas, but you can Take your time and look through this entire lookbook, everything that you get that is included when you become a Tribe Sister. So I'm going to just double-check comments for any last-minute questions, and then we're going to hop off for the evening, and I'll be back tomorrow at 10 AM with another Morning Mindset session with you guys. Rhonda said, how long will we have access to the videos in the hub? Again, if you're talking about for Paint Week, those are available through the 10th unless you join Tribe. If you join Tribe, you get continued access to all of the lessons that we're doing this week. So yeah, to kind of follow up, Karen said, will these paintings that we do this week be available in the vault? They will. We're adding— my team is adding them to the vault. Vault at the end of this week, so you won't lose access to them. They'll be right there in the top of the Tribe Sister Vault, up in the, like, beginner section, so you can go to any of these videos up there. Sally said, when will I be opening Tribe again? We will not be opening Tribe again until the fall, so this will be your last chance to kind of get in if you're wanting to, you know, paint with us in May. If you're wanting to paint during summer, this will be the only chance to sign up before then. Okay. Ingrid said, how often do nights like this happen? So I only do this when I open cart. So these big paint weeks like this that I do for free, I do one in spring and one in fall. So that's the only time that I do that is when we're welcoming new members to the tribe. But inside of Tribe, you get 2 new lessons with me every single month. Yes, I jokingly say, like, our vault, you kind of saw— let me take that comment off. You saw all of the paintings that we have in there, and we actually designed it. We bought a program, and Megan— I shouldn't say we— Megan, my community manager, went in and redesigned our vault for it to literally kind of feel like a Netflix for painting. So where you can just flip through and that you— again, when you go to that website to sign up for TRIBE, there is a preview of the vault in there where I walk you through it and you'll see exactly what I'm talking about. You can just scroll through and pick which painting you want to do, whatever you're in the mood for. Those are yours, available 24/7 as long as you are a member of TRIBE. Okay. All right. Yes, good job, Megan. Thank her for doing that. She does all the behind-the-scenes things that make TRIBE, TRIBE, so I definitely wouldn't be able to do it without her. Um, Lisa said, will you teach Resizer? I'm not sure what you mean by that, Lisa. If you can clarify that question. We do have some videos that show you how to resize like templates and stuff, if that's what you're asking. Thank you, Sally. Ingrid said, is everyone here artists? Like, you learn different styles here, or is it how we have people at all levels. So most of the women who end up finding me and painting with me online are probably very similar to those of you watching right now. You may be new to painting, maybe you haven't ever painted before. When I used to teach paint nights, it was mostly people who hadn't painted since school, right? If maybe even elementary. So we have brand new people, we have people who have been painting for a few years, we have women who have been painting for 30+ years. So we have beginner, intermediate, advanced lessons. All of them, anyone can do though. And I think that's a really important thing for me to stress. A lot of people think if they're a beginner, then they can't paint some of the paintings that you see behind me. And I want you to know that everything that you see hanging on the wall behind me, all of these are tribe paintings. All of these are taught step by step, just in the same way that I'm teaching you this week. Like those of you worried about templates, like if you're doing the chapel, it's going to have a template. The peacock is going to have a template, so you're not having to freehand those. But a lot of them you will freehand, just like we did this. But everything is taught in a step-by-step process. Again, videos that you have access to that you can watch replays of, you can rewind them, you can take them at your own pace. So I think it's really important for people to— don't doubt yourself. Trust me, trust the process. Don't Don't believe that lie that you can't paint just like this. Okay, because you can, and all of the tribe sisters here in the comments will agree with me. They were right where you were a few years ago, some of them, some of them a few months ago. We have new members from workshops and they have proven to themselves that they can do this. And, and that's what I want each one of you to believe and understand is that you can do this too. If this is something you want to learn to do. You have to have the desire. You have to choose to make that decision, to make that investment in yourself, to carve that time out for yourself. When you become a Tribe sister, you also get a planner that I designed for Tribe to help you budget your time. Because here's the thing, time is an issue for everyone, right? We're all busy. I have 3 kids. I have multiple businesses. We have a property that we have to take care of. We travel a lot. Our lives are crazy busy, but I still make sure to carve out time for painting. And then, you know, I think of like some of my members who are taking care of their elderly parents, and this is their reprieve. This is their step away from life. This is your chance to not only carve out that time for yourself to become a better artist, but a chance for you to just heal, to just have therapy for you to take time for yourself to enjoy painting, to get lost in it. Allow yourself that moment to decompress, have fun, and remember that we can put the— we can put the world on hold for moments at a time. And it doesn't mean you have to just carve out like, I don't have 10 hours a week I can commit to doing tri paintings. And that's okay. Most people don't. You work in your schedule what works for you. That may be many 30-minute sessions. I know a lot of the working women in my group do that. They may paint before they go in for their full day shift in the morning, or they'll squeeze in a 30-minute lesson here or there at— in the evenings. One painting may take you 2 days, it may take you 2 weeks, but that's the beauty of it, is everyone is working on their own painting in their own time. There's no such thing as being behind because there's over 200 paintings. There's no such thing as anyone catching up because there's going to be new ones added all the time. So I want you to really think about, it's more about what is available to you. It's more about your choices and painting whatever you're in the mood for. And I talk about that a lot. I have to be in the right mood to paint whatever it is that I'm painting, right? So it gives you all of those options at your fingertips. You're not wasting your time searching all over the internet trying to find lessons. It's all there for you inside of TRIBE. If you want to just focus on technique, we've got technique lessons. For you. If you want a specific painting, we've got that. If you want to teach paint parties and you're looking for a great image to do for paint parties, we have a plethora of them, many that I used for years that were staples at my paint parties that are still successful today. So, um, there's so much for you inside of there. And like I said, you can sell your work, you can make money off of paint parties, you can easily pay for this membership if you come in and you commit that time to learning those skill sets and taking that time to practice and always taking that one step forward. Every time you paint, you're building your confidence, you're building those skills, and all of them carry on into your next painting. Okay. Oh, I forgot the one other thing. So yes, Ingrid, I think that just answered— you can host paint parties, they just have to be in person. You can't do anything online. I forgot to mention, it's at the tip of my tongue, the other bonus that we have. Now, this will go on all week long, but everyone that signs up for Tribe during this time will get entered into a raffle. One person will be a lucky winner that is going to receive a ticket to the next retreat here in my studio in July. So that is a $350 value that one person will get. Everyone who joins Tribe this week is going to get entered into that drawing. Then we have a separate contest for current Tribe Sisters. If you missed it, go check out the featured tab in our Tribe Sister group, and we will be announcing those next week, hopefully during the welcome ceremony. Melanie said, are the paintings in back of you on canvas or paper? All the paintings behind me are all on canvas. Okay, and we do still have— if you, um, don't already have a ticket to the retreat, we do still have, I, I think We have 8 spots left for the summer retreat, and I will make sure that information is on our website, but you can also email in if you guys have any questions at all that I didn't answer tonight. If you have questions about the retreat or the paint week or any of that kind of stuff, this is our customer service email, and my team is going to be there to answer any questions that you have. So you can email in anything that you need, and they'll be able to help you if you can't find something. That's what they're there for. Um, April, off the top of my head, I think it's the 8th and the 9th, but I don't have that information in front of me. Hang on. Let me see. No, I don't have that tab open. It's posted in the Facebook group though, April. It's in there. It's in the featured section. Yay, Karen's coming back. Karen came to my last retreat in the spring. Is it July 10th and 11th? I don't even have my calendar up here. All that stuff is downstairs. I'm like, it's only paint up here. So we'll make sure and get that information out about the retreat for you guys as well. Yay. Okay. All right, that's all I got for you tonight. Bye. Have fun painting. We will post either later tonight or in the morning a place for you to share your artwork. So we love to see your paintings. Make sure you share share it there so we can all brag on you and give you some love. We love seeing what you're painting. So I'll see you tomorrow. Bye.










