Supplies needed to start painting with Christie
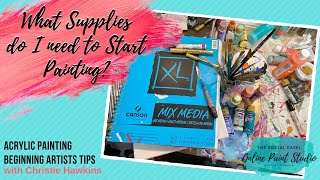
In this live tutorial Christie Renee Hawkins of The Social Easel introduces her first $20 pop‑up paint party—a Valentine‑themed gnome painting scheduled for January 23, 2020. She explains that participants will receive a traceable template, a color and supply list, and on‑demand video access via a private Facebook group. Christie then walks beginners through the essential acrylic painting supplies, emphasizing affordable, synthetic (Taklon) brushes, various brush shapes (flat, filbert, angled, round, liner), paint pens, mixed‑media pads, inexpensive canvases, and brush cleaner. She demonstrates how each brush type is used, highlighting the importance of loading enough paint, controlling pressure, and using paint pens for fine details. Throughout, she offers cost‑effective sourcing tips (Michaels, Amazon store, Hobby Lobby, Walmart, DecoArt) and encourages a supportive community mindset, noting that anyone can learn to paint with practice and that the resources are also available for those who want to teach the class locally. The video concludes with a reminder to sign up before January 22 and an invitation to join the free Facebook group for additional tutorials.
Chapters
Hey guys, it's Christie with The Social Easel. So I wanted to jump on tonight for a few things. If you joined me earlier in the week, we did some palette knife flowers. Let me see if I can find those to show you guys. I believe it was in here. So we did these earlier this week. So this is the first time I've ever done a pop-up paint party like this. We're trying some new things out for 2020. I'm super excited about it, and it's a way for you guys to get to paint with me if you're not in my membership, and an opportunity for you to paint some full paintings with me. So this is just the beginning of some of the new things that we're doing for 2020. I am going to show you exactly what supplies that you need to get going and painting. So if you're brand new, you've never painted before, you have no idea where to start, we're gonna talk about supplies. So I'm going to tell you what brushes you need, um, the different brushes and the different techniques that they're used for, because every brush has a different purpose. And we're going to talk about like what kind of canvas, mixed media pad, all that stuff that you need to get started in your painting journey. We're going to talk about those things, and I'm going to show you a few different brush strokes so you know what brush to use depending on what you're wanting to do in your painting. Yes, you're— I'm— you're welcome. I'm excited to tell you about the brushes. It can be a little overwhelming in the beginning, and I've gone through a lot of different brushes trying to figure out what I like best. So I'm gonna share that with you, and they are some of my favorite brushes, and they're not very expensive. A lot of people think you have to spend a ton of money on art supplies, and you really don't. So there's some affordable brush sets out there. That you do not have to spend like $30 on one paintbrush. That's not what we're trying to do. All right. So then how many of you like this little gnome? You've probably seen him before if you follow my page, but this is— was created for my Inner Tribe membership, which is where I teach women how to paint every month in a private membership. But we are not currently taking new members. And I had a ton of people ask, to learn how to paint this painting. So I talked with my team and we came up with the idea to do a pop-up live paint party. So basically what that means is I'm giving you guys the opportunity to learn to paint this with me. It's only going to be $20, which is a great deal because if you come and paint locally with me, it's $40 per person. So you're getting to learn this painting step by step for only $20 in a live video where it will be an aerial view. So I'll be teaching you over here step by step how to do it. And it's all going to happen on Thursday, January 23rd at 6:00 PM Central Standard Time, um, in a private Facebook group. So here's the best part. Number one question is people say, well, what if I'm not available that time? My kids have something, I'm teaching, you know, what, whatever it may be, it doesn't work with your schedule. It doesn't matter. So that is just when I'm going live. The group, and then you will have 24/7 access to that video afterwards, forever, in the Facebook group. So you can go back and view it whenever you want to, um, it's always there for you. It also includes the color list, the brushes that you need, and the template. So if you're looking at this and thinking, that's cute and all, but I don't want to freehand that, it comes with the traceable that all you have to do is print it off and trace it on to your canvas. They're so cute. I did some Christmas gnomes and then I took them down and then I was like, well, I kind of really want a Valentine's gnome. So that's how I came up with that creation and gave them some little conversation heart balloons to go along with him. So hope you guys are excited about that. I'm excited about it. It's the first time we're doing this. It's something new we're trying out for the new year. To see if that's what you guys would like to continue to have going on. Maybe a couple surprise pop-up, um, online paint parties with me throughout the year. So talking about supplies, the first thing you need to know when you're painting with acrylic paint as far as brushes, you want synthetic bristles. Okay, so Taklon is usually what you'll see in the description. It doesn't matter whether it's white or golden or like these are like gray and white, it doesn't matter. You do not want natural hair paintbrushes, um, when you're painting. They don't hold the paint the way that you need them to, and it's just going to be a headache for you. So you want synthetic brushes, okay? And there's lots of brush sets you can choose from. You can go to Michaels and get theirs. I think I have those here too. Can you guys see how organized I am? These are— this is a big mixture of them, but these are from Michaels and they're only $5. So $5 for a set of brushes at Michaels. I don't actually have that specific link, but these are in my Amazon store. So you can go to Michaels and get them for $5. They're in my Amazon store and they're $6.95, but it's free shipping on those too. So if you're not next to Michaels or you just want to get them and have them ordered, these are in my Amazon store, but it's a 10-piece brush set, and it has all that you need. So those are awesome. The other two brush sets I have in my store— this is just some of them. This is Addie's art set, and I found these probably about a year ago. I'm gonna hold these up. So this comes with like a large flat. This is what we use for backgrounds. It comes with a filbert. I'm pointing to the wrong one. A filbert brush, which is a rounded tip. This is really good for flower petals and leaves. And then it comes with an angled brush. These are just 3 of the 10 brushes that it comes with. Where will there be a template available for the gnome? Yes, Gretchen, there will be. Yes, traceable template. You can print it off. And just in case you're curious about the size, this is an 11 by 14. So, um, when you print it off, it will be the right size for your canvas. If you need it larger, you can always enlarge it on your printer. So those are some basic brushes. Lisa said, can you use acrylic craft paint? Yes, actually, that is all I use. Um, every once in a while inside my tribe, I use some thicker art, um, artist grade paint. I don't have any handy to show you, but craft paint, if you look back here, see all these bottles? On my wall, all of those are just craft paint. DecoArt is my favorite brand, but Michaels has some awesome colors, Walmart, Apple Barrel, they have some awesome colors. So I use everything. It really depends more on the color. So yes, craft paint is what you need, and some of them start at 50 cents a bottle. So again, the investment is not big on getting you started. See these little brushes? These are liner brushes. These are also in my Amazon store. These are absolutely essential if you want to have fine skinny lines. So if you struggle with being heavy-handed and you can't get the fine lines like you want, it's probably two things. Number one, you're not using the right brush. Number two, you're putting too much pressure down when you're painting. So, um, you definitely want some liner brushes if you're going to be doing some detailing. So now if we're talking specifically about this painting, I'm going to show you again up close so you can see like the gold that I chose to do in the conversation hearts and then the black that's on here. That is actually not paint. I decided to do paint pens instead, and I'm really glad I did because you don't have to just use paint on your paintings. Okay, you can use different products. Paint pens are awesome to work into your paintings, and I used two different ones. One is this DecoArt Premium. Now, this is a thicker one that I have here. This is a chisel point. You, if you're wanting to do fine lines like that and lettering, you want to get the skinny one. You'll see them in the store. You can get them at like any craft store, Walmart. They have— it's DecoArt Premium, is the best gold paint pen you can get. Hey Tammy, I am doing a pop-up paint party for the gnome, so you will get a message from me and it has a link for you to sign up. It's only $20. You get the template, color and supply list, and lesson from me, and it'll be in a private Facebook group, and then you have access to it 24/7 afterwards. So if you want to learn how to paint your own gnome painting, that is what we're talking about today. That's my first Valentine's pop-up special that I'm doing this year. And then this guy, this is Sharpie, and this is an oil-based black paint pen. I like the oil base because it just has a little bit of a different finish. So that is what I used for the fine details on my gnome instead of using a liner brush and black paint, just because I knew I wanted it very like crisp lines around the edges. and this pen was perfect for it. So I love, I love this black Sharpie pen as well. And just FYI, if you just use a regular Sharpie, it will look different. It has like a different sheen when you hang it on the wall, and it almost has like a gold reflection to it depending on the way the light hits it. So it doesn't look the same as the paint. So that's why I recommend getting a paint pen. If you like to teach paint parties, or maybe you're an artist and you teach in your local town, if you sign up for the Gnome, it does give you access to teach that locally as well. You have permission to teach that. In your hometowns or get a group of girlfriends together and teach it as well. Okay, so that's brushes, um, pens. This is my other favorite thing to get started with. This is called a mixed media pad, and it's like a big sketchbook for painting. So this one has a ton of pages. A lot of these I've done on Facebook Lives with you guys of practicing brush strokes and just working on different things. So there's some more palette knife flowers. Here's why this is so important, especially if you are just getting started on your, your painting journey. Patricia, yes, anyone can do the gnome class. It is open to the public. But here's why this is important. A lot of times we get in our head about painting, right? And we are like, well, I'm not an artist, so I've never done it, so I can't do it. And that's a big fat lie. You can, um, just using the proof of the women inside of my group. Some of these women have never painted before and now they're teaching paint classes, um, or making art and hanging it in their homes and selling it to people. And they never painted before because they didn't know they could. So you can, and it just takes practice. So it's hard to expect to just look at a painting and know how to paint it, right? It takes steps. It takes breaking it down and it takes practicing the brushstrokes. So I show you a lot of brushstrokes and you may not get it the first time and that's okay. That's why it's so awesome to have this mixed media pad because one, you're not attached to it. You're not all up in your head saying this is a piece of art I have to hang on the wall. This is like a sketch pad. It doesn't matter. I have pages of not getting brushstrokes right so that I can get them right. So hopefully that makes sense. So I highly, highly recommend getting a mixed media art pad. It's in my store. You can also get it at your local craft stores as well. And then a lot of people ask me about canvases. You do not need to get expensive canvases. This is just from— I think I get these at Hobby Lobby. You get like 7 11x14s for— let's see, they just changed the price. I think it's $10.99. It's either $10.99 or $9.99. Either way, it's about $2 a canvas. You don't really need to be spending more than that unless you want a big fancy piece of art and you know exactly what you're doing and you're prepared at that level to paint a piece of art that you want hanging on your wall and you want the thick canvas. This is just a, you know, half-inch thick. Unless you want something like that big and grand, you do not need to be spending a lot of money on your canvases. This is what I've used in my paint classes for the last 6 years, and it's still what I use on all these pieces of art that you see behind me. All of them are on these canvases. And last but not least, let me see if I have a jar of it here. I think it's in my kitchen. It is. Brush cleaner. So the brush cleaner is in my store. It's— you'll see a picture of it like on the top row of getting started supplies, but it's like a— looks like a hard wax almost, and you wet your brush and you just kind of rub the brush in it and it suds up. It also conditions your brushes as well. So that is my favorite brush cleaner. That's what I've used for years cleaning the, you know, hundreds of brushes that I use in paint classes, and it keeps them lasting longer. And then you want to dry them flat. So that's going to help your brushes keep their size, keep their condition, and all of that kind of stuff. So that is all in the store for you as well. Okay, so we've talked all about the supplies. If you have more questions for me, keep asking them. I'm gonna take you guys over here and we're going to show you some different brush strokes and what different brushes are used for, so you know what to do when you get your brushes. So let's, let's do a couple things here. I'm just gonna grab I just use— yes, I know it's not environmentally friendly, but it holds the paint better than paper plates. Just use some cheap foam plates to do my paint on. So I'm just grabbing— this is just Peony Pink by DecoArt, and what I want to show you first is just using the flat brush. Glenna says she has problems with the swirls. I will show you those. So number one thing people struggle with is they're not getting enough paint in their brush. If you don't have enough paint in your brush, it's not going to make the brush strokes the way that I make them. So that's number one. See how much paint I have in there? That's probably, what, 2 to 3 times what you would think in your head. Most people will like dip it in just barely and then they can make a brush stroke about that big and then the paint's gone. So you want plenty of paint in there. And this is how you're going to get your backgrounds filled in. So it's nice and smooth in the middle here. But see how it starts like fading out on the sides? That is your cue to know you need to get more paint. And it should be nice and smooth. It should glide very easily for you. It should not stick. Okay, if it's sticking or pulling, that means you don't have enough paint in your brush. So this is the main thing I use my flat brush for. The other thing I use it for is like this style of tree that I taught this week, and I'll just show you really quick what that looks like. Let's do a navy tree. These are fun trees to practice. So the first thing I do is just give myself like a base of where that trunk is, and then I'm just going to use the corner and I'm just going to dab at the top, and then I'm just slowly rotating it as I go down. I'm not pushing down super hard. So we talk a lot about pressure You don't want to push down hard when you're doing this or when you're making those skinny lines. Oh, I found my skinny gold pen. Speaking of, this is what you want. It's an oil-based Deco Color Premium Gold paint pen. This is the best paint pen you can get. The smaller one is great for lettering. I was missing that earlier when I was talking about it, but I'm not pushing down hard. I'm slowly rotating. Almost like— think of like stenciling in your head, how you're just kind of dabbing as you go. And this is just a quick and easy way to make some like evergreen trees. So I keep my brush fairly horizontal. You could angle it down a little bit. If you wanted to. See how quickly you've got a little tree there? Let's add some pink into it. Get a little fun colors in there. We're just painting. It doesn't matter. It doesn't have to be realistic. But you can use these different colors to just add— it's no different depending on whatever color you're using. Add some highlights and lowlights and all that good stuff. Stuff in there. So that's just a really simple tree. So those are just two quick things that I use a flat brush for. And there's different sizes of these, so that's a big one, that's about 3/4 inch. Um, so I either use 3/4 inch or a 1-inch flat brush for my backgrounds and stuff. Then we talked about the filbert That's a rounded tipped brush. These are good for flowers because they already have that curved shape to them, so you can make dainty little flowers with these. This is the brush that I used when doing this painting, which is my hydrangeas. So we use the filbert brush to get all of those petals. They're also good for making like bigger abstract flowers. So you could just come around and do these quick— I call them like parentheses, like think of like parentheses, like a C shape, and you're just kind of rotating around. You get these pretty curved lines with that. Do a little center there. So just some fun, really quick abstract flowers. And these are just the two colors that I chose. You obviously can use whatever you want to. I just wanted enough for contrast. So that's for your filbert. And then we are gonna skip the fan brush today because you're only gonna use it in a few paintings. I am gonna show you— where is it? I just had it a second ago. My angled one. I love angled brushes. And angled brushes are really good for, like, fun, more abstract brushstrokes. This is really cool to do for backgrounds. I've done lots of trees with these, so I'm just grabbing some mint with that. And just these quick angled brush strokes. And this is— we're really focusing on not blending. It's okay for them to overlap, but we don't want them to blend. So I use an angled brush. If you look at some of my art or go back and look at some of my pieces from over the years, you you'll see this type of brush stroke in my paintings, and it's done with an angled brush. You can also use an angled brush to do trees and just these quick little wispy— look how easy that is. So it's all about the brush. If you have the right brush, it makes everything easier on you. Super quick, fun little trees. And we're just flaring out at the end. So see why I like the mixed media pad? Because it's just like to play with. You can do whatever you want to in here. So I'm gonna grab a round, and I'm going to show you some brush strokes with a round brush, and then I'm going to show you with a liner brush, a nice skinny little brush. Both of these are in my store. So I'm going to show you with the same brush how different your brushstrokes can look depending on the amount of pressure you put down. So also load plenty of paint in there. You don't want to have too little, and you can make some some wispy little lines. Glynnis was talking about the swirls that I do. You can do little swirls with these, but I'm not pressing down really, really hard. Okay? Now you can come back if you want to fill those in. You can come back with a second round. I have plenty of paint, but I'm not pushing down really hard. If I push down really hard, I get these real thick lines. See that? My bristles are pushed all the way down where they're flattened out. That's not really what I'm working for in this scenario. I want them to be finer little lines. So getting the little curly Q's takes a lot of practice learning how much pressure you're putting down. When I'm doing these, my bristles are hardly moving, so you're not seeing them flatten out. When they flatten out, you get big thick lines. So plenty of paint and light brush strokes. Then let's say you want something even Skinnier. Marsha, yes, all my videos are on replay. You can also join the free Facebook group and I repost the videos in there as well. And it's like a little community where you guys can share what you're working on and share your progress and everything inside that group as well. So you can definitely go back and watch. This is just a skinny liner brush. And this is how you get those really dainty little lines. And again, I'm not pushing down hard, so I'm just barely dragging my brush onto the canvas. If I press down hard with this skinny brush, the same thing's gonna happen. Hold on, I got a glob of paint on there. It's gonna get thicker. So the harder you push down, the thicker your line is. And it depends on what you're doing. You may want a thicker line. I would recommend getting a bigger brush, not a liner brush. But you can also do like fast little accent marks with this. So those are some different things you can do with a liner brush. So those are some different things you can use the liner brush for. You could come back inside your flowers and add some little detail lines. So I use multiple brushes in one painting. You want to have a good selection when you start so you don't feel stuck or worried you don't have the right brush for what you need. So I recommend getting the set of liner brushes. They're awesome. You're gonna use them all the time. And then getting the Addi's art set or the Michaels paintbrush set so you have all those different brushes. That you can work with. You'll have your flat brush for background, your angled brush for different textures, your round, your filbert, and then your liners. So hopefully you guys enjoyed that. If you joined late, I'm gonna pop it up here one more time. This is a pop-up paint party that we're doing for only $20. It's an online class. We're gonna have a private Facebook group for it, and it's January 23rd at 6 PM Central Standard Time. You don't have to be there live. It'll be up 24/7 after that, so it doesn't have to work in your schedule. It'll be there for you to go back to anytime. But you get the template to trace this onto your canvas, you get the color and supply list, um, and the lesson inside the Facebook group. But yes, so we're signing up for that. You have until January 22nd to sign up for that class. And then we're closing doors. So this is the only opportunity you have to paint this gnome for only $20. So that's it, my friends. You guys have an awesome weekend, and get into the free group if you're not already. There's tons of videos in there of me teaching you little paintings and techniques that you can work on over the weekend. So I will talk to you guys next week. Bye!










