Watercolor Lesson: Lemons in a Jar
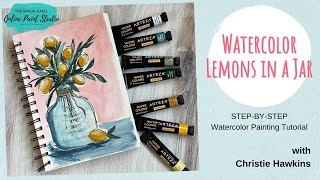
In this live-streamed watercolor tutorial, Christie Renee Hawkins (The Social Easel) guides viewers through creating a small "Lemons in a Jar" painting, adapting her palette‑knife version into a watercolor format. She begins by explaining the inspiration and sketching process, then dives deep into material choices—comparing tube watercolors, cake watercolors, and watered‑down acrylics—while providing Amazon store links for each. Christie demonstrates paper options (mixed‑media pad vs 140‑lb watercolor paper), brush selections (big rounds, skinny rounds, waterproof pen), and step‑by‑step techniques: laying down washes, layering colors, mixing hues for lemons, leaves, and background, and adding highlights, shadows, and optional ink outlines. Throughout, she engages with live audience comments, answers questions about gouache, brush types, and using watercolor on wood, and encourages experimentation, multiple versions, and playful scribbles. The session concludes with a recap, promotion of her blog, Instagram, and future live lessons, emphasizing a supportive, fun learning environment.
Chapters
Hello everybody, it's Christie Renee Hawkins with The Social Easel, and we are gonna do some painting and sketching today. So I'm really excited to do this lesson with you guys. Um, I just did one of my newest paintings. This is my palette knife version of Lemons in a Jar that I did for my membership group. And then, as I was talking to them, I was asking if they wanted a watercolor version too, and they did. And so I thought I would jump on and do the watercolor version of this painting with everyone today. So this is going to be super simple and fun, and I'm going to go over some of your different choices for mediums that you can use. To do this style, um, and just kind of show you how, how easy it is to do a quick little sketch and to play around with some watercolors. Um, so if you will let me know you're here, um, tell me where you're watching from. If you haven't already accepted permissions from StreamYard, go ahead and accept those permissions, and it allows me to see your name, um, when you're commenting, because I'm keeping up with comments through StreamYard because we are broadcasting in several different places. Um, so let me know how everyone's doing today and if you're excited about painting some lemons. I don't know why I'm like— I have like a lemon obsession right now. Um, so I'm excited and I loved doing this smaller version too. So, um, this was my original sketch. People always ask me how I come up with inspiration. I look at a ton of different images, photos, art, everything, and then I start sketching. So this was my original sketch that I did in about a minute, um, just to kind of get my idea on paper. And then I did a watercolor version of it, and then I did a palette knife version of it. Yes, Tony, I made myself a little cappuccino that I'm having. I'm still on morning time here. I mean, it's quite yummy. Okay, so I'm going to show you guys a couple different things. And as— oh look, this one's called Lemon Yellow, so maybe I need to pull that one out. As I am talking to you about products instead of you worrying about trying to keep up with, you know, what I'm talking about, making a list and all that kind of stuff. Anything I talk about is going to be in my Amazon store. So let me put this up for you real quick. All you have to do is text the word Amazon to this phone number here and it will send you a link to my Amazon store. And you're going to go to my Getting Started Supplies and all that, all that good stuff is going to be there for you. So these are what I just pulled out. These are Arteza watercolors in a tube. And then I also have my cake watercolors. These are— I don't have this exact set in the store because these are so many years old. They're from when I was in art school. And then I have my little travel set of cake watercolors too. These are in the store. So any cake version or tube watercolors will work, or you can also use craft acrylic paint to get a watercolor look. So I'm going to show you all of that. Patty, I will try not to put my, my brush in my coffee. Yeah, I'm gonna— I keep my coffee on the left-hand side, so I'm not tempted to do that. I always keep my water cup on the right. Take that down really quick. Okay, so before we get started with the actual painting, I want to show you the different materials because I get this question all the time. This is going to be turned into a blog post too, so you can always go back and reference it at a later point. But I get a lot of questions about watercolor, whether I teach it, what do I use, do I like the tube better, do I like cake better, can you use acrylics. So we're going to discuss all of that today. So right now I'm just using my mixed media pad. This is kind of like my sketchbook for painting, if you haven't seen me use this before. And if you're watching me on the Facebook page, go ahead and share with your friends and let them know what we're doing today. So I'm going to show you— let me grab a pen so I can write on here. I'm going to show you tube watercolor. I'm going to show you cake watercolor, and then I'm going to show you acrylic. This is just craft paint as watercolor. And that you can use any and all of them. You can even mix them if you want to. I'm going to zoom in a little bit closer. Is that better? Try to get this all on the screen for you. Okay, so let's start with tube watercolor. A little bit goes a long way. You do not need to use very much of this, and I bought these honestly to test them out because I had always just used these cake ones that I had from college. So we're just going to get a little bit of that yellow on there. So you do not need— these are going to last forever because you do not need very much at all. And I'm just going to grab a little bit of water. So you can see how heavy pigmented this is. So if you want really strong colors, You're probably going to want to go with some tube watercolor because it is really, really strong color, heavy pigmented. Um, let's do a different color too. I just want to show you some different ones. This is the Crimson. So see, they look thick like acrylic paint, but they're watercolor. So of course we're just going to add water to them, and the more you dilute them down, the more transparent they're going to be. So if I want that nice and thick and bright, I can really load it on with a lot of pigment. And then if I want it more translucent, I can take some water to that. And just keep watering it down. Yes, these are Arteza. So that is your watercolor in a tube, and these come in like— look at all these pretty colors I have. It comes in a big set, beautiful colors, all kinds of colors you can use. So if you want a really good color selection, you might want to start with the tube watercolors. If you're looking for something more affordable, you can start with the cake. So let's go to that. And we're going to go with this one here. So these are removable. Um, and I can just Again, load up with a bunch of water, and it's the same thing. The less water I get, the stronger that color is going to be. So I'm not going to dip back to my cake again. I'm just going to get more water on my brush. And you can just keep diluting it down until you get it nice and thin, however you want it. So you can get the same effect with either one. And we can even blend these. I'm gonna get some water. So see how I can just kind of dilute that out? So you get the same effect with both. Watercolors do not take a long time to dry. They dry really fast. And then last but not least, let's say you don't have any watercolor, but you want to do this project today and you've already got your craft paint. This is my palette from my palette knife painting. So we're going to get a little bit of that and we're going to do the same thing. I'm just going to water down this acrylic. And I get the same effect. You can see this is pretty heavy pigmented too, but I can keep doing the same thing with it. Just get more water and dilute it down. So you've got 3 different options, and hopefully that helps kind of guide you guys and help you figure out what you want to use when you're doing this. Um, Glenn is asking, are gouache paints the same as the 2 watercolors? Gouache is different. It does have a different, um, effect and finish than watercolor does. So I'm going to set my mixed media pad over to the side over here. And this is— you can do this project in mixed media, or you can do it on watercolor paper. I got this at Hobby Lobby, and it's just a, um, it's called a journal, but it's 140-pound watercolor paper. Um, but you can get that on Amazon as well. So watercolor paper has a different texture that it's going to grab the watercolors a little bit more than just doing it on mixed media pad, which is just a very flat surface. Um, Torita is asking what brush name that was. I didn't mention brushes. If you are looking for brushes, those are also in my Amazon store. And if you guys came on late and you're wondering about the supplies that I'm talking about and you want a link to the Amazon store, just text the word Amazon, just that one word, you don't need to say anything else, um, to this phone number, 417-217-7044, and it will send you an automatic reply with a link to my Amazon store so you can check out all the different supplies. Hey Linda, yes, these are, uh, this video is available for replay whenever. All right, so we're gonna start our sketch here. So the first thing I wanted to do was just kind of get an idea of where my kind of milk jug bottle is going to be. So I'm going to do a little bit of a neck here. And I know this is light, it's kind of hard for you to see right now, the pencil, but we're just getting a light little sketch here. And you can make your bottle however you want. Maybe you want to make it a mason jar. Maybe you want— someone in my group did like a flat container where the lemons were kind of like, you know, piled up in a big container that you'd put on a table. So you can do whatever you want to. I'm going to pull this out. I will say the only thing I don't like about this watercolor journal is that it doesn't have the perforated edges to make a clean cut, but I'll cut that later. So this was just— again, this is a super, super quick sketch that I did here. And then we're just going to kind of do the same thing, kind of get an idea of where we want our lemons, maybe some of the leaves coming out. And you can always go back and change your mind. Just kind of getting that set up here. I'm going to have a lemon down here on the bottom. Now there's two different ways you can do this. Yes, this is just a regular pencil. I'm going to go ahead, um, and go over this in pen. You don't have to do this right now. This is a waterproof pen. These are in my store. You want to make sure it's waterproof, bleed, bleed resistant, and all that kind of stuff so it doesn't leak and fade and smear on your painting. So I'm going to do a very, very light sketch over top of this so you guys can see a little bit better. Now, and here is kind of like when I'm doing this kind of style, I don't have super hard concrete lines. You can see they're kind of sketchy, right? So I do a lot of little lines to kind of make the shapes up. We're going with the loose style here. And I can come back and add more of this in whenever I want to. So I can add more pen at the end after I put watercolor on, and I can come back and touch things up if I choose to add that. So let's start with our background first. We're going to do a little wash of color here. And I'm going to get one of my rounds. Trying to remember what color I used for— I think it was this one. So you can do whatever background color you want. So this is kind of like an orangey red. Oh, I've got to— you know what, hang on. You guys talk amongst yourselves really quick. I'm going to go rinse this water out. I forgot that I used black in that yesterday when I was painting with the girls. So hang tight, I'm going to be right back and get some fresh water. You guys are having bad storms, I'm reading. That's no good. I feel like we haven't had terrible storms, but it has just been non-stop rain.
Give me just a second here.
I forgot to send out my text alert, so I'm going to do that real quick. I had it on my phone and then forget to— forgot to hit send. Karen said we've had it for days. Yeah, today is the first time I feel like I've seen sunshine in a long time, but we're gonna have a really, really nice weekend. I get to go floating and hang out on the river all weekend, so I'm super excited about that. Okay, now that we're situated I'm going to go back to this again and I want it nice and watery. I'm going to use this little— you can use whatever you want. I'm going to use this plastic packaging that I had here because it'll work perfect for a palette, but I want this nice and watered down because I kind of want that light peachy color on there. I may even get a little bit more water. And I like using a big round for this so it's nice and loose. And this is what I love about watercolor— it doesn't have to be the same on your background everywhere. You can have some areas with more pigment and some with less. It's totally up to you how you want it to look. Watercolors are really fun to just play with. When you're kind of working on ideas too, because they're fast and it's a good way to get your ideas on paper without the commitment of pulling out all the acrylics and everything. So on the bottom of this, I kind of used like a kind of a brownish color. I don't know if I'm crazy about that. I think I might want to do more more of like my version that I did on my palette knife, and I did a, um, kind of like a navy blue. So I think I want to do that on here too. So I'm going to get a lot of water here. Now this is just a bright blue right now. I'm going to go ahead and mix that red in there. It's going to give it a little bit of a purplish, more navy tone. Okay, so we're getting darker here, but I still want it darker, so I'm going to pick up a little bit of black. I get a pretty navy blue. I'm liking that. What do you guys think? I think I like the blue down there better. So now if I want that— I want to create a little bit of a shadow underneath there. I'm getting a little bit more, just adding a little bit more black. A little less water so it's a little more pigmented. Create a little bit of shadow underneath there. You know, I said I always keep my water cup on my right, and there I have it on my left, right next to my coffee. And then you can just kind of fade that out as much as you want. And you can do layers with watercolor, so you can start with a light base coat, and then if you want more, you can always go back and add more to it. I gotta get myself situated here, y'all. Feel like a little bit of a mess. This is my acrylic water cup that I did not rinse out yesterday. Do not follow my example. I need to have all my color choices available. There we go. And then I can also choose some of my tube colors if I want. Um, and like I said, you can mix these. You can go from cake to tube, whatever. There was a pretty one. Um, I love that color of green for the leaves. It's just fun to have all these different colors. I'm looking for kind of a mustardy yellow too.
There we go.
Yellow ochre. What's this one? That's saffron orange. I don't think I want the orange. I'm gonna grab white. So this is the other thing I like about the the tube watercolors is usually with watercolor you would leave blank spaces where you want white, but with the watercolor tubes you can actually add white to your paintings as well. This might be Christie Renee. Alright, so I've got a couple different yellows and greens. I'm gonna pull this dark green out. I like having a couple different shades of the green there. Maybe a couple of these blues. See all the color choices you have with the tubes? So I can use these and I can color mix, or I can use these. So we got lots of choices. I think I want to— I want to start with my jar here, so I'm going to try this ice blue. I may not like it, I'm not sure. I might want it to have— that's a really pretty blue, but I might want it to have more of like a teal color to it. Marty's asking if you ever use watercolor on wood. It's not going to show up very much. If you want a very subtle look, I would use acrylic on wood. So let's test this color out and see. What we think. It's a nice pretty blue, but I don't think it's the kind of blue that I want. I like that one better. So see how I can leave that pigment stronger on that side, kind of creating that shadow, and then pick up more water. So fun and quick. I could even take some of that, a little bit of that black I had, kind of get like a gray going on here. But I love using these big rounds when I'm doing watercolor. Just do a little, just a little color over on this side, because you can use just the point or you can push it down as you saw me do with the backgrounds. Oh, I'm liking the way this is looking. What do you guys think so far?
It's fun, fun, fun.
All right, let's play with our yellows now. So I'm going to start with a darker yellow first, kind of as our base of our lemon, and then we're going to add some brighter colors to it and some highlights. I may even add just a touch of brown to this. Here, I'm just going to use this right here. Let's tone it down just a little bit more. This is where you gotta trust the process, and trust me, I know it looks a little crazy right now. It'll all come together. Definitely doesn't look like lemons at the moment, does it? Show you what I'm doing here. Just kind of diluting that yellow down. So I added brown here. See how that's darker? And then this is just out of the tube with more water. Now we've got a little bit of bleed here. I can touch that up with some blue in a little bit. So see how that watercolor, that darker color, was already dry on there, but once I add the wet brush to it, it's blending with that new color that I'm putting on. Oh, look at that yellow leaking into my base here. I had too much water there. You can just take a paper towel and soak up that excess water. Let's come back with a little of that blue and touch that up where— see, that was just meant to be like that. And then it's going to create a little shadow where that lemon's leaning against the jar there. What do you guys think so far? You're getting a little bit of glare on that. Okay, I'm gonna let those dry for a little bit, but I want you to see even how I tried to use just a very, very small amount of that tube paint, you can see how much paint I have left there. So I'm gonna try to not do that with my greens. I'll just have to paint something else with this leftover paint. I would say if you're wanting to splurge, this is a fun set of paints to buy and play with this summer. Look at this light yellow that we're going to add to the lemons for some highlights. All right, so I'm going to get a skinnier round to do some of the stems and the leaves. So look at this. When I add water to that, look how kind of like bright green that is. I don't like it that, um, that vibrant. That's too, too bright green. So I could add black to that and tone it down, or I've got this red over here that I had earlier from when I was showing you guys the difference, because they're opposite on the color wheel. Watch, I can take red Add it to that green, and look what happens. Now I've got a really pretty dark green. That's like the perfect color for me. It looks almost black when I'm showing you guys, but it's dark. It's dark green. Glenn, it was just some packaging from a pencil set that I bought. I decided to use it as my palette today. So I'm gonna use the skinny thing, and we're just gonna make a couple lines down here for our stems. And I'm actually— this was still wet down here, so you're getting that little bit of a bleed. I think I'm going to use that to my benefit. Because this is water, let's just kind of smear that across and kind of give the illusion of water there, right? You're not gonna see those stems perfectly straight. All right, so let's come up here and add some of our stems coming out. And I had some green in here. I also had some brown. I don't know if I'm gonna add brown again. We'll see, we'll see what I'm feeling. And then I'm going to use the same brush to start doing some of my leaves on here. I'm just kind of holding the brush, pushing it down. I'm going to come back with some lighter green too, so it's not all just going to be this dark. Let's pull a little of the light in there and see what we think. And again, I'm not painting, you know, super realistic. You can see I'm not too worried about the leaf shapes, trying to make them exact or perfect. We just kind of want to have the idea of there being a bunch of little leaves coming out of this base on the stems of the lemons. I'm liking that combination of the greens. Do you guys like that? You guys are quiet today. I got a lot of water there that's gonna kind of spill over. I think I'm gonna get some of that up with my paper towel. Just a little too much. I'm liking it. You guys are probably too busy watching, concentrating. Someone's asking if I use different brushes for watercolor. You can use the same brushes you use for acrylic paint with watercolor. I really like big rounds and like some skinny ones, um, with watercolor just because of the different things you can do with them. Let me see if I have that painting I was going to show you guys. Um, if you're not following me on Instagram, Make sure you jump over there and follow me on Instagram. We're trying to get to 10,000. We just passed 5,000, but I was showing you guys some of the art I did with the girls the other day. I want to show you my— Emma's watercolors. So with these watercolors that I'm getting ready to show you, we used two brushes. We used a big round and a skinny just like this. How fun are those? This is Emma's. She's only 14. I was super proud of her. She was frustrated and not happy with it, and I was like, I— that's literally your first watercolor you've ever done. So I think that's pretty amazing, don't you guys? And then this one is mine, but it was so much fun. So, um, yeah, I'm kind of like hitting a little watercolor phase, and I just love how fast the paintings are. We did these— I want to say this was about a 30-minute project for us, and I— we just used the cake ones for that. We did not use the tube acrylics, but I think she did fabulous. And now they're her and Sophie. We did butterflies too. Let me show you the butterflies. My butterfly— oh, there it is. I was gonna say it must still be in the kitchen. Sophie's butterfly and my butterfly. We did these with Casey Hope, my friend who owns Pizzazz Art Studio. You guys can look up, um, her studio. She teaches watercolor and lettering as well, and some other paintings. But that was one of the lessons from her group, and it was so fun, and it was perfect for Sophie. So anyways, once I got them started with, with watercolors and they realized how kind of forgiving and fun they are to play with, they ended up sitting back down that afternoon without me, and they just sat down and started painting with them again. And that's what I love. We got to get our kids like let's just play. I want you guys to just play, um, introduce your kids to color and painting and just have fun. Um, Candace asking, can you layer white? Do you have to wait for it to completely dry? Yeah, you're going to want it to dry. And there's two— like I said, like, you can leave I left white on the background of the paper so you can have white in your watercolors that way. Um, or today, and like what I did on my landscape, this was actually craft paint, just white craft paint that I went and used because I didn't have this handy. But I'm going to use my watercolor white today, and you can go back and add those on. I'm gonna get a little more black. I don't know if you guys can see what I'm doing. I'm just still playing with that green that I already had down here, but I really like to create the depth by having the lights and the darks in the color. So I kind of want to add some even more dark green back in. Let me grab this black. Just some different areas. Of light and dark for some contrast in there. Thank you guys, and I'll be sure to tell the girls that you liked their watercolors as well. Linda said, my 9-year-old granddaughter— almost 9— has been crafting for years. She likes to build things out of cardboard boxes. Oh, that's fun. Makes beds and tables. Yeah, anything you can do to get creative with your kids, do it. It's so good for them, and it really does build their confidence too when they see that they can do something like that. You know, even though Emma was disappointed with that initially, when she came back to look at it, I mean, you know, it's like, I did that. It's pretty impressive. All right, I'm grabbing some of that baby, baby light. I don't know why I said baby light yellow there. Mixed it with a little bit of this green. So I'm just kind of hanging out with you guys today. I'm not really in a rush trying to get through this. I just kind of want to play and I want to show you how you can layer and just keep building even with watercolor. All right, let's take some of that and rinse that really good. I don't want any of that. Green in there for my lemons. Let's go back and add some of this up here, get some of those highlights on the lemons. It's very subtle, but hopefully you can see that lighter color that we're building on there. Can you guys see the difference? And I can just keep coming back and playing and adding whatever colors in there I want. Maybe I want to brighten my lemons up a little. Terry's asking, can you use watered-down acrylics? Yes, Terry. At the beginning of this video, I explain all the different ways that you can do this, and I show you whether you're using watered-down acrylics, tube, or cake watercolors. You can use all 3. And yes, Carol, this will be on my blog. Not immediately. But we've, we've already got the next month of blogs planned out, but this will eventually be a blog for you guys to be able to go back to. But you can always go to YouTube and watch the replay of this as well. I forgot about my leaves down here, didn't I? I'm also digging these really small paintings that I've been doing. I always paint big and bold. It's been kind of fun to paint smaller. What do you guys think? We're about done now. On this one, I was playing with the idea of doing like a buffalo plaid ribbon, and then I started it and then I didn't like it, so I'm not going to do that. Um, what I do think I might want to do is maybe like some twine around there. So I'm going to get kind of this brownish color here. And I'm making sure this is dry before I do this. I don't want the colors to bleed together again. So you could leave it and be done. I'm just going to play with this and we'll see if I like it or not. We're just going to add a little bit of twine around the jar. I think I like it. What do you guys think? I think I don't like the shape of my lemon down here. We're going to change this. Add a little brown. Take this brown that I just used. Let's add a little bit more shading. Why not? I like the twine too. I think I like that shape better. All right, so let's add that white in little highlights. All right, so how many of you are just itching to get out some papers and paints and try this today. I hope you are. And we could leave it just like this and not do anything, or I could go back with my black waterproof pen that I used in the beginning and I could add some black lines around it. So it really just depends on the look that you want. Do you want it super soft Or do you want some of those hard lines with it too? So I do not want a ton of water in my white because I want it to stand out a little bit more. So what do you guys think? Should we add some black lines or leave it soft? Don't you love the white? Jesse said she's gonna do a watercolor of the ocean. Um, someone said they stayed up till 10 last night doing the palette knife version. Awesome. Jan said she's never used watercolors but can't wait to try. I'm loving the white. All right, so I need your votes. Put in the comments, black lines or soft. You can just put black lines or soft. I'll let you vote. While you guys are doing that, I'm just going to come in here and add some of this white on. And by not getting— it's not super wet, you know, I told you I don't want a ton of water in here. It kind of gives me this like dry brush look, just those streaks of white over top of it. We've got a good mix of comments here. I feel like it's about 50/50. Oh, maybe there's a lot more soft. I'm kind of digging the soft too myself. Here's what I'll do, because I think I want to leave I want to leave this version soft, but I can come back and show you on this how adding more black on there, how that will look. So I'm just adding a little bit of white to my twine. Water it down just a little, even add some to my green in some places if you want. Let's get a little deeper shadow over here. See how easy that is to just layer and add? Okay, so we're gonna leave this soft. I think I'm done with this one. I'm really happy with it. So on this one, I'm going back with my pen and I can just add some of these extra lines, and they're just real quick. I'm not making Again, super solid outlines, just quick kind of brushstroke pen marks on here. Maybe outline some of those leaves. So it's just a different, different kind of look. Yes, Pauline. Pauline said, would scribbles ever look good on watercolor? I think so. I did little scribbles down here. It would be fun. But I just encourage you guys, just play with it. Do one painting and do like 3 or 4 different versions of it. And don't be afraid to like test things out. Scribble on one. If you don't like it, who cares? Toss it. Keep the one you like most and frame it, you know. So hopefully you guys enjoyed that today. It was a lot of fun. Um, it's definitely making me want to do more and more watercolor, so Let me know if you guys like the watercolor lessons, and we'll start sprinkling those in with the acrylic ones. Donna said, I'm so scared to mess up. Donna, you're not alone, and like so many people feel that way. But once you start doing it, then you're just gonna realize like it's okay. No one's judging you. No one has to see it. If you're doing it in a mixed media pad or a little journal, like this, which I think I might just make this my actual watercolor journal and just have page and page and page after watercolors that I'm trying out. Um, just have fun with it and realize no one's judging you. This is about you letting loose and having fun and finding that creative voice that you have. Yeah, I think I like the soft look the most. And I love painting small. All right, you guys, you have an awesome rest of the week. Have a great weekend. Um, we'll be back next week. I'm not sure what I'm gonna go live with next week, but I think it's gonna be on Tuesday. We'll do something fun. So I'll see you guys next week. And if you didn't already, be sure to share this with your friends. It will be up on YouTube and my Facebook page for replays. You can go watch it whenever you want to, and you can subscribe to the YouTube channel while you're over there and go back to all the past videos if you're wanting some more lessons. All right, you guys have an awesome day. Bye.










