MASTERING Lightroom Basics For TOTAL Beginners (I Wish I Saw This Video When I Started)
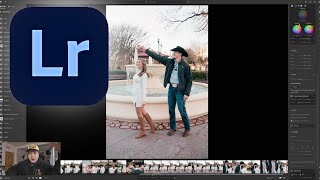
A complete Lightroom walkthrough for beginners covers importing and organizing photos, then systematically explores editing panels for light, color, effects, and detail. Learn RAW shooting, AI removal tools, masking techniques, and how to create custom presets and export your work.
Chapters
Hey guys, welcome to today's video. Today I'm just going to be breaking down Lightroom. It's a part of the Adobe product lineup and it's something that I've utilized in my media business since the very beginning whenever I started doing real estate photography. Any sort of photography, I throw it in a Lightroom. I have my presets, I have all of the above. And so let's go ahead and get into it. This is going to be to the beginner. Like, this is your first time opening up Lightroom, and I wanted to show you what it's like and break down each section that you're gonna need to know in order to get started and working effectively in Lightroom. So if this is the first time you're opening up Lightroom, you're on the right video, and I was there 3 and a half years ago. So let's go ahead and get into it. I have Lightroom Open up here to some engagement photos that I took a while back. But you open it up and basically on your left-hand side— let's go ahead and break down what we're looking at. It looks a little bit intimidating at first. So on the left you have a whole section where it holds all of your albums, and I need to clean up a bunch of these, but all of these different albums, and I'll show you how to create an album here in a minute. You have all these albums here, and so it— you can keep everything organized by using this. Don't want your reactions up here, Google. Boom. But if you need to have stuff organized, this is the way to do it. So whenever you, you go to open up your files and you hit Import with Lightroom, um, after your photo shoot, it'll pop up like, okay, they're importing, where do you want to import them to? Click on Make a New Album, which is this little plus button right here. You can create an album, you can create a folder, either one of those, whatever works best with your flow of organization. So I just make an album for each individual project that we work on. And so, for example, I open up this one and it's real estate photography. So very handy. That's pretty much it on that side. Um, yeah, that's, that's basically everything. So that's how you keep everything organized. Let's go back to the engagement photos here. We'll do this one. So whenever you import things into Lightroom, um, oh, why did that stop sharing? Here, present. That was weird. Anyways, whenever you import things into Lightroom, you put it in a folder, then you can— it goes to this screen. Um, so this screen, this is where you can view stuff. And down here in the bottom left, underneath my little box there, you can choose the layout of how you want to look at all of your photos. Um, you could do a side by side to make sure everything looks the same and in like the same style as the previous photo, because sometimes I've done it to where I've gone a whole like 100, 200 pictures, and by the end it looks a little bit different than the way I started off because it's kind of like the game telephone. It's like, hey, tell the person next to you one word, and by the time it gets to the end of the line, it's a completely different word. And so this is a way to keep everything organized and looking even. I usually just do this, um, because I can see the bottom here and it keeps me pretty in line. Like, you can tell this one's a little bit more orange than the others, and so I would go and fix that one and make sure they all, uh, look great down here at the bottom. Let's continue. So make sure to always have this fit button on. So if you zoom in, say you want to look at his hat, and now you're like, oh gosh, how do I zoom out? And you try to like line it up evenly. With your mouse or your mousepad. A lot quicker way to do that is just to hit fit and it'll fit it perfectly. You can zoom in to a specific percentage if you want, but I always keep it at 100% and I just hit fit and it keeps it everything lined up perfectly. So let's go ahead, let's get back on this picture. Down here in the bottom right, this little arrow button. Hopefully you can see my mouse okay. Uh, you hit that and it removes all the photos to give you a little bit bigger of a look, less distractions. You hit it again and you can see your photo album at the bottom. If you hit the button next to it, that is showing you the original RAW file straight out of camera. So it was a little bit darker And it was funny because you can see this sign in the background that wasn't supposed to be there, but it ended up being there in the shot on accident. And so what I did, which we'll show you here in a second, there's a tool where you can basically erase that whole thing. And so this is after the effects, this is after the, uh, profile filter. I put on, and after AI removed that sign, that's your final product. And so also, if you want to download the filters that you're seeing on these photos, um, I think they do a great job of removing the harsh highlights and making it look very natural. There's going to be a link in the description if you want to buy those. Um, there's only a few of them, but make sure to go and utilize those if you feel like you like this vibe. So let's continue. That's basically it on the bottom. Um, you got your albums, you got your pictures and your albums, and then over here on the right you have your editing section. And this is where all the magic happens. This is where you get to control every single variable of the photo that you have. Um, now not all of the things that you can do in this section are going to be applicable if you shoot in JPEG. So this is why it's so important, if you don't already, shoot in RAW. And it's just a setting on your camera, it's very easy to change. Um, let me know in the comments if you don't know how to change that and I can help you out. I'll probably make a video on it pretty soon. But make sure to shoot in RAW because what it does, it allows more data to be in the file. And so if you're overexposed, if you're underexposed too much, it's a lot easier to recover that file whenever it's in RAW. And so even if your camera has a JPEG and RAW option, that's not a bad idea. I just shoot everything in RAW, um, because I always throw everything into Lightroom anyways and throw filters on, whether that's on my phone or on my computer. So up here, a lot of people, the first thing they try is this little auto button, and it basically tries to analyze your photo for you, and it does okay. We'll hit auto now, and, and this is the final product. It's a little bit dark and too contrasty, so let's turn it off. This is the original edit. Um, you can use that as a good starting point if you want, if you don't have any presets that you throw over the pictures like I use, which again, link in the description if you want to buy them. But you can hit auto and see what happens and then go down the line and utilize whatever you want to fix. So there's that option. You can go black and white, a quick way to do black and white. Another way is to just lower the saturation bar right here, but Uh, let's keep going. HDR. If you have an HDR photo and you want to edit it in HDR, this is what you're going to want to press. So usually if you're on a MacBook screen or an iPhone screen, you'll be able to successfully edit HDR images because they're designed to handle HDR. Um, HDR stands for high dynamic range photos. And so whenever you take an iPhone out of the box, you basically It comes taking pictures in HDR mode, which HDR is, it takes multiple photos, more than one photos, and different exposure levels and stacks it on top of each other. And so if you're ever like, man, why is that so bright on my screen? It's because it's an HDR photo or an HDR video. I just turn all that off because it's way harder to work with and not all screens are designed for HDR and it looks weird. If it's not designed for it. So my camera, it was just shooting normal RAW photos. We weren't shooting in HDR, so I'm going to leave that off for now. And this is major— like, I've never used that feature other than maybe a couple times on some real estate photography. I move down, profile. You can change your color profile here, um, and that's just going to be something you play with. I just do the normal Adobe Color one. Here, this little bar, this light section, this is going to have where you can control your lighting. So your exposure— I don't know why I said it like that— exposure, your contrast, highlights, shadows, whites and blacks. And so all of these— so exposure is going to be one of the first things you probably want to adjust just a little bit. Especially if you're shooting in RAW. If you turn it up too much, it'll start to break apart, um, and you can see kind of where it's grainy and does not look good if you overexpose. So you can set that wherever you want. Fun fact: if you double-click the line of what you're on, it goes back to zero. So if you double-click, it goes back to zero on everything that you do in Lightroom, everything that you do in Adobe stuff, pretty much. But that's the exposure, um, contrast. Obviously these are things that you got to play with, um, and figure out how you like to see your pictures, and it's creating your own style. So contrast, highlights, let's bring it out here. Highlights are obviously what it sounds like, so like the brighter parts of the image. Everything that's not considered a shadow is a highlight. And so if you want to lower shadows and make it more contrasty without turning the contrast up then the shadow bar is going to be where you want to move. And then whites and blacks, similar situation. It only takes the whites and it brightens it up. And so if, if you have a photo that's really grainy and the exposure is like maxed out and you can't turn it up anymore or else it's going to start falling apart, that's when you can use the, the whites tab. And it can move up and brighten the, brighten the picture without having to up the exposure. So the blacks is the same thing. You can control your blacks here. Only the black colors in the photo move up and down. Curves, um, that's kind of a whole other video on itself, but basically, um, you can create points here and there's sections. So this is your dark section at the bottom, your middle is your mids, and your highlights is up here. So, um, this specific preset is already set to have a lower highlight, and so it makes it look more natural and less harsh, less like an iPhone basically. So we'll hit Command+Z to undo that, undo that. And we'll get it back to normal here. A little overexposed, a little too contrasty. Okay, um, so we'll make another video eventually on the curves. You don't necessarily have to worry about it very often unless you want to just go play with it and see what happens. The next tab— so we'll close this light tab here, we'll close that, we'll close that. Um, so the next tab you have is color. You can open it up and it starts off with white balance. So your white balance is basically how orange, how blue is the photo coming out of the camera. And you can set it manually on your camera, or you can set it to auto white balance. Majority of the time for photos, I set it to auto white balance And this is a preference thing, but every now and then it'll be wrong and I have to go and correct it. So if your picture comes out looking very orange like this, this is where you can do a custom one. Or Adobe has a few options. You can do As Shot, which is coming out of camera. You could do Auto one and it'll change it to what it thinks it's supposed to be. Um, and then there's like Cloudy, Daylight, all these things, and it'll change it. Based off these presets, but I always just use it as shot and I adjust it with this tab that goes orange and blue. What up, Mike? I'm teaching about Lightroom. Everybody say hi to Mike. But basically, that's your temperature tab, so you can do it orange or blue. Uh, then you move on to the tint tab, and it's similar situation, but it's with the greens and the purples. If you ever have a picture come out where it's like the face is looking greenish, this is going to be the, the tab that you want to start with. Um, vibrance, it's similar to saturation, but it only does like the greens and the purples, um, and the oranges, as opposed to like upping the saturation of the whole picture. So play with that, play with the vibrance, play with the saturation. Saturation is just the amount of color that it introduces into the photo. So if you go all the way up, obviously it looks way oversaturated. That's one mistake a lot of people make at the very beginning— they oversaturate their things too much. If you bring it all the way down, obviously it takes all the color out, and so it makes it black and white. Um, let's see here, the next thing— Color Mixer. If you want to adjust a specific color in a photo, say you're like these jeans are too blue, you can hit this little target, or you can hit one of these preset color options and change that specific color. So we can go over here. Once you hit the target button, you can change it here with the mouse. If you were like, hey, these need to be more blue, you can change them to way more blue. And so everything on the photo that's that color will change to blue. So you can tell there's some of it that picked up on his jacket, so we'll bring it back down. Um, but yeah, play with that. Oftentimes I just use those for like the yellows and the oranges because the yellows, um, are sometimes harsh depending on lighting conditions. So I'll usually bring down the yellows unless there's specifically something yellow you want in the photo. Um, let's keep going. Um, point color, I never use that. Um, color grading, here's where you can adjust like the specific colors of your midtone, shadows, and highlights. So similar to the lighting where you can control the exposure of it, here you can control the color of it. So if you're like, I want all the mids to be this specific color, all the dark colors to be like purplish, all the highlights to be blue, whatever it is, that's where you can control that. And it's these circles, and this is showing you how much it's being used. Um, let's see, keep going down. These little eyeballs, if you ever see these little eyeballs, it's basically showing you the before and after. If you hold it down, you can see it's changing. That's holding down the button, so it shows you before, and this is after when you let go. So that's the color, um, the color tab. The next thing you go to is effects. Here you got your texture, clarity, dehaze, vignette, and grain. And so if you want to make it look like it's, it's an older photo, you can add some grain here. I do not— I need to click off of the target. There we go. It was still trying to track the color. Um, the effects here, so you can add grain. Obviously, if you go all the way up, you can tell it's very grainy. It gives it, uh, more of like a film-like look, and some people like that. That's just up to you and your style. Vignette is if you go to the left, you see on the outside of the photo it gets really dark. So if you go to the left, it does dark. Um, if you go to the right, it lightens it up, which is very like cheesy, but sometimes depending on the situation in the lens, the corners of your photos will turn out darker. And that's pretty much it. Texture, I really don't use texture a lot because it makes it look kind of weird and gross. Clarity, same thing. You could use it a little bit, but it's gonna make it look more contrasty and harsh. Dehaze— if you're taking pictures in the fog and you need to take some of it away, this is gonna be where you do that. Next tab is gonna be Detail. This is just where you sharpen your photos. So if your camera is has the sharpness turned down, it's going to be a little bit softer whenever it comes out of the camera. So let's turn it down. This is what I have my camera set to because people like softer looks on their skin. And so if you need to add any back, this is where you do it, and you can sharpen it. As you can see, it gets sharper and sharper, sharp as you want it. That's way too sharp, obviously, but that's the difference right there. Um, noise reduction. If you— this is a newer feature on a Lightroom. If you hit denoise, it'll open up a box and it's called enhanced photo. And so it'll let you see what it looks like after you enhance the photo. So if you have a lot of grain or like noise, color, uh, color noise in the photo— see his jacket Whenever I move it, that's the original. Let go, and that's what it's going to look like after. So if you run that, it takes estimated time 10 seconds depending on your computer. You can run that. I usually run it anywhere from 50 to 60 depending. If it's a really bad photo, then I'll up it to like 70, but the more you up it, the more fake it looks. So you got to be careful with it. You can do denoise. You can also do, um, Super Resolution, which basically if you're making something on a poster and you need it to be like way higher resolution, then you can throw it in through this and it'll basically make it way bigger of a photo using AI, which is crazy. Um, but the Denoise is the one that I use the most. Denoise, fun fact, you can't use if it's a JPEG. So make sure if you're going to use the Denoise feature that it's a raw photo. Um, but yeah, that's that. So utilize that. Don't do it too much because it'll look fake. Uh, last two things, we got Optics here. Um, remove chromatic aberration. Chromatic aberration is something that certain lenses do in certain lighting scenarios. So like if you zoom in, there's not really any on this one. Well, there's a little bit So you see on these words, it kind of shows like a red and blue around the words. That's going to be something that when it's really bad, this is going to be what you click on. It'll do its best to take, to get rid of it basically. Enable lens correction. So different lens options, um, have different warps and distortions. So like the wider you get, the more distortion you get. and this is an easy way to fix it in post. So like with real estate stuff, I have to use this on every single photo because the wider I get, the more distortion there is. And so you use that and it kind of evens it out and also adds the right vignette that is needed for this specific lens. And it recognizes it off the file because your camera tells the file what lens you're using. So like right here, I was using a Tamron 17-70mm f/2.8 lens, um, and you can control it here. The distortion, you can control the vignette, all the things. Lens blur, this is a, a newer feature that basically uses AI, so you can hit apply and it will estimate the depth. This is something that I use a lot with my iPhone photos if there's a subject pretty far up. So like you can see there's some blur in the background, but it will add more. And this is called bokeh. You can choose the type of bokeh that you want, and it's adding this all artificially, um, the blur amount. So this is the original photo, the, the actual physical bokeh from the lens. If I turn it up all the way, then it adds bokeh to everything. And you can choose the focus range here if you want to pinpoint a specific spot. Or if you're like, hey, I only want that sign in focus, you can scoot it back and just make the siren or the bushes, whatever you want in focus. So that can be handy if you use just a little bit. Don't overkill it because then it will look like this and look very fake. So we'll just click this Apply button again. Um, I don't— and you can play with all these settings down here. I usually don't. Do much on that. Uh, last couple things. So on this side tab to the right of your editing area, you have your presets, which I'm linking presets that you can buy if you like the way this looks. It's very easy. You throw it on over your photos, you import it into Lightroom, and you just basically click it and it applies all the settings to that photo. Um, So you can look at all of your presets. You can go to yours and see which ones that you've created, the ones that you've bought. If so, like if you were to buy the ones in the description, this is where it would show up after you import it. To import it, uh, you basically hit the three dots here and you go import presets, and then that's it, and it'll show up in there. Um, so that's that. That's your presets. You can click it again and it will go back into the side so you don't have to see it anymore. The edit tab, that's what you're seeing right here. If you want to make sure it goes away, then hit it. Hit it again, it'll pop out so you can edit. This crop tab is basically where you're going to be able to crop photos. You can straighten out photos, turn them, rotate them. Rotate them however you want to do, fix the geometry. This little auto upright feature, it, it creates a perfect perspective, and so I've been using that a lot more recently. Um, but yeah, that's that. If you want to control the distortion, you can do all the things that you need in here. A lot of these things you used to have to do in Photoshop, but now that Lightroom has it, it's phenomenal. The remove option. So, um, same thing here. AI has come in and given us options. So where, like, for example, if we want to remove this sign, we'll do this real time here. We can do use generative AI, um, and that's pretty much all we need. And so basically we come over here and we highlight the whole sign. For like, man, that, that sign is ugly. You used to have to take it into Photoshop and do the whole thing. Now you just hit remove and it will give you multiple options whenever it's finished that you can choose from. And then it's just gonna be gone. Like AI has completely changed the game on this. And there's different options if, if you prefer a certain one, like number 2 looks the best and most natural. And so when you click off of it, now the sign is gone. Um, and like, there was multiple things I had to edit out of this photo, but you would have never known because it's just getting that good. So that's the eraser. Uh, you can do heal, which you can play with that. It's not as good as the remove. The clone, you can play with that as well. It's a Photoshop feature. It's not as good. Um, and that's pretty much everything here. This is a mask tab. So what a mask is Really quick, you can do these preset ones. So if you're like, hey, I just want to edit the subjects, you can hit subject and it will find what the subject is. And it found it's the people. So then you can edit those specific things in the photos. So like, if you're like, hey, they need to be brighter, you can up the exposure on just them. And same thing goes with like backgrounds. You can You can pick specific people, you can do the sky, or you can go in there manually, use the brush or the objects, and highlight the things that you want to do. That's what we have to do on real estate stuff. When the windows are too bright, we go in and I edit just specifically the windows and lower the exposure so you can see outside of the windows. But yeah, that's masking, and you have pretty much all the same effects. For that specific mask here. And that's your little mask bar. And again, you can do— you can hold the eyeball and it'll take away all the effects that you've thrown on to see what you have done before. You just hit delete if you want to delete it and move on. Versions— this is helpful at times. You can see the original. They see how there's a sign here in the middle. And I— it's gone. Like, that's the original, that's the edited, and that's how big of a difference it is. Um, you can view the different versions of different times that you've saved it. You can create a specific version if you want to come back to it later specifically. Um, but these are the auto saves. It saved me a couple of times because I'll get so deep into an edit and I'm like, crap, how do I get back to where I was originally? Because this is a lot to undo. Um, you just be like Command-Z, Command-Z so many times, which that's how you reverse what you just did on Lightroom, if you didn't know that. Um, that's pretty much everything up here. You can connect to the cloud. This is where you can export all your stuff. Um, custom settings, you can export as a JPEG. There's a lot of different ways you can export it. Um, you can name it however you want. You can keep all the metadata in it, which is things like all the raw, uh, the raw data and the, like, the megapixel count, the size of the file, all the colors captured, your white balance, what lens you use. All that is kept in this metadata file. And so quality, all these things, you pick which image type that you want. JPEG is normally what you pick whenever you're exporting these because every iPhone can see it. Um, but yeah, copy these settings. These are pretty good for 99% of things. Create the name, uh, have it start on number 1 if there's multiple. Not— no output sharpening. Just pick the normal color space and then hit export and it'll ask you where you want to export it to. So that's basically it. That's everything in Lightroom. You can edit off of local drives Or you can edit— confirm access, confirm access. Hold up, I got a billion drives plugged in. Um, you can edit directly on the drive, or you can cancel, or you can edit whatever you import and it puts it on the cloud and locally on your computer. So that's handy if you have a bunch of them that you don't want to necessarily import to your computer because it does take up a lot of space. On your computer and your hard drive, so you can edit them directly on the SD card or the SSD drive, whatever it is that you want to edit on. But that's everything. Um, I hope you guys learned something today. Good luck using Lightroom moving forward. If you have any questions, leave them in the comments. Again, if you like this preset and you're like, man, that's pretty easy to use, all you do is go in there and hit Insert preset and it throws it on whatever photo that you have and it looks great every single time. It's going to be a link in the description. Um, it's just a way to help you guys out and speed things up whenever you're editing. Um, it's helped me out tremendously and I've made a bunch of my own. I've bought a ton of people's stuff and it's always a huge time saver, um, whenever I go to edit all my photos. So if you enjoyed the video, make sure to subscribe. Like this video and leave a comment where you're watching and what you want to learn next, and we'll see you guys in the next one.
More from Daron



Entitled Woman Tries Suing Man For LEAVING Her Mid Date, Instantly Regrets It

This Is Why More People REGRET Buying Their Electric Vehicle Than Ever Before


