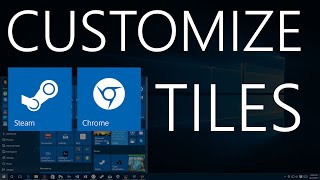
David shows how to replace Windows 10 Start menu icons with modern flat tiles. Download a free icon from Metro Studio, convert it to ICO format using convertico.com, then swap it in the shortcut's Properties and repin to the Start menu.
Chapters
Hello, David here, and without further ado, I'll be showing you how to make your own custom icons for your live tiles on your Windows 10 Start menu, like this Google Chrome icon I have here. As you can see, this Photoshop one kind of sticks out with its traditional desktop application icon compared to this modern Chrome icon, which matches the Mail icon, the Cortana icon on the various live tiles. So it sort of fits in more. Also, you'll notice Notice here on the taskbar, it blends in very nicely. I also made a Steam one. I also made one for Audacity. I plan on making quite a bit more, including one for Photoshop. So I will show you how to create your own icon for any desktop program that you use. So the first thing you do is go to a website and download something called Metro Studio. So the website you're going to want to go to is Syncfusion.com/downloads. Www.metrostudio.com/downloads/metrostudio. That's going to take you to this download page. All right, once you're there, you'll see a little form and you will need to fill out your name. You can put in whatever you want for your company, but you want to put in your actual email address. It doesn't matter what you put in for company, and then it honestly doesn't really matter what you put in for your phone, but if you'd like, put in your actual phone number. Then click free download, and when you do that, your unique key and will be emailed to you, and you'll be able to download it right there. And you know how to install programs, hopefully. If you don't, I can make a follow-up video, but hopefully most of you know how to install a program. And then when you're done, find the application called MetroStudio and open it. You'll find this vast array of icons, and they're all modern because they're all flat and and they have that sort of Microsoft look, which is really awesome. There's, there's an icon for all sorts of things. You can do, even do a search. So here's the Photoshop one, but let's say I wanted to search for it. You can do a little search and come up with some results. So then click this little pencil icon here and it'll come up with this screen. I think the default will look something like this, but make sure you're choosing this transparent option, transparent background. Change the size from whatever it is by default, it might be 32 or something, change it to 256, and then make the adding 0 on this slider over here. And then make sure the icon color is white or whatever color you want it to be on your live tile. I choose white because it matches a lot of the other icons. When you're finished, click Export and then save it. I'm just going to save it in my Downloads. Alright, now you've just created a PNG image with a transparent background of the icon that you want to use. So the next thing you're going to want to do is open up a browser and go to convertico.com. Com. It's going to take you to this website. So then what you'll do is you'll click upload, you'll navigate to the folder where you downloaded the icon, click open. This can you generate an ICO version of the image. So now it's downloaded, it's finished downloading. Okay, so what I've basically done is I've taken this image, which is a PNG image, and I've converted it to an ICO file which can be read by programs. So what I'm going to do now is go to So I already have Photoshop pinned, but let's say you want to pin Adobe Photoshop to your Start screen. You obviously just right-click it, Pin to Start, Pin to Taskbar. Now what I'm going to do is I'm going to find it and hit Open File Location. Now notice this path here. It's ProgramData\Microsoft\Windows\StartMenu\Programs. So there'll be a Start Menu folder if you click Open File Location. And then find the program that you want to use, whose icon you want to change. Okay, I wanna actually change the 64-bit version, so I'm gonna right-click this one, go to Properties. One of the options will be Shortcut, which it happened to be on. Now click Change Icon. There'll be all these default icons that are part of the package of the.exe file. So what I'm gonna do is I'm gonna browse to that ICO file we just generated. And here it is. It's.ico, so that's how you know it's the right kind of file. It'll show that. Click OK. Now it looks invisible on Explorer. Hey, you need— sometimes you need administrative privileges. Okay, okay, so now what I'm going to do is I'm going to unpin— see, it already changed right there. So I'm going to pin it to the taskbar. Now you can see Photoshop is now a white flat icon, which is really, really cool looking. So now when I click this and Photoshop opens, it is now a really neat modern-looking icon, and it looks great on your Start menu along with the other Live Tiles and default Windows 10 applications. So I hope you enjoyed this video on how to get cool-looking tiles for your Start menu that you can customize. If you did enjoy this video or you got value out of it, please subscribe for more videos like it. Thank you very much!