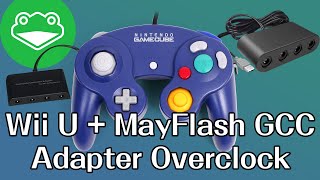
David shows how to overclock GameCube controller adapters from 125 Hz to 1000 Hz on Windows using Zadig and hidusbf. He covers both the official Nintendo Wii U adapter and Mayflash 4-port, walking through driver installation, firmware updates, and verification in Slippi.
Chapters
Hello everyone, this is David, and today we'll be going over how to get your controller adapter on your PC to feel a lot more like console. We'll be taking basically the polling that's normally 125Hz and increasing it to 1000Hz, so that'll feel a lot more like console play. And this is thanks to Artie on Twitter for putting this guide together. Um, we'll be going from beginning to end, including the Zadig install, which a lot of you probably have done, but for reasons later that I'll explain, uh, we'll just go through the whole thing. So, an easy place to start is on blippi.gg. Just click "Get Started" and scroll down to where it says "Zadig." This is only for Windows, by the way. If you click "Save" and then run it, you'll have it downloaded and it will look something like this. The correct option will already be there, so just click "Install Driver," assuming your adapter's plugged in. This works for both the Wii U adapter and the Mayflash 4-player adapter. Make sure it's on Wii U mode before you do this and not PC mode. Very important. So after it's done installing, click close and close out of this. Zadig's installed. That's the first step in getting it to work. And by the way, in this guide I'll be kind of comparing the steps for both the MapeFlash 4 Player Adapter and the Wii U since I actually performed this on both myself and verified that they both work. Next, we'll be doing the polling fix. To do that, click more resources on Blippi and scroll down until you see overclock your GameCube adapter. Now the first thing you'll want to use is this guide that Arty has created. This will open the guide and the first thing linked to is the hidusbf overclocking software from Mice, which you'll want to download by going to download and then clicking download zip. I've already done that. So just assume that that's pretty straightforward. And the next thing we want to do is go actually go back to Blippi and click— if you use the Mayflash adapter, click Mayflash v0.5 and just directly save that to your computer. And, uh, that'll be coming handy if you have the Mayflash 4-player adapter. All right, so assuming everything's downloaded, you'll want to go to the hidusbmf-master and then you want to extract the hiduspf.zip. I've already done that here. And then you want to run the driver-setup.exe. This window will pop up and you'll want to immediately click Install Service. There might be a prompt that comes up, just click Yes if that prompt comes up. Then change the selection from Mice to All. And then you'll notice that wup-028 is selected and this will look familiar to you if you've done the Zadig install. And you'll notice right now the interval, the B interval is 8. We're going to change the rate from default to 1000, and we should hopefully see this change from 8 to 1. So to do that, you'll need to change filter on device. There might be a warning that pops up and then change default to 1000. Then when you click restart, hopefully this 8 should change to 1 as it has here. All right, now that's done. We're going to close out of this and we're going to open Slippi. And the first thing I'm going to check to do is go to controllers. Now one thing it mentions in the guide is if you're using the Wii U adapter or if you're using the Mayflash 4-player adapter, using the second port is actually the most ideal for performance. And if you're using the Wii U adapter, actually plugging in a spare controller in port 1 and then just leaving it actually increases the the, the polling. So the most ideal situation is to use a Wii U adapter, plug it in, install everything we just installed through this guide, enable both port 1 and port 2, plug both in, but use the actual player 2 controller to play. So you'll click configure, and what you'll notice is that the poll rate is quite a bit higher than 124 or 125, and it should average around 1,000 or so. And I'm going to enable Rumble because I like using Rumble. I know I'm weird. So that's all perfect. The remaining steps for the, the Mayflash adapter is we're going to go back to where we installed the Mayflash adapter from Blippi. And we're going to run this. And right now, I don't have it plugged in, but you'll want to make sure you switch the Mayflash adapter from Wii U mode to PC mode. And then when you click update firmware, it'll update it. If you already have 0.5, it will say you already have the current version and it won't do anything. So this is just a way to verify what firmware you have on your Mayflash adapter. And once you do that, you should be in a really good spot and you should have almost console-like performance on your adapter. If you're having issues or you're not getting a 500Hz or 1000Hz and you need to troubleshoot, definitely reach out to Artie or use his guide. His guide's incredibly helpful. It covers pretty much everything you need to know, including every little error. Like, for example, I got an error that was corrected by, you know, going to my BIOS and disabling Secure Boot on my Windows device. I figured that out from this guide. It was really helpful. So yeah, hopefully with all this you should be good to go. And thank you guys so much again for watching. Until next time.