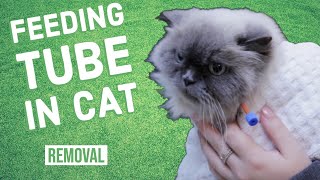
A short instructional YouTube video by Dr. Lera Clone (Heron Lakes Animal Hospital) demonstrating removal of an esophagostomy feeding tube from a 13-year-old spayed Persian cat named Sasha. Sasha developed an upper respiratory infection after stressful events, stopped eating, and was fitted with an esophagostomy tube (placed through the neck into the esophagus) about ten days prior to removal to prevent hepatic lipidosis. The video explains species-specificity of most viruses, the reason for enteral feeding, daily bandage care, the suture removal and cleaning process, and recommends the patient must eat independently for ~3 days before tube removal (the cat was on day 4).
Questions this video answers
13-year-old female spayed Persian.
Esophagostomy tube (inserted through the side of the neck into the esophagus).
Approximately 10 days before removal.
They should eat on their own well for three days; the video states they were on day four.
Chapters
Hey, guys, this is Dr. Lara here at Heron Lakes Animal Hospital. Today we're here with Sasha. Sasha is a 13 year old female spayed Persian. And so she came in because she stopped eating almost everything after potentially a stressful event. And so what ended up happening was she had two stressful events back to back, and she ended up developing a lot of nasal discharge. And that's very common. If a cat has something called an upper respiratory respiratory infection, most commonly herpes is going to be the condition that's going to cause that in cats. And so the one of the main questions that clients will usually ask is, is it something that I can get? The answer is no. Typically, most viruses are species specific, which means cat stuff stays with cats, dog stuff stays with dogs. Okay. Very rarely will you have something like the bird flu, which will jump from one species to the other. Okay. So what ended up happening was we. Sasha really didn't eat very much for about four or five days. And that makes me very, very scared of her developing something called hepatic lipidosis, which is fatty for a fatty liver. And if she does develop that, although it may not be fatal, it is something that will require intensive hospitalization and treatment and that kind of stuff. So what we did, if you come over here and you take a look at her tube, you'll see that she has this tube sticking out the side of her neck. And so this is what's called an esophagostomy tube. This particular tube goes in through the side of her neck while she's under anesthes and goes into her esophagus, which is her food piping. And that sits right above the opening for her stomach, doesn't go into her stomach, but just above it. And so what ends up happening is we're able to go ahead and give Sasha food through this tube without her really getting stressed out. Because when she had this upper respiratory infection, she had a lot of nasal discharge coming out. She didn't really feel like eating very much. And so she would actually start open mouth breathing, which is very uncommon for cats. So what will end up happening is we go ahead, we place this tube, we're able to give her her medications, we're able to give her her food with minimal stress necessary, and we can help her recover. So we placed this tube not this past Friday, but the Friday before that, almost 10 days ago today, and she's been doing great. The rule of thumb is they need to eat on their own well for three days before the tube typically comes out. We're on day four now and she did great through the weekend. And so we're going to be removing the tube right now. So one thing that we're going to do first is we'll go ahead and get ready to SC the area where the pipe, where the tubing is at. We'll grab some chlorhexidine scrub, squeeze this out and then what we're going to do is we're going to go ahead and remove this bandage. This bandage that we place here was a bandage that is just there just to kind of protect the opening from where the tube sits. Mom and dad like to call initially they were calling Sasha Scuba Steve because she looked like a character from a movie. And then when she started sneezing they called her Scuba Sneeze. So we're going ahead and removing this bandage now. Let's see here. Alright. And one of the things that's really important, when this bandage is being placed, it is very loose. It is not something that you want on very tight. So we're going to come over here, we're going to remove this. So this little piece of what we call Telfa pad is there in place to go ahead. And we put like a triple antibiotic on there. And so that just goes ahead. We change that bandage on a daily basis and that's to help reduce any sort of chances of infection. So now we're going to come in here, I'm going to scrub this a little bit, soften things up and then we'll come in and we will remove the sutures that are holding it in place. So let's see here. So I'll come right here. You can see these, these are special scissors that have a little hook on the end of them and that's so it catches the stitches. Okay. Make sure that we are completely out. And there we go. So that's the tube that was in there. You can see we even cut off the end of this particular tube just to make sure that the opening is wide so food is less likely to get caught in there. So we're going to go ahead and scrub this up a little bit more. Okay. Alright. So you can see there's just some stuff that's crusting and there's actually some suture material left. We're going to go ahead and grab that after we finish scrubbing just to kind of get all this stuff off. We want to do this to reduce the chances of any sort of infection. Go ahead. We'll use these hemostats, these are tweezers just to pull out that suture. Going to go ahead, scrub just a little bit more. I can tell you that Sasha is really excited to have this tube out. Okay. You can see over here, she's got a little bit of irritation from where the suture was going through her skin right here, here, and here. And so now that we've scrubbed that up, we're going to go ahead, get our telfa pad. We're going to cut this to a smaller size. We're going to put our triple antibiotic on here. It's not necessary that it goes inside. It's just more to go on top. So we'll just place it right here. We're going to place a very small bandage around her neck. Come here, kiddo. And Sasha is actually behaving very, very well. Okay. This is called cast padding. Cast padding rips very easily. We want that on purpose because if you put too much pressure on it, then it could actually almost suffocate her or choke her a little bit. What we did with this particular pink wrap is we actually pre unrolled it and then re rolled it so it comes off very, very easily. So there is no pressure on there. So we're going to come back in about three days. We'll go ahead, we'll check the opening and make sure that it's all healed up. And most likely after that, she'll be done and she'll be ready to roll. Thanks for watching, guys. If you found this helpful, please subscribe, share with others and give us a thumbs up. Have a.