How to Make Turkey Gravy Thickened with Himalayan Tartary Buckwheat Flour
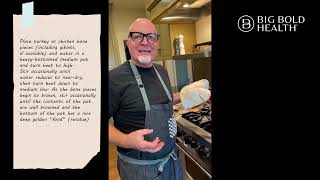
Chef Paul Canales (Big Bold Health) demonstrates a step-by-step method to make a quick, richly flavored poultry gravy from browned chicken/turkey bones and aromatics, then thicken it with Himalayan Tartary Buckwheat flour. The video covers rapid extraction/deglazing to build fond (shortening stock-making to under an hour), straining and measuring the liquid, making a buckwheat slurry (2 tablespoons flour per cup liquid) and bringing the sauce to boil to activate thickening. The demonstration also shows seasoning, reheating guidance, and a pan-seared chicken breast served with the finished gravy (target doneness ~150–160°F).
Questions this video answers
2 tablespoons Himalayan Tartary Buckwheat flour per 1 cup of liquid.
6 tablespoons (3 cups × 2 tablespoons per cup).
At least 150°F (approaching 160°F); the chef avoids going to 165°F.
Under an hour (versus 6–8 hours for traditional chicken bone extraction).
Chapters
Foreign. Hi, everyone, this is chef Paul Canales, and I wanted to talk to you today about Himalayan Tartery Buckwheat from Big Bold Health. I've been using this product for several years in my restaurant kitchens and my home kitchen. And the first application was actually thickening sauces, braises, and gravies of sorts. And I found that it's an incredible thickener in replacement of regular wheat flour because it's gluten free. And also it leaves a beautiful silky texture and sheen to your gravy without making it shiny like a modified starch, like corn starch or potato starch or something like that, arrowroot, that kind of thing. Himalayan Tartery Buckwheat from Big Bold Health is an amazing product for several reasons. One, it's organic. Two, it's healthy in the sense that it has 200 times the polyphenols that regular buckwheat has. And three, it's gluten free. So it's really a win win. Recently, I headed into the kitchen to demonstrate step by step, how to make an amazing turkey poultry gravy from scratch. And then subsequently thickening it with Himalayan Tartery Buckwheat from Big Bold Health. I hope you enjoy the video and come back soon for more fun applications for how to use Big Bold Health Himalayan Tartery Buckwheat. Okay, so we're. Today we're going to demonstrate how to thicken a gravy with Himalayan Tartery Buckwheat flour. And first, I'm gonna teach you how to make a gravy that's kind of like a sauce, like a reduction sauce. And the reason I want to show you that is rather than making a big stock and cooking it for hours and then doing the traditional thing where you make a roux in the roasting pan and build your gravy into that, going to show you a way to get a quick, a quick extraction from the poultry bones. And then we can end up straining all that out. And when it is time to take your turkey out of the oven and you want to use the drippings for the gravy, you can do that very, very easily. Okay, so now let me show you what we have today. We're going to make this with cleaved up pieces of chicken bones. Now, when you're doing this with your turkey, you can, I would recommend you take off the wings and the, and use the neck and the giblets and use a cleaver and whack them up and into bite sized pieces, maybe about one inch each. Something that looks like this. Then we've got the classic mirepoix, carrots, celery, and onions. And that amounts are in the recipe. If you're going to tilt on the side of something, celery would be the thing for a classic Thanksgiving flavor gravy. But otherwise kind of these equal amounts is nice. Then we have herbs, which are the classic poultry herbs of sage, thyme, marjoram, and rosemary. And here, again, if you want to adjust to your own taste, err on the side of more sage and more thyme. And if you don't like the taste of rosemary or find it too strong, you can omit it. It's really your personal preference. Bay leaf wouldn't be out of place here as well. Then we also have the Himalayan tartary buckwheat flour that we're gonna use. We have some water, and we have a nice chicken broth. So these are our main ingredients. Okay, so now we're gonna get started. First thing we're going to do is we're going to add our chicken bones. And please take a look at this, because I want you to make sure to not worry about having skin and or any fat that you have and the meaty parts. So we basically want to keep all of that just like that, because all of those parts are going to play a part in this, and it's very important. So don't trim too much. Don't worry about anything that seems like it's going to be out of place, because we'll fix that later. We're also going to add two cups of water, stir it up, and then we're going to turn this on high heat. Our purpose for this is to boil these parts and begin the extraction process while at the same time rendering the any of the skin and fat that's there that will help us prevent sticking while we're browning up the meaty bits and bones. That whole process of browning is going to be to create what we call the fond, which is French for foundation. That's the residue at the bottom of the pan. That will give us the color and the flavor of our stock slash sauce, and eventually our gravy. Okay, so now we're at a nice beginning of the boil. We're going to stir this around just to make sure everything gets exposed to that water. And again, just to review, we want to boil to for two purposes. One, to extract and two, to render a little bit of that skin and whatever fat might be sticking to these pieces. The purpose of that is to tilt things in Our favor when it comes to the browning. If you try to brown these poultry bones without any fat at all or any extraction, you're going to end up with a high probability of burning them. So we don't want to do that. We want to just get a really nice golden foundation at the bottom. So now that we've got this nice boil started, we're going to let this boil all the way to completely reduced. And then we're going to turn the heat down to more of a medium heat and start the browning process. Okay, so we're about halfway through the process of the rendering and the extraction. And I want you to see here that you'll see little pulled up areas of the rendered skin. And that's going to be really important in our final process at this point, right before the browning. So if you look in carefully into the pot, we've got a little bit of liquid left, just a little bit. And we're going to cook all of that off and that will begin our browning. You can already start to hear a little bit of a sizzle, which is this delicious pot talking to you. So we want to listen to that throughout the process because that's going to be our guide as to where we are in the caramelization browning process. So as you can hear, the sizzle is getting more and more intense as the water evaporates further. Also notice there's a little more pressure so that you're getting a bigger bubble. That's a good indication. And things are starting to stick. That's good. We want things to stick. We don't want to stop that because that's where our foundation is going to come from. So now that we're starting to get a sizzle, we're going to keep the heat on high and then we're going to. We're going to stir, but we're going to keep the heat on high until we get a foundation beginning. And then we'll turn it down to more of a medium heat to let that get nice and brown and get these parts brown. Okay, so now you can hear there's less sound. That means we're getting browning. So this is when we're going to turn the heat down to a little bit more of a medium heat so that we have more control as we're doing this caramelization process. And I'm just going to stir a little bit. So you can see. See here how we're starting to get some caramelization right there. And eventually we're going to have this throughout the pot. But to do that, we want to slow the he, and we're going to have to move things around just a little bit, because we want to make sure that all this gets exposed to the bottom of the pot. And this will happen, you know, relatively quickly. We're probably going to be done here maybe five minutes now. So that whole process of cooking down the water and extracting and rendering, that might have been 15, 20, 20 minutes to get to this reduced point to where we can now begin browning. The browning happens relatively quickly. We can elongate that process, draw it out a little bit by lowering the heat, thereby giving ourselves more opportunity to get a deeper and richer fond or foundation, which is, again, that's where the flavor is going to get built for our gravy. It's like pan drippings, except we're creating it rather than just doing it in a roasting pan. And then we also get that golden color. Okay, so now we're getting in a really good spot. This is where the fun begins. There's a tremendous amount of browning starting to happen. Come on in and take a look again. Slow sizzle. We're listening. We're using all of our senses. Our eyes are telling us some things. And what do we see? We actually see a lot of blonde and a lot of skin. This is fine. We don't want this stuff. We're not as concerned about this being brown. We want the fond and the browning on the bottom of the pan. And then let's use our ears. That really. That nice, gentle sizzle is our indication that we're not burning, but we're caramelizing. And now let me show you what we got. Look at that. And it's starting to cover the entire bottom of the pot. This is where the flavor is, my friends. This is the gold. This is what we're working on. And it's worth taking the time if you're gonna. You're gonna die when you taste the benefits of it. We're getting extraction, we're getting rendering, we're getting flavor. We're getting the whole thing. And it's all going to become super, super easy when we're done here to thicken it and have a gravy. And then, of course, you can augment it with the drippings from your. Your roasting pan. Now, again, we're going to engage our eyes, and we're seeing. This is a very nice dark foundation happening. Still nice and golden, but now we want to be really, really, really watching and paying attention to make sure that we don't burn anything because then you get that sort of acrid, burnt poultry taste, which we're not looking for. Also notice the things that are sticking to the bottom are meat and skin, little pieces of bone and cartilage. This is all really important to make our foundation. It'll also give body ultimately to our sauce and our resulting gravy. So you also. We didn't talk about the sense of smell, which is going to really get activated in a couple of moments, but right now you can really gather through your senses the smell of caramelizing, called the Maillard effect. In science, it's the smell of roasted coffee, toasted bread, browning of meat. That caramelization of protein is called the Mylar process. And that's what's happening in the bottom of this pan. Okay, now we have what we're looking for. You can start to see it's gotten quite dark. Much of what we started with is now sticking to the bottom of the pan in terms of meat and cartilage and skin, even some bones sticking down there. So what we're going to do is begin with our aromatics. So again, our carrots, celery and onion, known in French as mirepoix, also known as aromatics because they provide flavonoids and ketones and esters and all these things to what's already going on in the pot. So let's go ahead. We're going to add that, and that is going to begin the process of what we call deglazing. So the bottom of the pot is now a fond notice. We're just going to let that sit on top for a minute. The bottom of the pot, we call the fond. And now we want to lift that fond. And the way you would do that traditionally is to add some liquid at high heat, and that will boil on the bottom and steam up, lifting that foundation into the sauce that we're going to make. What I'm going to do first, first as you can look, is I'm allowing a little bit of this steam to happen with these vegetables so that they begin to release some liquid down. You can hear a crackling of that. That's what that is. And then we're going to stir it in. We don't want to go too long because we don't want our fond to get any darker. We like where it is now, but already you can hear a much greater sizzle and the activation. That's whenever you hear sizzle in cooking, that's liquid. That's steam coming off of whatever you're Cooking. And if the sizzle stops, you gotta start paying attention because you're about to burn something. Okay, so now we've got this in there. We're really gonna let it mix. We're gonna let it sit for a little bit. And again, take a look. We're at a relatively low heat. I'm gonna. I'm gonna leave it there. And then we're gonna wait a few minutes before we stir again and see where we are with lifting up that foundation. Okay. So as we look in the pot, we can see that some of the dark bits on the bottom have come up, but not all of them, which is okay because the onion, carrot, and celery have their own caramelizing properties. So those are going to now start to develop on the bottom of the pot. But take a look. The fond itself is getting thinner. There's less of the skin and bone and all of that. It's getting a little more sparse. And what we're seeing on the bottom is the combination of what we've. What we've extracted and the. And the juices coming out of. And sugars and things coming out of the vegetables. So now, I think, taking a look, we're getting quite dark, which is where we want to be. We're gonna. By the way, we didn't talk about smell. This has a whole new smell with these aromatics. It's starting to smell like Thanksgiving. But now it's really gonna smell like Thanksgiving once we dump the eggs. So these herbs are going to activate very quickly, and we're really going to be able to smell that Thanksgiving smell. First comes the marjoram, because the marjoram is the quickest releasing now the sage. We're getting the thyme. And now I'm starting to get the rosemary. The amalgamation of those smells, the combination of those smells with the aromatics, with the poultry and the browning really is beginning to start to smell like a Thanksgiving dinner. Come on over. Now that we can see that the herbs are wilting, but not broken down or anything. The fond is very dark. We're going to add our first addition of water. We're going to do this twice. And what we're going to do is we're going to add two cups of water, bring it to high heat. That will lift up the foundation. We're going to stir, stir, stir to get that fond off the bottom. And then we're going to cook that down to almost dry. We're going to let that reduce, reduce, reduce to what the French would call sec, which means dry. But we're going to be a little shy of that because we don't want to recreate the fond all the way. Then we're going to do a second iteration of that with water and bring that down to get quick. This is where we're getting the quick extraction and getting that fond to build up and come back down again. Build up and come back down again before we add our broth. So take a look at this. We're turning up the heat to high. Everything's sticking the way we want it. And we're going to add the liquid. And that will quickly allow us to deglaze the pot. Give it just a moment so the bottom can steam with this, the heat from the bottom of the pot and this liquid. And then we're going to start to deglaze. And you'll notice that water gets darker and darker and darker as we deglaze. And remember that deglazing is our the browning of our solids, the browning of bone and skin. Also, it's the browning of what we extracted from those bones in the first place when we first added the water. So now we're getting all of that flavor mimicking meat juices and caramelization at the bottom of a roasting pan, which is our whole goal here. So if you look, the bottom of the pan is now clean, and we've got that fond and look how dark the liquid is. Good. So now we're getting very close to where we're ready for the second addition. If you take a look, we've got still a little bit of liquid. We're going to let that cook a little further down so it just begins to stick, but not fully. And then we're going to add our next addition of water. And this is a great way of cooking from the bottom of the pan up rather than having a big stock and reducing down. So we're almost there. And you can hear and smell everything happening. And I'll expose it here so you can take a look. See, the liquid's just coming out. We're not sticking yet, which is fine. We don't want to get a full fond going because we've already caramelized all these proteins enough. But we want to reduce it down. So now that we don't see. We don't really see a lot of liquid. This is where we want to be for our next addition of water. Add the water, second addition, pint of water, 2 cups. Again, submerge everything. We don't have to worry about scraping the bottom of the Pot, because it's already been lifted. With our first process of deglazing, the second addition of water is back to a boil. Look at the great color. More extraction of those bones. And again, by cracking them open, we're exposing all of the goodness that we want from those bones and from the meat. And we're getting it very quickly. Rather than six hours that it might take to extract chicken bones, six to eight hours. We're gonna get this in under an hour, and it's really gonna save you a lot of time, and you're gonna have a better tasting final result. So now we're almost to the finishing point of the second addition of water. Take a look. Very little liquid. Another minute or so, and we're done with. With this first phase of extraction and reduction. And this one, we're going to allow to get close to sticking because we're going to want to lift it up with. With the chicken broth at the final time. But what was in a minute of that, so what. What was accomplished here is we've extracted and rendered most of what we're going to get from these bones. That extraction and rendering allowed us to brown all of these elements, the skin, the bone, the meat that was attached to those, to the bottom of the pot. That's the fond or foundation. Then we added our aromatics, which was what I call the mirror block here at celery and onion, we use that to begin to deglaze and also create its own foundation as its sugars and other flavonoids come out in the extraction process of those vegetables and those flavors. And that gives us that rounded sort of flavor that we associate with a Thanksgiving gravy. And then we added our herbs, and now we've got it all painted together. We've done two additions of water to have rapid extraction and reduction. And now we're about to add our chicken broth. Come on and take a look. So listen again. We hear the sizzle, the hotter sound, higher sound, a little more robust sound. That's the sizzle that we're looking for. That means we're starting to have less and less liquid present, and we're starting to just get to that point where we're going to start some again, sticking or building a farm. So let's just see where we are here. We're getting a little bit on the outside. That's what we want. We don't want much more than that. We're not really trying to get a full farm, but we are going to go a little further we're just there to the full boil. Now we're going to reduce it down to just a nice lazy simmer. We don't want to do a whole lot of reducing at this point of the sauce. We just want to reduce the heat. So we're going to turn it down to a nice low simmer and just let this bubble gently, 15, 20 minutes, just to get all the flavors that we've built up for this last period of time to meld with the broth that we've added. And that will be our final stock slash reduction sauce that we're going to thicken into our gravy. Okay. Now that we've allowed time for the broth to cook with the bones and the reduction and extraction, we're going to strain it. We're going to do this probably twice because we've got probably more stuff in there than we're going to be able to put in this size strainer. So I'm going to start by turning off the heat, and I want to have my strainer close so I'm not dripping everything all over the place. I want to strain directly into a minimum 4 cup. But if you have an 8 cup measure, that's great, because we want to determine the volume of liquid that we have at the end, because that's going to tell us how much buckwheat that we need to thicken. So first we'll just gently start bringing this out and strain. And we don't want to do it all at once for a couple different reasons. One reason is it just fills up. But the second reason, which is actually more important, is we want to press these solids gently so that we're. See, if you look here, if we're gently pressing, we're getting a lot of liquid out of those solids. So we want to make sure that we don't have too much, because otherwise what will happen is we're just pressing the solids against each other, and the liquid will stay trapped. But this way, we're pressing the solid directly against the strainer and getting every little bit of that good liquid that we've worked so hard for. And then when we're done and we don't have really much to extract, we're going to empty that into another bowl like so. And the purpose there is to allow this to cool. You don't want to throw that directly into your compost bin because it'll start to steam up and ferment and get a little bit disgusting. So I'm going to keep this process going and I'll come back to you once we're done. Now here is an important step for our last bit of straining. When we can actually see the bottom and the sides of the pot. You can see that there's some things, a little bit of sticky residue. We don't want to leave that in the pot. We never want to leave anything behind that we want to in our gravy and that we worked really hard to get those foundations. So let's make sure we get all of that. And this will say this in the recipe. So I wanted you to see it so that you know what I'm doing here. So now when we're done with this last bit of straining, we, we'll have everything we want out of that pot. Okay. So now that we've got our gravy base, our liquid fully strained, we're going to measure that because that's going to tell us more or less how much Himalayan tartary buckwheat flour. We need to thicken this sauce. So we're going to see this. If you take a look, it's just about three cups, so that's perfect. We're going to add that right into our small sauce pot. We're not going to defat it or anything because that fat has a lot of flavor, and that fat is going to get bound in the process of thickening. And we want that in there. That's really, really good. Now we're going to bring our gravy back to a boil. I'm not gonna go full high heat just yet because I want to make the little slurry first. So we're going to measure out our Himalayan tartery buckwheat flour. It's about 2 tablespoons per cup of liquid. So this will be 6 tablespoons level of Himalayan tartary buckwheat flour. I'm not gonna strain it. No need to do that because we're not really going to have any issue if there's some off size pieces. So that's 3, 4, 5, 6. So now we've got our buckwheat. The next thing we're gonna do is add approximately a quarter cup of water. Water to that to make a slurry. And we may have to adjust that. So we'll go ahead and we'll just add the water right in. Yeah, we're going to have to add a little bit more water. Okay. Looks like it's more like half of the cup. And we're going to get that all mixed up. This won't happen to you because you'll have the correct measurement on the recipe when we're done. But I have to get that buckwheat that's kind of stuck in the middle of the whisk. So we want this to be about the thickness of heavy cream, and that's kind of the ideal slurry. I might put just a tiny bit more water. Stay tuned. There we go. So that's kind of what. That's what we're looking for. Okay, got a little slurry now. We're going to bring this now to a complete boil. Back up to high heat that gravy base. This will take just a moment, and once this comes to full boil, we'll begin adding this slurry a little bit at a time until we get the desired thickness. We don't have to use it all, but we'll see how much we need as we go. But this will be a good starting point. Okay. And we'll start to add our slurry. And we don't know yet what the thickening properties are going to be until it comes back to a boil. And that's what will tell us if we need more, which we do. You can see that it's still quite liquidy. We want to check the consistency of this with a spoon. Or we can use a spatula. Still a little bit thin. We'll let it come completely up to the boil. Still a little bit thin. We want it a little bit thicker than that. So we are going to add the full amount of the Himalayan tartery buckwheat slurry now. Great. So now once it comes to a full boil, we're going to turn it down to just a simmer. And you can see by the size of the bubble what we're dealing with here in terms of thickness. Now, at this point, you see this foam on top? That's actually denatured protein. Let's see if that comes back. And the way we're going to test this is on this, on a spoon. So, see, it's starting to coat nicely. So that's what we want. Turn it down a little bit more. And notice there's no fat on top, because what we've done is we've bound the fat, we've binded, I should say the fat with the flour and the rest of the gravy. So we're gonna let that cook for just a few minutes, and that will allow the rawness of the buckwheat to cook out, and we'll get it a homogenous flavored. Gravy. Okay, so now we have to adjust for seasoning. The gravy's looking really good. It's fully thickening, and you can always. If it's a little bit less thick than you want, you can reduce it a little bit. If it's too thick, you can add a little water, but this measurement works. So now we're going to adjust the seasoning with, I'd say, nice pinch, maybe it's a teaspoon of sea salt. Let's just check that. A little bit more teaspoon and a half, let's say, of sea salt. Give that a good stir. And then black pepper. Black pepper and gravy are friends. They go together. Don't skimp on it. Don't use white pepper. Tastes like dirt or dust. Use black pepper. Delicious. And a pretty good bit of it. It really makes gravy taste traditionally like gravy. Give that a stir. We'll taste it one more time. Delicious. Now we're going to take that off the heat and let it sit covered because a little added treat for you today. We're going to cook a chicken breast. Serve this gravy with. So now we're going to cook a chicken breast, and I'm going to show you a cool little trick. The first thing we're going to do is we're going to start our pan low heat because it's a fairly thin pan and you don't really want to get a lot of heat going in a nonstick until you're ready to add something to it. So we're just going to season this chicken generously with sea salt and then some black pepper. Okay. Then we're going to add just a little bit of olive oil. We don't need too much, just enough to kind of again, protect that skin, Create a little barrier. A little barrier protects the skin, but also creates even heat. And then I'm going to show you something cool. While I'm picking this up, I'm going to slide that over to the foil, and I'm going to just put that foil on the bottom of this pan. Now, why would I do that with, by the way, with a reflective side out. Watch this. So we're going in, and we're going to put this weight right on that chicken breast. The foil protects our. Our breast and our and our plate from sticking. So we're going to start it now on high heat, and then as it begins to cook, we're going to turn down the heat. Come on in so we can hear that sizzle you can start to hear the sizzle. And we don't need this to stay on there the entire time. We just need it to stay on long enough that the skin stays flat. Because once it stays flat and you get the base of that breast cooked, it'll stake that. Great. Now we're starting to hear a good sizzle. We're going to turn it down to more of a medium heat, and we'll come back in just a moment to check on it. Okay, now we've got, you know, three or four minutes into the process, we're going to be able to remove the plate. Let's do that carefully with the tongs. And you'll see that the chicken breast is laying flat now, and we're going to allow that to just continue cooking. And we're going to want to cook this probably about two thirds of the way up, at least beyond half at nice low heat. But as you can see, see, we're getting nice caramelization on the skin, but not too hot. So we're going to take our time, and we'll come back to you when we look further. Okay, so now it's been about 10 minutes, which seems like a really long time. Look how low the heat is we're going on. It's very, very low. No need to rush because we don't want to burn the skin. But as I mentioned, we're easily serves on this side and more than halfway. And the internal, you can see we're more than halfway up the side, but the internal is actually a little further than that, as you can see in here. So we're going to go ahead and season it. Now, you notice that I didn't season it before this side, because all that's going to do is draw out a bunch of moisture. The salt will draw out a bunch of moisture. So I want to season that. Just before I flip it over, I'm going to add the salt, flip it to a pepper or three, and then just very gently turn it over. And look at that golden skin. Incredible. Just nice and slow. Take our time. No rest. And while that was, during that 10 minutes, and even during this time, there's multiple things you could do. You could be tossing a salad. You could be heating up your vegetables. If you're doing something quickly, like some asparagus or some zucchini in the summer, could be anything. But you now have time, because you're going so slow on this chicken, you're not trying to rush it through, and you get a nice golden, crispy skin, fully Rendered, no burning, no weird acid flavors, and it's going to be very gentle. The meat itself will stay nice and moist because we're going so slow and forgetful. So now, as you can see, our chicken is opaque white all the way through. But just for fun, we're going to test it. I want at least 150 degrees. Not much more, really. I don't really want to go to 165, but I want at least 150 degrees. So we're gonna use an instant read thermometer and see what we get here. Yeah, so we're certainly over 150 degrees. No problem. Approaching 160. So we're done. Got a nice crust on the bottom, nice skin on top. We're gonna turn this off, and then we'll going to want to let it rest. This is important. When you're doing any larger item, anything larger than a cutlet, which is a very, very thin piece, you want it to rest because what's happening in the cooking process is that we heard the sizzle. That's the moisture drying out of the item. It's drying out. And as it sits and as it rests, that moisture will come back to the middle. If we cut this right away, it's going to leak all its juice. But if we wait a little bit, that juice will stay inside. The final steps are just bringing our gravy back to the boil. Won't take long because it stayed warm covered. And when we do that, we're going to keep stirring it. Look at this. Thickened up beautifully. Take a look now. Just perfect. Bring that back to the boil, and you can make this gravy ahead of time if you want to. You can even make it, you know, day ahead. But bring it back slowly. Maybe add a little water if it's too thick, because it will thicken up as it sits. But what's interesting, when you do this and you make it ahead of time like this, then the last thing you'll do is you'll take your turkey out of your roasting pan, deglaze that residue at the bottom. You can pour off the fat if you'd like, but deglaze the drippings with water, add them to your gravy, and that will give you the turkey hit of the roasting of the turkey. That's going to be just delicious. So come back over, take a look in here. You can see the gravy starting to come back to a boil. Lots of good poultry flavor in there. Can see little bits of Himalayan Tartary buckwheat, which is very pleasant, but it's. But it's not grainy now. It's all hydrated and swollen up with the liquid, which is what causes that colloidal system, which is what thickening is. And that's fully boiling. We're done. Now for the test of all of this, we have to taste it. So I'm going to actually sauce the gravy around because I don't want to soften that nice, crispy skin that we worked hard to get and took so long to get on that chicken. So. But I like a lot of gravy. So for me, the gravy is. Everything else is a vehicle for the gravy at Thanksgiving. So that's why it's so important. Okay, perfect. And now we'll give it a try. Look how moist that chicken is. Perfect. If you just squeeze a little. See that? Look at all that moisture. By letting it rest. That's what we get to keep, And we'll give it a try. Delicious. And you could do this any day of the week with. With a roast chicken. Enjoy. Thanks for tuning in, and we'll have some more fun tricks next time.