How to Make the Most of Your Outdoor Time | 29 Minutes to Adventure
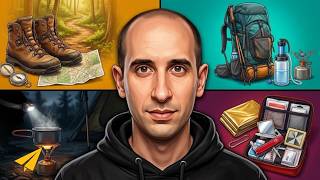
Evan Carmichael and multiple experts walk beginners through hiking basics: proper footwear, a three-layer clothing system with merino wool, and essential gear like water, maps, and a GPS-enabled phone. Always leave your itinerary with two trusted contacts before heading out.
Chapters
Good morning, Believe Nation. My name is Evan Carmichael. My one word is believe, and I believe that entrepreneurs are going to solve all the world's major problems. I started the Believe Life Series to try to expand beyond just the world of entrepreneurship and try to learn some other skills, resources, ideas to help us become maybe a more complete human being. So today we're gonna learn some hiking tips for beginners. And as always, guys, if you hear something that really resonates with you, please leave it down in the comments below and put quotes around it so other people can be inspired. And when you write it down, it's much more likely to stick with yourself as well. Enjoy!
Do you ever wonder what separates those living an elite life from those who live a mediocre one? You think it's their bank account? Guess again. They make time for adventure. Make time for adventure. All right, don't get me wrong, there's many things that separate an elite life from a mediocre one. But today I want to talk about memories and experiences. I mean, these are things that we all have, right? But at what level and what frequency? Ultimately, guys, life in my opinion is and should be an adventure. Over the past year and a half, I have studied countless world-class leaders and something that I've noticed they all have in common, that they constantly create memorable experiences. In 2015, I made it a point to make time for adventure. And during the summer of 2015, I probably fit in more adventures than I've probably put in my entire life, and it was life-changing. Don't get me wrong, I've always loved hiking, but I never found the time to do it until I changed my mindset. I ultimately decided to make time, and I planned a new place to explore every week, and I planned my life and work around it. Some trips were day hikes, some were half days, some were weekends, some were 4 days. Point being, I mean, no matter what my schedule was, I always found time, whether it be a long or short adventure, and I've honestly never been more fulfilled or happier in my life. I mean, really, what's the point of doing anything if you're not having fun and it doesn't elevate you emotionally? Now I know we all have things that we must do day to day that may not be fun, can get a bit bland, so why not make time to take a mini adventure, a half day or a weekend every week, every month? This will snap you out of any complacency you may be feeling. Don't let yourself be complacent. Complacency, it's the killer of dreams and ambition. You can start right now by making a list of adventures that you want to take throughout the rest of the year.
Hi, my name is John, and today we're going to do a little beginner's intro to hiking. And one of the things that I love about hiking is that it truly is Very, very simple. You put one foot in front of the other, you get out into a beautiful natural area like this, and that is the essence of hiking. Of course, there are a few tips and suggestions that will make the beginner's experience a little bit easier and will avoid some of the common pitfalls that people without experience come across when they go outside. First things first, I always like to talk about the feet. Make sure that you have appropriate footwear on. These boots that I'm wearing today are more of my heavier duty hiking boots. It is also appropriate if you're going on easier terrain to use running shoes or lightweight hiking shoes. Even Tevas or other hiking-style sandals can be adequate if you know what you're doing and the terrain is more forgiving. For dress, I always like to dress particularly lightly—shorts, lightweight long pants, a t-shirt, and maybe a jacket if it's a cooler day that you might store in your pack if you start out and it's warmer but it might be raining later on. As far as carrying some things with you, Some very essential or basic things. A day pack is really good for your shorter hiking trips. And in that day pack or carrying with you, you might have water. Please bring plenty of water. If you're gonna go for an hour or two, one water bottle is sufficient. Multiple hour hikes would take multiple water bottles. A little bit of food, some snacks, good old raisins and peanuts, AKA GORP. And then just an extra jacket. Always be prepared. Even if there's no rain in the forecast, it might rain on you. I always bring an extra jacket like that. First aid kit, sunblock. Those are pretty much the essentials. Now, as far as planning a place to go hiking, almost anybody in this country lives near a beautiful park or wild natural area. Today we're in Montaña de Oro State Park here in California. As you can see, thousands of acres, wonderful hiking trails here. If you're beginning, I would pick out a trail that might be 2 or 3 miles in length, maybe a little bit shorter. Pretty moderate terrain. As you get used to it, you can work up and do heavier-duty trails with more up-and-down terrain. 8 or 10 miles with a lot of up-and-down would be a really full hiking day for folks. That's hiking in a nutshell, and I hope that that helps beginners get a feel for it and avoid some of the common problems that happen to folks who don't really know what they're doing out there while they're hiking.
Have a plan. 99% of the time that I travel in the backcountry, I do so alone. Something I just really enjoy. So it's really important on the front end of my trips that I have a plan. And so what I do is I do some research online, look at websites at the area I'm going to be in. I look at a map to see where I'm going to park my truck. I look at the various destinations I want to get to, how long, how many miles it's going to take for me to get there, how long it's going to take to hike those miles. Another thing I look at is weather so that I can anticipate if there's going to be any precipitation, rain or snow. And I know the high predicted, predicted high temperatures and the low temperatures so I can pack accordingly. I always carry a compass and a map when I'm traveling in the backcountry. What I do is I take the National Geographic Trails Illustrated map. It's a big color map, and I'll take photocopies of the sections or the areas that I'm going to be hiking in, and I put those in a gallon Ziploc bag. It allows me to travel lighter, it protects those documents. I can write on the maps and not damage the original map, and it's very lightweight for for me to travel in the backcountry that way. And also I carry my iPhone, which has a GPS built into it with a topo app. And I just run the phone in airplane mode, and so it conserves battery power. And I pull that out every once in a while if I want to double-check where I'm at. But primarily I use my map and compass. I leave a detailed itinerary with at least 2 people. One is always my wife. I tell her exactly where I'm going to park my pickup and what my plan is for while I'm in the backcountry, where I'm going to be and so on. And the other person I leave this information with is a good friend of mine who knows the area and has the ability to come get me if I run into trouble. Most of the time when you read about someone who's experienced a tragedy in the backcountry while traveling solo, it's because they didn't tell anybody where they went. Day hikes.
So this video, this portion of the video is going to be for day hikes that are, you know, 1, 2, 3 miles. If I'm going on a day hike that's 1, 2, or 3 miles, these are the items that I'm going to bring. First thing I focus on, food and water. What I have here today, it's perfect for 1, 2, 3 miles. Sometimes I bring a little more. I just have some granola and some peanuts, simple snack to snack on. Sometimes I'll bring some extra granola bars, sometimes even a can of soup, depending on the area that I'm going. So that's food. Water, usually I'll just bring one canteen, and if I'm going for longer distances, usually I'll bring a bladder pack, or if I know the area that I'm going in, I'll bring a water filter. This way I can fill up my canteen when I stop near a stream or something like that. So that's food and water covered for, you know, 1 to 3 mile hike. Protection from the elements, usually I'll just bring a poncho and this This will basically keep me dry and all my gear that I have dry. A cheap alternative would be a big trash bag. You know, you can get them fairly cheap. Just cut a hole in the top and for your arms and there you go. You got your own poncho, very lightweight and cheap. I would recommend not buying the dollar store ponchos because they tear very easily. If you're going in an area where there's, you know, a small footpath and you scrape up against a branch, chances are the poncho is going to tear if you buy the cheap quality one. So I'd recommend maybe getting one that's a little more higher quality than the dollar store brand. So that's protection from the elements for the 1 to 3 day hike, 1 to 3 mile hike. What I like to call just in case items. So again, fire starting. If for some reason you do get lost, very simple, bring a lighter, bring 2 lighters, bring 3 lighters. Keep them in different locations because if for some reason you lose your backpack, you know, all your fire stuff is in the backpack, what are you going to do? So keep a lighter in your pocket, maybe keep a lighter in your jacket. I have another one in my inside pocket here. And keep a couple in your backpack. You know, practice using a ferro rod, of course. But that's the basics of fire. Keep something to light a fire on you, and a lighter, to me, in my opinion, is the best way. Another thing, just in case item, bring some flashlights. I have this cheap headlamp here. This actually cost $10. It's rechargeable. I did a test, the battery, I kept it on the highest setting. It lasts for about 11 hours and it still didn't die, so I just shut it off at that point. I, you know, determined it was very, very useful. $10 on Amazon. If I can remember where I got it from, the name, I'll put it in the description for you guys. So bring some type of light. I have another light on my keychain here. It's a very small light, but it's very effective. It's a high-powered LED light. I'd recommend bringing multiple lights if you can. Small flashlights work fine, you know, you don't need anything high-tech or expensive. And I actually keep another headlamp in my pocket here just in case. It stays with me at all times in my jacket. Just in case, this is my BetterHeadlamp that I purchased. So just in case you do get lost and you're out longer than expected and it does become night, you want to have light to be able to navigate. And that's basically it for day hikes. Something I usually bring too, just this little foam pad just for comfort. You know, if I stop to sit down for a second, put it on my bum, sit down, it's nice and cozy so my butt doesn't go numb. So that's something simple there. In there. And I also use this to fan the fire sometimes. So just some comfortable items that I bring. And that's the basics for, you know, a 1 to 3 mile hike. It's not too extensive. You don't need a lot when you're going out hiking. Just focus on the area that you're in, know the area that you're in, and know how to get out just in case. For longer hikes, I would bring all this stuff that I just explained. I would also bring a water filter shelter, very important. And I would also bring this Mylar top, and it's great for protection from the elements. If I had to make an emergency shelter, I can put this up in a lean-to fashion, have a fire in front of me, and it should keep me warm the entire night. I've actually done it before. I highly recommend these Mylar tops. I believe it was like $15 on Amazon. Lightweight, very, very versatile item, and they come in a couple different colors. But this is, uh, my favorite piece of kit that I have, and I highly recommend it. I've I bought one, I liked it so much I bought two more. So that says a lot. If you're just getting into hiking, I recommend bring more than you need. You know, if you can bear the weight on your back, bring more than you need, and then over time you'll get used to the gear that you don't need, and little by little you'll have less and less and less. That's basically how I decided on what gear I should bring. I went, you know, my pack was a little heavy in the beginning, but over time I was like, "Oh, I never even used this on the last three hikes, so I'm gonna take it out of my bag." And then you just go for go on from there. So that's it. Get a nice comfortable backpack. You know, over time, obviously you don't want to spend $100 on a backpack if you're going out hiking for the first time. You know, get something cheap and just learn and grow and get out there and experience the woods. Tell me about your adventure.
Respect the backcountry. What I mean by this is that when I am in the backcountry traveling alone, whether I'm scaling a steep slope to get a peak or I'm crossing a stream, I keep a slogan in the back of my mind, and that is, "Remember where you are." And what that reminds me is that if I were to get hurt right at that moment, I am days away potentially from anyone coming to help me. So it helps me to be vigilant when I'm hiking down the trail or stepping from boulder to boulder most times when people have accidents in the backcountry is due to laziness. They're not— they're just not paying attention. I mean, I get it, you get fatigued, it's late in the day, and you're just not paying attention when you're putting your full weight down on a rock. You just assume that rock is stable, and you can't when you're traveling alone. You get an injury by yourself and there's nobody there to help you. So remembering where you are just helps you to be vigilant at all times so that you minimize your risks.
And then last on the list is emergency shelter. We call them a bivy, and here's a 2-person bivy in a small container, and here's a 1-person bivy. You can see how small these are. You just throw it in your pack, and if you never need it, you never know it's there. But when you do need it, you're— it'll save your life. So definitely recommend that. One of the things I like to carry on some big trips in the North Cascades is my Spot 2 Messenger. I can check in with my wife and kids, let them know that I'm okay, and if I do need help, I can hit the button. It works with satellites, and it works very well. It's been out for for a long time. I also recommend that you maybe bring a plastic bag. This is great for shelter as well as keeping everything dry if you're in a torrential downpour. You get wet, you get cold, you're in trouble. Things to think about is weight. If you go on a trip, you obviously got to keep your weight in proportion to what you can carry. So scale down or scale up things depending on where you're going. Use common sense. Are you taking a long trip? Are there hazards? Is there going to be weather problems? You know, be able to deal with everything. Nobody wants to call search and rescue, and nobody wants to find themselves —spending an unwanted night in the wilderness.
[FOREIGN] What are the main categories or classes of hiking boots?
There's 4 main styles and categories of hiking boots. The first would be the low-cut, ultralight hiking boots, and then it would be just a general all-purpose hiker, and then you're gonna go with a little bit heavier in a backpacking hiking boot, and then the heaviest and most durable would be the mountaineering and winter hiking boots. The ultralight hiking boots are designed for the backpacker who wants to cut down on their weight on their trips. Most of them are not waterproof, they're mostly lightweight, breathable, but they provide for easier comfort through the day. They're gonna keep your feet dry. Even if you go through water, they're gonna breathe a lot faster, so you are gonna dry out quicker. Most of them do have a pretty aggressive tread to kind of keep going through most of the rugged terrain in Idaho. A lot of customers, or a lot of people who are going hiking, prefer to not have ankle, ankle support. A lot of people do. People with ankle injuries especially don't like to have the high-top boots because it rubs on scars or scar tissue. And so we get a lot of people asking for a lower-cut, still aggressive and still rugged shoe.
Now I've heard that 1 pound on your feet actually equals 5 pounds on your back.
Is that true? Yeah, absolutely. Your feet are moving all day, and if you think about lugging one of these around as opposed to one of these, I mean, it's way different. This is 3 pounds a foot. This is 16 ounces— not even 16 ounces, it would be like 12 ounces a foot. So you're cutting a lot of weight and you're moving all day, and so at the end of the day you're going to have a lot more energy wearing these out than you are when you wear these heavier-duty mountaineering boots.
Say I'm more of a heavyweight backpacker, I go on a lot rougher terrain, I'm carrying weights, you know, of 30, 40, maybe even 50 pounds or more, what type of boot am I going to step up to in that situation?
When you're in that situation, you're going to step up to kind of an all-around backpacking boot. Most of them are all leather, so you're going to get a lot of waterproofing, you can use Nikwax or something like that to also waterproof them as well. And then most of them have Vibram soles, and so they're going to provide a little bit more traction and a little more stability. And then it's a lot wider of a base than a traditional hiking shoe, and so it's going to provide that stability kind of left and right. One of the main things to kind of keep in mind, which a lot of people don't know, is trying on boots later on during the day. Your feet tend to swell as you're standing around and walking around, so knowing that you're gonna— your feet are gonna be a little bit different, even a half size different, later in the day is gonna help when you're tired at the end of a hike. So trying on shoes later in the day definitely helps because you're gonna— it's more of a true fit.
Is there anything else I can do in store to make sure that the boot is gonna work? I know some stores offer me maybe incline ramps or other devices. Can you maybe speak to that just quickly?
Absolutely. An incline ramp is crucial when trying out a boot. You definitely want to lace your boot up like you're gonna wear it and then start at the top and kind of stutter step your way down and make sure that your toes aren't hitting the front, because if they're hitting the front, forefoot 5 steps down an incline ramp, they're gonna hit on the way down from a mountain. And then you turn around and walk back up and make sure that your heel isn't slipping in the back because that would cause a blister pretty quickly.
So once I've actually tested the shoes, picked them out, purchased them, what do I need to do prior to hitting the trail with them? Do I just break them out of the box and go for a hike, or what do I do?
Prior to kind of taking them out on your first trip or your first adventure would be just wearing them around the house for a short amount of time. A lot of these, the stiffer ones, are gonna take a long time time to break in. Some people have had them on for 2, 3 years and still haven't broken them in. So definitely taking them on like short walks around the block. If you got a dog and you're walking a dog, or even taking them on little mini hikes, that way you're breaking them in, but you're still— you're not committed to them when you're out there and you don't have anything else to change into.
You only need a handful of garments to stay warm, dry, and comfortable in rain, wind, or snow so that you can enjoy views Like this. Hi, I'm Jonathan Simons, and I'm a wildlife tracker and bushcraft instructor, and in my spare time, a keen bird watcher and hill walker. So I spend a lot of my time outdoors. Every time I do go out, I use the same versatile clothing system known as the layering system to keep me warm, dry, and comfortable. And today I'm going to show you how it works. I'm working with my friends at Go Outdoors who who have all the know-how on outdoor kit at their fingertips. The light and packable clothing that forms the layering system is designed to be kept in your rucksack so that it can be pulled out at a moment's notice. To see how it works, we need to rewind to the start of the day. The first part of the layering system is the base layer. It's designed to trap a thin layer of warm air against my body my body and pulls or wicks sweat vapor away from the skin. It also keeps me very warm and dry. I'm wearing a base layer made of Merino wool. Its fibers are so fine it doesn't itch or scratch. Merino also helps neutralize body odor, and it's an environmentally friendly renewable fabric. There's one base layer fabric that you need to avoid, and that's Cotton. Cotton soaks up sweat like a sponge, and this is bad news because when cotton gets wet, it draws heat away from your body, and this can lead to hypothermia. Hypothermia is a potentially lethal condition and can be contracted in surprisingly mild weather. So unless you're in a hot climate, avoid wearing cotton clothing. And of course, avoid wearing cotton underwear and socks. Too. Well, it's getting cooler, so it's time to throw on the next part of my layering system, which is the mid-layer. Now, the mid-layer is designed to trap body heat and to allow sweat vapor to carry on moving through the layering system. The most popular mid-layer fabric is fleece, as it's affordable, durable, and quick-drying. The thicker the fleece, the more heat it traps, so you want a mid-weight fleece for colder weather and a thin or microfleece like this one for milder conditions. As you gain altitude, the temperature drops, so remember, on the summit it could be quite cold even though it was really warm down in the car park. But ambient temperature is only part of the story. Wind and rain can have a big impact on just how cold and uncomfortable it can feel. Which is where the next part of the layering system comes in. This outer layer, known as the shell, blocks wind and rain. It also allows my sweat vapour to leave the layering system. Now I'm wearing a waterproof Paramo shell, and I'm feeling very comfortable indeed. Lovely.
There are 3 types of shell: Paramo, membrane, and coated nylon. They all do a great job in keeping out the elements, but they vary in how quickly they allow sweat vapor to move from the inside to the outside of the garment. Paramo's Nikwax Analogy fabric, which is what John is wearing, and membranes are the two types of waterproof and breathable materials that are best suited for active use. Paramo is very breathable and great at keeping you comfortable in many weather conditions, but the material is heavier than some membranes and coated nylons. Membranes such as Gore-Tex, eVent, and Dewpoint are lighter and more packable than Paramo, but they don't breathe quite as effectively. The third type of outer layer is a coated nylon. These shells are designed for passive activities such as walking the dog, short rambles with a day sack, or hiking to the pub. Coated nylons are less expensive and less breathable than Paramo or membranes and will feel sweaty during arduous activities.
You can use the layering system on your legs too. You can layer a pair of merino or synthetic leggings underneath your wind-resistant summer trekking trousers, and you can pull on a pair of breathable and waterproof over-trousers should the weather come in. An alternative to the legwear layering system is a pair of softshell trousers like these. Softshell is a popular legwear material material, as it's time-consuming to adjust multiple layers on the move. Hi there, guys!
I'm out here enjoying nature again, just next to a nice little village on the Alps. And because I'm always out and about doing all sorts of adventures, a few people are asking me about hiking, like what sort of gear do you take when you go hiking, overnight camping, and so on. Like, what do you need? What do you actually take when you you go. So here I've selected 15 items that I consider as a basic kit, things that you should be taking if you go on that sort of activity. So let's get started with number 1, is your tent. Like, this might be for 1, 2, 3, or more people, maybe 3-season, 4-season, it all depends on what sort of conditions you're going to be facing. Number 2 is some sort of isolating mat mat. Like, the main function of this is not only to give you some comfort against the hard ground underneath your sleeping bag, but also to protect you from cold and humidity coming from the ground. Talking about cold, number 3 is your sleeping bag. Make sure that the temperature rating of your sleeping bag is adequate to the temperatures that you're going to be facing. Consider that at nighttime the temperature can drop quite a lot. Number 4 is your kitchen. So it's a kitchen kit, really. So here's your stove, several models out there: gas, alcohol, multi-fuel, and so on. Your pots and eating utensils. Number 5, it's one of my favorites, is your food package: breakfast, lunch, dinner, trail snacks, and so on. I'm going to be talking about all this gear on another video, giving more and being more specific. But yeah, so that was number 5. Number 6 is water bottles, not only to keep you hydrating during the walk and during the camping, but also, you know, to measure water for cooking. And a lot of them can be used with water purification systems, which is our next item, number 7. Now this could be a filter, you can use water purification tablets maybe even boil water, but it's quite important to treat water. You don't want to get contaminated, especially when you're camping in remote areas. Number 8 is a torch. I personally like headlamps, hands-free walking at night, cooking after dark, and so on. Very handy. Make sure you take spare batteries. Number 9 is a first aid kit with a multi-tool or a knife. I make make sure that this is always in a waterproof bag. I do the same with the rest of my gear, but particularly with this one here. Number 10 is your personal hygiene kit. So this is where your toothpaste, toothbrush is. Uh, you might want to take a small microfiber towel and your toilet paper, also kept in a small dry bag. Number 11 is your clothing. Just a package of fresh, dry, warm layers. So as the temperature drops, you want to make sure you're warm and protected. And that's it. So talking about protection, we go to number 12, which is a rain jacket and rain pants. See, when we're outdoors, we're always exposed— rain, winter, wind, snow, and so on. You want to make sure you're dry dry and warm. They also give you a lot of protection against the wind. The next item is a map covering the entire area and compass, and ideally some basic orienteering skills as well, if you have. Right, number 14 is a small pouch with your wallet, phone, and keys and so on. Here you can also keep copies of reservations, like an entry for national park or some sort of ticket for transportation and so on. And lately— lastly, our last item, number 15, a backpack. Obviously something appropriate for hiking. It must be comfortable and with capacity big enough for all your gear and maybe bit more so that you don't have to pack everything extremely precise. You've got a little bit of margin to play around with, right? So these are pretty much the 15 basic items that I consider as a basic kit for hiking, uh, staying overnight.
Thank you guys so much for watching. I hope you enjoyed. I'd love to know, what did you think of this video? What was the message that you took home that you're going to immediately apply somehow in your life or maybe in your business? Leave it down in the in the comments below. I'm really curious to find out. I also wanna give a quick shout out to Edward. Edward, thank you so much for picking up a copy of my book, "Your One Word." I hope you're enjoying the read, man, and I'm so appreciative for your support. So thank you guys again for watching. I believe in you. I hope you continue to believe in yourself and whatever your one word is. Much love, have an amazing day, and I'll see you soon.
More from Evan

How the Biggest Mistake in History Created A Trillion-Dollar Empire | Sergey Brin


9 Machiavelli Principles That Force People To Respect You | Machiavellian Philosophy



The First 10 Words That Instantly Ruin A Sales Conversation | Vanessa Van Edwards

The Top 1% Mindset Behind The First $5 Trillion Company | Jensen Huang (Nvidia)

