2016 05 10 09 03 eConnect Training BOH
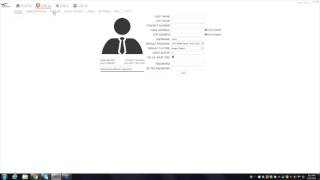
Zachary Whitney and Marcus Kelly walk through eConnect backend setup: adding cameras, configuring POS entity mappings for terminals and employees, building POS queries, creating camera-to-POS associations, and managing users and permission groups. The session covers export servers, device groups, camera access controls, and when to escalate to support.
Chapters
Sam.
Alrighty. So I have everything set up now. I just wanted to make sure if everybody can see my screen and everything's working okay, you guys can hear me fine and all that stuff.
All right, cool. So I think we have everybody we're going to get for now. So today's webinar, we're actually going to go through the back end of the system in terms of pretty much everything as far as like configuration and maintenance and just upkeep and stuff like that. So that goes from everything from adding users, adding cameras, changing time zones, if you add any camera associations, anything of that sort.
First thing that everybody is going to need if you're going to want to do something like this, is you're going to need a user that has admin privileges. Most users in the system, unless you're an admin user, is only able to see, when you click on setup, you're only going to be able to see your own user account information and possibly subscriptions. But other than that, you're really not going to see too much else. So make sure when you guys are wanting to go back through and to make all of these changes and stuff like that, that you have a user with admin access bas. So once you log in, we're going to be doing all of our work under Setup. So once you go to Setup the home screen, everybody here, I'm sure, has seen in the past, it's just making adjustments to your own account and stuff like that. First, we're going to start over here. I guess we can start with, let's start with cameras just to get that going first. So when you're adding changing devices or cameras and you add to the system, depending on what dvr, NVR your site is using, within our drop down menu here, you'll see most of our integrations. If you have a current working system and your integration isn't showing up in here, that's most likely because recently we have made it to where each player control we actually have installed acts as its own plugin. So let's say, for example, you guys have.
I don't know, let's just say for example, you guys are using Dallmeyer or Synetics or something of that sort. If it's not showing that list, it's most likely because you don't have that player control installed on your client machine. So once you have that installed and you reopen the E Connect application, our template for that integration will show up. So I'm not going to really pick on any specific cameras we need some basic ones that we already have installed here. So looking over here, like a genetech template or one of our own integration, our own E Connect recording software.
Pretty basic. So you'll just select whatever camera that you guys are using, whatever integration. So we'll select E Connect Media device here for example, and then within here, once you guys have already had a couple of cameras added, basically you can see the same information. You just want to adjust it appropriately for the different cameras. So in our case we have a server address which is the actual econnect server address itself. And then not every system has a server settings, but if they do, this is where all the changes are made. Again, every integration is completely and utterly different when it comes to it. So for us we go directly to the camera itself and do the recording as to where with our integrations with some other like Dallmeier, Pelco, Janetech, whatever site you guys are using, we could just be communicating directly with what port that that camera is using within your own respective camera system.
But things that are important to note that go across all cameras are things like the export server and time zone. So this is actually the time zone that we display. It doesn't change anything on your own camera system. So whenever you pull up a camera at the very top here, so if I pull up a camera, we'll just pick game room.
The camera. The time that we display is up here, as opposed to the camera time that it's displaying giving to us is over here. So whenever you see this time over here, that isn't correct. It's most likely because the.
Time zone on the camera itself is not set up properly.
And then obviously export server what this export server drop down basically implies is where the exports are going to be handled depending on how your site's configured. Most of the time it's the E Connect server itself that handles all the exports and thumbnails and stuff like that. So when this drop down is here selected, it's actually pointing to a specific IP address which we look at the top over here and I go to export servers. We'll see that this one is EC Export 1, which is 1 of our own that we host. If I go to export servers over here, you'll see that this is all the information that we have for that. So this server actually points to this address that we have set here. And these are all of the cameras within our system that are pointing to that. These new devices here don't need to be added, of course, just because they're just templates. Of nothing. So for every camera that an export is ran for, the client machine looks to this address and sends a request here for the export to be made. And if there is a service that's open and listening, which there should always be, in that case, then it'll sit there, and this server, where this is, will then communicate to the camera system and request the export and stuff like that.
Moving on a little bit from here, once you have all your cameras and stuff like that, I can't tell you how many times I've done it myself, but make sure you always hit the save all button. I've added 30 or 40 cameras myself and not saved that and then logged out. And then I came back into the RealCon. So make sure every time you guys make a change or add a camera or a bunch of cameras or whatever it is that you're doing, making changes to, always hit the save all button down here.
So moving on, the device groups are basically just camera groups. So if we look over here under cameras, you'll see we have conference room, game hallway ratings. And these are just like our own test demo system that we have here. All of those names are reflected under the device groups. So at any point when you guys want to organize and segregate your cameras and stuff like that based on location and whatever it is that they are, you just go down here to new group name. We'll just put in test123 and I'll hit the plus sign, which is going to add a new group here. And you'll see all the cameras that are over here are all in the same group. That's because they're not added yet. So let's say, for example, I wanted to go through and add this camera, this camera, this camera, and this camera to that new group. I just hit add selected, and it's going to bump all those cameras over to the left. And so if I click on any of these other groups, you'll see that some of them have cameras associated to them and some of them don't. And if I go Back to test 123, these cameras are still saved in that group. There's no save button here. It automatically saves as soon as you make that change. Automatically. If you accidentally mess up the group name here, there's no way to rename the group. You just have to recreate the group. If you hit the minus sign, it doesn't delete the cameras, it just removes the group and undoes the association and then you can make a new one. So if I wanted to call it task 456 and add that. Then you can go back through and just kind of do the same thing. Make sure you have the group selected and then add whatever cameras that you want and go from there. If we go over here to our cameras list, it's not going to show up right away. So we have a refresh button for the UI. So if you press then you'll see the test 456 camera that we made and all the cameras that I associated inside of it.
So going back over here to device groups, I'll just delete this really quick. We don't really want that here anymore. Access Control. So we have our own ACL for two things. We have one for plug ins and we have one for cameras. So the access control list is exactly what it sounds like. So let's say, for example, I wanted to make sure there are certain cameras that I can't see. In your case, if you have certain employees that don't want to see, you have certain cameras for whatever reason, if it's monitoring something secret, if you guys have a hidden camera somewhere, whatever the case may be, basically you can go into your users and select batch, select cameras and users and stuff like that if you want. So for me, for example, I'm just going to pick on my user and let's say, for example, I don't want to see any of the cameras here in our office that are inside the suite themselves. I would just highlight all of those cameras and then bump all of those over. And then what's going to happen is as soon as these take effect, it's probably going to take it a minute going through all these.
Maybe I broke it.
If I log back out, log back in. When I log in, I should not be able to see those sweet cameras at all.
Go to groups here really quick. We'll go to E Connect and then.
Switch to.
We're going to go to setup and then cameras and then access Control.
So if I go back down here under my user, they're still not there. It might be because I have super user access and it's not allowing it. But if I change this for Marcus.
Oh, Paul. Okay, one second guys. I'm just going to use our search prompt at the top. Is it pitters?
All right. So it's because of the superuse access. So I can't take cameras away from super users. But Paul on the other hand, doesn't have that access. So for him, if I, I select these cameras for him, next time Paul logs in, he's not going to be able to see these cameras. They won't even exist for him. He won't know there's an option for them. He won't know that they exist. Anything of that sort won't be there. So this is kind of a simple way of just taking away camera access for certain users and stuff like that. Let me interject real quick.
My name is Marcus Kelly, investigations manager. I know that when I go out to do training for some casinos, a lot of surveillance rooms are not allowed to show their cameras. This is where you can create users for audit or anybody outside the surveillance department and take away all ability to view any cameras. And that way they can see the data only and data mined that way. So it's just something to keep in mind. Like Zach was saying, if you want to restrict certain users from cameras, this is probably, would you agree, the easiest.
Way to do it? That's one of the ways. The other way that we have is by doing it via plugin. So even though we take away, let's say if I took away all the cameras from Paul, when he logs in, he's still going to see this cameras tab up here. Just when he goes to it, he won't see anything. It'll be completely empty. It'll be a ghost town. However, if we do it via plugins, which I'll show you guys how to do here shortly when he logs in, he won't even know that there's a plugins or a camera's plugin in general. It'll be completely gone. So when he logs in or whoever logs in, all they'll see is home set up for their own user and then point of sale and cases and you can, guys can even go further down from that and say I only want him to see POS and then nothing will show up. He won't see video or cases or anything of that sort or vice versa. If you don't want them to see the point of sale for whatever reason, you just want them to see certain cameras and stuff like that, you can get further into it that way as well. And I'll show you guys how to do the plugins way. But this is a very simple way of doing it. If there's just a couple of cameras you don't want somebody to see, this is how I would do it. If you don't want them to see all cameras, then we'll do it by plugin and that'll just alleviate all that stuff in general.
Going over to the next setup. This is for Motion detection, this isn't something that I would ever recommend to have one of our customers set up on their own. If this is something you guys are.
Paying for or wanting and our system supports it for whatever camera system that you guys are wanting to look at, this is something that we can do for you.
And yeah, so if you guys have any questions on the motion detection stuff, basically we can just set up queries within certain views of the shots and stuff like that and run queries based off that. So if you're looking for a certain activity in a certain portion of a camera on a specific type of camera, because we only support models and stuff like that, you can run a query based on that and then export servers. I already kind of went back to this. So our system is very modular in the sense that we can have the system completely spread apart amongst several servers as needed. So when we set up the export service for you by default and usually always it's the E Connect server itself. But for whatever reason if we have to do a bit of a tricky configuration for your site, for whatever reason, we can always set up our export servers to be handled by another machine, by a client machine, by a different server in general and be fully active and functional for the rest of the system export service. This really should never be changed for your local property. Obviously this IP address isn't going to resolve for your guys sites for the most of them at least. So it'll be just the local IP address of the E Connect service that sits on your side of the network which would most likely be surveillance in this case.
A quick note on this one, this goes back to again I do a lot of the training for your sites and I have run into surveillance department where they have asked for the video to be exported to their vault. That's something that can be done. If you guys ever have any questions on how to set that up with the server, you could reach the Support team at SupportConnect TV and one of either Zach or one of the other support guys will respond to you and be able to walk you through that process.
So moving on, next up we're just going to kind of go over to the point of sale portion. So under point of sale there's really not a whole lot to do in here as far as like configuration stuff like that goes. But what is in here is stuff as far as like adding and changing and modifying and creating queries and stuff like that. This in its own could be, you know, 10 webinars as far as like creating queries and stuff like that. If anybody is familiar with link with the language free link, it's basically SQL format and it's SQL and C kind of put together. But this is basically what our queries look like. So when you go into our system and you create a basic query, so if you go to point of sale and then you go to query builder and let's say you just put together something rather simple like event type in the last eight hours.
And we're just looking for no sales or anything of that sort, I'm just making some up. I don't know if this will even work. Let's do like last seven days. Probably not. But when you create a query like this, what it's doing is it's throwing together code basically like this. Our system is going to generate code like this. So within here making an advanced query is just basically taking our query builder to the next level. Because if you want to get something very specific with their query builder can go pretty far, but it still has its limitations. Whereas you can get into this portion, which is something we obviously help people out with often as far as building queries and modifying them for each site and stuff like that. So if you're looking for a very specific set of data for a certain employee on a certain day with a certain transaction with certain parameters that happen within that transaction, this is basically where you would do that. Within here though, if you just wanted to modify current pre built queries that come with the system by default and stuff like that, this is also the same place where you guys can set up real time alerts or if you just want to disable the queries and stuff like that. So the most used function back here, and correct me if I'm wrong, Marcus, is usually just the real time alerts.
What a real time alert basically is, this is what's going to happen. Like if I check this for manager authorized transactions, for example, that we do for a site, if I select real time alerts every time that this query actually gets triggered. So our system is looking for it. Basically every time one of these transactions happen, an alert will pop up at the bottom right with a hyperlink on it. Basically what that does is it's going to say, hey, this manager authenticated Transaction happened at 5:10 on 9:10 this morning. It's going to pop up with a hyperlink box at the bottom right. You can click on that and it will bring up the video if there is video for it. But obviously the transaction as well of that. So if you're trying to keep close tabs on a certain employee, on a certain whomever, it doesn't matter. On a certain venue or a certain transaction for maybe like a special you guys are running or something like that somebody might be abusing. This is one of those instances where you would select real time alerts and then be able to keep an eye on that. And that'll for everybody that's logged in will be able to see this unless you have it specifically set for only certain users or if it's like a private query which you can select here. So if it's only or a certain person, or if only you want to watch something, you can select it as private and it will only show up for your user account.
And then obviously in here, if there's certain queries that you have no care for or you just have no use for them or whatever reason, you can always go in here and delete these and stuff like that as well.
Entity Setup this is not really something that we venture too far into when it comes to configuration because there's not really a whole lot of configuration that needs to be done. Basically what this portion is is this is where we store. We display all of our stored information, I should say, as far as like terminals, employees and revenue centers go for workstations are just the actual point of sale terminals themselves. So in here you can see these are all the point of sale terminals varying from whatever point of sale system that we're receiving data from for our demo site and their system ID and the familiar name. The one thing that we do allow to be changed in here is the familiar name. Familiar name is just the terminal name itself within our application. So by default, whoever's point of sale system that this is, one of our demo sites, we have named all of our terminals numerically. Just term, dash and then a numeric number afterwards. Some sites will have very specific names, depending on how detailed your IT team wants to get as far as naming the system and stuff like that. The one issue that I have with people renaming terminals is, let's say for example, we name Terminal127 to POS Bar left 1, 2, 3. Terminals do get moved around and they do get adjusted. So not only when a terminal gets moved, it breaks our association from the camera to the terminal, but you'd also have to go through and rename that terminal to, you know, buffet bar, right, whatever 456 or something like that. So it adds another layer of, you know, maintenance that you would have to do to that. It's not a bad thing to have it named, but it is just one more thing to take into account when you're renaming is that they can change, which means you'll have to update it on both ends.
Adding workstations and revenue centers is not something that I normally recommend simply because the way our integrations work is we either grab a list of all the active terminals from a system or we sit there and we automatically add them as we receive data. Depending on what point of sale system you're using. So adding a workstation. Let's say we have Terminal 133 here. If I were to add another Workstation 133, this could cause a conflict within our system. Mostly because our database is going to say there already is a terminal 133. So it might either a duplicate the data or it might not do anything at all. But if you pre add a terminal and then wait for another terminal, and that terminal hasn't been added to our system yet and it does it automatically, it can also cause an issue. So unless we're specifically not able to receive data from a terminal, if the terminal doesn't want to add itself or we can't add the terminal, I should say to our system, or if it's something new and we just haven't picked it up yet for whatever reason, we can manually add them in there. Once you manually add something, you can actually change the system ID to set it to what it is. And then once it's saved, it's in the system. And then the only way to get rid of that is to have us go in there in the database and delete it.
Revenue centers Basically it's a functioning terminal that acts as the primary reporting terminal for that venue. What that means is if you're at a bar, there's three terminals. One of those is most likely a profit center or a revenue center. Both the verbiage is different depending on what company you're using. With Agilisys or Micros or whomever, they have a different. But basically that terminal just does the primary reporting for that venue. So.
The terminal delivers all the statistics and the revenue and all that stuff that happened for that one specific venue. So it keeps track of the three, the 10 or the 20 terminals that reside under it. And it still acts as a terminal itself.
And then employees. Pretty self explanatory. Again, we read a list from a database or as users log in and start using the system on the point of sale side, not on the E connect side, we will start adding them to our system automatically. Their System ID is usually just their employee id. And then they also have first and last name in here too. And this can also be changed. Some systems will give us some funky names or some funky characters for whatever reason. And sometimes we have to go in there and just make little adjustments. So sometimes it'll give us a bunch of dashes and asterisks in between the lettering, depending on how they have the name set up in the system. So sometimes we have to go in there and play cleanup. So when you have to do that, you just go in there and hit that and hit save. And lastly going to kind of skim to the point of sale settings. Realistically, once this is set up and running, this doesn't really ever need to be touched. What we have here is we have again time zone.
If the time on the point of sale data is not right as you guys are, you guys pull up. I don't think this is a good example. We don't have any point of sale terminals here. But if you guys ever pull up a camera on the right hand side, if the data is off by an hour or three hours or two hours or something, but the minutes and seconds themselves are right on. Nine times out of 10, it's usually because of the time zone is not set properly on here. But like I said, once this is set, this really should never be changed. Data retention, depending on who's hosting your site, if it is being hosted or if it's a local system, will vary on how far back we can carry data. I know some sites don't care to have data any longer than what their video is. Our I guess rebuttal for that would be even though if you guys only have 10 or 15 or 20 days of video, some properties if we keep video or if we keep data for 3, 4, 6 a year, depending on how much data and stuff like that you get and what your limitations are, you're able to grab statistics and patterns and kind of see the flow throughout the year and stuff like that and be able to catch stuff that way as well too. So data retention, this is done in days. Obviously. Records to remove pass. This is something internal for us. This is basically how many records we go through and clean throughout the database automatically within our system. This really should never be touched or adjusted at all. And then pos specific settings, again depending on what point of sale system you guys are using will depend on these settings and stuff like that. That's something that you just, you're better off just reaching out to support and asking us and we can go into detail depending on what site you guys are using specifically and stuff like that. If any changes are moved, if you guys are changing point of sale systems or making any adjustments to it, this is where we would do that here.
So next up we're going to go through associations. So if we go through associations over here, an association basically is just telling what camera to look at what terminal. So you know, as our system communicates to the DVR system and as we receive and store point of sale system in our databases, we basically need to. When somebody pulls up camera, it's our job to tell them when you pull up camera, 1, 2, 3, we want to display the point of sale data coming from Terminal 456. So if you guys.
Mentioned earlier, if you notice that a terminal has been moved, changed, replaced, whatever the case may be, if you're adding a terminal, if you're adding a camera, vice versa, whatever, it's very important you guys need to get the associations in there. Otherwise when you pull up a camera, you're not going to see the data or you're going to see the wrong data coming from something else. So in here what I selected is we're going to do POS cameras and then we're over here we're going to bring up pos.
So as we go through here, let's say for example we have, let's see here. Let's just pick.
This camera right here. Right? So this is just the standard camera. Say we just added it. And over here we're going to pick up point of sale terminal. To give you a quick reference, if you see the logo with the multiple terminals that are kind of fading in the back and then the single one, this is a profit center or a revenue center and these are single terminals. So the benefit to associating a revenue center is if you have a camera shot that has several terminals that are clean and crisp and clear and you can see each terminal pretty well. You could add a revenue center as an association and what would happen is you would see all the data merged into one point of sale view. It's kind of helpful for some people. I know some people prefer that and it's nice for certain camera angles and stuff like that. I would not recommend doing this if this profit center or this revenue center has 5, 6, 7, 8 terminals associated to it because you won't be able to follow the POS data. There will be way too much coming across to see that. So normally I just tell people and it's just most common to Just associate a single terminal itself.
So what we're going to do here is let's say for example, that this camera here is looking over this terminal. All you do is pretty simply take the logo, whether of the camera or of the terminal and then just drop to associate to whatever camera that you're looking at. It works both ways. So if I took the camera and associated it to the point of sale terminal or the point of sale terminal camera, it associates both ways. And that's it. There's no save button. There's nothing. And you should see the logo for both the camera and the terminal opposite of each other.
If you misassociated something, if something is one terminal off or the camera's not right to drop to delete the same exact concept. As soon as you drop in the trash bin, it'll delete it on both ends. And then you can go on and associate the right camera. Our associations are not limited one to one. So if you have several, let's say you have two or three cameras that have different angles on a point of sale register. What you could do is let's say we want to get more cameras on this. All you have to do is just associate more and more cameras to that one terminal. And then if we were to bring up. Let's see, this is East BK dining two. So if I go to point of sale cameras and if I type in BK, we should see East BK2, what's going to happen is we're going to see the first association that we did. Obviously there's no point of sale terminal here, but if we do items, we'll see. Not that refresh. I should actually. That's a good point. Refresh this really quick. Wrong one.
Bear with me. Sorry.
Did I not associate those East BK dining. Oh, I didn't see the first one. That's why.
Use it for the terminal, not the camera.
That is correct. Wait, no, no, I did that. Right. Hold on one second here. I'm getting myself backwards.
So let's do. We'll do Terminal 160. So I want to associate.
Vice versa. Let's do terminal 160. 16.
So what I'm doing here is I'm associating multiple.
I'm associating multiple terminals to a camera. So if I go over here, I'm going to go to East BK dining and I'll hit it up the other way that I was mentioning earlier too. So if I close out this camera and then I go East BK dining.
And I just. That's two. I Need to get one. I'm all over the place. Here we go.
So as I pull up this camera here, I am still not doing this, right?
There we go.
So what I've done here is I've associated multiple terminals to a single camera. So if you have one camera shot kind of going back to before that can monitor several terminals at the same time, this is where you would do that. And then the exact opposite is if you go back into our associations here, let me just unassociate these really quick.
What we can do is I can pick on several cameras to associate to a single terminal. And all that would do is as you bring up those three cameras.
They'Re all going to show the same exact point of fill data coming from a single terminal. And then within that we also have our sync times option. So let's say for example, I bring up these three cameras here.
Assuming that they're all pointing at the same exact venue from different angles and stuff like that. Some camera shops don't have a good shot of a register or the money or who's giving the money or whatever the case may be. Depending on what kind of architecture and cameras and stuff that you have to work with, you can associate multiple cameras to a single revenue to a terminal revenue center and say I want to have all the other cameras synchronized to whatever time this is. Hitting the sync times button on these other cameras will put them at the same exact point in time in which this camera is sitting here. So you guys can catch the same transaction from multiple angles at the same exact time. As opposed to having to manually go through and punch the time in, pause the camera, play the camera, etc. Etc.
Last thing to note on this portion here for associations, if you guys do end up adding cameras or changing cameras out, it's very important that you guys have your cameras. If you'll see here, each one has our server logo. It's a piece of paper. Basically this represents our cases plug in here. And what this does basically is if you pull up every camera, let's just pull up.
Any of these cameras. I'm going to close these two out.
Under items, you'll see that same piece of paper here. Basically what this represents.
Is the actual cases plugin for our application, which I'll show you how to configure that shortly. So what this means basically is when you go through here and you create a case from this portion, this is going to save it to our cases plugin up here, which is going to save it to an incident. So let's say if you guys have a reoccurring case for an employee, that's shady, it's stealing money however they're doing it. And you have a single case open for that one person. As you open up cases and stuff like that, it's going to save all those clips to the same exact case.
So as we go back over here, if you don't associate same instance, if you don't like going back to the cameras, if you don't associate an export server, it's going to fail as soon as you try to make the export same concept, if you try to create a case, that case plugin is not even going to be there for you to add that to a case to start with. And all you have to do for that is as you have the cameras plug in, change the point of sale over two cases.
And then all you have to do is for every camera you don't see it associated on, you just drag it and drop it to it. If it's already there, it's not going to add another association to it, it's just going to refresh it basically to click not going to hurt anything. But as you add cameras, it's very important you make sure you have this added to every camera in your system.
So moving on from here, next up we're going to cover users.
So under users, pretty straightforward, we're going to have a user list of all the employees that are going to be using the system or application. Pretty straightforward. So using my user as an example.
If we go to you click on the name, you can fill out all this information here if you'd like. We do some sites depending on how your system is configured and stuff like that. We can supply email alerts and text alerts depending on if we can get a mail server set up at your site or using a current mail server at your site and if your system even allows us to communicate with stuff like that, that is an option. So if you put this option, if you put that information in there, whatever their email address is. So if I were to put my email address Zachary WhitneyConnect TV and then hit checkbox, anything that we have set up for the real time alerts where I was showing you guys under the point of sale will be sent as an email to me. So it will come back and it will say E Connect system transaction canceled or void or whatever it is that I'm keeping an eye on from a certain employee or a certain transaction type will show up in my inbox. If I really wanted to Keep tabs on somebody. Same thing for the sms. This is basically like every provider has a different address. So depending on what your provider is, it would be your phone number at VZ Text, if you're using Verizon or something of that sort for that address. And that will reach out to your phone, send you a text message and let you know, hey, same exact concept as email. Somebody ran a transaction, this employee did it. Whatever it is you're trying to keep an eye on with your real time alerts.
Under permissions. This is really the part that most people usually just come straight to. As far as configuring, you're not going to see all these options in here, really. All you'll see is admin and viewer. We can make certain permission groups, which I'll show you how to do here in a moment. For most of your users, a viewer user is going to give you basic access to look at queries, make queries, look at video and create cases, but not delete anything. So this doesn't allow people to go in there and make changes to the system, everything of that sort. And then the exact opposite of that obviously is admin. Admin gives you full permission rights for everything. Basically what you're saying, what I'm doing is what the admin users will be able to do. And the third one you guys will be able to see is service only.
Very rarely does it happen, but once in a while we do come across some sites where they actually see our service user, which are, you know, depending on what services we're providing for you guys, we'll have a different user for it. But most cases it'll say ServicePOS. This is actually a service user for our system itself. All this does is this is actually what parses the point of sale data and sends it to our API within our system. What that means basically is this is a service that listens for point of sale data and then inserts it into our database. If this gets deleted, removed, changed, anything of that sort, it will stop all the point of sale data coming to our system. So the only permissions that this should have if we go here will be service only. And that's all it ever should have. In this case. Nobody has it set, probably because it's a demo system, but.
That'S all the service does. So we always need to make sure this is always in the system and it's never deleted, it's always there. And then to add new users, pretty straightforward, you click on add user, you'll see a fresh template Come over here on the right hand side.
You just put in the name, first name, last name you want. Username has to be at least five characters. You can make it whatever you want as long as it's five characters. So you can make it 1, 2, 3, 4, 5. Make sure you set the right time zone password. The username is not case sensitive, but the passwords are. And then same thing. Password can be whatever you want it to be, at least five characters and you can set it to whatever you want, yada yada yada. And then as you go under you hit save and then you go into permissions and you can select what permission you would like for that user to have.
Going through the permissions builder. Basically what this is here for is if you want to create a very specific set of permissions for a certain user group. Personally I've never had to do this too much, but I know our investigations team has to do this from time to time for certain properties, certain sites for people that want to have. I want them to be able to do this, but not this, and specifically this and not that. We have a ton of options in our system, as you can see. You can kind of go through and it's pretty self explanatory for the most part.
We have a document that's going to be coming out shortly so people can actually look at it. So it will actually give you a rundown, specific detailed notes on what each permission specifically does. But looking at stuff like this, like device add and device remove, those are cameras, we call our cameras devices in our system. So this will be able to let somebody be able to add a device and then remove a device if you wanted that to happen. So if you wanted to go through and make a specific permissions group for whatever, then this is where you would do that.
Next up is logical groups. So this kind of comes back into where Marcus and I were talking about our access controls for our cameras. So with the acl it's specific for cameras and nothing else, and it's only specific to taking away the cameras but not the actual plugin itself. So here is where if you wanted to have somebody outside of surveillance or outside of your department that you don't want them to see, whatever, for whatever reason, this is where you'd be able to basically delete that option when they log in. So it doesn't even exist for them. They don't know anything else. So let's say for example, there's already a group here called POS Data only. And then over here we have domain pos users only under here. Actually, you know what, let's use our, we have a group called Management instead. So looking under here, here's all of our users that we have under management. Let's say for example, we go to Demo 4. What we have right now is when Demo 4 logs in, they're considered under this management group here. Right now it looks like they're not allowed any of the plug ins. So when they log in they're not really able to see anything.
What we do have though is let's make our own group here. So we'll call this group name. We're going to call it.
Let'S call it no Cameras.
So if we go to no Cameras, what we're going to make sure we have this selected. The next thing we're going to do is we're going to select what users are going to be in here, right? So let's say for example, I'm going to pick on Marcus and Paul. So instead of going through the whole list, I'll just select Paul name. So for him it's his first initial last name. And then for Marcus I think it's actually the same thing. M. Kelly, we'll do the same thing again and we're going to assign them to that, right? And then that's all you have to do for that. So you just close this out. So when Marcus and Paul log in, they're automatically going to be added under the Snow Cameras group and then under here.
The plugins that we're going to add to this group. Let's say for example, no cameras is basically just going to be no cameras. So if I add cameras to this list and hit save when they log in, they're not going to see this Cameras tab at all. It will not exist. It's completely gone for them. It's not an option at all. So when they log in, all they'll see is BOK Ratings casino cases. They'll see this one, but the Cameras tab will not show up.
I've used this quite a bit in the past and this is very useful for. I know some surveillance rooms are very closed off and they don't even want to let point of sale or food and beverage people in there.
Some sites like to have those people come in the room because they know exactly what to look for. They know their policies and procedures when it comes to why employees should or shouldn't be doing this, et cetera, et cetera. Or if they want to use the point of sale system, our system, I should say to screen for certain employees or look up something that they can't in their point of sale system. This would negate them from seeing cameras at all since usually they're not allowed to see any surveillance cameras when they log in. You can even take away if we wanted to go a step further and say no cases either. So when they log in all they're going to see is our point of sale tab. That's it. So when they log in they're only going to see point of sale data. No video, no cases, nothing.
So this is just one of those ways of doing that. Within here you can get even more specific and you could say, hey, I only want to allow them to see this point of sale terminal. So all you do is just drag and drop this over there. So when they log in and they can only see the point of sale tab, the only point of sale data they're going to be able to see is any point of sale transactions coming from Revenue Center 155 in this scenario. And then same thing you can do with our point of sale queries. If you only want them to see certain queries, you can also do that down here too. These queries are generated from what we have in our default system or just saved in our system in general.
So and then undoing plugins just as easy, select what plugins you don't want them to have or you want them to have back.
And then same thing, if I don't want Paul in this group anymore and if I don't want Marcus in this group anymore, I can just take them out. And then if I don't want this group anymore for whatever reason, you just hit the minus sign, it will delete them from the system in general.
Lastly, our import portion, nobody's going to use this, but this is basically for our CSV files. So if we want to import users and anything else in that sort to like Masshat, if you have 100 people that want to use the system, if you can put it in CSV format, we can import it here and that will basically just auto add them in a sense to our system and our application here. And if you guys are interested in something like that, this is the format that we have to go by when it comes to our CSVs.
So if this is something you guys are interested in, let us know. We can work with you on getting a CSV set up in this format and then importing it and getting it all configured set up for you.
I think that's just about it. We've covered cameras, point of sale, point of sale, associations, permissions, logical groupings.
I can't think of anything else off the top of my head. Can you guys think of anything?
That's pretty much the basics.
So this is just the basic back end of our system when it comes to us making adjustments to the system, initial configurations, anything of that sort, and then. Yeah. So I guess we're pretty open to questions right now. If anybody has any questions, feel free to. You can type in at the bottom there and I'll be able to answer them for you.
As you guys are thinking of questions or getting ready to log off. Just to let you know, next month our webinar will be on the basics how to use the system. So if you have any new employees coming in, anybody who wants to just understand the basics, that's what we'll cover in June. And then come July and August, we'll build a new template to cover different options. And with that being said, if nobody has any questions for us, I'd like to thank you for your time today. If you do think of something else later on, feel free to email support@supporteconnect tv. Or if anybody in your loss prevention or security or surveillance department has any questions, you can reach Investigations at Investigations at Econnect tv. And with that being said, I'd like to thank everybody for their time and have a good day. Thank you.
Sa.
More from Henry

Skip the line, not the security: Facial Recognition for Guest Experience & Safety




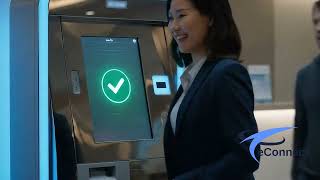
eConnect’s Red Light Green Light – The Most Advanced Facial Recognition Tool for Casino Entry


Skip the line, not the security: Facial Recognition for Guest Experience & Safety