2016 11 08 08 57 eConnect BOH Training
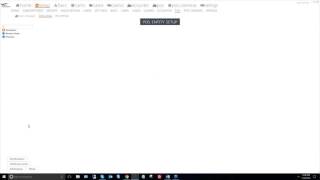
George De Grande and Marcus Kelly walk through eConnect back-of-house setup: how to group cameras and devices, configure POS terminals, set up real-time alerts through Query Manager, manage users and permissions, and control system settings like password policy and session timeout.
Chapters
The broadcast is now starting. All attendees are in listen only mode.
Hello everybody. My name is Marcus Kelly. I'm one of the investigators here. I'm generally the ones who run the webinar. But seeing how today is going to be back of house, I have one of our support reps with us, George De Grande. And with that being said, I'll let him take over this webinar. And if you guys have any questions, please feel free to type in and we'll cover anything that you might have. George, the mic's all yours.
Okay, thanks, Marcus. So, as Marcus said, this webinar will cover the back of House or the support and setup options from within the econnect application. In order to see these, you need to be logged in to the software as an administrator. Once you're in as administrator, you'll see under the setup box, we'll see several different things that I'll cover, like setting up cameras, point of sale settings, case manager associations, user management, subscriptions, and some other system settings. So to get started, I'll start covering the camera setup. A common support request we get in terms of adding cameras, removing cameras, setting up the groups, things like that. So what you do is you go over to your camera options under setup and I'll start with the devices. From here you'll see a list of devices that are currently set up and in the system already. You can go into these devices and manage them from here, or if you were to add a new device, you do so right from this menu here. First thing you'll do is you'll select your device type and this would be the surveillance system you're running on your location. As you'll see a list of integrations that we currently have. And I guess for an example we'll go ahead and add a device. We can add a PELCO device. So you'd select the device type pertinent to your location, click the plus to add it, and then you'd have to type in the device information. Device name would just be the friendly name.
And then all the information for your locations, server address, camera ID number, username, password, time zone, and then export server, which I'll cover next. So to add your device, you need to click to save all and what that does is added our device to our system as you see here. From there you can take that device and you'd want to group it. Sometimes you'll add a device and you may not see it until it's properly grouped. To do so, you click on the next option, which is device Groups and you'll see the list of device groups that we have in our demo system. What we'll do is we'll add a new group for this camera that we just added.
Now we've added a group for webinar. As you can see, no cameras are part of that group. But if we want to go ahead and add the new one we just created, we can add our camera by either searching for it here, adding to selected and now our camera is in the group. Cameras can also be part of multiple groups. So say we want to add this to our webinar group as well as our all cameras group. We can just select the group we want to add it to and go ahead and add selected. Now what this will do is it will allow you to see your camera viewing it. Just refresh the groups here. Now you see our webinar group has been added with our new camera.
Circling back to setup. If this is the camera that you would not want to use, obviously this is a webinar camera or there was an error to remove it. You can simply remove it from our device list, which I'll do here.
We can also go ahead and remove the group right from here.
Now another option from our camera setup is called Access control. By default, all of your users are given access to all cameras in the system as long as they have viewer permission. So if you were to select the user, you'll see that he's permitted to all devices. If there was a camera or a camera group that you didn't want specific end users to view, you can restrict access to those cameras from this menu here. So we want Marcus here not to be able to view any of these C cameras. All we would have to do is select a user and then deny devices. You can select one at a time, or you can hold down control and select multiple cameras and just move them over to denied.
And what that'll do is then imarkets those devices.
Another option you have in here is to set up your export server.
On most installations, export servers is the actual econnect server itself. This is set up for you during installation, but if you ever need to make any changes or make a new export server or want to export outside of the E Connect server, you can add that address here.
What I've done is I've gone ahead and click New Server.
It'll populate an additional export server which I'll then show you how to set up.
So what you do here, you'd give it a server name.
Address, could be a host name or IP address.
And by default we would turn on ssl. So what I've done is I've created a new export server, but as you see, there's no devices assigned to it. So if you were to add a new camera or you were to move your devices to the new export server, you have to select them from here. And you can select them all or one at a time and assign it to your export server.
To remove the device, you simply remove it. And to remove the server altogether, you'd remove it from here.
Okay, so that covers just about everything under the camera section. What I'll show you next is under our Point of sale. This is all under the Setup menu. And now we'll take a look at our point of Sale settings.
These are the point of sale settings that are. These are also set up at installation, but recommend not modifying these without talking to us. We'd be able to assist you with it. Or if you have to make minor changes, they can do so here. Things like selecting your time zone, your data retention. So it'd be how long POS data is stored in the database records per pass. That's the amount of records that our application will purge at a time. And the purge time, we would like to leave that by default. And here you'd enter in your specific settings to your point of sale system. Like I said, DTMX will configure this for you. And any changes need to be made, we'd be happy to assist you with them. Other things you can do under POS is manage your queries. So under Query Manager you'll have a list of all of the SQL queries that have been created in your application. It'll actually show you the query that's being run. So if we were to click on one, you'll see the actual query here.
I guess the most useful feature from here would be to enable real time alerts. This will allow your application to alert you when this event takes place. So if you want to be alerted, we're on discounts. You want to be alerted when these discounts take place. You can enable real time alerts right from the query manager, or you can do it on subscriptions, which I'll show you later. You can also disable and remove queries that have been created by other users in the application. Through here. You also have the ability to make them private to that user.
The last thing you'll see under the POS setup options is your entity setup. This will give you a list of workstations.
Revenue centers and employees that are Populated in the system. These come in automatically. The system IDs, the numbers, the names, these are coming directly from your point of sale system, which cannot be changed. There's one thing you can do in here. You can change the friendly name or the familiar name of these terminals. If you click on it, you'll see an option here. The system ID is hard coded, but the familiar name you do have the ability to modify from within E Connect. We'd recommend doing this within your point of sale system to keep everything in line, but except some sites like to give them their own names. You can do this right from here. Change the name, click Save, and when you view that terminal in our application, you'll have the familiar name that you created.
Okay, so moving along, the next thing I'll show you is how to manage your case manager from within setup. This is another feature that we would set up initially at Setup, but if you want to make any changes, add a new case manager or need support, you can manage it from here. So to create the case manager, you can go ahead and add it. This creates a new server, and like our export server, the case manager will also typically exist on the E Connect server on most of our installations. To edit you, simply give it a name IP address. We recommend enabling SSL.
And enabling the server. We've now created a new case manager server which can be assigned to all your cameras under the Associations menu, which I'll show you next. But for this one we're just going to remove it.
Other things you can do here from within your case manager is create incident types. As you see, we have some incident types already in the system. As you're creating cases and using new connects, you may have locations, types of events or incidents that you're tracking. And this will allow you to categorize them and view them by category from within the case manager. To manage your types, you can just click on them here. Want to make any name changes, remove or to add a type, you can create a new incident type.
Add it to our type of incident, and then as you create cases, you'll be able to categorize them from the type you've created.
So we'll go ahead and remove that and that's really all you'll see under the Cases menu and setup. Next thing I'll show you is under the associations.
Here is where you'll kind of tie everything together. You'll be able to tie in your cameras to your point of sale, to your casino devices, all from within the associations menu. So to do so, you'd select the two plugins that you're going to be associating. So we'll associate our POS cameras.
To our POS terminals.
And to do so you simply drag and drop the cameras to terminals. So you can find a terminal by searching for it here, or find a camera, excuse me, by searching for it here and then find the corresponding terminal. So maybe we'll search for Starbucks and you'll see all the cameras at Starbucks will pop up here. Looks like East Starbucks Dining doesn't have a terminal associated to it, so I'll show you how to do one. So we'll say, for example, Terminal 13 is the one we're going to be associating with East Starbucks. What you can do is simply drag and drop to the terminal to associate it, and that'll save automatically. Once it's associated, you can then view it alongside the video from within the application. The other item you see associated is the case manager, and this should be associated to all of your cameras, which will allow you to create a case. To do so here, you simply click on cases and then the same procedure we did, which was drag and drop to the camera. If you wanted to remove an association, you simply take the terminal drop to delete, and now that's no longer associated with that camera.
Okay, next section of our setup options, which I'll take you through, is the user management. This is all done under Setup and then Users.
Here you'll see a whole list of users that have been created in your system already. To create a new user, you simply add the user clicking this button here. Then you can enter in their pertinent information.
The really only required item is the username, but you can enter in first name, last name. For alerts, you would want to add the email address and SMS address. For text alerts.
We'Ll call this.
User.
Username. Just to have a five character minimum. But this could be anything. A combination of numbers, letters along with the password, which I'll show you how to create the password settings, but by default it is a five character.
To create the user, simply type in the information. Click Save. Now our test user has been created. Next thing you want to do after creating a user is to assign it permissions.
Click on permissions. You'll see that once they load, this user has no permissions installed. There's several permission groups you'll see in our system, but the ones that you'll typically be using is Viewer. Viewers are default permission that we would set up all of your operators in the system which allow them to view everything, but not the setup options that you'd see under admin, which we have here.
Now that our user is created, you have the option to create either module groups with this user.
Edit their subscription, change their mail settings. Everything from within the user menu here can be done through here as well. Next thing I'll cover is logical groups. Now these are similar to what we did with Access Control, which allows us to to limit the number of cameras you can see. Logical groups allow you to actually limit sections of the application that a user can view. So say we wanted to create a group for our new user and we only wanted this user to view point of sale data and no access to cameras. What we can do is we can create our group.
Call it.
Now we've created a logical group and we only want to allow people in this group to see POS statistics. This is something we've set up. For example, maybe some locations have just the food and beverage managers that want to get in and view that point of sale data, but they're not permitted to view cameras. You can actually set up a group for them which will allow them only to view the POS plugins. Add those users to the group. We simply select the user. We'll use our test user, add them to the group here.
And now when they log in, they'll only be able to see point of sale, and that's done through this log of group management.
To remove the group, you can simply select it and then remove it.
Next thing I'll show you in here is the Permissions Builder. This is something that's commonly not touched. Usually our default permissions are what most users have. But if you wanted to create a custom group for users that allow certain functionality in the application, or add functionality to a permission group, you can do so here. I'm not really going to mess around too much with this section right now. It's something our support staff can help you with if you have questions. But to add a permission, you can just drag and drop the permission to that group that you want to add it to. I can see all the different permission groups here. So simply drag and drop. Let it go. But I'm not actually going to change these right now. Last option you see under Users is the batch import. You can add the users one by one like I showed you, or you can import them through this import tool here. This is done through CSV. It's this format something we can also help you with. But if you wanted to do it yourself, you'd create your CSV File, copy and paste it in here and this will actually add all of your users action port to this process here.
Last thing in the users to delete the user you simply select it which I'll go down to our test user and remove them from the software here.
Okay, next thing I'll show you under setup is subscriptions. And subscriptions are a way to manage all of the alerts that your users are getting from within E Connect.
Say we wanted to create an alert or a user request that you help them. With the alerts you can click on the source which would be what you want it to be alerted on. So for this example we'll use our point of sale.
Here. You can select your user, I'll select myself and we can manage subscriptions by adding them. You click add. Maybe I want to be alerted anytime a no sale takes place. If I click no sale I'll be allowed to select the event. Maybe I only want to see no sales at the various Starbucks locations here. I can select them here.
Save subscriptions now. I'm now subscribed to these alerts. Now without email alerts or text alerts, these subscriptions and these notifications will pop up from within Econnect while you're logged in. If you were to go under your mail settings and configure your mail server, which I'll go to here, these alerts can be emailed to you. This would be using a mail server on your property or your location to allow those messages to go out to the users. Jumping back to subscriptions to remove any from a user, simply remove them from the list here.
Hey George, can I step in real quick?
Go ahead.
One thing to keep in mind, I know some of our customers are casino based and you do work off of your surveillance side. If your econnect software cannot reach out to the web, these alerts will not be able to be sent out. It's just something to keep in mind. I know some of our locations do work on a closed network. I just wanted to add that in.
Yes, definitely that is correct. The alerts will go out from the E Connect server and like Marcus said, that E Connect server does need access to that mail server whether it's on the web or locally. It would need to use that server to send those alerts out. So that would be needed for that feature to work as intended. Like I said, without that the alerts do pop up within the E Connect application itself.
Okay, so jumping back to those alerts which were under settings here, you also have a few other options you can manage from here as well. You'll be able to modify your password settings which could enforce the password policy, which by default it is enabled but if you wanted to remove it you can remove it here. You can change the password length complexity block out password days to expire can be managed through here. And lastly you have a few other options in the system. This will allow the application to timeout say users leaves it logged in. It'll close automatically under this duration and you can also add some branding and a few other options here.
And that really covers everything under the setup within the Econnect ui. If there's any questions, feel free to type them in now and I'll be happy to answer them for you.
And Marcus, if you have anything else to add, feel free. But that really does cover the setup options.
No?
I just want to thank you George for your time of going through Back of House. Like I've always said, we try to keep these short and brief. If you do have any questions, you could reach support at SupportConnect TV. And then if any of your investigators have any questions on the front of the house or how to go through anything, you can reach out to the investigations team at at Investigations at econnect tv.
Well, I see that we don't have any questions, so once again I'd like to thank everybody for their time and hope you guys have a good day. Thank you.
More from Henry

Skip the line, not the security: Facial Recognition for Guest Experience & Safety



eConnect’s Red Light Green Light – The Most Advanced Facial Recognition Tool for Casino Entry



Skip the line, not the security: Facial Recognition for Guest Experience & Safety