eConnect Webinar Support 11 10 15
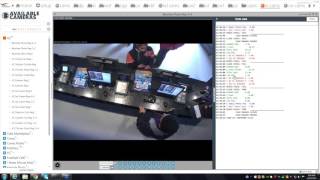
Brandon walks through setting up eConnect: creating users and permission groups, configuring cameras and DVR/NVR servers, organizing them into folders, and linking cameras to point-of-sale systems like Micros and Infogen for synchronized review and export.
Questions this video answers
Typically 90 days and 1,000.
Chapters
Sa.
Foreign.
The broadcast is now starting. All attendees are in listen only mode.
Hey guys, this is Brandon over at E Connect. We're going to go ahead and just give it one more minute and see if anybody else joins us and then we'll go ahead and get started.
All right, Good morning guys. We'll go ahead and get started. It looks like we got a little input from everybody and they kind of want to cover a little bit of everything from user setup, camera configuration to point of sale configuration. So let's go ahead and start with user setup. So what we'll do is we'll go ahead and go over here to setup and then we'd go over to the second drop down line below to users and then user list.
Now your current users are going to go ahead and populate here in this whole field right here. If you want to, let's say edit a user or check on a user, or reset a password, anything like that, this is where you're going to go. You're going to go ahead and highlight the username and you're going to go to the right here and you're going to have the information for that user. It's up to you how detailed you want to get in filling this out. It's always good. Especially if you're going to have a lot of users like this property does here. You're going to want to get as detailed as possible as far as email addresses, first and last name, contact number and whatnot.
Under the default time zone you're going to want to go ahead and select wherever you guys are because that's going to go ahead and set the time zone for that user when they log into the application. Also as you move down, you don't really have to be concerned about this. If you guys want to go ahead and have things set up in 24 hour time format, go ahead and select this checkbox as well. I know a lot of people in the surveillance world like to utilize the 24 hour time zone. So moving down there, you won't see a password population within here. But this is where you're going to go if you want to like say reset a password, change somebody's password for any reason, or if they forgot their password, you'll just go ahead and retype it and then retype it in the retype and then you're going to push save. That will effectively change their password from that point forward and then that will be their new password. If you go to permissions.
That'S going to go ahead and take you over to view the permissions that are installed for that current user.
This is where you're going to go ahead and give certain users access or take away certain access to certain users. These are pre built. We can.
You know, we can edit those pre built users. We can create new ones completely based upon what you guys want to utilize at your property. This person is only a viewer. Okay. So if you want to give admin access to somebody, you can as well.
Sorry, hold on one second. Okay, and then we can. The best way to do this, if you want to say, okay, I want to go ahead and make this person an admin of the system. Now all you do is highlight and you move the directional aerials for that permission to be sent over to the other side. If you want to take away that admin privilege, you just highlight that and bring that back over. Pretty straightforward. They made it real simple. If we want to dig into as far as editing the permission groups, what we'd want to do is we'll go ahead and go over here, we go to permissions and right here is those pre existing permissions that you guys saw on that last screen. And within those pre existing permissions we'll have the individual permissions that we can take away or we can add from our selected permissions builder over here on the right hand side.
And it's completely up to you. We do create default permissions for everybody's property. Everybody gets a viewer, a service only and that is only used for the application that's not going to be used for specific users. So don't worry about the service. Only one. We can go over that here in a minute though. Sysadmin. That's definitely one that you're going to want to be careful with as far as who you have a system admin assigned to. That's typically something that we really only use for the E Connect support login for when we go ahead and we need to support you guys or if we need to make configuration changes during updates or anything like that, that gives us complete access to everything and to alter configuration. So you want to be careful with that one. That's definitely not one that you want to give people.
Everyday access to.
So with that in mind, we also have an admin up here that's typically going to be like power users. People are going to set up the system for people and again you can add and take away permissions for any of these specific user groups that are pre made. As you can see here, you got user details, remove user details, update permissions modified, which is what I'm doing right now. I'm modifying permissions, user permissions, associate user and so on. You can go through here and again you can take away. All you have to do is click on the little X and that'll take away the permission. Now if you want to actually add one of these over here to one of the specific permission groups, all you have to do is left click, hold down your left click, drag it over and drop it into that actual specific user you'd like to add that permission to.
Again, it's pretty user friendly. It's a nice feature, especially if you want to control access. You don't typically want a bunch of people in the econnect application changing configurations, adding things, removing things. So that's really going to be based on your property and who you want to have permissions and who you want to limit permissions to. And that's something that we'll always be available to help you guys with. Even if you give us a call on our, our support line as well as our support email, which is just support Econnect TV. I'm sorry, SupportConnect TV. We could be reached there as well if you want to go in further detail or if you want to figure out how to make a specific user group for your property.
With that said, if we go ahead and go back over. I'm sorry, real quick, before we leave this screen, I just wanted to show you here, down at the bottom left is if you do in fact want to add a separate user group, you're going to want to go down here, you're going to type the name of that group, add. Okay and then you can start after you add that into the field, then you can start adding your permissions into that new user group that you've created.
So like I said, it's pretty straightforward here. You can give us a call if you want to kind of have specific help in setting up user groups for your property, which we have no problem doing there for you.
One second. And then you guys probably have noticed since we're over here, I want to go over this too.
See where theirs are here. So you probably have seen.
A service user and you guys.
User list. That's something that we specifically set up for the application to utilize. And that's something that we can't have deleted, we cannot have altered. That just needs to stay there. Typically we'll put in do not delete in here. Just so you guys are aware that that cannot be deleted. That is something that the system relies on. So if you see something that says do not delete service user, go ahead and leave it be.
Again, it's just something that the application actually uses itself to go ahead and function with the system.
So with that said, that's pretty much straightforward on that. If you guys want to go into even more detail, we can do that as well with logical groups and.
What that enables us to do. For instance, if you want to create a group up here.
You can create a group, call it whatever you guys need to call it at your property, you can add users to that group, okay? And then within that user group or that group that you've created, you can give access to certain plugins and then you can add within those plugins what you can add to that group. Whether you want this group to be permitted to see.
You know this revenue center, you drag, you're going to drag and drop over here to the permitted entities.
And so forth. And if you want to delete them, you just can drag them back and you can move those to the permitted ones. This is really a little going into a little more detail as far as what the users and the user group setups. But if you want to just reach out to us and we can help you guys locally, I don't want to necessarily keep everybody on this screen if they don't necessarily want to go into this far of a detail in setting up the user groups and logical groups. That's something you could reach out to us and we'll be more than happy to assist you with.
So as far as users, that's how that's set up. And then if you want to delete a user, you just highlight, I think my screen. I don't think you guys can see the bottom, but there's a delete button and you can remove a user that way or you can push the.
Minus button to the right here, and that will remove the user from the list. So that's pretty much the gist of the user groups and the user list. How to use, add a user, how to remove a user. If you want more detail as far as your specific site and how to set that up, just reach out to us. We'll be more than happy to help you out on that as far as setting up the users, removing users and users group if needed. So with that said, I'm going to go ahead and move from as far as covering the user groups and we're going to go ahead and go to camera configuration. So same thing here. Any changes that you make in the system, you're going to automatically go from your home screen, you're going to go to setup. So after you go to setup, you're going to go to your camera group.
Okay. And then you go to your camera. And just so you guys know, these are multiple groups up here. A lot of your sites you might not have this many groups. Typically on sites you'll see.
One camera group, you'll see one point or so group and one cases group. On this location, there's just, as you can see, there's a lot of different camera groups, a lot of different locations that are tied into this group.
So let's go over here. One, this one. Perfect. And then you're going to want to select again, you're going to want to select your camera groups. And then after you select your camera group, you're going to go down below and you're going to go to devices.
So when you go to devices, you're going to see here you're going to see a whole camera list. These are cameras that are for this specific group, which is kicams. And then when you select a camera, you're going to go ahead and highlight it. And to the right you're going to see a field populate. Now this is a thumbnail and that kind of gives you just a brief highlight of what that camera is covering. It's really helpful when we're setting up a camera or if you guys are setting up a camera on site that you can make sure that you have the right camera. So underneath here, this name here is what you're going to see populate over to the left.
It's really good. And we notice that we go into some properties, systems. The best thing to have is to have consistency with your naming scheme inside e connect the same as you have on your surveillance system. So then there's no confusion, you guys are calling the camera the same name. You know, you're not guessing. Or if we need to jump in and help you guys, you know, there's no guessing of like, oh, do we have the right camera? You know, there's no confusion on that end. But again, it's completely up to you guys because the system is completely customizable, so.
The description isn't necessary. That's completely just another customizable field that we offer for you guys. So you guys, if you want to say like, you know, description, you know, of course you have your name and camera up here, but if you want to go into further detail, that's where you're going to want to go ahead and Add that.
Down here is you're going to be your server address, okay? That's going to be your SM address.
Wherever it may be. You might have multiple ones, you might just have one depending on your particular site. And then this site has exacqvision. So don't be thrown off if these settings are a little different than your specific site. The idea is still the same. And we can add other cameras, different types of cameras, but for exacqvision, they require to be able to access the system, the system manager IP address, the server port, and that's how it identifies the camera. When the application reaches out to the actual server itself, the username and password that was created for the E Connect application to access the camera.
And then this one also has a channel number. So again, this is specific to ExacqVision. Other locations like Hikvision, that might have Hikvision, Pelco.
Milestone, whatever it may be, they have their specific settings for their system and this is the same area that you'll put them into. And then below here you're going to want to make sure that you select the proper time zone. That could very well throw off the time. And again, it's just going to lead to confusions for people that are utilizing.
Below is an actual export is the export server. Now we create an export server in the configurations when we actually set up the system for you guys at the beginning, the export server is what the system utilizes when the analyst investigators, whoever it may be using the system needs to export a video, make a case case, utilize that clip that they've downloaded.
Hold on one second.
Utilize that clip, that information that they needed to pull off. So that's where all this takes place as far as the configuration of it goes.
So as you can see, I can scroll down here, you'll see the configuration change a little bit between the cameras. For instance, just to give you guys an idea of.
How it reaches out to that SM or whatever system manager you guys have on site. You can see the server address changed when I went from this camera to this camera. That means obviously that camera is being pulled from a separate server. And just to give you guys a better idea of how that's being handled behind the scenes from the settings. Okay. And again, I'll just run through here. You can see that change.
Okay. Again, they tried to make it, you know, as simple as possible. If you guys have something going on on your site again, please feel free to reach out to support. And then also we'll go over here on adding a specific camera type. Okay? So let's say you guys have a Bosch device. Obviously you're going to select Bosch.
And so on and so on.
For instance, I'll just add a Pelco device. So I'm going to select the device and I'm going to push on the plus button and then it's going to populate the new device that I want to add. Obviously they don't have Pelco there, but again, this is just an example to show you the difference. You know, it doesn't matter which type of DVR you have on site. You know, the whole configuration and setup is going to be the same process. So again, you're going to get the sm, you're going to get the logical camera number, username and password. That's what Pelco's system requires. As you can see, it's a little different than what the exacqvision requires, but same idea, same principle. So I'm going to want to configure all of this. Select my device name and then I'm going to select the time and then I'm going to select the export server so that whenever anybody's in the system and they need to make an export, they're able to do that. So refresh this. And I'm just going to go down here and delete a camera. Yes, I would like to delete that.
So pretty simplistic, you know, save all, delete anytime you make any changes. Just make sure you go down here because that happens quite a bit. Somebody will make a change and not quite sure why it didn't take place. It's just a simple thing of pushing the save all button. Then we also have delete and refresh. Good thing. Even if you want to go in here and check some things on the camera again, if you guys change your sm.
Move over to a different system. This is really a great place to understand how that works. So with that said, we'll move over to the next section which would be device groups. Now the way this works is, for instance, we'll take it up here one step, we'll go to KI camps. Okay, if you look over here to the left, you'll see these groups. Okay. This is just another form of customizing it and.
Really making it useful to your property. So you go over here and you have. This is separated by little storefronts. Depending on your property, you can do what you want. It's always a good one to have like say if you want a folder that says all cams, you can have all your cameras in that. If you have a lot of cameras. It might not be the best solution, but our customers range from anywhere from 10 cameras to over 1,000 cameras. So it's really customizable, depending on what you guys want to use it for. So you can create your folders. Just a way to organize it. So everything that's at Coke Marketplace, we'll put those cameras in that folder.
And so on. There's only one camera at Freestyle Cafe, but for organizational purposes, this is the best way to do it. And then if you add a camera at one of the locations, after you add it to the E Connect application, you can go ahead and just add it to that specific folder as well. So we'll go back over to the setting up of that process. So we're back over at Device Groups.
So then we see all of our same folders here. Okay. These are all the folders that we've created so that when we go back over here to our screen, visually it's going to be easier and it's going to be organized to be able to find those cameras. So if we go and we select on one of those folders, you'll see those two cameras populate again.
The way this is done is this is all the cameras that are available that have been added into the system. Okay. So if we want to start organizing things, we're going to go ahead and we're going to create a folder called Coke Marketplace. I'm going to create that folder and then I'm going to find the cameras that I've created.
They're not going to populate over here now because they're brought over. But for instance.
If I go down, I'm sorry, up to az, you'll see all the azs have been dragged and dropped over here. I'll go ahead and just make a test one for you guys.
So I have one now called Test. I want to go ahead and put, you know, all sweet spot cameras. Oops, sorry. I want to put all sweet spot cameras into that folder. So I'm going to highlight test and then I'm going to. Sorry.
I'm going to go ahead and highlight those. Then I'm going to put add selected. So now those are in my Test folder. So if you see, if I go up, you can see what's in each individual test folder. So if I go back over to my main ki cams, I now have a new group called Tests. And if I drop that down now, all those cameras that I've added to that.
All right, well, I guess this is a Good camera shot. So.
With that being said, you'll see my test camera folder and all the sweet spot cameras that I had added are now in that folder. So I can go ahead and close that folder. I can open that folder. But as you can see, if you guys are familiar as well, the little plus button over here to the right after you make that folder is going to go ahead and open. If you click on that, that's going to open all the cameras at one time.
As you can see right now, they're not open at this point. They're closed today. So there's nothing going on on the cameras. But you can see it opened all the actual cameras that I have selected for this group and it looks like they might have a camera offline here that they're going to have to fix that one. But you guys can see the actual use of this when you make your folders. Now, if I want to close all those cameras at once, I'm going to go over here to the right, I'm going to go ahead and select the little X down at the bottom.
And it's going to close them all out. If I want to individually open them up, I'm just going to select the plus button to the left of the camera and it's going to open that one camera.
So that's how you go about setting up the groups, adding a camera, setting up the groups, and then selecting what you want in that folder. So it's visually organized and easily used. So let's say, okay, I made that test folder. I don't want that selection together anymore. In that folder, it's going to remove the folder. It's not going to remove the cameras though. Okay, so you'll still see your cameras in this selection.
So now as far as that goes, if we go over to Access Control.
We can actually select from here as well. It's more customizable settings and configurations. We can go over here, we can select a user and we can say, this user doesn't really need to see these cameras. So we can select out of those cameras. Say this user doesn't need to see this device. So I can select that.
And.
Hold on one second.
Okay, so, well, bear with me here. I'm going to have to find out why in this specific demo setup why that is not functioning as it should be. But at your sites it should be working the way it's intended. As far as being able to select a camera device and say, this user, you know, we don't want this user to be able to access these cameras. So they would be. Those cameras would be under the denied devices uses or denied devices for that specific user. So.
Again, it's just more of that customizable configuration setting up everything else for you guys, just so it's a little easier.
Just to get that really customized over here. You know, this isn't really something that we want you to necessarily change.
This is just to show you guys, this is where we select that export server within the camera configurations. With that being said, you select that export server. This is how the cameras actually know that this is where the actual camera in that case is going to be exported to. Again, this is not something that we really.
Suggest being changed or configured differently in any way. If something was going to be changed per se in this avenue, we'd like you guys to go ahead and reach out to us. But I did just want to kind of give you a quick show of that section.
As far as that goes. Is there any questions on the user setup and camera configurations at this point?
Okay, so what we'll do is we'll go ahead and go into point of sale configuration and then we'll go over a little bit of associations as well, because that really ties in. The whole thing gets tied in with the association. So as far as point of sale configuration setup goes.
Really once it's set up with your specific point of sale.
Whether it be micros Infogen, a version of micros, like Symphony 1, Symphony 2, whatever it may be, or whether it's another one, those are just the three biggest ones that you know, we've came across.
You go to setup and then we'll be able to go to.
For instance, we'll go over this. Is this user groups, one of them point of sale setups. So we'll go over here and we'll go to point of sale settings. Okay, now the way that Micros works, we pre configure and we have a configuration file on the server. I can briefly show you that it's not something that we really want to have altered or changed. But with Micros we just receive a VSS feed to our specific server. So most of the changes are most of the configuration and most of the.
Settings that need to be implemented are really done on the microserver itself. So the only thing you really want to worry about in here is our time settings.
Data retention. That's going to be specific per site. Typically it is 90 days and 1,000.
We have that written down there just so you can kind of see the default. And then the point of Sale specific settings are based on your property. Again, so right here, these are the specific ones that are available on this setup and you just select that. Now each one's going to have a little different. With infogen, we need more information as far as communicating. That's a completely different setup. I won't go into specifics here because I'm not quite sure what's individually at your specific locations. So I don't want to necessarily go in depth into that. But again, if you guys need assistance with anything, go ahead and reach out to us here at Support. Again, it's SupportConnect TV and we'll be available to help you out if you need to go. Specific details if your point of sales settings have been messed up in some way or need to be reconfigured or you're switching over from, you know, say infogen to Micros or vice versa or whatever it may be. And we can help you with that.
Entity setup. It's really not something that anybody really needs to go into.
The way our system works is once we start receiving point of sale data from whether it be infogen, Micros, again, whatever it may be.
We get all of the terminal information, revenue centers and everything else. And then that gets stored on the SQL database on the actual econnect server or if you guys host your own SQL, it'll be stored on there.
Well, the names and everything gets sent to us from the system. And unless you guys want to alter those names, I wouldn't recommend it. I would stick with what the actual point of sale system is actually being sent to us. But again, if you guys want to go more into detail with that specific naming them. Again, the whole thing about the customization is it's great and you guys want to utilize that customization, but you want to make sure at the same time as for instance, your camera names, be specific and.
Stay with the same naming scheme that you guys already have in your surveillance departments.
Just so it really bridges that gap and people can jump into one system to the next system and understand it. Same thing with the point of sale. Those names are provided from the actual, say the microserver or the infogen server that's actually provided and given to us. We don't create those ourselves. There are, you know, we can change names if you want to, but again, I would stick with what you have as far as what's being provided from a point of sale setting to us.
So that's with the point of sale.
As far as when we start getting the connection from whatever Your point of sale server you guys have on property, that data just starts getting sent to us and the only thing that we do with that data is again, we'll parse it in our SQL database on the econnect server, or if you have a hosted SQL database, we'll access it that way.
So once we have the cameras and the association, or, I'm sorry, the point of sale data flowing in and we have all that information available to us, we can go over here and go to setup, go down to associations.
And then we want to go ahead and select. Let's see here.
We'Ll go ahead and select the one that we were working with already. We'll go with KI cams and then we'll go ahead and.
Select ki. And this is going to be. Hold on one second.
All right, perfect. So what this does is again, this is just the application that's been created here for you guys. Just trying to make it easier for the association and the understanding of how things get put together. Over here, we've selected KI cams and this is going to show you, it's going to come up with all the cameras that we have available under that user group. It does take a little bit sometimes for, if you have quite a few cameras for all those thumbnails to load.
But under here it's going to show you what is actually associated with that camera. Again, we're always going to want to have a case server associated. That's something specific that we'll always want to have. The way that we make sure we can do that as well is.
Go over here to cases and you can associate this drag and drop, associate a case with it. And again, that's going to be utilized for whoever may be the end user that's going to want to create a case. Create a. Hold on one second. I got all these thumbnails loading here. Slowing things down here for me for a second.
But you know, again, it's for that end user that is going to make the clips, is going to make a case file. And.
So you're going to want to make sure that a case is associated with each one.
Okay.
Yeah, all the thumbnails are getting loaded. Yeah.
All right.
Sa.
All right, guys. Perfect. Okay, so it took a second for those, you know, those thumbnails to populate depending on the cameras. And this is.
One of the demo systems we're using. So again, as far as the case association, make sure that there is a case associated with each other. Each of the cameras. That's going to be how they're going to export. So.
For instance, we'll go back over here to the Point of sale. So the way this is done is when the Point of Sale server is set up, it's going to send us all of those terminals. We're going to store that information for those terminals. And these names are what?
Okay, all right, sorry, I don't know if we lost the screen there for a second. So in this association list, again, you have your camera selected. We have our cases associated with those cameras. So.
Under the Point of Sale plugin, when I select that specific one and this one's been named ki, okay, yours might be named pos, whatever it may be, but again, it's all the same. And this is sent to us from your actual server. So when we do initial setups, or sometimes when things get changed around, like here in support, we'll ask you, can we get an association list of the terminals to the cameras? And this is where kind of that naming scheme comes into play. And that's why we kind of need to stick with what you guys have from those systems. Because at this point, this is where we're going to go ahead and we're going to take, say, a point of sale terminal. We're going to associate it to a specific camera. As you can see over here to the left, the camera here actually has, let's see here, 1, 2 terminals associated with that camera. And you can, if that camera shot has, you know, three or four terminals, you know, within its reach, you know, there's no issue with associating, you know, all those terminals that it can see in that association.
So with that being said, if I wanted to, for instance, drag and drop, say, terminal 2017 to this camera, I'm going to drag and drop that. And now this camera is associated with this terminal. So say, oh, I made a mistake. I don't necessarily want that, you know, terminal associated with that camera, well, then I'll just take it over here and I'll throw it in the trash can and it deletes the association. So then that's no longer associated with that specific camera. So if I roll down here, I can see this. Now, this site has quite a few Point of sale and camera. So let's see, Terminal 2065. For the sake of not having to scroll through everything, I can go over here and I'll be like, you know what? I'm looking for Terminal 2065. It's a nice feature, especially if you have a lot of terminals to sift through and you don't Want to sit there and scroll and be looking, you just go ahead and plug in your.
Point of sale terminal. What you're looking for now, same thing goes over here. Let's see here. I want to look up.
What is this one? Banshee. You know, it already starts, you know, populating whatever's close to it. So I don't even necessarily have to finish the whole name. But anything that has the name Banshee in it now is going to populate under there. So. So now this really makes it a lot quicker, more convenient and efficient so that I can go through my associations a lot, a lot quicker.
And if you want to just back up and you know, I'm done looking at Banshee. There you go. Remove the name and you have all your cameras available for association. Same thing with your point of sale over here.
So let's take one that we are familiar with here. If we go back, I'll show you our examples. We go back to ki.
Okay, hold on one second guys. Since they're not open today, we are going to go ahead and select a day that they were open on.
Okay.
Perfect. So as you can see.
Now we have our camera. And over here to the right you're going to see this is term 2066. Now that association took place back in the settings where we just were. So that is where you're going to see the data start to come through associated with this camera. Now if we associated multiple point of sale terminals, you know, if you want to see your association with your, excuse me, with your case server. So over here to the right now just. If I did that too quick there, over here to the right, you'll see items and you select items and you're going to go ahead and see each of the terminals that have been associated with that specific camera. We can switch in between. As you can see, that terminal is not being utilized in this shot right now. So no data is going to be present. So over here, this one was used just recently. See here? Yeah, about 14 minutes ago. So it's still going to present that data that was being done there. I'll click on that just to kind of show you guys that running through there.
And again, this is more of a front end user feature. But if you guys didn't know, that's a good way that we can check things out as well. If you actually click on one of the links, these are linked here so you can go back to that point in time. You can kind of see what's going on. And this kind of Helps us understand too if there's any issue as far as any time sync goes, any things off from the point of sale transaction versus the camera settings, you'll be able to see that by seeing when these transactions are taking place versus your time of your camera up here. And that's. And if you guys are familiar with our system, you guys will know that's really important. As far as having the econnect server and the whether it be a DVR or system manager synced on the same NTP or synced from one another, it's a biggie. So with that being said again over here, back to this section, you're going to see your associations, you'll be able to jump back and forth. And over here, this is the case that's been a case server that's been associated with this case. So if we want to jump back and forth in between these items that we're able and available to use, you'll see that. And this is where the end user is going to go ahead and create, you know, their case and export. They'll be able to select their time that they want to export. So.
Yeah, again that's the terminal associations. With that being said, is there any other specific questions that anybody has that they would like answered here that we didn't cover necessarily, or any other back end features that you guys are not familiar with or need a little more input on?
Okay. Okay, perfect.
Okay, well what we'll do is if anybody has any other questions or any other things they need to go in further detail on your specific location, just go ahead and reach out to us. Again, our email for support is.
SupportConnect TV and just give us a call if you need help with anything. Thank you.
More from Henry

Skip the line, not the security: Facial Recognition for Guest Experience & Safety




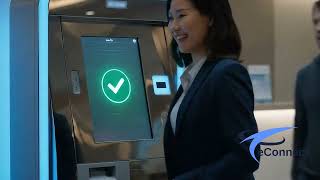
eConnect’s Red Light Green Light – The Most Advanced Facial Recognition Tool for Casino Entry


Skip the line, not the security: Facial Recognition for Guest Experience & Safety