How To Build Muscle At Home: The BEST Full Body Home Workout For Growth
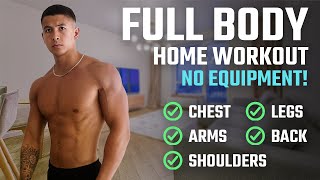
Jeremy Ethier presents a science-based full-body home workout to preserve and build muscle when gym access is limited. He emphasizes two central principles: push each set to near failure, and ensure resistance is not too light (roughly ≥30–40% of 1RM, which he converts to ~30–40 reps per set as a practical cutoff). He provides detailed exercise demonstrations and progressions using minimal equipment (bed sheets, backpack, chairs, platform), recommendation of four sets for push-ups, rest periods (roughly 2 minutes between sets; 30–45s between superset exercises), superset structure for time efficiency, and a recommended frequency of 3–4 workouts per week. A free PDF of the program is offered via builtwithscience.com/forward/homeworkoutPDF.
Alright guys. So as many of you in my programs already know from my announcement earlier last week, in light of all the coronavirus commotion outbreaks in this world, I thought it'd be a great idea for me to make a science based full body home workout routine that you can resort to in the event that you're either staying away from the gym or the gyms in your area are currently closed due to the outbreak. Now, typically when we think of home workouts where you're more or less limited to just using your body weight, we automatically assume that they're inferior for muscle growth when compared to working out at a gym where you have access to heavy weights. And I'm not going to lie, for most homebody weight workouts out there, this is true, and they are in fact inferior for growth. But this is simply because they aren't designed properly. Because research has time and time again shown that in both untrained and trained individuals, you can make comparable gains in muscle mass by using either lighter loads with your body weight, for example, or or heavier weights in the gym. But the catch is that there's a couple key points that people overlook when it comes to home workouts, which are key to ensuring that you're still able to maximize your growth despite being limited to just your body weight. These key points are essential that you incorporate into the routine I'll be showing you today and are as follows. First off, and arguably most important, is that you need to push to near failure for every single set that you perform in this workout. This is because research has shown that when using lighter loads, if you stop well short of failure during your sets, then you'll fail to fully activate all the motor units within your muscles and as a result, you won't experience the same amount of growth that you would when using heavy weights. Therefore, during each set of this workout, you want to push until you generally just have a couple reps left in the tank before you would not be able to perform another rep with good form due to muscle fatigue. Now this will be very uncomfortable to do given that we'll be working with a higher rep range, but it's essential that you push through if you truly want to maximize your growth with this routine. Secondly, although research has shown that working with higher reps and lighter loads, like with your body weight for example, can lead to comparable growth as heavier weights in the gym, it seems that there is a low end cutoff to this where if you train with loads or use a resistance that is too light, then you won't be able to maximize growth, which seems to be right around 30 to 40% of your one rep max, meaning that during each of your sets you need to be working with a weight or resistance that is at least 30, 30 to 40% of your one rep max if you want to maximize growth. Now, although this is easier to calculate when using weights, since we're just using our body weight in this workout, we want to convert this to reps. So 30 to 40% of your one rep max equates to around 30 to 40 reps per set. And what this means is that if you're doing one of the exercises in the work that I'll show you today and you're able to perform more than 30 or 40 reps on it during each set when pushing to near failure, then then it's an indication that you aren't using a resistance or variation that's difficult enough and you want to instead use one of the progressions that'll show you to make the movement more demanding. So ideally, you should not be reaching over 30 to 40 reps during any of your sets in this workout. Now that we have that covered, we're ready to dive into the full body home workout, designed to train all of your upper body and lower body musculature in a proportionate manner. I'll first go through the various exercises and how to perform them, and then I'll cover your options in terms of how to best execute the workout. The first exercise we'll use here are narrow grip push ups with the hands placed in a diamond shape, which will be used to target the chest and triceps. We'll be using this specific hand placement since three EMG papers have confirmed that it elicits significantly greater chest and triceps activation when compared to a shoulder width or wide hand placement during the push up. Perform four sets of these in total. Two of these sets will be performed on a flat surface to emphasize the whole chest, whereas two of these sets should be performed in a decline with your feet elevated and your hands positioned a little bit more towards your face, as this will now shift more emphasis to the upper chest, given that it now incorporates more shoulder flexion to the push up, which is one of the main functions of the upper chest. And to progress this movement, you can simply stuff a bag with books and strap it onto your bag to gradually increase the load. You can also use a band to add more resistance to the movement as well. Next, we're going to move on to the inverted row to target our overall back with most of the Emphasis on the mid back for thickness. Now, ideally for the most resistance, you should either use a broom or mop and place that between two chairs, or you can perform these under a sturdy table, like so. And to make this movement easier, you can start out with bent knees to use your legs for support. Another option though is the following setup instead, which we'll continue to use later on in this workout. Simply take two bed sheets or towels, tie a basic knot at the end of each of them and then throw it over your door and close your door. This will enable you to now perform your row like so. For whichever variations you do choose though, you can progress them by either getting your body more horizontal to the ground by elevating your feet, for example, and or add more load with the use of a backpack stuffed with books. Next we'll be moving on to something called pike push ups to mainly target the shoulders and triceps. For these, you can start them out on the ground by assuming a push up position and then moving your hands closer to your feet while keeping your legs straight such that your body now makes an upside down V shape. Then bend your elbows and lower your upper body until the top of your nose nearly touches the floor. Your head should move forward past your hands as you reach the bottom position and then return to between your hands at the top position. And just like with the overhead press you should your elbows should not flare out sideways. Keep them tucked and forearms vertical over your wrists as you descend. Then to progress this you can first simply elevate your feet up to the edge of a platform and then to progress this even further, you can move your hands closer to the feet, which will make the movement considerably harder. And then again, just repeat the process of elevating your feet onto a higher platform. Once you're ready, I'd recommend marking down with tape how far your hands are from the platform, so so you're able to accurately gauge your progress over time. Next it's time to target the back, primarily the lats with a vertical pulling angle rather than horizontal like we did earlier. This one is bound to get you weird looks around the house, but is worth it for the return in back gains it's going to provide. Simply lay on a smooth surface and use something for grip on your hands like shoes for example. Then you simply perform a lat pull down motion by pulling your elbows down to slide your body up. You should feel your lats working as you do so, and to progress it you can simply add weight with a backpack and or provide additional resistance by Pressing your feet into the ground as you perform your reps. Now it's time for some arms isolation. Go back to your bed sheet setup and lean back with your arms straight, like so. Then, keeping your body straight and elbows locked in position, curl your hands towards your face by using your biceps. Then to target the long hair of the triceps, which has yet to be emphasized in this workout, you can simply switch over and perform tricep extensions like so, again keeping the elbow locked in place and your body in a straight line. Alternatively, these can also be done on an elevated platform, like so. And for these arm exercises, you can progress them a few ways by orienting your body to be more horizontal to the ground, transitioning to just one arm at a time, and or just adding weight by using the backpack. Next, it's time to move on to the lower body. And for most of us, bodyweight squats just aren't going to cut it. We which is why today we'll use the bed sheet setup once again to perform assisted pistol squats. To target the quads and glutes, lean back with your arms straight and then lift one leg off the ground. Then you simply squat down like so. Finish your reps on one leg before proceeding to the other leg. And at first you can use your arms to pull yourself up for assistance if you need to, but over time, you can progress it by either relying less and less on the assistance of your arms during the movement, or transition to doing the same movement but stopping the range of motion short by sitting on an elevated platform and gradually reducing the height of this to continue, making it harder. Next, we'll move on to one you're probably familiar with, the Bulgarian split squat with your rear leg elevated up on a platform, which will again further target the quads and glutes. To progress them, you can simply hold a weighted backpack at your chest, like so. Once that gets too easy, though, more difficult progression is the Assisted Shrimp squat, where you can use the side of a counter for assistance. Hold one leg behind you with the same arm and then squat down until your knee just about touches the floor, and then come back up with the assistance from the counter as needed. And over time, you can progress these by moving off of the counter. Next, we'll use the sliding leg curl to effectively work the hamstrings through both hip and knee extension. Simply lay on a smooth surface and plant place your feet on two cloths or something that will enable them to slide easily. Then, using your hamstrings, curl your heels in towards you while raising your hips up into the air. Your back should remain straight as you do so and to progress these you can slow down the tempo and or perform them with just one leg at a time. So here is a summary of the workout now when performing it just like your exercises in the gym, is vital that you get adequate rest of roughly two minutes between each of your sets and to do so in this workout while saving you time, you you can perform the following upper body exercises in a superset fashion as shown below where you perform for example a set of the push ups, rest for 30 to 45 seconds, then go right into a set of the inverted row, rest for 30 to 45 seconds again and then go back to the push ups and repeat. By strategically using this agonist antagonist superset method with the appropriate exercises, research has shown that you'll be able to save time while ensuring that your performance on your sets don't suffer. And as for the rep ranges, again you need to push to near failure each set, which is why I haven't given a specific number of reps as this is going to vary for everyone. So instead just jot down how many reps you perform for each set. Try to beat those numbers in your next workout and use the progressions as needed once you're reaching over 30 reps per set and then as for frequency, I'd recommend performing this workout three to four times a week as this will ensure that each of your muscles are worked at the optimal number of sets required to maximize growth. And lastly, I've compiled this home workout into an easy to download free mobile friendly PDF for you to use and reference while you're performing it. It'll show you the workout, tutorials, proper progressions and more. To get a copy of it, just head over to builtwithscience.com forward/homeworkout PDF and I'll send it right over to you and I'll leave a link to that in the description box down below as well. Guys, I hope you enjoyed this one and I also hope that you're able to see that it's the little details like the ones I went through in this video that really are key to maximizing growth and actually see progress with whatever work or routine that you choose to do. And for a step by step program that takes care of all the guesswork for you and shows you exactly how and what to work out and eat week after week so you can fuel your body and build muscle most effectively with science. Then simply head on over to buildwithscience.com to take the analysis quiz to discover which science based program will be best for you and where your body is currently at. Anyways, hopefully this video is useful to you and do let me know how you like the workout. And please don't forget to show your support by giving the video a like commenting below as to what you'd like to see me cover next and subscribe to the channel and turning on notifications to the channel as well as this all really does help me out. Stay safe everyone and I'll see you next time.