How To Get 6 Pack Abs With No Equipment (DO THIS ANYWHERE!)
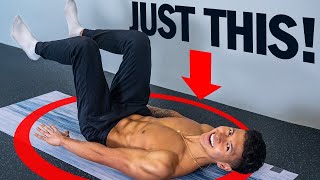
A bodyweight ab workout you can do anywhere, no equipment needed. The video covers exercises for different abdominal regions, proper form, and how to progress the difficulty. There's a free downloadable workout PDF included.
Questions this video answers
A 2010 study on tennis players found a 35% difference between left and right sides of their abs.
builtwithscience.com/absathome
15 seconds between each exercise; 2 minutes rest after one circuit.
Repeat for a total of 3 times.
Walkouts: 5–10 reps; Reverse crunches and regular crunches: 10–25 reps; Russian twists: as many reps as possible in 1 minute.
I'll show you how to sculpt a great set of abs using just your bodyweight and a few square feet of floor. First, we'll expose why most bodyweight ab workouts are a waste of time. Then we'll go through the four ab exercises we'll be using and at the end combine them into a full downloadable workout that you can use anywhere. So there's three things that we're going to do with our ab workout that will make it far more effective than most bodyweight ab workouts out there. First, to build a great balanced looking midsection, there's four regions that you need to make sure your ab workouts are hidden. A 2010 study on tennis players helps explain the potential dangers of failing to do this. The researchers analyzed the muscle development of the players abs and found major imbalances. In fact, when comparing the left and right sides of their abs, there was a 35% difference in the size. There were differences seen in the growth of the upper and lower section of the abs as well. This disproportionate growth is obviously attributed to the fact that tennis players work predominantly on one side, but it helps illustrate the fact that the same can occur from an ab routine to that favors certain regions and movements over the others. Second, the abs are just like any other muscle. You can actually build them up to make them more visible. However, most bodyweight ab workouts don't make their exercises more difficult over time to continuously stimulate growth in your abs as it gets stronger. And lastly, how many times have you done an ab exercise yet felt it more in your hip flexors or your lower back? Instead, many ab exercises are just poor choices and should be avoided. For this reason, today's workout is going to solve each one of these three common problems. Let's learn how by diving into the first exercise. Okay, so the first exercise we'll cover will be the most demanding. It's going to target a region called the tva, also known as the transverse abdominis. This is perhaps the least talked about ab muscle. You actually can't see this muscle because it sits beneath your abs. But when well trained, it plays an important role in creating a better looking midsection. And it does so by acting like a natural corset, pulling the abs in and tightening the waist. It also has the added benefit of making the sexiest muscle on a man more prominent, AKA those two lines that start near the hips and come down towards the hyperplate. So to best work this muscle, we're actually going to recreate a no equipment version of a great gym exercise, the Ab Roll Up. The Ab Roll up has not only been shown to work your six pack muscles extremely well, but it also forces the TVA to contract hard to stabilize our spine as forward and back. To recreate this without a roller though, get onto all fours with your hands under your shoulders and knees under your hips. Move into something called posterior pelvic tilt by rotating your hips and contracting your abs. Pull your belly button into your spine to fully activate your tva. Then from here, slowly walk your hands out forward, but go only as far as you can without breaking this form and arching at your lower back and then walk your hands back as you get stronger. You want to progress it over time by trying to get your hands further and further out. Don't worry, it's totally fine if it's just a few steps at first. Trust me, it's going to improve over time. Now we're going to move on to the next most demanding exercise to target the lower abs. Now, the key to effectively targeting the lower abs is to use what's known as bottom up exercises where the bottom half of your body is brought up, such as with leg raises. These types of exercises, however, are where most people have a lot of trouble feeling it more in their hip flexors rather than their abs. So pay close attention to the form I'm about to show you. First, lie on your back with your arms straight by your sides and knees bent to 90 degrees. To pre activate your lower abs, initiate posterior pelvic tilt by squeezing your glutes and contracting your abs. Your lower back should flatten against the floor as you do this. Next, don't think about raising your legs. Instead, simply curl your pelvis up towards your belly button. Then on the way back down, avoid arching your lower back and instead make sure it remains flat flat against the ground when you reach the bottom. When done properly, you should feel a strong contraction in the lower region of your abs. To make it easier, you can simply tuck your knees in towards your upper body more. As your lower abs strengthen though, you can increase the difficulty by straightening out your legs more and more. By the way guys, just so you're aware, I've compiled this ab workout into a free PDF for you to download so you can quickly reference it when you're performing it. It's complete with step by step picture tutorials and instructions for each exercise. To download it after watching the rest of just head over to builtwithscience.com absathome and I'll send it right over to you I'll also link this in the description box and in the comments down below. But for now, let's get back to exercise number three and hit those upper abs. So, to target the upper abs, we'll now want to use what's known as a top down exercise. This is where the top half of your body is brought down, such as with crunches. Speaking of crunches, since our upper abs will already be quite fatigued from our previous two exercises, it actually makes a less demanding movement, like a crunch, the perfect option. But to make them effective and avoid messing up our backs, there's a specific way that we'll want to do them. First, set up by lying on your back with your knees bent and hands placed behind your head. Place a rolled up T shirt or towel under your lower back to increase the range of motion your abs go through. Now, given the role of the upper abs, we don't need to come all the way up as that's just going to work more over hip flexors. Instead, all we're going to do is lift the shoulder blades up, up off the ground by flexing the spine and then come back down. Avoid yanking your neck as you come up and avoid using momentum. Take it slow and really feel the upper abs working. Once that becomes too easy though, you can progress these by placing your arms straight over your head or add weight using a bottle or stuffed backpack. Alright, so before we dive into how to best perform the full workout, we're going to complete it by covering the last region, the obliques. These muscles, they're best trained with exercises that rotate the torso. Our move of choice is a well known exerc exercise, Russian Twists. But the problem with this popular move is that they're often performed in a way that makes the exercise far less effective at working the obliques. To avoid this, it starts with a proper setup. Sit on your butt with your knees bent and feet on the floor. Sitting too far upright will make the exercise easier but less effective. So try to angle your back to about a 45 degree angle. From here. The goal is to touch either side of the ground. But your hands aren't what activate your obliques. So avoid just reaching with your arms and not rotating much at your torso. Instead, let your shoulders dictate your rotation. So when you reach to each side, focus on trying to line up your shoulder with your leg. For example, your left shoulder lining up with your left leg when you twist to the right. Doing this will force you to rotate your torso and engage your obliques as a result. To progress this move over time, you can raise your feet off the ground slightly and try to reach further and further out with your arms to force your obliques to work harder to stabilize your body. All right, so now let's get into how to perform the full workout. For the best results, you're going to perform this workout as a circuit, moving through one exercise to the next with just 15 seconds of rest between each exercise to catch your breath. After you run through it once, you're going to rest for two minutes and then you're going to repeat it for a total of 3 times. As for reps, for the walkouts, aim for 5 to 10 reps. For the reverse crunches and the regular crunches, aim for anywhere between 10 to 25 reps. And for the Russian twist, you'll do as many as you can within one minute. Now, you can do the workout two to three times a week, but what's most important is that as you get stronger, you're trying to increase your reps and using the progressions that I mentioned earlier. This is what's going to be key to helping your abs grow and pop more over time. And as mentioned earlier, for a free downloadable PDF of the full workout with tutorials, just head over to builtwithscience.com/absathome and I'll send it right over to you. But keep in mind guys, that no matter how hard you train your abs, you're not going to get the six pack you're after without a solid diet plan in place. That's the secret behind the incredible transformations that thousands of our members are getting using my Built with Science programs. Within each program you're shown exactly how to train and how to eat, to lose fat and build muscle. To start today, just head on over to built with science.com and take our free 60 second quiz to find out which of our programs is best for you and your body. Anyway, thank you so much for watching. You can click here for more ABX exercises or click here if you need some help with nutrition. I'll see you next time.