How To Grow Bigger Shoulders At Home (NO WEIGHTS WORKOUT)
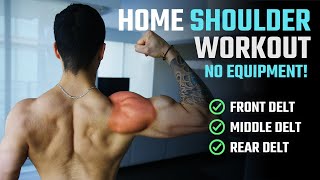
Sam shows how to build all three shoulder heads at home with no equipment. Pike push-ups hit your front delts, wall raises work the sides, and bed-sheet rows target the rear. Do 10-15 reps per set, split the work across two upper-body days, and progress when you hit 30 reps.
Questions this video answers
Roughly 10 to 15 reps per set.
Once you can perform more than roughly 30 reps per set in any exercise.
Sam.
builtwithscience.com.
If you want bigger, wider and just more powerful looking shoulders, then you need to focus on hitting all of the three heads that make up this muscle group. Because adequately targeting and growing the front, the middle and the often neglected rear delts really is the key when it comes to creating that three dimensional, rounded look with your shoulders. And although doing so is pretty easily done when we have access to heavy weights and gym equipment, this now becomes much more difficult to do at home without any equipment to rely on. But by simply knowing what each head is responsible for doing, we can then determine what body weight shoulder exercises can be used to effectively train each of these heads without the use of heavy weights. And in this workout, I'll show you not only what those exercises are, but I'll also show you how to properly progress each of them such that you can continue to grow your shoulders over time as you get stronger, and all in the comfort of your own home. The first exercise we'll use here are pike push ups to mainly target the front portion of your shoulders, which is responsible for moving your arms forward and pressing them overhead, just as we're doing here. As you can see here, due to the similar mechanics of both exercises, this exercise can effectively replace the heavy overhead shoulder pressing movement that we typically perform in the gym to target this portion of your shoulders. So to perform them, start out in a push up position and then move your hands closer to your feet while keeping your legs straight until your body makes an upside down V shape. Then simply bend your elbows and lower your upper body until the top of your nose nearly touches the floor. And then press up by using your shoulders to return your hands back to the top position. Now, if these are too hard, then initially you can start out by performing these on your knees instead, where you again lower your upper body forward until your nose nearly touches the floor in front of your hands. And then press backwards in the opposite direction back up to the starting position. And then you want to progress to the standard version and then to progress even further. From there, you can first elevate your feet up to the edge of a platform and then perform your reps on that. And then over time, gradually move your hands closer to your feet to make the movement even more difficult. And then once you're able to do so, you progress it once again by elevating your feet onto an even higher platform and repeating this process. This way, despite having no access to heavy weights, you're still going to be able to continuously overload the movement and grow your shoulders by just manipulating your body weight. Next, we're going to use lateral raises to now target the side portion of your shoulders, which helps give it that added width. Now, this head of the delt is mainly responsible for shoulder abduction, or in other words, just raising your arms out to the side. The but given that we don't have weights to perform traditional lateral raises with, we can compromise by using our body weight instead. So here you want to lay your forearm against a cloth or towel placed on a smooth wall or the edge of a door frame. Take a small step to the side of the wall and then lean your body against it. And then you simply want to mimic a side lateral raise by sliding your forearm up and down to raise your body back up and down to the starting position. To make these easier, you can initially stand closer to the wall and use less of a lean, and then over time, as you get stronger, you want to gradually move further away from the wall and lean your body to a greater degree so that your side delts are now lifting a greater proportion of your body weight. You can also lengthen the lever to increase the difficulty as well by simply straightening your arm and performing the lateral raise like so. Next, it's time to shift our emphasis onto the rear delts, which function to help pull the arm back behind the body and gives our should rounded 3D look that we're after, yet are unfortunately quite a difficult muscle to train at home. We'll effectively do so in this workout though by performing a rear delt row by using the bed sheet setup that I've shown in my other home workout videos. To perform these, wrap the sheets around your hands, take a few steps away from the door and lean back until there's tension in the sheets. And then with your palms facing downwards, perform a row by pulling your elbows back as far as far as possible to raise your body up and then control your body back down until your arms are straight and then repeat. However, as you row, you want to keep your elbows high up at shoulder height, as this helps biomechanically minimize the involvement of the lats and instead shifts more of the tension onto the rear delts. You can start with your feet further away from the door and then gradually move your feet closer and closer to the door over time, just to continue progressing it as you get stronger. If you don't have the bed sheet setup handy though this then an alternative is to perform the same rowing movement, but in between the end of a hallway or doorway. Here you can just grab onto the edges of the wall or door frame and then pull using the same rowing motion and again keeping those elbows high. Lastly, we'll finish off the workout with a little more rear delt isolation by using the rear delt fly. Here you want to again use the bed sheet setup, but this time you'll straighten your arms out in front of you with your palms inwards, facing each other, then raise your body up by pulling your arms out to your hold the M position for a second or two to intensify the contraction of the rear delts, and then return to the start position and repeat by keeping your hands facing inwards throughout the movement. Incorporate slightly more external rotation into the exercise, which research has shown helps boost the activation of the rear delts, given that it's one of its main movement functions and it's something that a previous rear delt exercise was missing. I suggest first starting these out with a spot split stance and using your back leg to assist you on the way up, and then progress it by moving your feet together, and then progress even further by simply bringing your feet closer to the door, just as we did in the last exercise. Now, if you don't have access to bed sheets for this, a viable alternative. Here are rear delt holds with external rotation where you lay down on your stomach and then simply raise your arms back behind your body while twisting your arms outwards such that your thumbs are now facing more towards the ceiling at the end position. Hold this for a few seconds before you come down and then perform another rep. This does effectively incorporate the various movement functions of the rear delts, but obviously it becomes problematic to overload with weight as you get stronger. But as a compromise, I suggest using a combination of holding that end position for a longer pause, adding an additional load by using the band, or even holding onto weights like water bottles, for example, just to ensure that you're still progressing over time. So, to sum the video up, here is what your home shoulder workout could look like. Now, this can be performed all in one as a shoulder workout on its own, but I'd recommend instead splitting the exercises up to at least two days throughout the week by using an upper lower split, for example, in order to better manage the training volume and frequency. As for reps, ideally you want to use a rep range of roughly 10 to 15 reps per set, but worry less about the rep range and instead focus on taking each set of the workout either to failure or a rep or two short of failure in order to maximize growth despite having no access to heavy weights. And then once you can perform more than roughly 30 reps per set in any of the exercises you want to then progress to a harder variation that provided for each movement in order to continue maximizing growth over time. But by executing and progressing this workout properly over time as you get stronger, you'll be able to build your shoulders in the comfort of your own home without the need for heavy weights. And just keep in mind though, that that's just one piece of the puzzle because pairing your workouts with the right nutrition plan is essential when it comes to seeing results and packing on size and for a step by step science based program that takes care of all of the guesswork for you by showing you both how to workout and what to eat week after week in order to build muscle as efficiently as possible with science. Then simply head on over to builtwithscience.com to take the analysis quiz to discover which program is best for you and where your body is currently at. Anyways guys, that's it for this one. Please do me. Give me a follow on Instagram as well by the way, as that's where I post all of these workouts in a more condensed version that you can easily follow along to. As always, don't forget to show your support for this video by giving the video a like leaving a comment as to what you'd like to see me cover next, subscribing to the channel and turning on notifications for the channel as well as this all really does help me out. Thank you so much everyone. I'll see you next time. Sam.