How To Unlock Your Mobility in 5 Minutes (DAILY STRETCH)
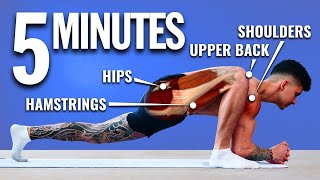
Five-minute daily routine to improve hip, upper back, and ankle mobility. Includes spine rounds, World's Greatest Stretch, deep squat with heel elevation, half-kneeling wall rotations, and wall slides with step-by-step cues and modifications.
Our bodies are very efficient at maintaining the resources we use and getting rid of what we don't. If we stop training, we get weaker. Similarly, if we don't regularly use the full range of motion of our joints, we quickly lose our ability to do so. Most people in this day and age, they haven't trained their full range of motion in their joints for years. Whoa, whoa, whoa. What is going on? Jeremy, what is on your leg? Yes, your boy just got a fresh new tattoo. I actually just posted on my Instagram. You can check out the full full booty shot there, but comment down below. What do you guys think? Love it. Hate it. Either way, I'm going to keep it. Cheers guys. Let's get back to stretching. As a result, the shoulders, hips, back and ankles just don't move like they may have used to. A good example here is how certain cultures, such as Southeast Asians, use the deep squat every day and can assume that position quite easily. And although differences in bone structure do play a role, you can contrast that to Western cultures where very few are able to perform a comfortable deep squat. And for example, try sitting down and rising from the floor without using your hands or knees for support. How easy or difficult was that for you to do this? Loss of mobility can not only create feelings of tightness, limit your ability to perform certain lifts in the gym, and prevent you from being able to activate certain muscles very well, but it may even extend far beyond this. So how do we improve this? Well, today I'll show you how by focusing on the right areas and the right exercises and you can significantly improve your mobility in just five minutes. So before we dive into the exercises, we first need to understand what will make this five minute routine so effective. Although I have released quite a bit of posture and mobility routines in the past that can help you, let's face it, the shorter a stretching routine is, the more likely you'll be able to stick to it. Five minutes done every single day will be far superior than a 10 or 20 minute routine you only get around doing once or twice a week. But because this routine is only five minutes, we need to make sure it focuses on areas that need the most help. And based on the sedentary day to day life of most individuals, as well as the results of a recent poll that I ran on my Instagram, we pick three key areas. The hips, the upper back, and an area where you probably don't even realize needs help. The ankles. Even though you may think that your problem areas are elsewhere, like your shoulders and your hamstrings because these three areas are such important links in the human kinetic chain, improvements here tend to improve things everywhere else. To ensure that we've mobilized these areas properly, though, pay very close attention to the form and modifications I'm about to show you for each exercise, as the details really do matter. The first move will be used to loosen up the spine and our back muscles in preparation for our next exercises. This is especially helpful in the morning, after we've been laying in bed for several hours. To perform it, get onto all fours with your knees under your hips and hands under your shoulders. From here, in a gentle motion, round your back up towards the ceiling as if someone was pulling your mid back up with a rope. As you do this, take a deep breath in while tucking your head down. Then exhale as you reverse this motion, by now curving your back the opposite way while lifting your head up. Based on the lab research of back pain expert Dr. Stuart McGill, he found that just seven, eight cycles of this are what's needed for the most benefit. When done slowly and controlled, this should take you about a minute to do. If you're having trouble nailing down this motion, though, try placing a band around your mid back. This is going to help you pull your spine into the bottom position and also give you the resistance and sensory feedback you may need to learn how to properly round your spine upwards. And for your reference, here is a snapshot of each part of the stretch so that you can quickly screenshot it for reference. I'll do the same with the next four exercises as well. The next exercise, called the World's Greatest Stretch, will be the most effective way to hit all the key problem areas at once. This stretch has three parts to it, a lunge, a drop and a reach. The first part is going to focus on your hips and ankles. Get into a plank position with your hands under your shoulders and your feet together. From here, lunge forward by bringing your right foot up as high as you can, ideally next to where your right hand is. You should feel a deep stretch in your groin muscles of your front leg and the hip flexors of your back leg. As you do this. Next, take your right hand, place it on your knee and push your knee out and back and then forward and back a few times just to loosen up the hips and the ankles a little bit more. Then, to deepen the stretch even more, in the second part of the stretch, you'll try to drop your right elbow as far towards the ground as you can while rotating your upper body down towards the ground as you do this, try to keep your right knee pushed out rather than letting it collapse inwards. And then for part three, to really open up the mid and upper back, rotate your entire upper body up and to the right and reach your right arm as far as far overhead as you can. If you can, try to keep your back leg as straight as possible as you do so, then you're going to reach back down and Repeat this for 5 reps, or about 30 seconds in total, before switching to the next set. Now, this is quite a difficult stretch. To make it easier, you can keep your leg bent or keep your knee on the ground and work towards straightening more and more over time. In the beginning. Also, don't be discouraged if you can only reach so far here and there's just stay consistent with it and it's going to improve very quickly. And finally, here is a snapshot of each part of the stretch for your reference. Next, we're going to do what I'll just call the Asian squat, but with a few modifications to really open up the hips and ankles. First, you're going to want to get a rolled up towel and place your heels on it from here, using a squat stance, which is typically just outside shoulder width. Squat down into however deep is comfortable for you. Keep your chest up and try to keep your heels down. If your heels do come up, you can roll up the towel to make it even thicker. Otherwise that's fine. To keep your heels up if you have to. From here, place your arms on the inside of your legs and use your elbows to push your knees out. You're going to sit in this position for 30 seconds, and as you do so, you should feel a deep stretch in your groin and in the muscles around your ankles. And if you're in a rush to get to work, you can always have breakfast while you're at it. Then, for the next 30 seconds, move side to side to deepen the stretch of each ankle one at a time. As you do this, though, you want to avoid collapsing your knees in and avoid pointing your feet too far outwards as this takes a stretch away from the ankles. Instead, try to keep your feet angled out at a max of about 30 to 45 degrees and keep each knee in line with the outside of your toes. Now, there's a couple ways that we can go about progressing this. In the beginning, if you struggle with ankle mobility, you may need quite a bit of heel elevation to comfortably get down into a deep squat. Over time though, try to use less and less heel elevation and see if you can eventually get to using no elevation at all. Then at the bottom position, to open up the hips even more, you'll first just push your knees out with your arms straight ahead. Once that gets easy, try to place your hands together into a prayer position. Once that gets easy, place your hands together into fists. Each progression is going to open up your hips more and more by spreading out the distance between your elbows. And finally, here is a snapshot of each part of the stretch for you to screenshot. Alright, so next we're going to really focus on mobilizing the upper back with rotation and opening up the chest. Get into a half kneeling position with your right leg bent as close to the wall as you can get and your left leg planted forward. In a lunge position, you're going to place both arms directly in front of you, with your right arm making contact with the wall. From here, push your right hand into the wall as you rotate your upper body to the left, trying to reach your left arm to the other side of the wall. As you do this, you want to avoid rotating your hips and try to rotate only the upper body. Return back to the starting position and then Repeat this for 30 seconds before switching sides. To make it easier when starting out, try moving your planted leg further away from the wall and just try to rotate as far as you can without rotating your hips. As this improves, try to move your leg closer and closer to the wall and rotate further and further. Then once you can get that down, you can progress it even further to really open up the chest and shoulders by sliding your hand against the wall as if you were drawing a half moon. And here's a snapshot of each part for you to screenshot. Okay, so now that we've loosened up your upper back, we will now temporarily have the mobility we need to be able to better activate and strengthen some of the smaller weakened muscles in the back. Strengthening these muscles will help you maintain these mobility improvements long term. And the exercise we'll use to hit these muscles are wall slides. To perform it, stand with your back against the wall and contract your abs to flatten your lower back. Then slide your arms up and down the wall. Make this easier. When starting out, place your feet further away from the wall and then over time, try to get your feet closer and closer to the wall while trying your best to keep your lower back flat. When done properly, you should feel a few muscles in your mid back really light up as you raise your arms up. And if you can't initially keep your arms in contact with the wall all the way through or you just can't slide your arms up very high at all. That's all perfectly fine. Just focus on improving this over time and here is a snapshot of each part for your reference. Alright, so here is the full five minute routine. Each exercise will take you just about a minute to do, but within that minute I want you to focus on doing as many high quality reps as you can. And just for your convenience, I've created a completely free downloadable PDF that contains the full routine, step by step tutorials for each exercise and instructions on how to use this routine for the best results. To download it, just head on over to built with science.com and/daily Stretch and I'll send it right over to you. Implement this daily, make an effort to move more and supplement this with exercises in the gym like split squats and overhead presses that help you actually use your new mobility and you'll very quickly notice a massive improvement in how you move and how you feel. And for a step by step program that takes a holistic science based approach to transforming your body by focusing not just on your workouts but also on your nutrition, your mobility and your recovery. Just head on over to built science.com and take our analysis quiz to discover which of our programs are best for you and your specific body. That's it for today guys. Please don't forget to show your support by giving the video a like subscribing to the channel and leaving a comment down below as to what you'd like to see me cover next. And if you haven't already, give me a follow on Instagram to check out some more of my content. Thank you so much guys and I'll see you next time.