STOP Doing Squats Like This (SAVE YOUR JOINTS!)
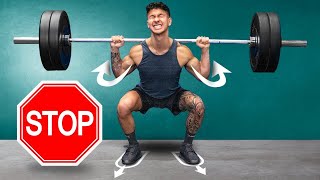
Jeremy Ethier breaks down four squat mistakes that damage your joints: wrong stance for your hips, butt wink at the bottom, unstable feet, and chest collapse. He shows you tests to find your problems and fixes like adjusting your stance, limiting depth, and doing pause squats with upper-back cues.
If you want to keep your joints healthy and maximize your strength, then you have to stop squatting like this. You're probably wondering, Jeremy, like what? Well, to the untrained eye, you wouldn't notice anything was wrong with this, but in reality, there are four key mistakes I'm making here that you're very likely making as well. Without even realizing it, let's dive into what those are and how to fix them to get you a safer and stronger squat right away. So the first mistake has to do with your hip structure and how it affects what the optimal foot width and foot positioning is for your squat. This is actually something I covered in a past deadlift video, which I'd highly recommend you watch after this one. But the same concept applies here for your squats. For example, some people can naturally squat with a narrow stance. Others, such as those born with relatively deep hip sockets, will have to squat with a wider stance. Similarly, depending on hip structure, some will be able to squat with their toes straight forward, while others will have to turn their toes out in an angle in order to reach full depth. And if you try to use a squat stance that doesn't fit your anatomy, you'll often have trouble getting deep into the squat and may even feel a blocking or pinching sensation at the hip that stops you from getting any deeper. This is your body's way of telling you that something needs adjusting. To figure out what your optimal stance is, there is a simple test we can do. First, we'll figure out your foot width. Get onto all fours with your hands directly on your shoulders, knees under your hips, and and ideally with your feet against the wall. From here, try to sink your hips back into your heels as deep as you can without rounding your lower back. Make note of how that feels and how far you can go, and then simply play around with it. Try widening your knees and feet a little bit and see how that feels. Keep doing this until you find that sweet spot position that feels the best and allows you to get the deepest without riding at your lower back. Once you've found that position, stand up and make note of how far apart your feet were. Then from here, either with your body weight or under the bar. Squat down with your toes and knees straight out and see how that feels, and then try it with your knees and toes pointed out more. Experiment and find what foot angle feels best and enables you to squat the deepest, which will now be your ideal squat stance. Okay, so by the end of that test, you should have a good idea as to what the best squat setup is for you. But even with that proper setup, you may be guilty of making the next mistake. As you then perform the squat. Take a look at these two shots at the bottom of the squat. Can you notice any difference? If you take a closer look at the lower back on the shot on the right, you can see that it rounds and the pelvis pulls under the body, whereas the shot on the left, this doesn't happen. This is what's known as butt wink. Although it may be fine for some individuals, for others it can put a lot of harmful forces on their spinal discs. And in theory, after years of this, could eventually cause a disc bulge in this area. Now, there are ways to avoid butt wink that I'll share with you, but let's first determine how serious of an issue this may be for you with a simple screening test created by back pain expert Dr. Stuart McGill.
The beginning of the experiment, they would put just a 45 pound Olympic bar on their back and they would do pelvic tilts, extension flexion, extension flexion. And they did 10 cycles. Do you know, we had to stop the experiment, Jeremy, because it caused so much back pain. Then I learned, hey, I just had a great. I just developed a screening test by accident for is butt wink okay for that lifter? So if they can do 10 cycles with a bare bar back and forth with zero pain, and they're not going really heavy and they're just squatting for the hell of it, I really don't have much of an issue with that. Except I will say to them that eventually, if you want a lifetime of good health, you would be wiser to not smoke, wear your seatbelt, brush your teeth, and avoid butt wink. How's that?
So if you tested positive for that screen or would just like to err on the side of caution, there's two things you can do to minimize butt wink. The first thing is to simply limit your range of motion. For example, if you try to go below parallel and notice significant rounding, then it might be a good idea to just limit your squats to parallel. But oftentimes, butt wink is actually caused by an ankle mobility issue. If you have stiff ankles and you try to go into a deep squat, once you reach the end of your ankle mobility, your lower back will have to start rounding as a compensation to try to get deeper. To improve this, try squatting with your heels on plates or use lifting shoes and see if that helps. If it does, great. Continue doing that while working on improving your ankle mobility With a few drills that I've outlined In a past mobility video that I'll link in the description box down below. Alright, so we've got our stance down, we figured out butt wink. But the next mistake is something almost everyone overlooks and it has to do with your feet. Try standing up on one leg with your other knee bent behind you. Are you able to hold this for at least 25 seconds without falling over? The Russian training philosophy, which has bred countless elite level powerlifters, states that if you can't do this, then you don't yet have the right to squat with the bar. This is because your feet play a major role in stabilizing your body as you squat. As you perform the squat, you'll make slight movements forward and back and left and right that our feet will have to respond to and correct. Without adequate stability from your feet, your body will seek for it elsewhere, often leading to compensations that can cause excessive stress in the lower back and other areas, especially when working with heavier loads. To help improve your foot stability, there's two things we can do, the first of which I'll let back pain expert Dr. Stuart McGill take you through.
Begin by spreading the toes and rooting into the ground and through the ankles. Move the center of mass forward, pushing the toes down and explore the front of your foot. Now leaning tower back through the ankles onto the heels, making your foot as big as possible for controlling the what we call the thrust line. From the weight down through your body as you're squatting to control the position and the thrust line of the weight, you can use your ankles to leaning tower forward, you can use your hips and you can use your knees. The problem with some lifters is they compensate their injury resilience by correcting the thrust line with their back. So it's especially important for them to gain the foot athleticism through the leaning tower. Then of course, the idea is to transition and have a unloaded bar. If you're doing a back squat on the racked on the shoulders and practice the leaning tower and then adding a little bit of weight to the bar. To really learn to control, control the bar through the path.
The second thing you can do is pay attention to how you distribute your weight as you're squatting. Before you squat down, grip the floor with your feet and spread your weight across these three points, your heel and the base of your first and fifth toe. This will form a stable tripod structure. Then, when you perform your squat, rather than shifting your weight more towards your heels or your toes, make sure each of these three points remain in contact with the ground with the weight distributed evenly among them. Doing so will increase your stability and lead to a safer, stronger squat. Alright, so with your feet now stabilized, it's important that you avoid the last mistake, which has to do with your bar path. To lift the most amount of weight and to avoid excessive stress on the knees or lower back, the bar should travel straight up and down as you perform the squat. But a common mistake lifters make is letting their chest fall forward and hips rise up during the ascent. This shifts the bar forward from the midline, which can place more stress on the lower back. What causes this? Well, although weak quads relative to your glutes may play a role in this, based on a 2014 analysis of the squat by Meyer et al. It seems that suboptimal motor recruitment patterns are the main culprit. This refers to the inability for the body to turn on the right muscles at the right time to maintain proper form, which can't be fixed by simply strengthening a muscle. Instead, we need to essentially relearn the squat and the goal is to get your hips and chest rising at the same rate to keep the bar path straight up and down. To accomplish this for at least a few weeks, swap out your regular sets of squats for what's called double pause squats. This technique will force you to maintain the proper position and recruit the right muscles at the most crucial parts of the squat. To perform it, squat down how you normally do, but then at the bottom position, pause for a second. Then while keeping your chest upright, push out of the bottom and then pause again about halfway up before completing the rep. But to help further reinforce the proper form before you squat down, I want you to tuck your elbows into your sides, squeeze your shoulder blades together and pull the bar down into your traps. And then on the way up, think about driving your upper back up into the bar as if you're trying to push it up towards the ceiling. When you apply this, you will likely have to lighten the weight. Consider to break out of old habits. But after a few weeks of this, it'll start to feel much more natural and is when you can then switch back to regular squats if you wish to do so. So now what I want you to do is take a look back at the squat video I first showed you and see if you can now spot some of the mistakes with your new knowledge. Hopefully you now see the importance of the finer details when it comes to each and every exercise you do. It's not just about choosing the right exercises, but also performing them in a way to get the most out of them while avoiding any potential injury or setbacks later down the it's so important that you get this right from the start, and it's why I focus so heavily on that. Not just within my YouTube videos I put out, but especially in the built with science programs that I offer. For those interested who want to maximize your efforts and start transforming your body today, just head over to builtwithscience.com and take my analysis quiz to see what step by step program is best for you and your body. Now, chances are, if you've been messing up your squats, your deadlifts could probably use some work too. So give this video a watch. Next, don't forget to subscribe and I'll see you next time.