Why The Bench Press Isn't Growing Your Chest
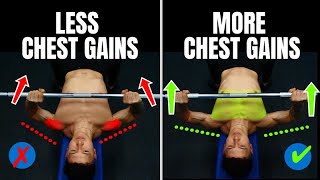
Your bench press might not be hitting your chest because of how your body is built. The speaker breaks down elbow angle, grip width, and upper back arch, then shows you how to adjust each one based on your anatomy to actually feel it working.
The bench press is one of the most popular movements for the upper body, and at first glance it seems fairly simple to perform. In reality, though, for many of us it tends to be a movement that frequently causes discomfort in the shoulders, elbows and wrists, or is just a movement that we have trouble really feeling activate our chest. And most of these problems are due to our individual anatomy, as the way that our bones are structured and muscles are aligned will affect how exactly we should perform this movement in terms of things like grip width and elbow angle and so on. For example, a less experienced, taller individual with longer arms and a relatively flatter chest will have a bench press setup that looks quite different than a more experienced, shorter individual with shorter arms and a bigger, well developed chest. And if one tried to copy the other simply because it felt good for the other person, they would likely end up with aches and pains over time and wouldn't be growing their chest as well as they could be with this exercise and if they had tweaked their form based on their individual anatomy. In this video, we're going to show you how you can do just that in three easy steps. But before diving into each of these steps, I first want to pre frame the video by emphasizing how the bench press is not absolutely necessary for you to do. For some individuals, it's a great effective movement at growing the chest and the overall upper body musculature, whereas for others, it's just not the best exercise for their structure. And especially since the barbell forces you into a fixed hand position. So if your main goal right now is to build muscle rather than increasing your bench pressing strength, just realize that you can accomplish this just as effectively with other exercises like machine presses, dumbbells and even push ups. If properly progressed. The bench press isn't the end all be all chest exercise, and you don't need to force yourself to do it if you find it's just not a good fit for you and your body. But. But before you actually make that decision, run through the following three steps. I'm about to go through. As much of the discomfort and problems that you may be experiencing with the bench press is likely due to a problem with your setup, the first thing you need to do is determine what elbow angle is going to best activate your chest while minimizing any shoulder or elbow discomfort as you press. The way we do this is by aligning your elbow angle with where the majority of your chest fibers run, which will vary for each individual. For most people, an elbow angle of somewhere around 45 degrees to about 70 degrees will best line up with and activate their chest fibers when they press while being the most comfortable on the shoulder joint. If you flare your elbows too much and go above this range to 90 degrees, for example, this has not only been shown to increase the risk of shoulder impingement, but will also shift more of the tension away from the chest and onto the front delts. And similarly, going below 45 degrees by tucking the elbows too much will again shift more of the tension away from the chest and onto the front delts, since they'll now be better aligned to do work. So what I'd suggest is just play around within this range to see what feels best for you to do. So you can simply mimic a bench pressing motion and just focus on contracting your chest using different elbow angles to see what best activates most of your chest fibers. You can also just experiment with using dumbbells and just play around with the elbow position. One of the things that you'll notice is that a lower elbow angle will bias more of your upper chest fibers, whereas a more flared out elbow angle will bias more of your mid and lower chest fibers. The key is just to find the sweet spot that feels the best in terms of overall chest activation and comfort on your joints. Once you determine roughly what elbow angle is best for you and your body, it's now time to set up your grip width to enable you to use that elbow angle as you press. The way you do this is by ensuring that at the bottom of the press, your forearms are vertical with your elbows stacked directly under your wrists, both from the front view and the side view. If you use a grip that's too narrow, for example, your forearms will tend to angle inwards. This shifts more the emphasis to your triceps rather than your chest, and over time can also create quite a bit of stress in your wrists, elbows and shoulders. On the other hand, if you use a grip that's too wide, your forearms will tend to angle outwards. This can again create more stress on your joints while limiting the range of motion that your chest goes through as you press. Also, keep in mind that if in step one, you chose an elbow angle that's tucked a bit more to around 45 degrees, then you'll have to use a more narrow grip in order to get your forearms lined up properly. Whereas if you chose a more flared out elbow angle in step one, then you'll need to use a slightly wider grip. So play around with the different grip widths. Take a look at your forearms at the bottom position and record yourself from the front and side view just to double check that they're aligned. Once you nail this down, you should notice significantly more tension placed on your chest rather than on other muscle groups like your shoulders or triceps. Lastly, as you press, you want to maintain at least some degree of an arch in your upper back rather than keeping it completely flat against the bench. This helps activate more of your chest, specifically the mid and lower fibers, by putting them in a better aligned position to do work while also keeping your shoulders in a safer position. But as for how much of an arch you should use, this is going to depend on your individual chest fibers, the structure of your sternum, and the overall size of your chest as well. Generally, though, most people will get the best activation somewhere between an arch that isn't completely flat against the bench, but also isn't as exaggerated as a Powerlifter's arch, for example. So again with this step, play around with it to find the optimal position where you feel the most activation in your chest with minimal discomfort on your joints. And there you have it. Go through this step by step process, experiment with it and find what works best for you and your body. If you want to build muscle as effectively as possible while minimizing your risk of injury, then you need to not only pick the right exercises, but you also need to ensure that you set up and execute them in the right way and in a way that's based on your individual structure for a step by step program that does just that for you by showing you exactly how to train and how to eat week after week so that you can transform your specific body as fast as scientifically possible. And simply head on over to builtwithscience.com and take our analysis quiz to discover which of our approaches is best for you and your body. Anyways, that's it for today guys. Thank you so much for watching. Hope you enjoyed it. Please don't forget to show your support by giving the video a like leaving a comment down below. Subscribe subscribing to the channel, turning on notifications for the channel as well as this all really does help me out. Much appreciated and see you next time.