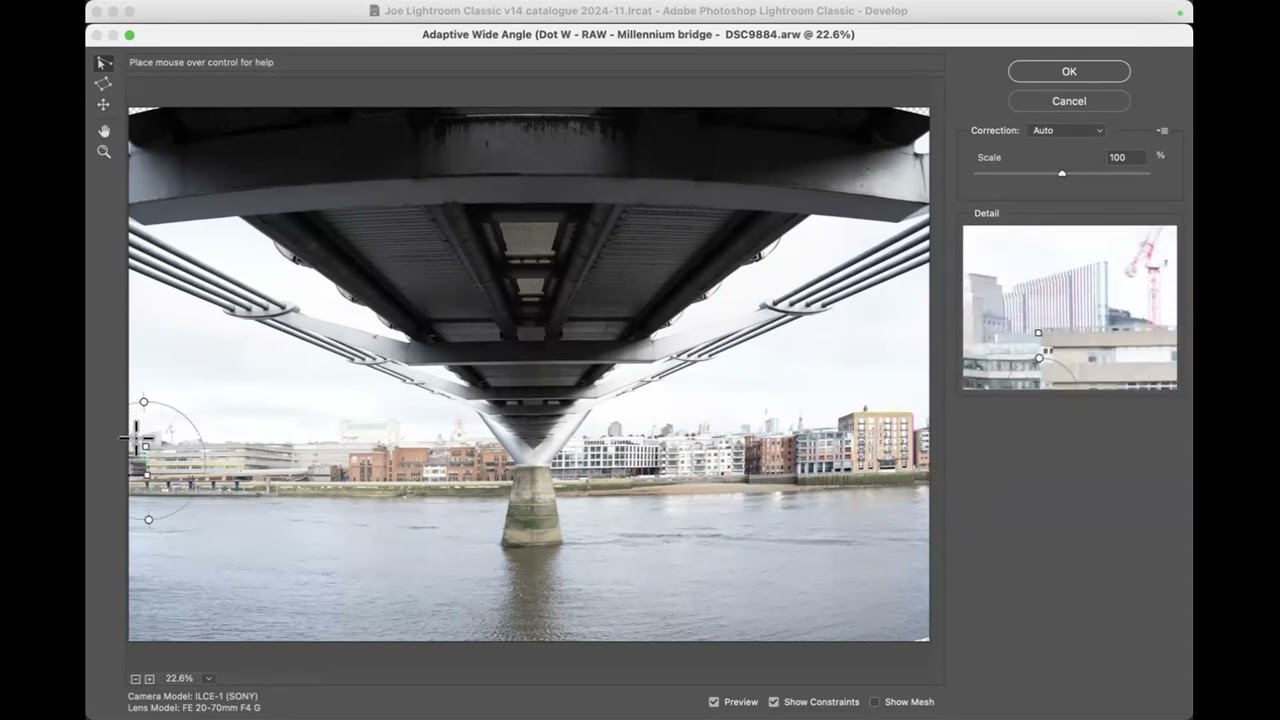
2026-01-31 RPS Under the bonnet 5 - Masking in Lightroom Classic with Joe Houghton

In this live webinar, Joe Houghton demonstrates the full range of masking tools in Lightroom Classic, showing how to create, edit, combine, and refine masks for precise local adjustments. He begins by defining masks and explaining the workflow shift from global to local editing. The session covers brush masks (size, feather, flow, density, add/subtract modes, shortcut keys, overlay colors, opacity, and mask naming), radial and linear gradient masks (creation, feathering, rotation, inversion, duplication), luminance and color range masks (selection based on brightness or hue, refining with sliders, subtracting unwanted tones), subject and object selection masks (AI‑based selection, manual refinement, subtracting background or color), and AI background subtraction tools (GenAI eraser for removing objects such as cars). A new AI Landscape tool that automatically segments images into sky, architecture, vegetation, and water masks is introduced, with a walkthrough of tweaking these masks. The webinar also dives into people masks, demonstrating how to isolate individual subjects, split masks into skin, hair, and clothing, and use radial gradients to highlight eyes. Joe discusses workflow ordering, emphasizing that denoise should be applied early, before exposure or texture adjustments, and that mask order generally does not affect outcomes except for noise handling. Throughout, participants ask questions and receive live demonstrations on real images (a forest path, a leaf, sky, water, a flower, a squirrel, the Arc de Triomphe, Notre‑Dame, and a group portrait), illustrating how to combine masks, invert them, and apply exposure, clarity, dehaze, texture, and black‑and‑white adjustments. Limitations of Lightroom compared to Photoshop (e.g., lack of Refine Edge) are noted, and practical tips such as using Option/Alt for quick add‑subtract toggling, managing mask order, exporting a PDF of Lightroom shortcuts, and naming conventions are shared. The session concludes with announcements about upcoming fine‑art series, community‑driven session ideas, and reminders about the Lightroom Classic Step‑by‑Step book.
Chapters
Okay.
Any announcements, Mel?
No, we'll perhaps talk about later at the end, shall we?
Yeah. Okay. All right. So this is, I think, the last of the Under the Bonnet 5. I didn't have a background for Under the Bonnet, so I've used the Let's Edit Photos one. Um, so we're going to talk about masking today. Um, so I've just, I've just put a kind of— I've just pulled a few photos together, some of which you may have seen before. Um, you know, they're from other, other talks and things. And then I've structured out— you can see on the left-hand side here, I've structured out kind of— there's 14, at least 14 different kind of separate things to talk about, about masking in Lightroom. It's a very, very powerful area of Lightroom, and, you know, there's, there's a huge amount of tools and techniques that you can, you can apply when you're doing masking. But before we kind of start, let's just define for— I mean, some of you that, you know, this inside out, some of you maybe, you know, it's, it's relatively new to. A mask is simply you choosing or selecting in some way an area of your picture that you are then going to do something to. Okay, so you, you draw a mask and you— that normally shows up as a red wash or as, in my case, a blue wash or whatever. Yeah, and you, you quite often are going to need to kind of tweak that mask. You're going to need to maybe add bits to it, subtract bits to it until it's exactly the right shape.
Right.
And then when you've got the mask correct, yeah, you can then go and raise the exposure or add clarity or, you know, do things to that area. So this is kind of second-stage editing, if you like. So, you know, most people when they start post-processing will start with global editing. They'll just make exposure changes and it affects the whole picture. Okay. move on a stage, and now what we're doing is we're identifying specific elements in our picture. We're selecting those by putting this mask on top, if you like, of just saying, right, I just want the sky, or I just want that tree, or I just want that bird, or whatever. And then we're applying, you know, adjustments just to that mask. So that's the fundamental idea behind masks. Okay, and when you're creating masks, you can add to masks, so you can, you know, paint a bit more on and then that becomes part of the mask. You can subtract from masks, you can rub things away with it with an eraser or whatever, yeah, and you can even mix masks together. Okay, and we'll later on, we'll kind of just cover the intersect tool where 2 masks kind of come together, and it's only where both the masks, if you like, are on top of each other that the subsequent mask is formed, and that's a slightly more advanced masking technique. Okay, I think I've covered all the, all the kind of main techniques with these 14. If there's anything I've missed, let me know. All this stuff is covered in quite a bit of detail in Lightroom Classic Step-by-Step number 2. Okay, so I released a little while ago this this set, uh, 1 and 2, of, you know, how to do Lightroom from end to end. So it's the second of those volumes, um, that has got all the stuff for Develop. So the first volume is basically organized with like, that's your Lightroom library kind of module, and then the Develop module and, you know, those creative bits, that's all in, in volume 2. So that's on Amazon. And a lady rang me in the week and said, I don't like buying from Amazon, can I have it anywhere else? So I've also put my books up on another service called BooksBy. And so it's available in both, in both places. So I mean, you know, to find them, just go to the Houghton Photography website and look for books. Okay. And then, yeah, you can get into the BooksBy link or you can get into the— all the Amazon links are on the main pages. Okay, so if you haven't got that book, that is a— I think it's getting on for 400 pages, volume 2. It's pretty solid. I think a few of you have already got it, haven't you? I hope it's proving useful to those who have got it. Dot's nodding her head, so— and she's still showing up, so yeah, that's super. Okey-dokey, let's come back to Lightroom. All right, well, let's start with the simple— simplest one. So D for Develop, and you get into all the masking tools with that little dot there, the second icon from the right. This is, this is into the masking tools, and this gets you into this masking area here. Okay, and K is the shortcut key to bring a brush mask up. So you can see some of them have got the— I don't know why they all don't have a shortcut key, but the shortcut to bring a brush mask up is K. Okay, so if you don't want to kind of, you know, click into the masks and whatever, you can just press K. Okay, and now you're in the mask and you can see that the cursor has changed and I've got that little circles that I can, I can change the size up to. Okay, now a lot of the masks have this, this kind of, you know, this, this circle with 2 lines on and the plus in the middle. Where you see a plus in the middle of any of these tools, that means you are adding to the mask. Okay, you're gonna— so if I click and drag now, you'll see there Now look, the center of that, the small circle, is where, if you like, most of the paint has been laid. And then the, the, the, the area between the center circle and the outside circle, you can see that that's where the, the kind of blue color fades. Okay, so anything within the center circle, you get full effect, and then between the center circle and the outside circle is the feather. And, and over on the right-hand side, you can control the amount of feather. So if I move the feather back to 0, I've only got a single circle. Yeah, it's just— it's now a hard edge. Okay, if I move that feather to, say, half, and I do a line, you see it's got— it's a little bit harder than the first one, but it's not as hard as the, the 0 feather. So you can set your feather. Most of the time I mean, not all of the time. For certain things, you might want a hard edge, but most of the time you're going to probably want your feather in the 50 to 100 range. Okay, because you're generally trying to make changes that then, you know, just soften into the rest of the picture and you can't see that they've been done. So generally feather wants to be up there. The other, the other kind of 2 to be aware of are flow and density. Okay, now flow is the amount that you put down with each stroke of the brush. Okay, so if you imagine that you've got a spray can, okay, if your flow's up to 100%, when you spray you get the full effect. Okay, so now let's, let's bring flow back to 50%, and I'll do that same, that same something. And you see, look, it's only laying down a little bit each time now. Okay, I think 50% should lay down half as much as 100%, but it doesn't. Okay, you know, to me, that's a little bit kind of counterintuitive. Okay, but you adjust the flow. So if we want the flow to, you know, put in most of this, we can kind of say, right, okay, so there, that's a bit heavier. And you see, if I keep doing it, I can layer up more and more of the effect. So that gives you a lot of control over there. Okay, so that's flow. Flow is how much stuff is coming out of the nozzle. Okay, density is different. What density does— density is the limiter. It's a bit like on cruise control on your car, you know, you can set the speed limiter so it won't let you go more than 80 miles an hour or whatever it is, 70 miles an hour.
Yep.
Density is your limiter. So what this does is says, whatever you want to do further up in flow and, and, you know, with feather and all the rest of it, yeah, I'm going to limit the amount that you can lay down however many times you spray it to 40%. So now I've—
let's—
let me put flow back up to 100, but density is down at 40. So you see, now I can only— I can keep going over that area. But it's only letting me put 40% down. If I raise the density up to 80, I can, I can make it a lot darker. Yeah, but I can't go above 80. And if I put that up to 100, now I can fill it right in and I can get a full mask. Does that, does that make sense? Because I know some people probably didn't understand perhaps the difference between flow and density. And ask questions as we go along, you know, there's no such thing That's a silly question.
Yeah.
Am I explaining this reasonably well today?
Yes. Yeah, absolutely.
Very clear.
Okey doke.
Perfect.
Super. All right. What's the easiest way of me getting rid of all this mess now on my picture?
Delete the mask.
Well, we could just do that. Yeah. So just come here and just delete the mask.
Yeah.
And all that masking has gone because I was just adding to the mask, the brush mask, as I carried on. Yeah, another way that I could have done it would be come back here and just go back to before I— in the history and just go to before I did. But, but yeah, yeah, just, just deleting the mask is, is probably the easiest way. So how would we use a brush on an image like this? Because I mean, it's, it's a nice enough image, but it needs a bit of titivation, I think, doesn't it? Because the light is quite flat in here. So what we might want to do is make a little bit more of the path, make that maybe slightly brighter than the rest of the image. Yeah. So what I would probably do with this would be start with— and what I know, my workflow— I don't know why I'm so dark today. The lights are all on as normal, but I'm in darkness. You'll have to just— allow for that today. Um, what I normally do is I pick my main subject. So in this particular case, the main subject is, is the path. The story is the path leading into the wood. Okay, so that's going to be my main subject. So, so my first mask is probably going to be a brush mask to just pick out this path. So I want the feather all the way up. Maybe we'll just pull the flow down a little bit so that I don't kind of go too, too overboard. And, and I'm going to start here, and, and the path is wider here. Okay, so I'm going to start here, and I'm going to draw enough in that early stage just to kind of lay down a good, good wash. And you see the feather is, is just letting it soften off. Okay, and then I'm going to come up a bit further, but before I go any further, I'm just going to pull the size back a little bit. Okay, to say there. And now we'll, we'll take, take it round, round the corner. And then I'm going to pull the size down a bit further, and I'm going to take it around the corner there, and then just pull it back and just take the brush around there.
Okay.
Okay, so now we've got the brush kind of highlighting the area of the path. Okay, and once we've done that We've got the overlay is showing as blue. Now, if you don't like the blue color, you can click on this little square here and you can have any color you like. The default is red. I don't use that because I don't see red because I'm colorblind. Okay, so I know, and it doesn't give me a blue option, but that's, you know, that's the color that normally jumps out most at me. But, you know, given that this is, this is a kind of mostly greens, yeah. You know, you might— you probably wouldn't want kind of to use that as the color for the mask because it's kind of fairly close to the colors of the image. So you can, you can choose whatever color you want for the mask by just dragging it around in here. Okay, so I just normally try and choose a color that's very different to anything that's, you know, in the main area.
Okay.
All right, and then the opacity of the mask. If you have the opacity set up to the top there, the mask is kind of pretty much— you can't see through it when it's at 100%. But you can adjust that opacity so that you can actually still see the mask, but you can see through it as well. And sometimes that's quite useful when you're just trying to, you know, make sure the mask is in the right place and stuff like that. Okay, what I would not start to mess with is this bottom option, Overlay Shows. It defaults to the affected area. Okay, if you change this to the unaffected area, yeah, you're gonna have a mental breakdown. Okay. Because that is just so completely counterintuitive that that would just do everybody's head in, probably not just yours. So don't, don't make that, just leave it as affected area. Okay, um, go on, David. Yep, was it David? No, you've muted yourself. There we are.
Yeah, sorry, I was, yeah, I was leaping and I hit something else. Um, on the unaffected area thing, if it might, it be useful when you are trying to tidy up a mask, because there are times, especially when you having selected something and you then want to say reverse it and Yeah, I just want the background, and there are bits of the subject that are still unmasked that you intended to be masked, and then suddenly they become masked when you swap it. Yeah, that might be quite useful to see that.
It could be, but what I would generally do is I'd still say leave it, leave that as it is. Yeah, but you can now come in and, and adjust this mask. So we've done that mask, but maybe you've gone too far over into the foliage down here on the On the left-hand side. Yeah, so you can come into the mask, click on the mask, and you can now subtract. Okay, so we can now subtract from the mask using any of the other masking tools, but let's just subtract with the brush. Okay, and you see the brush has now got a minus in it. Okay, that's very important. So now if I, if I bring that brush down a little bit and I start to brush You see, that's getting rid of the mask in that area. Now it's brushing that mask away. You see, if I want to get rid of the mask in the middle there, I brush away and it's, it's removing the mask. So the mask is now these, these 2 bits separated.
Yeah.
And if I want to go back and add that middle bit in again, now I can click on Add and Brush and I can brush into the middle and just, just fill it in. So you've got a lot of control. And, you know, this is one of the things that I do recommend to people. is get your masks right, because any of the editing that you do then is kind of affecting the area of the mask. So get used to working with masks and getting them right.
Okay.
You can also switch between add and subtract very, very quickly by holding the Option key on a Mac or the Alt key on Windows. So you see I'm in my brush mode at the moment, and I'm adding to the mask. You see the mask is getting bigger. Okay, if I hold my Option key down, it changes straight away to a minus. Okay, so, and as long as I hold that minus key down, I can rub away. Okay, now I, I don't know why it's gone to, um, the feather has gone so far down. So there we are, I come back. Yeah, and I rub away, and you see that now the feather is, is working better. So, so the Option key switches between plus and minus.
That's interesting. So the plus has a different flow density from the minus.
Yeah. The— what you can do is you can set up 2 brushes. You see A and B here, and you can— and it also kind of has the plus brush and the minus brush have different settings, you know, so that it'll remember what your last settings were for each of those brushes, the plus brush and the minus brush. So you can take— you can set 2 brushes. You've got an A brush there and you've got a B brush here. So maybe you know, you want one brush with very little feather. Yeah, that's, you know, this size. And then this brush, you want full feather and a much bigger brush. Okay, so I can flick between those 2 brushes by just clicking A and B, and you see it changes the settings here. So that's another little trick that a lot of people seem to overlook is there. And now we've done that, the overlay is sitting there, Okay, the O key hides and shows the overlay, the mask overlay. You've got to be clicked on the mask, okay, to show where it is. And if you click on one of the sub masks, yeah, then it's just going to affect that, that little area of the brush that was— you did with that one. Okay, and you can see, you can see by using the I key, the little eye icon, Yeah, that will show you, yeah, which bits were brush 1. So brush 1 is the bits at the back and the bits at the very front. Okay, because they're the ones that are disappearing when I turn that eye mask off. Yeah, brush 2 is those extra fat bits, and brush 3 is that middle bit that I put back in. Yeah, and then the whole mask is this one at the top. Click on that. Okay, and I can turn that whole thing on and off. So you've got a lot of control building these masks up. Okay, but if we're showing the overlay, as soon as you start to make any change in the right-hand side— and in the right-hand side, yeah, the Mask 1, it's the gray box. Now it doesn't have every tool in it. It has most of the tools in it, but you see, once you get down to here to the bottom and it says Delete All Masks there, now you're into kind of the normal toolbar and stuff. This is the— these things outside of that gray mask box, yeah, would affect the whole image, whereas the stuff that's in this gray mask box only will affect the mask that you've currently got selected. So I can now drag exposure up and make that area brighter or darker.
Okay.
So in this case, I'm thinking I probably want to make it just a little bit brighter, and I want to come down and give some extra maybe clarity just to, just to pull the, the contrast up, and I want to really make that mask area I want to see every single little bit of detail. Okay. So this is path. So I'm going to double-click where it says Mask 1, and I'm going to give that the name. Get used to giving your masks a name, because if you've got 10 masks, it makes it much easier to jump to the right bit. Now I've got that path. Yeah, I want to actually adjust the rest of the image. So I can create a new mask, and I could go with a brush, and I could paint all these different areas, or I can just come here and go to the 3 dots and duplicate this mask and invert it. So this will give me everything apart from the area of this mask. And because this mask is feathered outwards, if you like, yeah, then the next, if I duplicate and invert, will still have feather. Yeah, but it'll be coming from the outside in towards the path. So it's still feathered. Okay. So now I've got that, and we can call that, you know, not path.
Okay.
And what I might want to do there is just darken that a little bit. And you see, if I darken the rest of it, yeah, make the woods the deep dark woods.
Yeah.
Now the path is kind of much brighter, isn't it, in relation to the rest of the woods? So, so you kind of— now you're storytelling with light. Yeah. Photography. Yeah. You're actually, you know, you're using the light to, to tell the story. And in this case, the story is the path. And where does it lead? And, you know, who's, who's gone down it and all the rest of those wonderful things.
Okay.
Anything I've— have I missed anything important about brushes? Don't think so.
I know you covered it before, but can you remind me how you increase and decrease the size of a brush without using the slider?
The square brackets keys. So if we're in a brush, okay, so we've got our brush mask there. Okay, now I'm on a trackpad. So I just use 2 fingers on the trackpad up and down, and that allows me to change the size. You can use the slider over here and change the size that way, or you can use the square brackets keys on your keyboard, and you see that is also— that is also having the same effect. Okay, thank you. So that's it. And if you've got a mouse with a central scroll wheel, I think a lot of the mouse central scroll wheels set to that as well. Okay, so there's lots of different ways of adjusting the size of your mask. Okey-dokey. G for grid. My favorite tool, I think, in the whole of the masking kind of set is probably the radial gradient. So let's just do a D for develop. Now, the radial gradient again is under here, and there is a shortcut key for it, which I never use actually. You know, it's not one of the ones that's stuck yet in my head, but Shift and M. So if we just come back to outside of the masks, yeah, and do Shift and M, yeah, then we're in and we've got this crosshairs. And what the crosshairs does is lets you draw So if I click and drag, I can now draw a circle oval shape. Okay, and if I move it around like this, you can see I can, I can do that in any, any aspect ratio or whatever. If you want a perfect circle when you're drawing your radial filter, hold the Shift key down. Yeah, so I've now got my little finger on the Shift key as I'm clicking on the trackpad, and you can see that's constraining to a perfect circle now. And again, we've got the little circle in the middle. Everything inside that is full effect, and then the feather effect out to the center, to the right of the outside circle. Okay. When you release your keys, you've got now your radial filter. If you can't see the lines, so if you've just got a blob like that, okay, the H key hides and shows the lines, and that works for all the masking tools. Okay, so H hides and shows that sometimes you don't want the lines on because they get in the way. You can't kind of see what you're trying to do. So these 2, these 2 things work independently. So there's the H key for the lines. And there's the O key for the overlay, the color. Okay, so if you want, maybe you could, you could turn the overlay off and still, still see the lines. Yeah, and now you can adjust, for instance, the feather by grabbing that center circle and making it smaller. So that makes the feather to the outside. This is the graded bit now, and then that's the full, full effect.
Yeah.
And you can see that if we press the O again. Yeah, so you can see the feathered— the kind of feather to the outside is from the inside circle out. Yeah, so you can adjust that feather by pulling on that little bottom stone there on the ring, or you can adjust using the feather there. Okay, so there's a couple of different ways of doing that. Okay, or you can turn both off, so H and O. Okay, we've still got the mask selected, so now even though we can't see it, when we make changes, yeah, those changes will affect that area. Okay, so you don't have to have the lines showing, and The nice thing about radial filters and all the other great— or most of the other tools is this has got a little center handle. If I want to put this now over the leaf, I can just click on that center handle and drag it and reposition it over here. And then the cardinal dots allow you to now adjust the size of that radial filter. So maybe we just want to kind of make sure that the radial filter covers the whole of the leaf. And if you go to the line between any of the cardinal points, you see you get a little double-headed arrow, you can rotate now. So if that, if that is, you know, more of an oval shape, you can rotate it in one direction or another. And then so you've got a lot of control over that. And now as we start to make changes, you can see that those changes are affecting the center mostly, but then fading out to the outside. Okay, so that's great. Now, you know, if you go crazy, you can see that the brightening is not just affecting the leaf, it's actually also affecting the background. Right? So now what I want to do is I want to restrict, if you like, that mask to just being on the leaf. So I want to subtract, if you like, everything that isn't leaf from that mask. Okay, so one way of doing that in this instance would be, let's see whether, whether we could subtract the background. Yeah, let's see whether the, the AI will pick the background out from, from this. Okay, and you'll be able to, you know, so we, we can see then that, that the background which is getting this brightening effect. won't get the brightening effect. So then we come to Subtract and we select Background. Boom. Yeah, now look at, now look at the mask. So before we did that, the mask was that full oval. Now the mask, if we press the O key and show the overlay, is restricted to the leaf because we've subtracted away the background. It's found the background automatically and subtracted it away. Yeah. Did that make sense? Absolutely.
Yeah.
Magic, isn't it?
Now, does that show that it retains a little bit of the feather just on that bottom edge especially?
I don't think that subtraction— I think that's probably because that bit of the leaf is slightly blurred, right? Rather than it being a feather, because there's no feather options. Over here.
Right. Okay.
Yeah.
So subtracting the background, whatever it determined was background, it just removed.
Okay. Thank you.
Yeah.
One thing that you haven't got in Lightroom that you've got in Photoshop when you're doing masking is you haven't got Refine Edge. Yeah. So, you know, in Refine Edge in Photoshop, you can go in and you can kind of say, give me a 10-pixel kind of edge or a 5-pixel edge or whatever. And it'll kind of give you that control over your edges. And so you don't actually have that that control in Lightroom. Most of the time it doesn't matter, you know, good enough. Yeah, but if you're a real pixel peeper and you want that absolute control, then for some things Photoshop is still more powerful for making those very, very, very fine selections.
Can you hit H and show where the masks are now?
Yes, I should be able to. So click on, click on the mask. The H, E. Why isn't the H key working there?
Yeah, right.
So that's probably why the outside is different, because it's in very much in the feathering of the original mask a bit.
Well, even if I changed that mask and made it much, much bigger, you see, it's still, it's still leaving the— but the edges are getting a little bit harder now because the effect of the center circle is more. But the AI has just removed— it's identified the background as everything. And it's easy to do in this image, relatively speaking, because the background is so much more blurred. But it's even removed these leaves here that are in the same plane of focus as well. So the AI is clever enough to figure out that we were— because the center of this radial filter was on this leaf, it's clever enough to figure out that we just wanted the one leaf. Not always that clever, but, but in this case, it seems to have done a pretty good job, doesn't it? So now a couple of little things. Let me just make this a bit smaller so we have it back on the screen. Our radial filter. There we go. So you can see it on the screen. Now, if I hold the Option key down— so, well, before I do that, let's, let's not hold the Option key down. I grab this, this thing here, and you see it, it's bringing it in left from, from, you know, the line is through the middle, and it's, it's bringing the top and the bottom in to the central line. Okay, if I hold the Option key down while I do that Yeah, it shifts the anchor point from the central line to the other side. So now as I move, I move with holding the Option or the Alt key down, it's flattening it to the top, if you like. Yeah, so the Option key gives some options for that. And if I hold the Shift key down, yeah, whatever of the cardinal points I grab, it will shrink or make the whole thing bigger in the same ratio as it currently is.
Okay.
So Option key, or, or on the Mac, the Command key does the same thing. Yeah. So the Option key kind of changes to sets the anchor point to the opposite place to where you are clicking. Yeah. And the Shift key says shrink or expand based on the current ratio or the current shape. Yeah. I don't think the Control key does anything else special. No, it doesn't.
No.
So those are the 2 options. Those are kind of like hidden ones that you kind of don't find out unless you're sad like me and play with all these hotkeys. But they can be useful now and then.
Yeah.
So there's our mask that's restricted to the leaf. Yeah. And again, so I would, you know, call that leaf. And now we've got a good mask on the leaf. Again, if we want to choose everything else, you know, the best way of doing that is now just to duplicate and invert it. And now we've got everything but the leaf. Yeah, very, very quick and easy technique. That duplicate and invert I use so much, um, because, you know, the background is quite dark, so we might want to just raise the background up a little bit. Yeah, so now with the background leaf inverted mask, yeah, whatever we change is just affecting the outside. Or maybe we just want to put the leaf on black. Yeah, and now I can come back to the leaf And I can say, well, actually, I want that leaf. It's way too bright. So let's bring it down a bit.
Yeah.
And I want to change the color temperature on that leaf to make it kind of warmer. Or actually, no, it's such a lovely leaf. I want it in black and white. What's the shortcut key for black and white?
V.
V. That's right. So then that just turns that mask into black and white. Yeah. And now I can come in and I can kind of say, okay, well, give me more clarity and give me a bit of texture on that leaf and stuff like that. Yeah, and all of a sudden we've got something looking very different. So the radial filter is fabulous. You can duplicate a radial filter as well. So if I press the H and the O to show you where that radial filter— actually, let's do another one. Create a new mask, radial gradient. So there's a new radial gradient mask. Okay, so you get it just right. If I right-click, I can duplicate. So you put the cursor right on the middle and right-click, and you can duplicate that radial gradient, and it now gives you a second one. Yeah, and it's like shining a torch into, into the, the background. So now let me, let me go back to my leaf inverted, and let's just raise the background up a little bit so that we can just barely see the background. Okay, right. Now, our Mask 1, because I duplicated these, anything I do to one of them will affect both of them. So let's say, you know, I've got kind of like 2 torches here. So this would, this would brighten up both of those areas. Yeah, simultaneously. Okay, so that's what happens when you have one radial filter and you duplicate it. But if I click on the center of this one and say go away, delete it, Hit the delete key. Okay, now I've just got this one. Okay, now if I do a separate radial filter, not duplicating, just create a new one. Okay, and I put it up here. Now if I change this one, it just changes the exposure up there, and this, this one here is completely separate. Yeah, um, so I've got lots of possibilities to adjust different areas of the image. Serge Ramelli, the, the French photographer calls this complexifying the light. Yeah, complexifies the light. Yeah, shine these little, little kind of torchlights into, into different areas of your image, and it can, it can really be very, very effective. Okay, so that is the radial filter, um, and the inverting of, you know, any filter. Um, anybody tell me the shortcut key to flip a filter inverted? So at the moment, this, this this one here? Yeah, you know, the main effect is on the inside, is on the inside. But what if I wanted this to be the darkest bit and I wanted it to be affecting on the outside? So how would I flip this filter? Is that apostrophe? It's the apostrophe key. Yeah, that's right. So now you see, look, before, after. Yeah. And that's this little invert button or this little invert checkbox up here. Does that, and you can use that with any mask. Okay, so if you, if you invert a radial filter, it just takes it from inside to outside. If you invert a linear gradient, it just flips it across the line of the linear gradient. If you invert a brush, it does it from the path to the outside and the outside back to the path. So invert is quite a useful tool as well to flip flip things around. Joe, would you say that, that what you've just shown us, this sort of radial filter plus invert background, is the best way to highlight an irregular-shaped object like this? No, no, no. I will show you the best way of doing that in a minute. Okay, this is just a radial filter, so this is this kind of general oval, circular, shine a bit of light into an area of an image. But no, when we get down to things like the subject mask and the object mask, particularly for irregular-shaped objects. Typically, the object mask is going to be your best friend there.
Okay.
That is— it's just uncannily good at picking out, you know, irregular-shaped objects. And you can add then to the mask if it doesn't get it quite right first time and stuff. Yeah. Okay. Linear gradient. Typically used in a scene something like this where, you know, the foreground's reasonably exposed, but the background clearly isn't. So D for develop. I mean, first I'd do a crop, alpha crop, and just get rid of the vignetting there. Yeah. And maybe pull the thirds line down onto the horizon. And then I might just check that my horizon angle is perfectly right. Because I don't think it is quite right. It's just, just off by a fraction. Okay, so there, there it is. Now there's a couple of options from mask, the masking tool that you can use here. So I'm going to show you the, the linear gradient first. So it's a linear gradient, the shortcut key is M. So if I come out of the masking, yeah, and just hit M. Okay, again, I've got my little square, my little crosshairs now. But when I click and drag now, it's not going to give me an oval shape. It's giving me— so wherever I click and I drag down, okay, the mask is going to be above. If I click and drag up, the mask is going to be from below. Okay, and I can vary the angle of the mask by just moving things around. If I want this mask to be completely horizontal, the Shift key. Yeah, so hold the Shift key down as you're creating the mask and it maintains it as completely horizontal. So in this case, you can see that the mask is going to be on the sky, and I've— then if I pull the bottom line, which is what I've got at the moment, okay, if I pull that bottom line away from the top line, the feather is increasing. So full effect is above the top line, graded effect is from the top line down to the middle, and then the middle to the outside is kind of just the control area. Okay, so if I make this wider, the feather is from here to here. Yeah, and there's virtually nothing in the bottom there. So you can make this very soft feather Or if you keep those all those lines together, then that's quite a hard feather. And if I hide the lines, you can see H that that's quite a hard line now. Okay, so pull them apart, and that the feather is much softer. So you're very often going to do this cool, you know, medium soft for something like this because we've got a reasonably hard line of that horizon, and then. Grab the square, which is the center. Okay. And once you grab the square, it's not going to wiggle around normally. Okay. So there we are. And I can just now move that. So that's really just given me the sky as a good, you know, kind of selection. This isn't ideal for this particular image because, as you can see, we've got some sticky up sticky-uppy bits. Yeah, we've, we've got the, the land, the, these trees, these 2 trees in the middle and stuff like that. So if I darken all the sky now, it's also going to darken to some extent this stuff in the foreground. So if I, if I take this and I just darken the sky, yeah, and maybe take the highlights down, okay, we're just affecting the area of that linear gradient. But You see, as I use the darkening to kind of get all those clouds and stuff, yeah, it's also darkening these, these trees and things like that. So we, we might need to then come into this linear gradient and subtract, yeah, using maybe a brush or using something else, these other areas that are part of the mask at the moment. Okay, so if I was doing this and I was using this mask Okay, and let's just, let's just make it way too much. So you can really see we've got the sky very dark now, but look, we've got way too dark on the, on the trees and stuff. So what I want to do is subtract from this current mask, show the overlay. I want to subtract from that all the areas that are darker than the sky. Yeah, so I come to Subtract, and rather than using a brush or, you know, anything else here, I'm going to come down to Luminance Range. Okay, so this allows you to create or kind of, you know, select things based on how bright they are. And now we get this bar. Okay, and the left-hand edge of this bar is the darkest tones. And the right-hand part of this bar are the brightest tones. So I want, I want to subtract. We're subtracting from the mask. So I want to choose all those dark tones in that kind of top third of the picture. Okay, and have those subtracted from this current mask. So if I pull back from the right, so if I grab that little house icon and pull back from the right, what we'll start to see is, yeah, the mask kind of building up again. Okay, but now you see the mask is just picking up the sky. Yeah, and all these darker tones are the ones that have been excluded from the mask. So we're getting a much, much kind of more focused mask because we've removed the dark tones. And if we— when you get to kind of that, which is about right now, you've got quite hard edges to the mask. Now it's going to look a little odd. So now come back, come to the right-hand edge, and there's 2 handles. There's a vertical handle and there's the little house icon. The little house icon will, will come to the right, and that will feather the edge of the mask. So this is a bit like the Refine Edge. Okay, so this one is the main tones. So you can make sure the main tones is all the sky, and then this one is the feather. And you can see that feather just, just giving you a little bit more control over the edges of that mask. Okay, so now we've got a very, very good sky and sea kind of mask that we can now adjust as we want to without really affecting the trees in the foreground. Okay, now, you know, you go more than 1 or 2 stops on, on a sky, the, the stuff that you're not affecting is going to look slightly odd. So, you know, just, just be aware that the more you do change masked areas, then the non-masked bits often look a little odd. So just, just, you know, you've got to be gentle. If you like. But that's, that's how we would separate kind of trees or whatever, or that, that bottom area from a linear gradient mask like this. Let's just draw that mask again. So if I'll just, I'll just hide this one. Okay, let's just create another linear gradient mask. Okay, so I grab it and I do that. Okay, now if I decide actually I'm more interested in the foreground than the background here, yeah, the apostrophe key. Inverts the mask. Okay, so rather than it being at the top, it's at the bottom. Okay, and if you've got the lines, yeah, you can also just move that, move that point, that drag point there. If you just drag it the other way up, then it just flips the mask as well. Lots of different ways of doing that. If you go to the center line on the linear gradient mask, you get the double-headed arrow, and now you can rotate around the middle. Okay, so, you know, that can give you your— because sometimes you don't want the mask, you know, so if we were bringing in a bit more light in this bottom corner and we wanted it to kind of match the angle of the road, perhaps, yeah, then what we might do is something like that and just drag that down to like there. And that gives us a rough, you know, a pretty good mask. And now we can just darken that foreground a little bit, see, and it's just that area on that angle now. Okay, and as before, if you hold the Option key down, yeah, the Option key when it's held down will expand the mask in both directions away from the center. If you're not holding the Option key down, it's just pulling away from the opposite edge. So just ways of modifying your masks and stuff. Questions on the linear gradient? Making sense? Anybody learnt anything yet this morning? Really good.
Absolutely. Absolutely.
Super.
Super. Yeah, I mean, I think we've probably covered all this in other sessions, but I think perhaps just going through it step by step, mask by mask, might be a good learning. Yeah.
It's very good.
Reminds you of certain things.
Very good. Yeah. Sorry, Joe, could you just say that last point again about expanding when you were dragging those 3 and you mentioned holding the Option key?
Yeah, so if I hold the Option key down now, so if I just, if I want this mask, let's just turn the overlay on. So if I want to just make that a slightly sharper edge, I just normally grab the bottom there and just push it up there. And now I've got a sharp edge. Okay. But if I wanted to soften that edge, but I didn't want to move, I've got the line right now in the right place, but I just want to soften the edge generally, hold the Option key down, and then that just opens the whole— oh yeah, both sides. It just gives you that control. Yeah, thank you. Yeah, lovely. Okay, that's fine. You can add to this mask just like you can add to any other mask. So, you know, let's say that we wanted this, but we also wanted the grass. So we could click on this mask and say, well, add with a brush. Okay, and I just want to brush in you know, the grass, whatever. I just don't want to get the trees in. I just want to do the— so now we've got a mask that's, you know, a combined mask of the original linear gradient plus that area of brush. Let me undo the brush, the brushed area. So we're back to just our linear gradient now. Yeah, we could add— yeah, use— and again, you can use any of these options as well. So we'll, we'll come into some of the other options in a minute. I am on— I'm just about to stop for a scone for about 10 minutes so you can grab your, your breakfast. April has just showed up for breakfast. It's Saturday.
Right.
Okay. I think we will break for a scone. Does that sound like a good idea?
Good plan.
Perfect.
Good idea.
Stop the share. Pause the recording. Lovely.
Oh, you didn't? Oh, sorry, Mel. Can I just say, uh, I didn't do what you— yeah, you— yeah, just to remind you, put it back on my list. Thank you. I'm sure it's getting longer by the week, but sorry about that.
Right, um, just a little freebie in the chat for you all. Um, I did a talk last week and somebody asked whether I had a list of the Lightroom shortcuts, and I didn't, so I put one together.
Brilliant.
So I've just dropped the PDF in the chat.
Oh, fantastic.
So I'll, I'll probably ask Mel whether she can put it on the Notion page as well.
Yeah, that'd be great.
Or I can do it, but you should just be able to click on it in the chat now and just save it. So that is a practical guide with 20 pages of all the shortcuts.
Oh my God.
Yeah, 20 pages of shortcuts. There will be an exam next week.
Yeah.
But Dot will win.
Dot will win. Oh yeah, Dot knows all the shortcuts.
Yeah.
She's not here. She's climbing Mont Blanc at the moment. But anyway, I hope that is of some use to somebody anyway. So I just thought I'd share that with you.
Very good.
There we go. G for grid. So we've touched on the luminance mask before. I mean, something like this is an obvious place to use the luminance mask. And I mean, the thing about a lot of these masking tools is as well, once you know how they work, you can kind of almost shoot differently. Yeah, because, you know, if you know that you can select based on brightness, you can be in a church and you can not worry that, you know, kind of, you know, the stone is too dark or the glass is too bright or whatever it is, because, you know, you'll be able to kind of make these adjustments and do this fine detail selection. So with a shot like this, maybe we actually want to select on the dark. We want a mask of the dark. So that we can bring the stone up. Yeah, so I mean, before, you know, so we'd first we'd do a transform, wouldn't we? Probably. So, you know, just do— I mean, let's just try a vertical transform. That's done a pretty good job of just giving me the verticals. And then a crop. And I'll just do an open crop here. So we'll crop down to the middle. We'll put the— now in this case, you see the thirds lines, they're not the most helpful overlay here. So if you click on the O key until we get to that one. Yeah. Now, as I do this, I can put that middle line right down the middle of the— you see? So that's really much more useful there. Yeah. And now if I hold the Option key down now and drag from the right, it will bring the both sides in around the middle. Yeah, because I've put the middle where it needs to be. And now I can kind of get rid of those horrible triangles and just come in far enough. And yeah, I like, I like the figure in the bottom right-hand corner. So I'm going to leave them there. So there's our crop. Okay. Now come into the masking and come down to range. And then luminance range. So Shift and Q. Yeah, that's, that's one to remember, isn't it? Yeah, Shift and Q. Okay, that bit of a luminance range. So there's our luminance range. Now you can either just come over with the dropper and you can choose an area of darkness or brightness, and then it will set the chosen area here. Okay, so if I click here, yeah, it's kind of in the bright area and it's picked all the brights. And you see on the, on the range now we've got the main area of brights is this area here between the verticals, and then we've got the brights feathered out from the left-hand edge. Okay, so you've got a bit of feathering. So, you know, maybe in this case we probably just want quite hard Hard edging. We just want to pick up the, the right. Now if I want to restrict that even further, so I've got all the kind of detail of all the leading in the stained glass, I would pull this back even further. Yeah, so the brights now, and then just bring it out so I've just got the brights. Yeah, but all that leading is now excluded from the mask. We've got more, more detail. Okay, so we might call this mask now window. Yeah, and then let's, let's create a new luminance range mask, and I just want the dark areas now. So I can— you can either just click once and it'll make a selection based on what's under the point, or you can draw a box You can drag and draw a box, and then it'll be— it'll kind of make that selection now based on all the tones in the box. If you do a single point— so let me just delete that mask and do that again. So if you delete— if you just do a luminance range and you just click on a single point, okay, then it's done that. You can actually add 4 more points. So if you hold the Shift key down Yeah, we now get the— why isn't that letting me? Oh, maybe, maybe I'm wrong. No, maybe, maybe for luminance you can't do it that way. Now it's color range, maybe. I think you can do that. All right, so, so we draw, draw, draw this in. So now you, you've got the darks selected and you can adjust the feather and you can adjust the main set of tones. The main set of tones is the stuff Yeah, that the dark, the vertical line, and then the feather is the little house icon. I just think of that as like a Monopoly house, that little icon there. Okay, so you see that's just giving me really all the dark areas now, and it's excluding the brights. Yeah, so we'll call that stone. But now we've got that lovely stone mask, I can bring the exposure up. Yeah, and all of a sudden we're getting exposure. Now it's quite interesting, I hadn't realized, but there's clearly lots more light at the bottom than there is at the top of the stone, because look, this has come up bright and this is still very dark, isn't it? So what we might do, and this might make quite a nice example of this, what we might do here is now put an intersect. So I want to actually do another mask that is just— I'm going to do a radial, a linear gradient. So let's, let's do it. Let's do a linear gradient. Okay. And we'll pull it down from the top. And you see the light kind of seems to be at an angle, doesn't it? So we'll pull it down to there. Okay, so now my first mask is this area of linear gradient. Okay, so what I want to do first is I want to— now, now what I want to do is eliminate all the brights from that linear gradient mask. Yeah, so I can subtract using a luminance range and just choose the brights. Okay, and now you see the mask is being restricted as I take the darks away. So there's the, there's the darks being included back in the mask. Yeah, but the linear gradient is being restricted to— yeah, I've basically taken out all the, all the luminance. So now I can change this darkest area without raising the brightness of the stone on the bottom. So I can, I can make the, the stone, you know, even darker. Now it's, it's so dark, it's not really coming out, is it, from the, from the, the shadows? It's very, very noisy and stuff. Could we do anything about the noise?
Probably not.
We can take the sharpness out. We can reduce the noise in that area. So we're getting a little bit more, but it's so— it was so dark, it's not really having a whole lot of effect, is it? You can play with the clarity. Yeah, but you see, it's still so noisy. We've had to do so much with the dark that it's not getting kind of— it's not going to even up. So in this case, it might not work very well. What we might need to do here with the dark mask, with the stone mask, yeah, is not push it quite as hard and just leave the stone dark. Yeah, but in this case, come to the window and see whether we can make more of the window. So now look, we just drop the exposure a little bit on the window, or maybe the highlights, whatever. Yeah, and it's just giving us a little bit more window. Now this window probably wasn't the best one because it's basically black and white. There's not much color in the window. But if this was one of your classic stained glass, you'd come in and, you know, boost the saturation a bit or whatever. And you see that's pushing the colors out of the window more. So, okay, so that was that one. I mean, another luminance mask one would be something like this, where we've got quite a dark edge, but we've got the brights of the long exposure waterfall. So D for Develop, and then come in and find your luminance range. Okay. And in this case, I just want these brights. So if I come in and just use the pointer, I can just drag into that area there, and it will make a very good kind of initial selection. Now, it's given us quite a bit of the brights because the light's coming down on these leaves as well. Okay, I kind of don't want those. So what I could do now with that is I could subtract, but rather than subtract based on luminance range, I'll subtract based on a color range. Yeah, so I want to, I want to remove all the green basically from, from this mask. So come to color range. Yeah, and then just select some of those colors. Okay, and all of a sudden, right, what have we done with the mask now? So maybe I've taken too much of it away with that particular thing, but let's see whether we can refine it. Show the overlay. There's the color range. So that's got rid of too much. Why has that got rid of too much? Subtract, mask, mask 1, manage, subtract by color. And then we just choose a bit of color, right? Okay, so this is starting to— right, so I've chosen a specific color there. And if I expand on that color with the refine, you see nothing. And that's getting rid of more and more of the greens. And it's just really leaving the whites of the water alone, isn't it? Yeah, there's maybe a bit of green moss under this, under the water here, but that's, that's almost eliminated all of the stuff we don't want. Now here's a little trick, okay? If there's bits of mask like this that you know are still there, but it's quite difficult to pick them up against the color of the image, come down to the 3 dots in the masking thing here and just ask for white instead of showing the color overlay, show white on black. And now you've got the image as a negative.
Yeah.
And this is a really, really easy way now to come in with, say, a brush. Yeah. And you see we've got a minus brush now. So I can just brush away All the bits that I don't want in my mask. Yeah, so I can just come in and, and, and push away. Now, why isn't it brushing them straight away? You see, look, it's not getting rid of it completely. I've got to make 2 or 3 passes. Anybody tell me why that is?
Flow.
Flow.
Look at the flow slider on the right. It's set to 79. not 100. Yeah, whereas if I come over here and make that flow 100, then every stroke just removes everything underneath it. So again, if you're careful, you just take your time, you can really, you can really love, you know, clean this up beautifully. Make your brush a bit smaller, come in here, get those, get those little bits that you don't want out of the mask. So now we've got a mask which is just the brights of the water. And then come back and just show the color overlay. Show us, show us the image. Okay, so there's a, there's a much better mask, um, now. And now, you know, as we start to play with, with the area that is masked, if we put a bit of clarity on that, it kind of sharpens up all the lines in the water. Yeah, if we want to dehaze it, we can make it kind of more hazy or less hazy and stuff. So that's one to play with. Texture will give you kind of sharper or softer feel as well. So lots to play with there.
So this isn't directly relating to what you're talking about, but as you're on that bit, is there a way of moving those boxes of adjusters in the mask tool to line up with the sequence you have on your main screen? Because the texture clarity dehaze on my main screen is relatively near the top because I use it a lot. On this one, it's buried in these 3 different parts.
Yeah, within, within the masking tools that are available to the mask, there's no way of, of Altering the order? No, no. Thank you. The only way you can alter order is in those main— is in these main ones by right-clicking and customizing the develop panel. And then you can—
Actually, I won't search for it then.
No, no, we can't do it at the moment. So that's that. So that was Luminance masking. Any other questions or thoughts on luminance masking, or did that make no sense at all? Yeah, great. Okay, I know this is a bit of information overload today, isn't it? I'm throwing a lot at you here, but it is recording, so you can watch it again. Does anybody ever watch these videos again?
Oh, absolutely.
Yeah, yeah, yeah.
Okay.
Yeah, yeah. Because, because actually, when, when you go through it, it all makes sense, but then when you come to do it, you need a bit of help, so you have to go back and watch. And, uh, actually, the, that, um, the range you've just done, I find that probably the most difficult of all of them. That needs the most practice, I think. It's getting the feather right and everything else. I struggle with that. Anyway, sorry, that's just me.
And I've never used a luminance mask like that, so that's new to me.
Yeah, anytime you've got contrast or you've got, you know, different areas of brightness or darkness, you can use a luminance mask to kind of, you know, tie things in together, which is good. Color mask. Okay, D for Develop, Masks. Oh, let's just reset this one. This one has already got some edits on it. So I just right— if I just right-click and go down to— go down to— might have to do this in the grid view. Yeah, right-click, Develop Settings, Reset. Okay, so that just resets it to, you know, what it was when it came out of the camera. Okay, so that's, that's what I started with. Maybe I just want to select the background. Now I could just come in and select background. Okay, so we've got background, and that's made a pretty good job of selecting everything but the flower. But I want to select based on color. So I want this green. I presume this is green in the background. To be the thing that, that is the selection criteria. So come to Range, and rather than Luminance Range, Color Range. Shift+J is the shortcut key here. Okay, and then now again you've got a dropper. Okay, so if I click in the background here, that gives me that color under that pixel. Now you see that's not given me the whole of the background because there's slightly different greens in the background, but you can see where, where the mask is so far. We've got a refine slider here, so that will expand the number of colours around the pixel that I chose. So we can expand this a bit further or a bit further. Now notice this is also bleeding into the flower in the middle a little bit as well, so we might have to come back and just remove that from the mask, but this is making a better job of selecting the background. Now I also want these other bits of color, so what I can do here is if I hold the Shift key down, you see the dropper changes and I get a plus sign next to it. Yeah, with holding the Shift key down, and now I can choose up to 4 more either single points or areas of color. And it will add those to the mask. So I can drag this little area here and say all the colors under that area there, include them in the mask. Much better. Yeah. If I undo that and I just do single points, so hold the Shift key down, click that color. Okay, so now we're getting almost there. And then let's find some of these white areas on the mask here that, that area there, click. Yeah, pretty much there, aren't we? Okay, and we've— that's a— that's now a pretty good background mask. And if you've— each time you've clicked, you've got a little dropper icon showing you where you clicked. So 1, 2, 3, 4. I've got one more click, so I could just maybe do one more click right there. There we are. Color range is limited to 5 samples. Okay, and if you want to get rid of one of these, Option click, you see, as I hold the Option key down, I've now got a pair of scissors. So I can say, don't want that one. Okay. And now I can Shift and click and choose a different area. Yeah. All these shortcuts, Options and Shifts and whatnot and whatever. It's lots to think of. Is your head exploding, Gordon?
Absolutely.
Absolutely. Yeah, once you learn them, you know, once they become part of your muscle memory, it really speeds the editing up. But you've got to practice. You've got to, you know, you've got to go and run the video and do this on a couple of images or whatever. So now I can— now I've got that mask, I can darken or brighten, you know, that selected area. Now you see, as I'm brightening or darkening, it's darkening the center of the flower as well. So what I really want to do is, now I've got that mask, yeah, I want to remove them, certainly in the middle. In fact, I want to remove the whole of the flower from it. So if I click on that mask and just subtract— if I say Subtract Subject, yeah, let's just show the mask again, show the overlay. All right, there we are. So let's subtract. So click on the mask there, subtract subject. Boom. Yeah, so it picked the subject out and removed that from the mask. Or I could subtract with a brush, and now I could use my brush and I could say just don't include that. But you see, as I brush out here, there's, there's other bits of stuff that are clearly— oh, gone too far. Yeah, so I can Command+Z and then just start again with that brush. Yeah, subtract with a brush and just, just make it the middle, maybe something like that.
Okay.
So now that's not part of the overall mask. So now when I'm changing things, it's not going to affect the center of the flower. Okay, so lots and lots of different ways to interact these masks and add to masks and subtract from masks and, and whatever. Okay, G for grid. The subject mask, which we've, we've just looked at, but let's, let's do it again. Okay, now sometimes, you know, on something like this, it's going to make a pretty good job of it. I would think you would think that this is going to do a good job. So let's do it. D for develop. Come into the masks and say select subject.
Yeah.
Okay. Now, you happy with that? I'm not. I'm not happy with that mask at all. Let me just move the mask panel. Why am I not happy with that mask?
No idea.
What? Steve's saying it's great.
I take it— well, ah, now you see. Okay. Okay.
So look between the feathers.
Okay.
It's not done a good job, has it? So what can we do about that? Well, we could subtract. We could subtract with a brush and spend the next hour pixel Pixel. Yeah. Or we could try removing the background from the mask. So subtract background. It's made a bit of a, bit of a better job, but it's still not very good, is it? What about subtract based on color? Yeah, because the sky color, if we, if we choose the sky color kind of here near, near, near the edge of that Presumably it'll get rid of the rest of it. So let's see, subtract color range, and then choose the sky color here. Right, so that's made a better job. It's not quite as good as it might have been, so maybe we just need a few more pixels of sky color. Okay, it's still not perfect, is it? It's better, but it's still not perfect. Okay, so this comes back to Mr. Hayes' question. Is it David or Derek? I don't know. Put my microphone on, it's Dave. Dave, Dave, right, Dave. This comes back to Dave's question earlier on, what's the best? And a lot of people fall into the kind of trap, I think, of because the subject mask is the easy one, you know, it's got a big kind of subject mask option there. Yeah, you know, Select Subject, that's the one to use. Yeah, I, I don't use Select Subject very often. Okay, the most powerful tool to select objects, particularly when they're kind of complex objects. So let me just turn that mask off. All right, create a new mask, use the Object Selection. Okay, now with the Object Selection, you just draw around the edge of the object. Okay, and you need to make sure that you get all the edges, but it can be quite a fat line. Okay. And I'm running out of mouse, mouse area.
No.
So let me—
right.
And it made a good— I didn't even have to go around the whole object, whole object there. Yeah. Now look at the difference. It's a more powerful selection tool. Yeah. That's a really, really good selection. Straight out the back, you know, straight out the back. Much better selection than the Select Subject tool. So, you know, if in doubt, use Object first, I think, is the trick. There's a squirrel option as well. Where's my squirrel? Here he is. So let's, let's do the same thing. Let's do Select Subject. So D, Masks, Subject. Okay, it's okay, but it's a bit muzzy around the fur and stuff like that. So let's try subtracting the background. Okay, much better straight away. Yeah, let's try subtracting the background color. Okay, and then choose maybe, you know, something quite close to the edge of the squirrel. And all of a sudden, look at that, we've got a much better, finer mask now in. And, and if we do the Shift and choose a few more colors, we can actually Come around to the different parts just outside where the squirrel is, and that just gives us much, much finer control over that mask. Yeah, so Select Subject did a pretty good job, but let's try doing an object select on the squirrel instead.
Boom.
Okay, now in this case, it's better than the first subject mask, I think, but we'd still probably need to now adjust it just to get all the details. So again, I'd probably come in now with that object and just do a color range selection and just see whether we can get rid of— look at that, straight away we're getting a better A better set of the detail now on the fur and stuff. So if you only take one thing out of today about masking, it's don't trust them. Yeah, they sound so powerful. One click, boom, looks fine. You know, like Steve was looking at the vulture and saying, oh, that's fine. Well, it wasn't fine.
Yeah.
Yeah, so, so, so kind of, you know, ask yourself, is this, is this mask really, really good, particularly on your subject? Because if you get the subject mask right— so now we've got a good subject mask. Okay, you know, I'm going to call that squirrel. Yeah, and now I can do a 3 dots, duplicate and inverse, invert, and I've got a really good background mask now. because the original mask that I've now inverted, yeah, is, that's a better mask than I would just get from selecting background.
Okay.
So knowing the differences between these masks and their different strengths and weaknesses and how you work them all together, I think is, you know, key for this kind of stuff.
Okay.
Alrighty. Um, so the background mask. Yeah, so, so I mean, let's, let's do that then as a background mask. D, uh, come up to here. It's one of the main options when you create a new mask is select background. Okay, and it will, it will make normally a pretty good job of selecting the background, but you see again in, in the top of his brush there It's not really done a very good job, has it? So what we might need to do now with this background mask is add. Yeah. And say, well, add to this mask now based on color. And let's see whether we can get a bit further in here. So let's just choose the color just outside the hazy area here. Let's see what that— All right. And now look. Yeah, that's made the mask a bit bigger and add a bit more there. Now look at that. Yeah, it's just bringing the mask in a bit better.
Yeah.
Now maybe that's too much because we've lost this part of the brush now from the mask. So again, you've got to kind of think, you know, what do I want in the mask? And, you know, let it go appropriately. But don't trust the masks. You've got to adjust the masks until they're right. But they don't have to be perfect. They just need to be good enough to get the effect that you want from, you know, the next stage of editing. Yeah, object masks. I mean, the object mask is fantastic for doing all kinds of things. I don't like the cars. Do you?
Yeah.
Wouldn't it be lovely if it was a Sunday morning before all the cars were around there? So we might come in here. Now, you know, another form of kind of masking is the AI selection of stuff. So if you come into the eraser tool and use the GenAI and detect objects, Okay, so this is kind of object masking for removing stuff. Okay, now let's just see. Let's just— so if we just— let's say we wanted just to remove that one car. Yeah, you go around it and then you— yeah, you just say remove that car. And let's see how well it'll fill in the cars in the background. Oh, that's not bad, is it? That's, that's not bad. And we've got 3, 3 options there. Okay, so that's, that's not too bad. Let's come back in and see whether we can get rid of all the rest of the cars and whether it'll just fill in the bottom of the, the arc for us. Okay, so just the cars I want to get rid of.
Really?
Okay, so that's all those cars. And then there's this one over here. So it's created that block. And now I just want to say, well, just add this to it. Okay, there we are. Get rid of that as well. Let's see. Sometimes this is wonderful and sometimes it's awful. Well, the cars have gone. I think we would be get get shot by the French if we if we released this photo of the Arc de Triomphe. But let's see. Yeah, it's still not quite right, is it? Oh well, we've got a lovely curvy bit now. So you know, it'll go so far, but it won't it won't do. you know, very complex renderings and stuff like that. So, you know, sometimes it works, sometimes it doesn't. Before and after. Yeah. But yeah, it didn't have enough information to faithfully recreate the base there and stuff like that. Let's go back to the start of that and see what else we could do here. Rather than getting rid of the cars, let's say we didn't want the lampstand.
Yeah.
So again, you could just, you could do that. And I think this will probably do a better job of kind of doing things. And maybe we don't want all the tree branches. So let's see whether it's intelligent enough to just get rid of all the tree stuff and the lampstand for us. Okay, now you see there, it's included the ark. So before I, before I do remove now, I subtract from the mask. Okay, come down here to subtract, and I say I don't want— so subtract, I don't want— why is that not— there we are. Just, just take out the arc. I don't want you to get rid of the arc. Okay, I don't really want you to get rid of the pavement.
Either.
Okay, so there we are. Just keep that safe. Now, do your thing.
Boom.
Yeah. Before.
Fantastic.
Yeah, that's not bad, is it? Yeah. Yeah.
Yeah. Lost half a car though, haven't we?
Yeah, lost half a car. So you've got 3 options. So again, Yeah. So we've got, you know, 3 options. And, you know, you might take one of those and say, well, that's, that's almost right. Yeah, something like that. I don't like this shed now. And now you can, you can go in and kind of just say, well, clean this up again. You know, try, try, try, try something else there. So there might be a couple of goes before you, you get something that, you know, the eye can't Actually, kind of check on. Yeah, so something like that might be might be better. There are so many amazing guests. Oh, somebody's got the radio on as well. You do you you double double jobbing, Stephen.
No no no, I pressed something I shouldn't.
Sorry.
He's listening to the match. First time. He's listening to the match.
China.
China.
Cal. Cal.
Right.
Wonderful. Okay. Now. Here's, here's one we haven't looked at yet today. This is, this is the newest set of masking tools that's come into Lightroom. This came in with, I think, version 15. So here's quite an old version, an old shot. I don't know when this was taken because it's a long time since I was in Paris. Yeah, 2009. Okay. Of of the Notre Dame before the fire. So if we go into D4Develop, there is in the masking tools, there is an option now called Landscape. And what Landscape does, this is one of the AI tools. And what Landscape does is, let's just shut that down, is breaks your image up into different areas of the landscape. So there's the sky, there's the architecture, there's the vegetation, and there's the water. Now, it's not perfect. The wall isn't water, but you can get rid of those. But it's not bad. So let's, let's just tell it straight away, create all 4 masks for me. So straight away you've got those 4 masks that you can now start to tweak. So the water mask, we click on the water mask. Okay, this isn't water and this isn't water. So we'd come in here and subtract, probably with a brush, and just rub off, rub away that stuff there. And now we've just got the Seine in the mask. Okay, so now we've got water. I can now maybe come in and make that you know, a bit more clarified.
Yeah.
And, you know, a bit more textured, something like that. You know, I could dehaze it, darken it off, something like that. So straight away we can, we can make quite a change to that specific area very quickly. Okay. Now the vegetation. Okay, so there's the vegetation stuff. Maybe it's all looking a bit dark, isn't it, that vegetation? So let's just bring the shadows up on the vegetation. Okay, and it just introduced just a little bit more maybe detail there and maybe a bit more texture. Yeah, just to get all that lovely detail coming out of the stuff. Actually, I think this is a very soft photo anyway. I think there's a bit of motion blur on this photo. Yeah, it's, look, it's not very sharp anyway. So, you know, shows what a photographer I was back in 2009. But it was getting dark as well. So I don't know, what's the shutter speed on this?
It's half a second.
So was it half a second? Yeah. So yeah, half a second. So yeah, this was before stabilized lenses and stuff. I was probably shooting Yeah, the D300. So this is before any of the stabilization had come in and stuff like that. So then the architecture. Now that's made a pretty good job of picking up the cathedral. Yeah. And maybe we just want the cathedral. Okay. We don't want, you know, these buildings here, but I just want to play a bit more with the cathedral. So let's click on architecture. Oh, toggles the, the overlay on and off. Okay, so really I want everything but, but these areas here. So again, come to Subtract. Now I could just use a brush like I did before, but given that these are all on the left-hand side of the image, I could also subtract using a linear gradient. And I could just draw a linear gradient here, yeah, and just say, look, anything anything this side of the linear gradient is being subtracted from the mask. Okay, so that's a quick, easy way to just exclude everything from, you know, one side of the image, something like that. And now I've got whatever I do now just affects the cathedral itself. Yeah, again, I can maybe just get a bit more detail out. And, you know, maybe I just want to warm it up even more. Yeah, let's give it that lovely kind of warm, or cool it down, you know, depending on, you know, what I want to get out of the image. Just like that. Yeah. And then we've got the sky. It's given us a pretty good sky mask. It's not perfect though. So look at the haloing around different parts of this image. Yeah, and haloing kind of generally tells you that the mask could be better. So that's what— that's the sky mask that this created. Now let's just try an object mask, and let's see whether we can get it to give us the sky using an object mask. Create objects. Okay, so I'm just gonna just tell it that I want The sky. Okay, not so good, but it's giving me a better mask at the bottom. And then I'd have to, I'd have to go in again. So, so now that, that, that's some of the sky, but it's not all of this, so I might have to add again. Yeah, with an object to just, just, just say, okay, I just, just want the rest of the sky, please. Yeah, and just maybe paint it all in. Okay, that's better. And that's giving me a somewhat better mask. Very good around the cathedral, um, less haloing. So it's just a different way of getting to a point where you've now got— and so I might, you know, call that sky now.
Yeah.
And now I can apply things like dehaze to the sky, which will give me all that lovely detail that's sitting there that you just didn't know was there. Yeah, always, always try dehaze on a sky. It's, it's amazing what's hidden behind a boring nondescript sky when you just suddenly apply dehaze.
Oh, look!
I mean, that transforms the image, doesn't it? Yeah. And we didn't know it was there. And certainly back in 2009, I didn't know that sky was there. I've never ever processed this image and found the sky like that. So isn't that wonderful? It's finding all this stuff so many years later. That's great. So has anybody been using the landscape masking? Is this a tool that you've found yet? Yeah, Ken, you've been using it.
Yeah, I've used it a bit.
Yeah, yeah. To good effect, or is it— are you finding it good, bad, indifferent?
It took me a time to do it.
When it works, it's great. When it works, it's great, yes.
Yeah.
Yes.
Yeah, it took me a time to work it out. I don't think I, I hadn't used it much. I didn't realize it was AI, but never mind.
Yeah. Yeah. Most of, most of the new masks are.
Yeah. No comment.
Yeah.
Oops.
Oops.
You'll have to get, you'll have to give back that, that, that distinction that you just won.
Yeah.
Yeah.
Yeah. Yeah, I won't enter it in landscape then.
Well, I would have thought that sort of AI is okay, isn't it? If there'd been generative refill, get rid of the cathedral, that would be an issue. But I would have thought just masking type AI is acceptable for competitions, isn't it?
It's not. They don't differentiate. In the RPS rules, it just says AI. So yes, it's an ongoing conversation, let's put it that way. But yes, but I mean, these tools are very powerful, aren't they?
They really are.
Huge difference.
Yeah, yeah. And just breaking images up into the, you know, because I mean, if I was, if this was an image I was going to continue to process, you know, I'd maybe want to make more of the wall perhaps. So with something like that, you might, you might use, say, an object mask again. Okay. And let's just make it a bit smaller and let's just choose the wall. Okay. So we just draw along there and then just say, okay. And I would think this will make a pretty good job of identifying what I want. Boom. Look at that.
Yeah.
So now I'll just start with clarity and a bit of texture. Yeah, and all of a sudden that wall has kind of come to life from there to there.
Wow.
Yeah, and it was so quick to just pick that bit out and then apply something to it. Yeah, the Intersect tool would work quite nicely on this to just pick out these darker areas of foliage. So again, if we used— I don't know, it doesn't matter. The first mask that you do is your playing field. Okay, so we just brush this area here. Okay, and say that's, that's where I want you to look. Okay, so that's, there's my first bit. And now I want to intersect that mask with a luminance range. Okay, so the first mask is, is your kind of, that's where you're playing. The second mask is going to restrict, if you like, the first mask to a specific area. So the area that I want to restrict this first mask to is just those dark areas of vegetation. Yeah, so I'm going to intersect the first mask with a luminance range. Yeah, and the luminance range, all I want are the dark bits, so I'm going to get rid of all the bright areas. So as I get rid of all the brights, there's the lights and there's the sky And now as we get down to the— all the darker tones, look, there's the stone. And all I'm left with all of a sudden are just the darkest areas. If I turn the overlay on and off, you can see it's just restricting the mask now to those dark areas. And look how fast we did that, and it's such a complex mask.
Yeah.
And now I can just feather out a little bit, take, take the little house and just, just feather it out a little bit. Okay. And now I can make changes to the exposure of those things. Now, you see, I don't like the way I'm getting lovely exposure on the, on the leaves and things, but this stuff at the top, it's not working, is it? So let's turn that back and let's just restrict this mask now. Just let's just eliminate all the trees from the mask. So I'm just going to subtract with a brush and just say, actually, I don't want this mask to include those top bits. Yeah, just basically run this along the the wall. So I'm just going to kind of eliminate those, those bits from the mask. Yeah, and now as I make my changes, it's just working on— yeah, and maybe I don't do exposure, maybe I just do shadows, just try and bring out the shadows a little bit more. Now there's a little bit of edginess around those, so come back into that luminance range and just open up the, uh, the, the open up the feather a little bit more. Okay, and that just gets rid of the edginess. So, but look at the difference. Look at the difference we've got in the detail of these by just doing that mask and just putting it directly onto there. If we just want to see that mask itself, there it is. We can just turn it on and off using the little eye there.
Yeah.
And it's little changes like this that you might think, oh, it's just Joe kind of being OCD again. Yeah. But it's little changes like these that make the difference between, you know, an 18 and a 19 or a 16 and a 17 or, you know, a 19 and a 20. So breaking your picture up into these smaller and smaller elements and then just focusing attention where you want it to be, diverting attention away from stuff that you don't want by maybe darkening it or softening it. You know, classically, the eye is taken to light, bright light, and sharpness. So you can use that, you know, both ways. So you can soften things, you can darken things that sends the viewer's attention away from those areas, and moves the viewer's attention through the image. And that's kind of fundamentally what you're trying to do most of the time is just, where do I want the viewer to go? Is there a specific path that I want the eye to follow through an image? Is there somewhere that I want the image, the viewer's eye to end up, you know, typically the subject? And then you start to manipulate the other elements in the image from a light and from a shade and from a texture and from a sharpness perspective, using masks to to guide the viewer through that narrative. It's all about storytelling, you know, so many images, it's all about storytelling. I've thrown an awful lot at you this morning. Is there any final questions?
Anything?
Joe, could I just ask you about the people mass?
Yes.
Could you, in particular, You know, I find, you know, very often in a people mask, you, you want to bring that person out to stand out from the background.
Yeah.
But then you're going to want to go in and you use a radial gradient around his eyes and, you know, do something with the face and so on.
Yeah.
I get very muddled up of what order to do that in. If you, you know, so there's a mask for the whole person, there's individual bits. Yeah. What's, what's the process?
So there's, there's a couple of different options. You've got the subject mask, and then you've got an option for people as well. Okay, so the subject mask will, will try and figure out what the main subject is, and in this case it's the party. Yeah, so now any changes that you make will affect all of them at once.
Yeah.
Okay, which is fine, you know. So I mean, that's good because we can just maybe raise the shadows and get, get a bit more, you know, out of the suits and her dark dress and stuff like Okay, so that's fine. But let's say that we just want to focus on, you know, one of them.
Yeah.
Then rather than using the subject mask, so rather than— let me just kill that mask then. So get rid of that. Boom. So rather than using the subject mask down at the bottom, now the people mask will break up an image and it will try and identify each individual person. So let's say that I just want her. Okay, so I click on her face and it's just pulled her out of the, the image. And now I can either just have her as an entire person and create that mask, or I can break her up. Okay, so I can have her facial skin, I can have her body skin. Yeah. Or I could create a mask based on those 2. So you've got the option of kind of give me all her skin, say. So don't create 2 separate masks, just create a mask that's both of these together. Okay, so there's lots of combinations here, but you know, I mean, typically I'm going to want hair, I'm going to want clothes, and then maybe the skin. And with the facial skin and the body skin, you know, maybe I'm just going to do that as a separate mask. So I'm going to put in lips and teeth and the eyes and the eyebrows. So that lot would be one mask. Yeah, all of those. And then I might want a separate mask for hair and a separate mask for clothes. So if I create a kind of mask that's all the skin. Okay, so we'll just call that skin.
Yeah.
And then I create a second mask using Select People again, come into her again. Yeah. And now I just want, okay, 2 separate masks for hair and clothes.
Yeah.
Right. So now I've got, you know, dress and I've got hair and I've broken her up now into 3 things. So I can, I can do the, do, do the, the changes on the dress. Yeah, you know, give her a different color dress or whatever. I can now come into her hair and bring up the, you know, the shadows or whatever in the hair. Yeah, and then I can do the skin thing. And again, just maybe just bring the shadows up, just give her a bit more light, you know, and maybe, I don't know, soften her skin a little bit or something like that. Yeah, so it's very quick and easy way of breaking people up.
And Joe, if you just wanted to lift her out, you know, let's suppose you, you, you just did her face, just brought her eyes out a little bit but nothing else.
Yeah.
But then you want her to stand out from the other 4.
Right.
What order would you do that? Would you then do entire person? Would you do the eyes?
I do a select— I, I do a People mask on her.
Yeah.
Entire person, create the mask. Okay. I didn't, and then I would duplicate and invert that.
Yep.
And just darken everybody else a little bit.
Yep.
And now she stands out more.
Yeah. And would you then go in to do her eyes or whatever after?
Oh yeah. Well, it doesn't matter. That doesn't matter.
Okay.
Okay, so now, yeah, so now if you want to come in and do her eyes, um, we'll, we'll come in and, you know, typically what I'm going to do now is a couple of radial gradients.
Yeah.
Yeah, so radial gradient over this area. Now notice it's not just the eye sclera and the, the whites of the eyes and the, the iris. I'm choosing that whole area under her eyebrow. Yeah, and I'm just— what I'm going to do is I'm going to raise the shadows just a little bit. Look.
Yeah.
See what it does? And I'm going to pop the contrast, the, the, the clarity and texture, the texture, and that will just sharpen the eye. Okay, now if you want the eye to be a little bit whiter, you can also, you know, raise the highlights a little bit or whatever. And now if you want, and given that the light's Pretty much the same on both eyes. I just duplicate that now. Right-click, duplicate.
Yeah.
And just take that over here and just rotate it to that eye. And now whatever you do to either of those is on— is both on the same.
Yeah, yeah, yeah.
But so you've gone from that to that.
Yeah.
It's not a lot. Subtle lift of the eyes. And then Zed takes us out. So yeah, so we've gone from, you know, something quite flat and boring to something a little bit more, you know, where she stands out more. You've just subtly knocked the others down a little bit. And she's kind of standing out.
Yeah. Yeah, it was the order thing that kept throwing me. So that's really helpful, Joe. Thank you.
Yeah, I mean, order doesn't normally matter. Order matters in things like denoise. Okay, you always do denoising of an image early in your process because you don't want to be doing then changes to exposure or texture or clarity or anything, because that will exacerbate the noise.
Yeah.
So if you've got a noisy image, denoise it almost before you do anything else. Yeah, that's, that's one of the key things that is important. Great, thank you.
That's brilliant.
Okay, well, there we are. Another 2 hours has gone by. Everybody's still awake, I think. Gordon's head is wrecked.
And yeah, migraines have set in.
But migraines have set in.
Yeah, that's right.
Let's go, go, all go and have a lie down now. The 5-year-old birthday party, lie down.
Yes, I may be woken up a little bit in a minute, even more.
Super. Now I think Mel has some housekeeping, which she said there might be at the end.
Well, just to sort of keep them abreast of what we had—
what we were talking about, discussion.
So this is the final one of these 5 sessions. Now we go on to the Fine Art ones, which are 5, and they finish on April 11th. So that sort of fills that time. And then the following week from that, Joe is doing a talk on videoing, aren't you?
Oh, converting images to video. Yeah.
Yeah, just a— it's just a fun—
Just a fun thing. Yeah, just a kind of turning things into AV and whatever. Yeah, yeah.
So, so that's just a talk, which is probably a freebie. So that's the 17th. So we're looking towards starting again and doing a short series of 3 through May.
Okay.
And then Joe—
Because I'm away for most of June.
And Joe is away for June. What?
It's outrageous.
And then being in January, we're now talking about Christmas. So he's going to have June off. So then we'll come back in July, and we will start on a new series.
Yeah, we'll do a five kind of the last week of June through July. So we'll try and do. We'll try and do you know a series across June, July, back end of June and July, and then and then we have August off because Melanie has August off.
Good God!
Bad timers. I know.
Cool. And then we will bring more into the September, October, November. Yeah, so that's how it is.
Now, are any of those up yet? Are you gonna—
No, no, no, no, we're still in talks.
Oh, okay, fantastic. Oh, and don't forget, I think, Jo, have you done Photo Ephemeris?
That's one of the main—
that's one of the ones. That's probably one of the ones from— for the May series is TPE and Photo Yeah, fantastic. Now we do listen to you, Steve.
I know, I know, I know, I know.
Thank you.
So we're just looking at all the things that people suggested and trying to bring them into—
And if there's other stuff, if there's other ideas, whether it's on a theme, whether it's on a tool, whether it's on a, you know, whatever, just send them in. We're always looking for ideas, you know.
Oh, right. I'd like to— I haven't sent one in, but I'd like to make a puzzle from my photos. from a photo in Canva or any other option.
Yeah, yeah, kind of a crafty, a crafty one. What can we do with our photos in terms of—
Yeah, I'd like the puzzle to be— I've tried to do it, but it's, it's quite difficult.
Yeah.
So I don't know if the pieces can move in.
So you want, you want, you want a puzzle on screen rather than printed out as a physical jigsaw puzzle that you can reassemble into a photo? What's your—
oh, both.
Oh, both, right. Good girl. Okay, we can work up something. We can work up a session around fun things to do with your photos.
Yeah, right.
Primarily a photo on the screen, right?
Yes.
Okay. So I've got— I've just thought of something else actually now. Well, this is taking very, you know, taking very old photographs.
Yeah.
Which are in a mess.
Yeah.
Or you want to get them a bit more modern standard, you know, they often are grainy.
Yeah.
All you've got is a print.
Restoring old family albums.
Yeah, yeah, yeah, exactly that, exactly that.
Yeah, I think we've, we've already done— we did a session.
We have, but it was over several times, wasn't it?
But we could do a quick one, couldn't we? But yeah, do that as a standalone.
That would be great. My wife's always on at me about Can you do something with this photograph? Yeah, no, I can't. It's a short answer.
I hope she's not listening.
Well, the answer is, oh yes, we can.
Yeah, but not yet.
Yeah, and that may not, that may, may not always, always be in Lightroom. We might use other tools to do, do that because there's a lot of different tools that you can use to do that stuff now.
Cool.
Yeah.
Yeah, looking forward to that too. Is that in May as well?
Oh, he's putting me under pressure now, isn't he?
We'll let you know as soon as we've— we'll get that first 3 up for May. That'll be the first thing.
Oh, thank you both.
That's really good.
That's brilliant.
We never forget you. We talk about you when you're not here.
I mean, I love, I love these. I love doing this, and I love putting new talks together because one, it, you know, it's not boring then, is it? Hopefully it's new stuff that we haven't done before or it's a new angle or whatever. But yeah, I mean, there's, you know, Mel and I have only got kind of, you know, 15 brain cells between us and most of those are Mel's. So we need input, we need suggestions. So, you know, anything that comes to you, drop us an email, help us out, and we'll try and lay it on for you.
Yeah. Perfect. Perfect.
Mel, do you want me— Jan here— do you want me to email you the password?
No, I've written that down.
You've got those.
Thank you.
Yeah.
Super duper.
Okay, wonderful.
Righty-ho. See you all next time then, whenever you can.
Sorry, let me just tell you when that first one is.
Oh yeah.
Do we know?
I'll get the recording up on the Notion page later on.
Thank you.
So it won't take too long.
14th of February, Valentine's.
Oh, here we go.
Architecture with hearts on.
Yeah.
If anybody, if anybody has images of London or Birmingham, you know, the photos of kind of buildings with the sky and clouds, if anybody's got any of those, I would love some of those for that series.
Okay.
Because I haven't got many.
Yeah.
So it would be really useful if somebody, if people could send me those, either I'll create a Dropbox— not a Dropbox, a Google Drive for fine art architecture, and then Mel can send that link out to everybody and we can—
Can it be Bristol?
Yeah, it can be anywhere.
Right.
Oh yes, anywhere at all. You know, it could be Bilbao or wherever. Yeah, anywhere where we've got architecture and buildings that we can turn into those lovely fine arty looking jobs. Yeah, cool.
Turn them into black and white as well.
Yeah, definitely. Yeah, thank you.
Cool.
And any other ideas for fine art? Because I mean, that's a series of 3 or 5, I can't remember, but we're covering buildings and flowers and other things. So anybody's got anything that they think might work in there, then send the images in raw file, presumably, hopefully. Um, but yeah, yeah.
Great. Thank you very much.
Enjoy your birthday party.
Thank you.
Great to see you. Thank you. I will. Thank you, Joe.
All right.
We'll let you go.
Thanks a lot.
Bye, everybody.
Bye. Bye. Bye.
Many thanks, Joe. Cheers.
Okay. See you.
See you, Dave. Thanks again. Thanks, Dot.
Dot, you're— oh, she's gone.
She's gone.
I thought most people leave their kettle out when they're moving. I reckon she's left her computer out so she can still watch this. Not many people would be doing that on the day they move, would they?
More from Joe



Joe Houghton on creating a Google GEM based on a NotebookLM notebook optimised

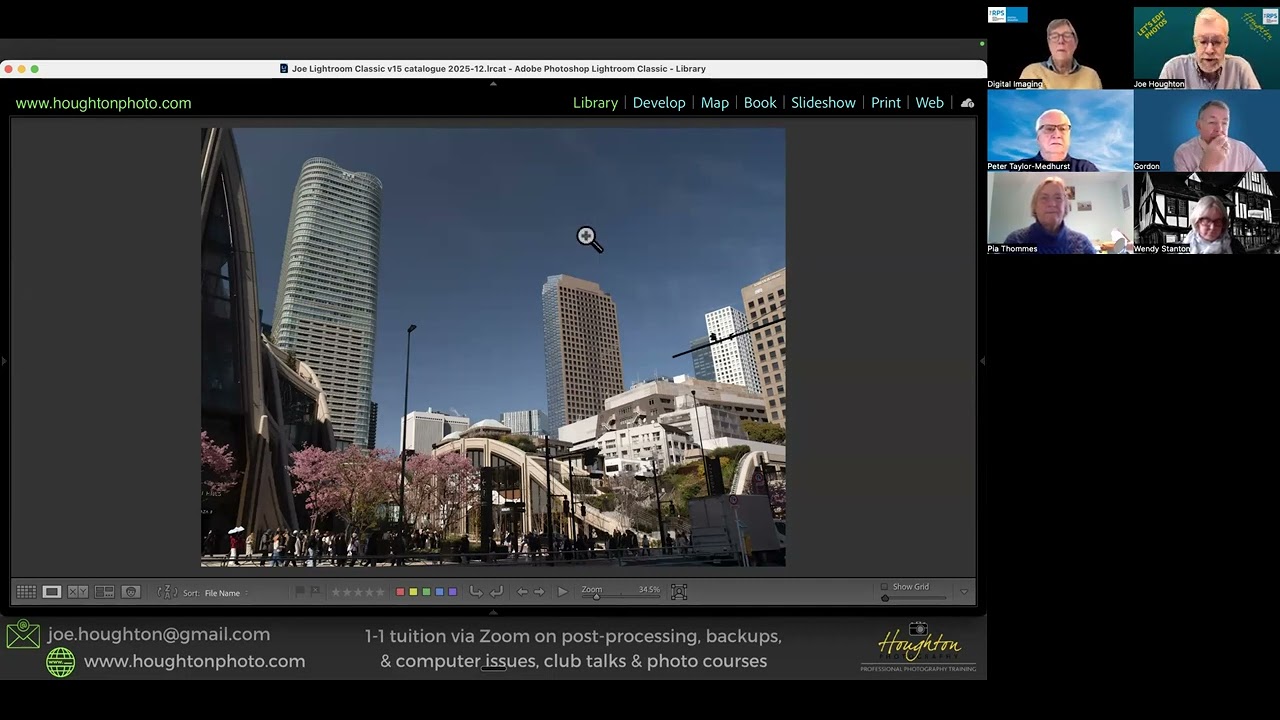
RPS Let's Edit - Composition - Depth & perspective - Joe Houghton 2025-12-06