Beehive Supplies Poly Hive Review
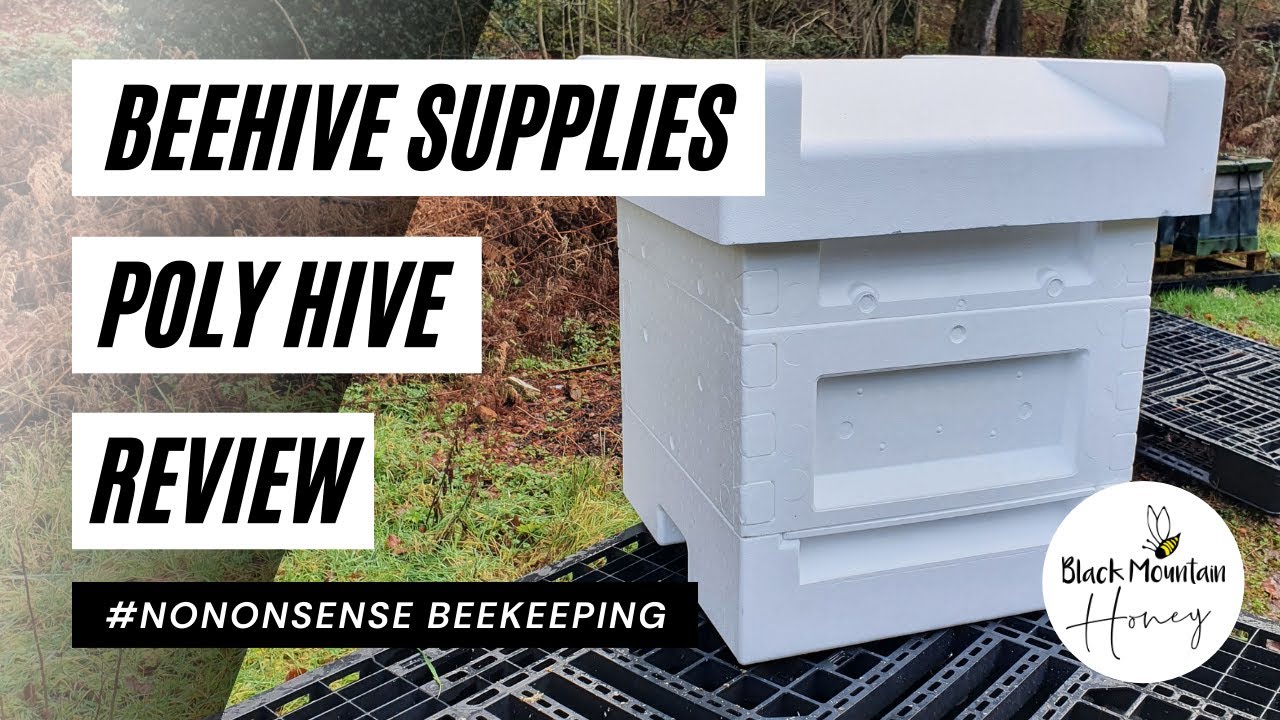
In this episode of No Nonsense Beekeeping, Laurence Edwards (Black Mountain Honey) provides a thorough, first‑hand review of the Beehive Supplies polystyrene beehive. He begins by stating that the hive was purchased personally and that his opinions are unbiased. The review proceeds component‑by‑component – roof, crown board, super, brood box, and floor – with measurements, material density (≈100 g/L polystyrene), wall thickness (30–60 mm), and design features such as a telescopic roof, integrated stainless‑steel mesh floor, and internal landing board. For each part he lists positives (e.g., heavy, well‑insulated roof; thick walls; solid floor) and negatives (oversized external footprint, lack of internal bee‑space rim on the roof, runners that fall out, missing rebate under frames, no queen excluder, vulnerable entrance reducer). He suggests simple DIY fixes (adding an 8 mm plywood bee‑space rim on the roof, permanently installing an 8 mm strip on the floor entrance). He compares the hive to other UK poly hives (Suyenti, Payne’s, Abello, Maysmore) and notes that while it outperforms his Suyenti boxes in insulation and robustness, it is heavier, more expensive (≈£110 for floor, brood box, and one super), and overall less efficient than some alternatives. The final recommendation is cautious: he would not recommend this hive as the best value, despite acknowledging its strengths, and encourages viewers to consider other poly hives that may offer better price‑performance.
Chapters
Hi, I'm Laurence Edders from Black Mountain Honey. Welcome to another episode of No Nonsense Beekeeping. Today we're going to review the Beehive Supplies polystyrene beehive. So we're going through all of the poly beehives on the UK market. We're nearly there. This is the second to last one that I'm going to review. We'll cover all of the details of this hive, so as normal, we'll go from top to bottom. Talking about the roof, the crown board, the super, the brood box, the floor. I'll tell you what I like about it, I'll tell you what I don't like about it, and I'll give you my reviews and recommendations at the end. So first thing to say is I bought this direct from beehivesupplies.co.uk. I paid for it with my own money, and I'm going to give you my honest review and recommendation. Final thing to say is please check out honeybeeBay.co.uk, an online beekeeping marketplace connecting buyers and sellers. Right, so the Beehive Supply polystyrene beehive. As you know, I really do like my poly beehives. I've got pretty much every single national version of the poly hive within the UK market. I've also got a couple of Langstroth versions that I'm going to review for you later on in the year. The only one that I've got left to do apart from this though is the Honey Paw National, and that's coming up in the next few weeks. It comes in that standard 100 grams per liter polystyrene density. You can feel that it really doesn't feel anywhere near as solid as, say, the BS Honeybees 120 grams per liter, or again the Abello 160 gram per liter steam molded injection process. It's got a few really strange design quirks and features. Some of them I really do like, some of them not so much. So in this video, we'll run through all of the things I like and all of the things I don't like. So let's get on with the review, starting from the top. Now the roof, as soon as you lift the roof off, it is absolutely monstrous. It's huge. I can't quite believe how big this roof is, and I don't know whether I want to say it's a negative or a positive, and I think I'm probably somewhere in the middle with it. So the dimensions of the hive as it is, is equivalent to a Maysmore or a Payne's hive. So it's around 500 millimeters square. It's not fully compatible with wooden exterior footprint of 460 by 460, although you can use wooden national kit with it. I'm not a fan though, and as I've said in my previous videos with the Maize Mort and the panes, it works, but it is a different footprint. So it's just something to be aware of. However, when we're looking at the Beehive Supplies roof, there is a significant overhang on all All 4 sides. So when you put the roof back on, it's huge. Like the external footprint of this hive is just so big. So when you're stacking these, you're going to have issues stacking these in a pickup truck. You're going to have issues stacking these in the back of your car. That external footprint is, is just really, really big. So that's something that I don't like about the roof. Obviously the size of it is just enormous and the external footprint is something that I look for to try and keep to an absolute minimum. Which means that I can stack them effectively. Now if you're just looking to have a beehive in the back of your garden, you're not going to move them around, that just is completely irrelevant to you. It doesn't matter and it's not that much of a negative. So if you're not looking at moving your beehives around, you can safely disregard that comment. So what do I like about the Beehive Supply poly roof? And the thing I like about it is it is by far and away the most weighty roof out of all of the poly hives on the UK market. The amount of polystyrene in here is just incredible. I'm just looking over there now because I've got a Suyenti hive behind the camera here. I'm just going to go and get the Suyenti roof just to show you the difference in terms of how much actual material there is. So that's the difference between the 2 roofs from that angle, and then that's the difference between the 2 roofs from that angle. Now if I had to have a guess, I would say there is at least 3 times the amount of polystyrene in there. They're the same density, so it's 100 grams per liter. But that is relatively lightweight, really, really flimsy and lightweight. And this is— I'm going to go 4 times. It's absolutely solid. I can't quite believe how heavy this roof is. Now you can see that heaviness as both a positive and a negative. The reason I like to use poly hives, the main reason really is due to their weight and that they're not that heavy compared to a wooden national. This is by far and away the heaviest hive, I think, out of all of them. Now, on a real positive side, heaviness on the roof in terms of the density and the insulation properties. I don't think there's a better roof on the market in terms of insulation above the cluster, because that is where you want to keep your insulation. However, I think what I've got with my Swienty hives is probably equivalent in terms of insulation, because what I do is I put a Swienty poly feeder on top of the brood box, and then I have that roof on top, which is pretty much just to keep the water out. So if you're using that doubled up system where you've got insulation and then an air void and then insulation, which is what I've got with my poly feeder and roof setup, that gives really good insulation properties as well. Haven't done the studies, but I would say it's very similar to a big solid roof like this. And if you're going to use this hive setup with a feeder on top anyway, and I would recommend a poly feeder, you kind of don't need this much weight in the roof. So I think this is a bit outdated maybe in terms of the amount of polystyrene that's in there. I 100% get what they're doing and I really do like it because they're putting the polystyrene where it matters, which is in the roof, in the walls. They're making the hive thick and solid. They're not skimping on polystyrene and saying, oh, here's a polystyrene hive with really thin walls. They've gone for belt and braces and they've put a lot of polystyrene in there. So it is good. But whether it's as effective as a poly feeder with the thin roof, I'm not so sure. And if one's more expensive than the other, I know where I'm going to spend my money. So other features of the roof then. It's a telescopic roof, so it comes down on all 4 sides. That means that there's going to be no ingress of water anywhere through any of these channels here, which is really good. Your bees will be safe and warm and insulated inside. Something that I don't like about the inside of it is that there's no integrated rim. around the interior of the roof, which means that if you're going to use this on a bottom bee space box, which is theirs, is, then you're going to crush bees unless you use some sort of crown board. And I'll come on to their crown board in a little bit, but a definite improvement would be to put a single bee space rim all the way around the inside of this hive, and then you can use this roof as your crown board and you don't need to use the bee crushing crown board that comes with the hive. So with this one, I'll be doing that. I'll do a little mod on it. And all I'll do is I'll pin down an 8mm piece of plywood or just a piece of pine, glue it down, and then that gives me my single bee space so the bees can move freely over the top of the frames, be it on the super or the brood box. Right, so other things about this roof, and you probably noticed it, that it's a gable roof design, but it's also got these flat pieces on here, which means that it's very bulky. And I get, I get the design. I do get it because you've got the gable roof that's going to shed the water off to the sides like that. And then you've got these pieces here so you can stack other stuff up on top of this box, because that's one of the really annoying things with gable roofs is you can't put anything on them unless you upturn them and then they wobble. So obviously if you upturn that, it doesn't wobble and you can put stuff safely inside. So I do get the design intent. However, I just don't think it's a major, major issue. Like you look at the Suyenti roof again, all you need to do with that is just make sure it's ever so slightly off angle. And the water just sheds off it fine. Even if you get a little bit of pooling on these roofs, same as the Suyenti or any of the other roofs, it, it's just not a massive deal. This really does significantly contribute to the amount of polystyrene that they've put in this roof, which as I've said can be seen as a positive, but the more and more I think about it, the more I think this could probably be redesigned to be a more efficient product and a more efficient use of the polystyrene. So overall though, it's a good roof. Please, in these reviews, don't get me wrong, I am nitpicking with a lot of these things. It comes down to price for me, but in terms of functionality, if you're keeping bees in your back garden or you're just keeping a limited number of bees, I do like the roof with a few caveats I've already mentioned. Right, so as we move down this poly hive, the next thing to say is they've included a lovely piece of Correx in there. Not sure what that's for, but I joke, it is, it's the crown board that they're putting it in there for. But I just, I just don't see the need for that. It's a bottom beespace hive, the frames are going to lie flush with the top, so any form of, of Correx or polycarbonate sheet or anything that's flat, you're going to put it on there and you're going to crush all your bees. So for me, like all of the hives that I get, that just goes away and I'll use that for blocking up floors or I'll make something out of it. I'm not going to use it as a crown board because I don't think it's fit for purpose. Right, we move on to the super then. And this hive was a little bit more expensive than all of the other hives that I bought. I paid around £110 for this hive, but I only got the floor, brood box, and one super with it. So it's considerably more expensive than some of the other hives on the market. I think that is due to the fact that there's so much polystyrene in it. So all of this kit comes as a flat pack kit, so all of the brood boxes, all of the supers, you need to put them together yourself. They are very, very similar to the Suyenti. So you've got the dovetails at either corner, and then what's nice is it comes with some expanded polystyrene glue. So they give you a little bit of glue just to put these together. Really, really easy to put together. So the other thing you need to do with this one is put the runners in, and it's exactly the same design as Suyenti. So you've got these plastic L-shaped runners and they just slot in. Make sure you get them the right way around though to preserve that correct bee space. Now one thing really, really annoys me with this hive already. So then he got down to the super and it's just a tiny little thing, but it is very annoying. So I've put the runners in and then I move the hive and they fall out. Like, really annoying. The gap that they go in is just a bit too big, so they just fall out. So I'm gonna have to look at either pinning them in or gluing them in. I'm sure once I've got bees in here and they've propolised it down, they're not going to fall out. And obviously the frames will help hold them in a little bit. But it's just a little thing that I picked up on, that the groove that they sit in, just a little bit too big and they do fall out. Right. So other things to say about the super then. So it's a bottom bee space hive and it's a bottom bee space super. You've got handhelds on 2 sides only. One of the annoying things, if you come to hold it that way, you can't get it. So you have to make sure that you've got it from the right way like that. It's made from the same density polystyrene as we've had on previous hives. So 100 grams per liter. It's fine. 100 grams per liter is perfectly acceptable for use, and you'll get decades of use out of it. There's nothing wrong with it, but it is just a little bit softer than any of the, uh, the ones that are a bit higher, so the 120 grams per liter. What you do get with this though is you get pretty much the optimum insulation. So this hive, I can tell, it's been designed to be a true insulative poly hive, which is good, which is the reason that I kind of started using poly hives was for the weight and for the insulative properties. Now what I really do like about this hive, and it works all the way down across all the components, is the thickness of the walls. The walls on this hive are definitely the thickest they are on any of the other ones. They're so much thicker than the Suyenti, where you get a real minimum wall thickness in some areas. What you see is what you get on that side there. You get at least 30mm of poly insulation. That's huge. And then on this side, you're up to about 60 millimeters, but then obviously you've got your handheld groove in there as well. So I think with this one, you've got 30 millimeters insulation all the way round as an absolute minimum in any point, and that is going to be so good for the bees. So in terms of numbers of frames, it's an 11-frame, it's an 11-frame box. There's no getting away from that. That there is the 12th frame, and I just can't get it in. So there's nothing, there's nothing wrong with that. There really isn't an issue. But if you're thinking you're going to get this as a 12-frame box, I don't think you can get it in. And even if your copy of the hive can get that in, it's going to be a really tight fit. So I would recommend using that as an 11-frame box with a dummy board in there as well. That's going to be the easiest in terms of management. But just to give you that indication, it's 11 frames plus a bit of space. So you can probably get 11 SN4 in there and 1 SN1 dummy frame. Or any other standard dummy frame, I can't personally fit that 12th frame in. So I'm not sure if it's advertised as a 12-frame box. I don't think it actually is. I think it's just an interior wooden national dimension design, and that pretty much correlates with that. So it's 11 frames plus a dummy board. So you can tell this design is a little bit old. I think a lot of the other polyhives on the market have really moved on and modernized the design a little bit. And I'm not talking just in terms of aesthetics because I'm not fussed really what they look like. I'm looking for functionality, and one of the real issues that I have with my Suyenti hive is the fact that there's no rebate that will sit on top of the frames. So what that means is when you put this box onto another box, they will propolise the top of the frames onto this piece here because you've not got the minimum bee space required. So a bellow Fixed that, and they sorted that out in their hives. A couple of other hives on the market have fixed that one as well. Obviously, this one still hasn't got that fixed. So this for me is a real negative with this hive. It will cause you a lot of issues, and it means when you come to pick that box up from there and lift it up, everything will be stuck together, and you have to prise it apart. And it's it's a perfect recipe for really angry bees. So if they're going to update this box, I would suggest a rebate in there. 8mm rebate, and then that can completely eliminate that issue. So that's pretty much it for the Super. Again, please don't think I'm, I'm being overly negative with these. I'm trying to give you my honest reviews and recommendations just so you can see the quirks of each of these polyhive designs so you can make an informed decision going forward. This polyhive here, this Poly Super in particular, is way better than the Suyenti one, and I use Suyenti across pretty much all of my kit because that's what I bought when I started out. And it's usable and it works. However, it does have a few issues. This one is considerably better because it's got an additional frame, it's got really strong sides and good amount of meat on the bone in terms of the thickness of the polystyrene, but it does have some of the issues that the Suyenti has, like that lack of rebate underneath. Right, we'll move on to the brood box then, and you might notice a bit of an omission here. So there's no queen excluder came with this poly hive, Bit surprised with that. I do like it when they come with the queen excluders in, even if it's just a plastic one. Means that when you buy a kit, you've got everything you need to start off and to put bees in it. So yeah, I would have liked to see a plastic queen excluder thrown in there, but we'll move on to the brood box anyway. So not, not a huge amount to say about the brood box. Obviously you've got the exterior dimensions of around 500mm square. You can get 11 frames in here, similar to the super. Plus a dummy board, so you will need some sort of dummy board if you're going to run these hives. You've got your little plastic runners similar to the Suyenti; they just clip in, and then you've not got the rebate underneath there as well. And as you see, it's fallen out right on demand. Really frustrating that. Just needs to be a little bit of a narrower gap just to hold that in, or maybe a thicker runner. Just to be totally fair though, again, I really don't like doing these reviews because I pick out all the negative things, and I think the manufacturers must be thinking. Oh geez, he's reviewing our products and he's picking up all these negative things. These are the boxes that I use. These are the Suyenti, and you feel the difference between the two. And I know that's a bruised box. There's nowhere near as much polystyrene in here. These are considerably heavier. I would much prefer these boxes over my boxes because they've got the same faults. You can see underneath I don't have a rebate there. I have a major, major design flaw with my Suyenti, and that is This distance here with the curve, I have at the minimum point about five millimeters of poly from the bees to the outside world. Whereas you can see on here, I've got about twenty-five mil. So the bees aren't going to chew through this. So when I'm nitpicking and finding fault, there's always something else that's going to be worse on the market. I would much prefer the Beehive Supplies boxes as opposed to my Swienti boxes that I have. So handhelds on only two sides as per the super, nothing on the front. But you do have the full depth of polystyrene, so it'll be a really nice hive. The bees will thrive in these hives; they will do so well. Okay, they're going to propolize the frames together, and they might be a little bit angry when you open them up. But in terms of a back garden hive, it's a it's a good hive, and the bees will do well in it. Right, we'll move on to the floor. Now I already know what you're thinking with the floor, which is. Oh my God, it's huge! It's an absolute monster floor, and it's a very, very different design to any of the other ones on the market. You look at the Suente, you look at the Paynes, you look at the Maysmoor, Abello, all of them are very, very different to this hive design. And there's a couple of things that I don't like about it, but I'm going to go out there and say it, with a simple modification, I think this is the best poly floor on the market. And I'll cover those reasons in a little bit. So we'll just go from top to bottom. I'll show you what it's all about and I'll tell you why I think this is the best poly hive floor on the market. So obviously the first thing I noticed when, when this floor was delivered to me was it's so deep, like it's at least 150 millimeters deep. It's so big. It's not that heavy. It's surprisingly not that heavy, but it's big and it's solid. It raises the bees really high off the floor, which is something that I like. but does cause issues when you're stacking stuff in the back of a truck, um, because you've got that additional height in there which might limit you if you're double stacking or if you're moving colonies with supers or bigger boxes. You've got an integrated stainless steel mesh, which I like. Good quality stainless steel mesh, and it's siliconed in place. So I, I do like it when they're screwed in place, but this is really solid. Um, that is not going to go anywhere. So I do like the floor. You've got solid faces here And I just, I just can't believe how thick it is. Like, you're going to get so much good insulation from the side here, but essentially it's an open mesh floor, so I'm not really sure that you need so much insulation on the sides there. Again, this is why I think this hive is maybe a little bit expensive, because of all of this excess poly. Poly's gone up so much over the last few years, so obviously they need to make sure they make a profit on it, and they do that by increasing the cost of the hive. Right, so the first thing that you'll notice on this is it doesn't have a landing board, and I love that. Do not like landing boards, but what it does have is an integrated landing board. So that means you've got a landing board on the interior footprint of the hive. Now I tell you what, if this hive had an exterior landing board, it would just be a monster. It would be so big, because it's big anyway, it would be similar to the Maysmoor and the Paynes, and I would be chopping those straight off. So I really like this integrated landing board design because it gives the bees somewhere to land, But it's internal, doesn't add that additional dimension to the hive. Now when I put the brood box on, onto that internal landing board, something became really apparent and I thought, well, this, this doesn't work. The landing strip and the side of the box here creates a space that's about 20mm wide. Now you're going to get really bad attacks from wasps by doing that. It's a huge gap for the bees to defend. And although it is essentially an underfloor entrance, it's only slightly offset. And because it's so big, you're going to have issues with wasps and you're going to have issues with rodents. So I kind of thought at first, wow, that's, that is a really poor design. But then I realized that this, this piece that comes with it, and this is an incredibly flimsy piece of polystyrene that's going to break without a doubt in a very short amount of time. But this piece of polystyrene is actually part of the So what you do with this piece of polystyrene is you put it in there and it is essentially an entrance reducer. So I assume that in the summer when you've not got issues with wasps, you can run it like that. And then when you need to, you can put this entrance reducer in if it's not broken by then. And then that reduces it down to a really small 8mm entrance. Now what I would say to that is I'm going to break that. Yeah. And I'm going to chuck that away because that is going to get broken at some point. And it's not— I think that's a bit of a fix at a later date to try and stop something getting in there. Now, a wasp, they can chew through that. It's not going to give a huge amount of protection against wasps, but it probably would stop them. Rodents, however, they'll just chew straight through that. So to use that as a winter excluder, it's just not going to work. So you're going to need to start looking at kind of putting a mouse guard on here. And I looked at it and thought you could maybe pin one on the front there. But it's just going to be so, so difficult to do. So there's such a simple modification to this hive that you could do. And that's the reason that I've just broken that there, because I'm going to do this on my hive here. All I'm going to do is I'm going to take a piece of plywood and I'm just going to glue it permanently into that position there, maintaining that 8mm strip all the way across. And then that way, I think this is, this is the best poly floor on the market. It really is. It's hot, it's big, and it's high, and it's probably not the most efficient use of all of that polystyrene in there, but it's an underfloor entrance that's made out of polystyrene. It gives you that 8mm slit, so it's really going to help you protect against wasp attacks. It's going to all but eliminate any rodent attacks other than the smallest, the mice that might be able to get in there over winter. I like— I love this floor. I wish it was made in a standard national exterior footprint, Because I'd potentially look at getting all of my floors like this. I think it's a really good quality floor, but it just needs that ever so simple design tweak to put a solid piece of wood across there, and I'd keep that on as a permanent basis. So I wouldn't use the excluder and then try and run this with it without, because I do think that you would have real issues as soon as wasps tried to get into this hive. God forbid you get Asian hornets trying to get in. They'll just flood the hive in a matter of seconds. And I think wasps would probably do the same. I would do that small design change, nice little piece of 8mm ply or a piece of 8mm polycarbonate, even better, and just glue that into position and then maintain an 8mm slit. Make sure that you get the bee space correct on that. And I would leave that in permanently. And then I think this is a really, really good floor. So other things to know about the floor, you get a correct sheet that goes in so you have the ability to monitor varroa drops. It doesn't have the same issues as the, the Maize-More one where it will pull everything off when you pull it out. So there's a little bit of play on it. You could pull that out and you could see all of the drops. You can see the brood cappings. You can see all of the stuff that you need to see on an inspection board. And that's about it. There's not a huge amount more to say about this floor other than with that small design mod, I think it would be a really, really good floor. So there you have it. That's my review of the Beehive Supplies polystyrene beehive. Would I recommend it to people buying a poly beehive? And this is a difficult one because I'm probably going to say no. And the reason that I'm going to say no, and I do apologize to Beehive Suppliers, but I just think that there are better poly hives on the market. I think a Payne's poly beehive, if you're looking at a 500mm square format, it is superior to this one. I think the Abello poly hives, even though they've got a few issues with water ingress, are superior to this one. I think there are other polyhives on the market that are a little bit better than this one. So I do apologize to Beehive Supplies, but I can't recommend this product. It's a shame because I do think it's good, and I think it's way better than the beehives that I've got, which is the Suyenti. But yeah, I personally think there's better hives on the market than this one, and maybe for a little bit less money as well. So that's it for today's video. I hope you've enjoyed this review of the Beehive Supplies polyhive. We've gone through all of the details, top to bottom, roof, crown board, super, brood box, and floor, and I've given you my honest review and recommendation of the product. So as always, I hope you've enjoyed watching. Please hit the subscribe button, please hit the bell so you're notified of every video, and I'll see you next time.