Branding My Beehives
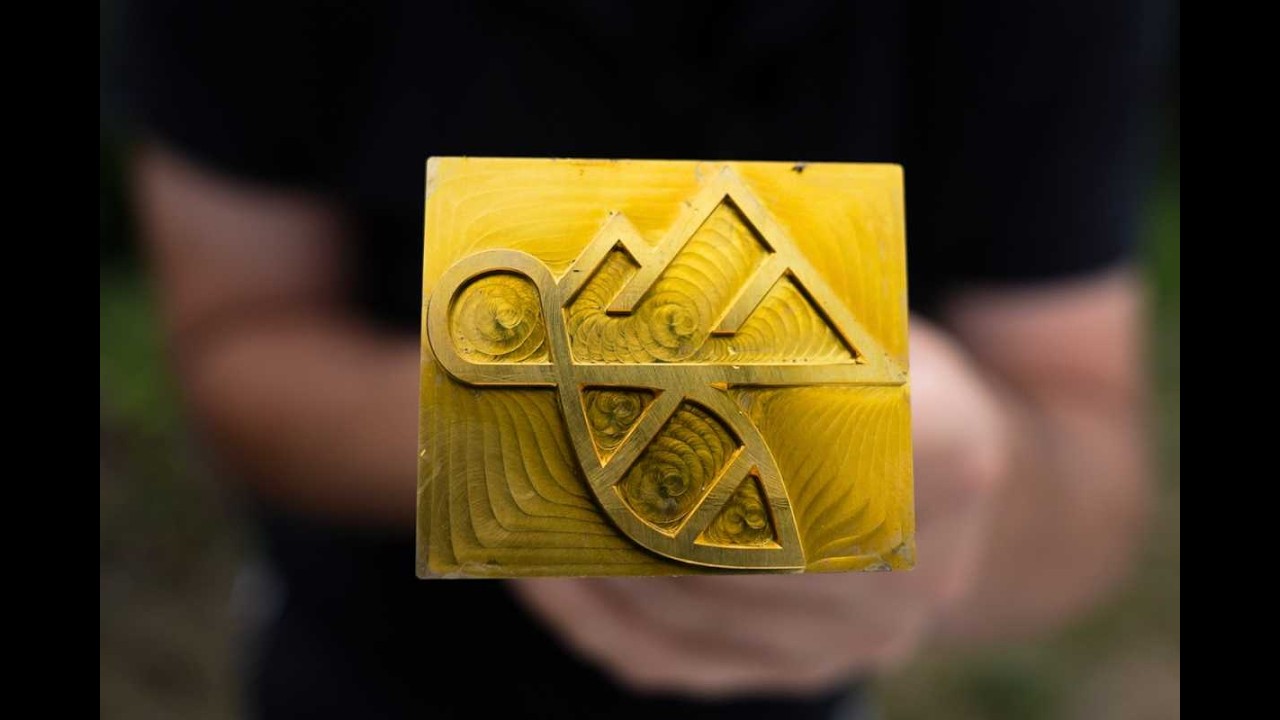
Laurence Edwards shows how to brand beehives with a custom brass iron from Outpost Workshop. Heat it with a MAP-gas torch for three minutes until glowing, then press firmly on wood for a deep burn or use a lighter touch on plastic to avoid melting. A vertical-stamping technique lets the heavy iron do the work without manual pressure.
Chapters
Today I'm branding up some beehives with a brass branding iron. So how much fun is this? A brass branding iron from Outpost Workshop in Liverpool cost me about £90, I think, and I maybe oversized it a little bit. Should have gone with one that's slightly smaller. Wooden handle, threaded rod, brass front. All you do, get the blowtorch on it, get it really, really hot, and stick it into things. It is so much fun. Let's get branding. Now you have to get it really, really hot. Don't think that you can heat up this branding iron in 5 seconds, 10 seconds. You need a couple of minutes of getting it really hot, but then you can do a few consecutive brands with it. You wouldn't want to buy something for this if you were doing like thousands of brands at a go. So I recommend watching a video, doing something at the same time as heating up the brass iron, because that is a serious big chunk of brass iron that you've got there, and you need to get all of it up to a good branding temperature. But once you get it up to temperature, it is absolutely Phenomenal. I was so impressed the first time that I did this. I left it on the cedar and it singed right in. But apparently you can use this on plastic, you can use it on wood, you can use it on anything that's not really going to completely disintegrate and melt away. But like I said, just make sure that you get it super, super hot. I'm using MAP gas here, so a mixture of propane and something else. I always forget what it is, but you can use a different type of gas if you want to get it hotter quicker, but I find this is fine. So So probably 3 minutes, I would say, of heating that up, and I reckon that is good to go now. I'm going to do the wooden one first, and then I'll do some poly ones after. And then you can always clean it up in some acid to get any remnants of poly off, but it will work really, really good on both wood and poly. Don't push too hard on poly. On poly, you just want to give the imprint as opposed to like a serious brand. With wood, it works well if you give it a good push in. So you'll just see on that one there, if you're doing it on poly, you need to push it hard enough to burn through the paint and to get the paint to come onto here. Um, I've done a half and half on that one, so that's like a special limited edition brand which is half all the way through the paint and half not through the paint. Completely deliberate. Let's try that one again. It's a good opportunity to show you here, if you get the paint on the brand like that, if you just burn it, it does come off. Comes off pretty quickly. So when I go to do the next one now, this will just burn through. I'll do one on wood just to get rid of this, clean it up, and then I'll go back onto the poly again. You can see you've got the wood there. Don't burn your fingers. This should push the paint off on it. Kind of left a little bit on. I think I might have to get that paint off before I start again. There we go. I'll leave that in real time. Doesn't take long to do that. You can see there now, let me just tap to focus. You can see completely got all of that paint off there. So predominantly this is for wood, and if you're doing it on poly, I recommend maybe doing it before the poly is painted and then trying to go with like a two-tone paint, do some weird crazy thing on it. But it's definitely really, really good for wood. But I'm going to get it working for poly, and I want to get it burning through the paint to give you that really cool kind of white effect at the back of it. We'll give that a go now. I'll heat it up again and we'll have another go on the poly. So it definitely does work on the poly, but because the paint melts so immediately, like instantly as soon as you take it off, the remnants of it can stick a little bit. So I've just tidied it up there with my— what's it here— Leatherman Micra. Really good, I love it on my keyring. Never be without my Leatherman Micra for fixing little things like that. Let's do some more on some wood and let's do some more on some different types of poly. Now I just touched that and it's really warm still, not, not burning warm, but that's been a couple of minutes and it's cooled down. But you can see if I just kind of focus in on that again there, It cleans up relatively well even when you're using it on things like paint. So let me get myself back in focus. We'll heat it up and we're going to burn some more things in the apiary. So you can see there, if you get it to a reasonable temperature, you'll get 2 or 3 light brands out of it. I think it's loads nicer if you heat it up till it's like glowing. Doesn't actually glow, you'll never get it that hot so it's glowing, but so it is really, really super hot and then just get one super long brand on it. I'm just going to show you something quite cool now because I didn't know this before I did it and I did it by mistake, and I think this gives a really nice effect. So if you're doing this before you're building your boxes, if If you put it down vertically on a surface like that and just leave it there, the weight of these, because they're so heavy, it will really like singe it in, and it means you don't have to stand there holding it, and you get a really cool like super burnt effect. So I'll show you that now on a horizontal piece of cedar and leaving the brand in a vertical position. I'm just standing basically in front of a beehive there, and they're all doing, what's he doing, this weird guy? But they're not stinging me, which is nice, even though it is miserable here today. I don't know if you can see it on there, it is actually raining, and luckily a lot of my camera equipment is, is pretty good in the rain. It's supposed to be weather sealed, but I don't think it is fully weather sealed. But the lenses are good, the camera is good. I can't stop because of the drizzle because it means that I'll just never ever get anything done. I've got loads and loads and loads of videos to film today. So I'm going to get this one nice and hot. I'll do a vertical stamp on the cedar, and then I'm going to go and stamp some of the wooden painted hives and some of the other painted lycra polyhives that I did myself because I think they're going to come out really good. Good fun though, isn't it? Love it. Branding up equipment with fire and brands is pretty cool. So you would have probably seen like a little bit of smoke going out there. The difficult bit actually putting it down like that is getting it down in one impression as opposed to kind of putting it and moving it a little bit. If you move it, obviously messes it up. Might have moved that one. Might have to do that one again, but I'll give it like 10, 15, 20 seconds, something like that. You can see it's still smoking now, so it's still imprinting, and then you get the very best imprint if you leave it like this. So like I said, if you're doing it before you build your hives, that's what I would recommend. And leave it on there for a little bit, you get a beautiful imprint on there. So I've got a couple of different iterations there. You can see that one there, maybe a little bit too far, but gives a really nice kind of cool glowing effect. And then that one there, probably left for about 10 seconds, I think that there is the sweet spot. Really well burnt into the cedar, not quite as blurry as the one that I left too much like that. And then if you just go for kind of like a medium one, 2 or 3 seconds, that is what you'll get, which is really nice and crisp But I don't know, it doesn't look like a brand to me, doesn't give that same glowing effect that you get when you really start to burn the wood. So there we go. I've given you a few different options there. I've showed you what works, I've showed you what doesn't work. Definitely works better on wood, definitely works better on wood before it's been treated, although this one here has actually been oiled after I've burnt it. But you can see on there it's not quite as nice as the one where you use it on raw wood. Doing it on poly does work, and I think doing it on poly gives a really nice effect if you just do a gentle imprint. It's quite like incognito. It's almost like you haven't branded it, but you've got a physical brand on there. It's not blatant, but great for stealing beehives because people might not realize that it is actually on there. And of course, you can just go and do it in a really discreet place as well. You could put information on there, you could put the name of your business on there, you can put your brand name on there. You can do it in different years, you can do it on frames as well if you want to brand up your frames with names. I think it's a really, really cool idea. I'm definitely going to brand all of my equipment just to get the brand on there. You know, it's good for social media, but really good as well for preventing hive thefts. Not that it makes a huge amount of difference, but it means that it just makes the work a little bit more difficult for the thieves because they're going to have to burn all your equipment because it's fully branded up. What was your favorite brand? Was it the wooden one? Was it the poly one? Let me know in the comments.










