How to Build A Pizza Oven - Step by Step Pizza Oven Build - How to Build a Modular Pizza Oven
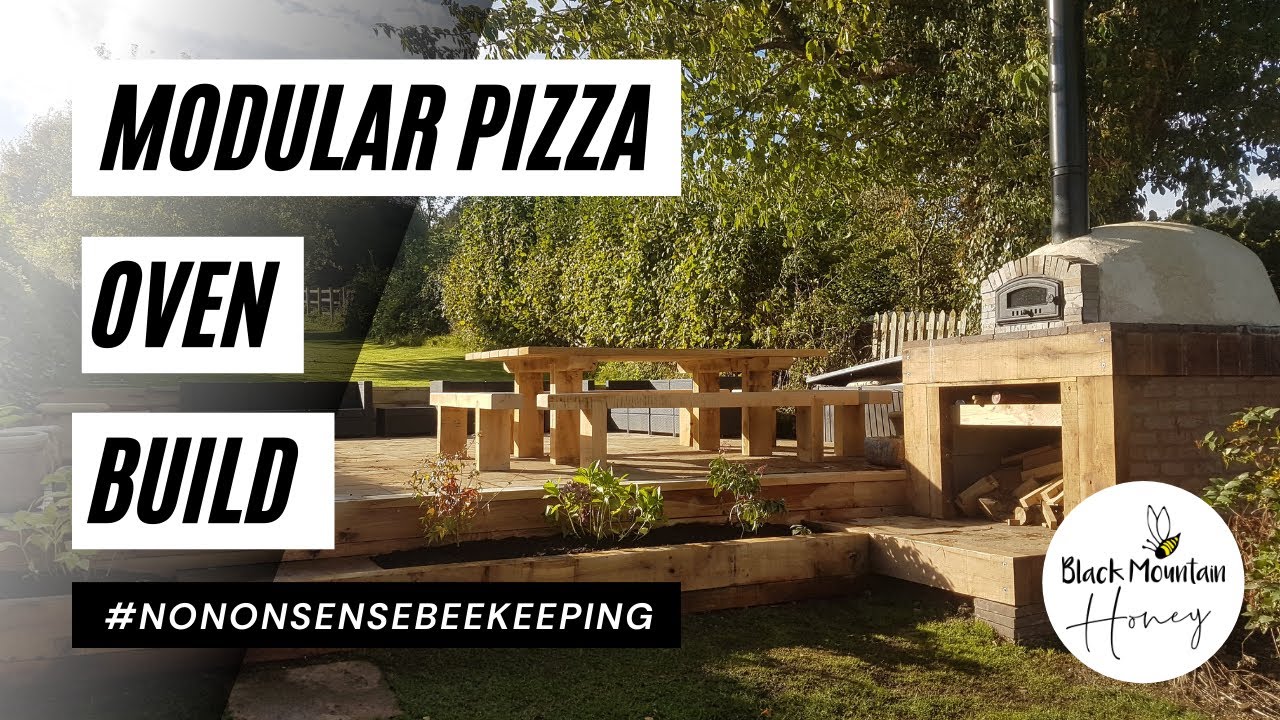
In this 30‑minute video Laurence Edwards, a civil engineer and beekeeper, walks viewers through the complete design, construction and finishing of his own modular Neapolitan pizza oven. He begins by explaining his motivation – a love of food, engineering and the desire for a durable, over‑engineered oven for family gatherings. He then details site selection, foundation design (oak‑frame sleepers, concrete strip foundations, and a stone step), the use of retaining‑wall blocks for the base, and the integration of marine plywood and stainless‑steel bolts. Concrete mixing ratios, reinforcement, and the importance of a cement mixer are covered. Insulation is achieved with a 50 mm Vermicrete layer, a 50 mm refractory board, and fire bricks, all built around a prefabricated Woodfire Gourmet dome kit. He explains fire‑brick herringbone layout, flue design (twin‑wall insulated flue with extensions), and the curing process, emphasizing slow moisture retention for strength. Safety tips (gloves, eye protection, handling brick acid) and wood‑fuel selection (dry hardwood, avoid pine or treated wood) are given. Temperature management (building a hot fire then letting it drop to 400‑450 °C) and pizza‑making advice (high‑quality flour, sauce, mozzarella, light toppings) are shared. The video concludes with finishing work using K‑Rend coloured render, a simple oak door, and reflections on what he would change in a future build. Throughout, Laurence mixes instructional, conversational and enthusiastic tones, offering practical, experience‑based guidance for DIY pizza‑oven enthusiasts.
Chapters
Hi, I'm Laurence Edwards from Black Mountain Honey. Welcome to another episode of No Nonsense Beekeeping. Today we're going to talk about something completely different. I'm going to give you a video on how I built my pizza oven. So I know that's completely different from beekeeping, but anyone that knows me knows that I'm a real kind of foodie. I love everything to do with food. I'm a civil engineer by trade as well, so I love building things. So the building of my pizza oven is something I'm not only very proud of, it's something that gets a lot of use within the household. Kind of whenever we have parties or anything, we always bring people around, light up the pizza oven, and cook out some pizzas. So I've always wanted to do this in terms of kind of showing people how I put together the pizza oven. It's difficult when you see the finished product to kind of understand how it was built, And the construction phases that were put in place. It's very well over-engineered, so I've put factors of safety kind of left, right, and center across the whole build. It will last for a long, long time. Probably spent a bit too much money on it as well, but we'll kind of talk about that as, as we go through the different processes. So purpose of this video is I'm going to give you a step-by-step guide how to build a full Neapolitan pizza oven. So first step is you need to identify a good place for your pizza oven. So I put mine by the patio which is kind of like 15-20 meters away from the back door. If I was going to do it again, I would build a canopy next to the house and have a bit of an outdoor kitchen there and put the pizza oven underneath it with the flue extending up through the roof. And then that way I could use it whenever it rains because obviously it rains quite a lot in Wales. So the first thing you need to think about is the location where you're going to put the pizza oven. If you've got solid ground already, that's great. If not, you need to think about a kind of potential foundation for your pizza oven. I wanted to go with an oak-framed structure for mine, and the way that I— the reason that I did that was that I could build the foundation into the base of the oak frame structure. So the first picture that you'll see here is the base of my oak frame structure. So I've got all of my sleepers. They were all non-treated English oak sleepers. You don't want any treatments across any of the wood. Oak sleepers, they're not going to rot anytime soon, so you've got no worries about kind of needing to put preservatives in it. I bolted them together with stainless steel bolts, so I kind of drilled and then screwed them together with a Torx head bolt to make sure that was completely secure. You'll see on the foundation it's got 2 specific areas, so you've got one which is a step and then the other area which is the base for the pizza oven. So this next picture shows you the kind of materials that I was going to use for the step. I had some leftover Indian stone, so I decided to kind of build the steps out of Indian stone just to save on money. You can see very well from this picture how I've leveled it up. So because I was putting so much concrete in the base and because the oak is so heavy anyway, there's no need to actually level the ground. You can just kind of plonk it onto the ground and then level it up using— I had some, some slabs left over from somewhere, and then I kind of battened down all around that so the concrete fills down lower to the ground. But you need to make sure at this stage that that oak frame, if you're going to go down this route, is completely level. And if you're going to go with a standard kind of concrete foundation, obviously it needs to be perfectly level at this point. On the step, it's not load-bearing in any way, so I just chucked loads of rubble in, leveled it off with sand, and then I kind of continued with the construction. So finished off the step quite quickly. I leveled it off, I put some mortar down, 4:1 sand and cement, nice wet mix. I embedded the Indian stone in there and just kind of finished it off with a bit of, a bit of mortar around the edges and used a wet mortar mix. So that's the step complete. So then in order to kind of save on the amount of concrete that I was going to use, instead of doing a full pad foundation, I turned it into 2 strip foundations. Now this is massively overkill still for a pizza oven, but it's just I didn't want to kind of fill that whole area up with concrete because it would have cost me loads of money and it really wasn't required. I only needed that load-bearing force actually on the strips. So you've got the strip on the left, the strip on the right. You can see where I've kind of put some offcuts of stone down there as well. That's to stop the concrete seeping out. because obviously the, the wood was leveled, so it was propped up. And in the middle, it's just kind of hardcore and rubble that I didn't need because there's no load kind of going through the middle. So this picture just shows I've chucked loads of hardcore in the middle, leveled it off with a really, really weak kind of sand mix. I think I went for about a 6:1 ratio on the sand to cement mix here. There's no load going through it whatsoever. All that's going to sit on there ultimately is some logs. It's basically my log store, so it didn't need to be very strong. And then this picture shows that the strips are full as well. So I use a 4:1 mix on my strip foundations, the piece on the left, the piece on the right, and I put some rebar in there as well. So some top and bottom rebar just to give that additional strength. It's, it's way overkill. It's probably, it's like 12 inches of concrete, um, with, with kind of 25mm rebar mesh on the top and 25mm rebar mesh on the bottom. So it's a really, really solid foundation, but if you're building it on a solid concrete foundation This is the step that you'll get to where everything is kind of just a flush, neat, level finish in which you can kind of continue your build. So although I'm a civil engineer, I'm not the best in terms of laying bricks and blockwork. So in order to be able to kind of do all the work myself here, I decided to go for a retaining wall block. And a retaining wall block's great in that you can kind of just stack them up, overlap them with a normal kind of brickwork fashion, and then you put concrete down the middle of the holes and then it joins it all up. It gives you an incredibly strong finish to the job. They're a little bit more expensive, but I had leftover rebar anyway, and it meant that I could do all the work on my own. So if you're worried about kind of building the base and you don't have the skills to do the blockwork, this is a really, really neat solution for you. It's, it's not that much more expensive than blockwork, but it is an absolute doddle to do. You just place the blocks on You drive a rebar rod through the squares as they overlap, and then you just fill it up with concrete and fill it up with a bit of hardcore as well. It can be a relatively strong mix that you want to use for that, so maybe a 4:1 mix, but it's a really neat, quick way of doing it, and it means that kind of anyone can have a go. I placed some paving slabs on the bottom. These were paving slabs that I just had left lying around the garden when we moved in. Effectively all that's going to sit on there. It's not load-bearing, you've just got loads of logs. So I just put these old kind of paving slabs on there, pointed them in, and didn't worry too much about doing the best job. So as you can see now, it gives you a better explanation of what I was talking about with this retaining wall structure. So you nestle these blocks down, you overlap them on each other, you make sure the squares are aligned, you drill holes in the concrete base, and then you drive these reinforcing rods down into them. And then that gives you that kind of continuity of structure and it works really, really well. So as you can see now, the wall is built and this is kind of after that I've poured the concrete into it. It's incredibly strong, it ties into the base and gives you no problems at all. So then I wanted to kind of continue the oak frame structure over the top of that. So I'm using the concrete and the steel for strength and then I'm using the oak almost in this instance just because it kind of looks quite nice. I used green oak I didn't— not too worried about if it shrinks. I'm doing this video about 4 years after I built it and it hasn't shrunk at all. All of the joints are absolutely solid, which I'm quite surprised at. I guess because it's outside and kind of exposed to a lot of water still, it's not shrinking as much as if it was kind of inside in a drier environment. But green oak is absolutely fine for this. And again, I've just kind of cut that on, on a table saw, cut that on my chop saw, and drilled it with stainless steel big bolts. Need to be stainless, otherwise they start to corrode against the oak and it looks a bit unsightly. So make sure you're using stainless steel bolts. Make sure you do what I didn't do the first time around and that you pre-drill the oak. If you start to try to try and go into it with an impact driver, you can get yourself in big trouble and burn them out quite quickly. So just a little tip for you. But the oak here is very much kind of just for show and it's not a huge amount of load support going on it apart from a little bit that I'll show you on later. So then once I got my oak structure up like that, what I did is I took some marine ply and I cut, um, I cut it to fit the size of the hole there. Now the marine ply, it's not attached to anything at all. It's literally resting on those 2 reinforced walls. So if you can imagine, you've got the 2 walls coming up and then I've just rested that piece of ply on it and then I've built the oak frame up and bolted that to the walls as well. So you've got the oak frame that's restraining the concrete moving out like that. And then you've got the marine ply that's kind of taking the weight of the concrete. Now I went for 18mm ply just to make sure that during— there's a lot of concrete that goes in here, there's a lot of weight. I didn't want it to kind of break as I was doing the pour. Obviously as the concrete cures, it takes the strength on its own, so the marine ply becomes redundant. I've just left it in, you can't see it. So that's the build-up. So you'll see here I had extra mesh, so I thought I'd chuck some extra mesh in. I've used some old slabs as spacers. You want at least kind of 25 to 50mm here, but it's really not overly important. It's not actually getting any contact to the air because you've got the wood there as well. The wood effectively gives you a little bit of extra cover. Those slabs there, they're about 50mm, so you're talking kind of like 50-60mm cover on a slab about 12 inches deep, which is absolutely fine. So I've got the reinforcement top and bottom. I doubled up on the bottom where most of the force is going to be through tension, and then I've just got a single layer on the top. So then this is where you have to beg, borrow, and steal a concrete mixer. I was going to do this by hand, and oh my God, it would take you so long to do this by hand. So if you've got it, or if you can borrow one, even, even if you go and hire one for this, I'd say it's worth it. Like, you're going to spend a good amount of money on your pizza oven. Paying £50 to kind of stop you breaking your back mixing up concrete for the day is really, really worth it. Makes the job a lot quicker. you can do it in one pour as well, which is better for the strength of it. So definitely invest in a cement mixer for this one. So that's the final pour there. What I had to do here due to the way that I designed it is I left a 50mm gap from the top of the concrete finish level to the bottom of the oak finish level. So you'll see that gap there, and I'll explain a little bit more on the next slide. So it might be a little bit difficult to see from this picture, but the, the final 50mm of that slab there is actually Vermicrete. So I've done that to increase the insulation properties of the slab. So a lot of people, when they're building a pizza oven, you're really, really keen to make sure that the whole of the top of the oven is really well insulated, but you need to make sure underneath is insulated as well. It's just as critical to keeping the top of it insulated. You need to make sure you're getting a balanced heat from the top and the bottom. And if you've got loads of insulation on the top and none on the bottom, it means that the top of your pizza is going to cook quicker than the bottom of your pizzas. So you need to keep it balanced. So you can't really put too much insulation in, especially for something— I mean, if you're not doing it on a commercial basis like I'm not, it's purely kind of my own garden, then you can spend a little bit extra money, make it— make a proper job of it, and make sure it's insulated top and bottom. So that 50mm there, that's Vermicrete. We'll talk about Vermicrete later, but it's very simple. It's vermiculite, 8 parts vermiculite mixed to 1 part cement. And you just mix it up, add water to make it pliable, and you just mold it on. Make sure you wear gloves. Make sure you wear gloves doing this. I didn't because I thought it's going to be very, very quickly. I'm not going to be in contact with it for a long time, and I was, and it burnt me. So learn from my mistakes. Make sure whenever you're using any concrete products, full eye protection, full glove protection, full skin protection everywhere. So this is just a shot of the location of the pizza oven. You can see the proximity from the house. It's not It's not too far away. Like, it's a lovely spot, but it would be nice if it was closer to the house and we had a cover over it so we could use it in the rain. But it's got a nice patio next to it, and we get, we get a lot of use out of it there. At this point, I was thinking, what am I going to clad the sides with? I was thinking I might use a render, and then I found some really nice brick slips. So I had my first go at putting brick slips on outside, completely messed it up. First 5 or 6 layers are absolutely fine, then it started going off all wonky. So I ended up having to remedy that the next day, took a few of them off and redid them, redid the pointing, and ultimately it came out all right. But it took me 2 or 3 goes to get it right. It gives you a really nice finish, and it's— for someone who's not good with blockwork or brickwork, it gives the impression that you've actually produced a kind of really professional-looking product. So it's a good, good cheats way to kind of get a nice professional look. So here it is, that's the remedied cladding now. Straightened it all up and I just put a bit of pointing on it and it looked really good. So I just did a bit of tidying up here on the oak. Instead of having just the sleepers, I ripped some oak on the table saw just to kind of tidy it up, give it a little bit of a feature and kind of hide a little bit more of that blockwork. So if you're looking at this and you've already got all of your base sorted and you've kind of brought it up to say like chest height or hip height and you're ready to go with the actual pizza oven build, build, this is, this is where you really want to start kind of taking notice. So all of the rest of it, I'm just building like a big box that supports a pizza oven. So the, the construction of my pizza oven, I wanted to go for the simplest option possible. So I'm not— like I said, I'm a civil engineer, I understand all of the, the ways that forces work, but I'm not very good practically in terms of kind of brickwork, blockwork, building, pointing, all of that stuff. So I wanted to make it as simple as possible. So the way that I designed my pizza oven is that I thought, well, I'll do the majority of the work in terms of putting together the base and the slab and all of that, and then I want to buy a ready-made product. So I was thinking at first I was going to buy one of the ones with the lifting hoops, completely prefabricated product, and just put it on a base. And then having read a little bit more about that, it seemed that they weren't very, very good quality, and they actually weren't conforming to the Neapolitan standards, something that I wanted to adhere to. So I looked at kind of building my own, looked at getting fire bricks, and looked at building my own kind of dome-based pizza oven. But it was going to cost me about £2,000, and the pizza oven cost me more than £2,000 overall in the end. But I was just— I didn't want to commit that much money to it and risk it just falling down on itself when I lit the first fire. So I went for a bit of a halfway house. And I used a prefabricated kind of jigsaw-style Neapolitan pizza build. So the kit that I used was from a company called Woodfire Gourmet based in Scotland, and they do 2 different kits. They do one which is just the dome, and then they do one with a dome and the entrance section as well. Definitely, if you're going to go with Woodfire Gourmet, go with the one with the entrance section as well. Gives you so much more flexibility in terms of your pizza oven, allows you to have a door the correct side of the flue, so you can use it for a lot more than just pizza. You can use it for baking, cakes, casseroles, everything like that. It's a really, really critical step in the design that you can have the door on the correct side of the flue, so when you put the door in, it stops everything. There's no air getting into it whatsoever. If you put the flue in the main dome of the pizza oven, you can't stop that without using a damper. So just, if you're going to use Woodfire Gourmet, use that particular design. I think it's a 12-section design as opposed to the 8-section, but you want the one with the kind of corridor section included on it. So Wood Fired Gourmet, they use— they give you all of the components that you need. So you get the floor, you get the fire bricks, and you get the components to build it, but then everything else is left up to you. So you need to kind of build all the other components yourself. So I use this kind of refractory board underneath it. So this is like an insulation product It's 50mm, and that's what gives you the real kind of solid insulation underneath the product. So my build-up is basically 50mm of Vermicrete, then I've got this 50mm of insulation board, then I've got my 50mm of fire brick, and then that's it. And then I've got all of the slab underneath that as well, so it's really, really well insulated. So you can see in this picture, I've just cut that roughly to shape, that insulation board, and then that's kind of how I start my design. So once I've cut that board to shape, I took it off and I spray painted it onto the Vermicrete just to give me an indication of exactly where my pizza oven was going to be. It's just a good kind of habit to get into spray painting and kind of making measurements, because once you kind of start the build, you can't move it. If it's not central, it's not going to be central. So just make sure you kind of measure correctly exactly where you want it, and make sure you take note of all of the depth of the walls. You don't want to start too close to the back and then realize that you've not got enough room complete the insulation. Like, the walls on my pizza oven, it's an 800mm internal diameter, but it's, it's huge. Like, the walls are about 8 inches deep, um, and I'm jumping between kind of metric and imperial there, so it's like 200mm deep, the walls. So instead of having an 800mm diameter, it turns into kind of a 1200mm diameter by the time you put all the insulation in the walls. So just something to bear in mind. Look through to the end of the video and you'll kind of see the dimensions. This is just here. I had loads of these paving slabs. This is going to be my kind of my finished appearance. They're really, really nice slabs. Now you could actually use these for kind of cooking pizzas on directly. They're really old clay-based slabs, but I'm just using them for decorative purposes here. There was a bit of a gap in terms of the rest of my delivery coming, so I just kind of got on with other stuff while I was waiting for deliveries. So I put all of these on. I used a 4 to 1 mix of sand and cement. Pointed them all up, and then I knew that my refractory board was going to fit perfectly into that slot. Didn't matter that it wasn't neat because I know that the, the walls are so deep they're going to cover any of these imperfections, as you'll see later on in the video. So then I cut my insulation board to size. When you've got any edges of this, you use an aluminium tape just to stop any ingress of water. I went a little bit overboard with it because I had a big roll, but you might as well Again, I'm kind of designing this for my own purposes. I want it to last for a long, long time, so I didn't scrimp and kind of went overboard on a lot of the design areas. Around all the gaps, I just added a layer of Vermicrete just to kind of make sure there wasn't any air pockets in there. Just wanted to avoid air pockets throughout the whole of the design, so just kind of filled that in, tamped it down, and then I've got a nice level surface to start laying my fire bricks on. So then you know roughly where you're going to put your pizza oven, on the slab, so then you lay your fire bricks down in a herringbone pattern like that. It's a lot more wasteful, this pattern, but they give you enough bricks in the Woodfire Gourmet pack to allow for kind of all of your cuts. The reason for the herringbone pattern is that when you're using your pizza peel to get pizzas in and out, you're much less likely to catch up against any uneven fire bricks within your pizza oven. So then it's really starting to kind of take shape by now, do you know what I mean? I did a dry run first, and this is really important. Make sure you do a dry run and everything's So you put your herringbone fire bricks on the base, and then I just kind of manually lifted up these slabs and put them on without any fire clay just to see what it looked like, check all the dimensions were correct. If you've got someone to help you do this, definitely take the help because these pieces are really, really heavy, and obviously kind of the item's quite high up now, so you're doing a lot of leaning and you don't want to break any of these. There's no reinforcement in them, so if you drop them, they are quite fragile. They're incredibly strong in compression, incredibly weak in tension. So don't drop them, they will break, and then you're in a bit of a mess. So I like this picture because it gives you a really kind of good indication of how shallow that roof is. So on the prefab ones, you can see how high the roof is, like it's almost as high as it is wide. And that's what causes the issues in those prefab ones, is that you can't get the temperature up high enough Because all of that hot air is circulating too high up. So it essentially becomes a bread oven, those ones. This is what you want. This is the Neapolitan formula, and these Woodfire Gourmet Pizza kits are designed to conform to the Neapolitan formula. So instead of you measuring it, if you buy the kits from them, it makes it very easy. If you're going to build this from scratch yourself, then you're probably watching another video anyway, but you can get all of the dimensions, and there's loads of calculators online to give you the kind of dimensions from the floor to the ceiling and the open and the diameter. It's all there readily available, so just take a look online. So then next job is to cut all of the fire bricks. So once you've got it, once you've got all your bits on the fire bricks, I just took a marker pen and kind of sketched around it just so I knew where all my cuts were, put all of the modular pieces away, and then cut all of the fire bricks to get the exact shape. The way I did it is I overlapped the modular pieces and sat them on top of the fire bricks. I thought that was a better way of doing it and holding it in with render as opposed to trying to kind of perfectly cut the fire bricks to fit inside the modular construction, if that makes sense. So the, the pieces, the big gray pieces here, sit on top of the fire bricks as opposed to sitting directly on the base with the fire bricks butted up next to them. So then in the kit you get some fire clay, and the fire clay you just mix with water and you use that as a glue to kind of stick everything together. It sticks really, really well. But it's not strong until you do the first firing of it. So just be aware that it's not glued together permanently, it's just kind of giving you like a nice solid setting just to kind of get everything into the correct position. This was quite difficult, and it's difficult to align everything up. So again, get someone to help you with this part, it definitely makes it a lot easier. So then 2 additional items in this picture here. So once you've kind of stuck it all together with fire clay, I put my flue in. So So I used an insulated twin wall flue, a black piece that I actually had lying around from an old log burner installation. But you can pick these up really, really cheap secondhand, and for a pizza oven, secondhand is absolutely fine. The insulated one's great though because this is where a lot of the heat will come out. When you touch my pizza oven when it's running at like 400-500°C, the top of the pizza oven with the thermometer, like the external of it, is running at about 17°C. So it's incredibly well insulated, whereas the flue is a lot hotter, and that's already got 25mm of insulation in there. So if you were to go with a single wall, then it would get very hot. So I definitely recommend a twin wall flue, and it will give you a better draw through as well, so it'll bring the smoke up and out your face a lot better as well. So put the twin wall flue in there, and that just fits into the slot that comes in the kit. And then the next thing that you see there is kind of refractory blanket. So it is in effect like asbestos, but it's a safe version of asbestos. So there's a step that I missed out on here, and underneath what you can see now is Vermicrete, there is chicken wire. So in order to kind of give it a bit more structural integrity and hold everything in place, there's chicken wire in there, and I just kind of like pin that in just to hold that refractory blanket in place. And then you start molding on your Vermicrete. So Vermicrete again, vermiculite 8 parts to 1 part cement, You mix that up. The idea is that you want it as lean as it can possibly be in terms of as little amount of cement in there as possible. That boosts the insulation properties of it, but you need enough to kind of keep it together. So I find 8 to 1 good, good kind of beginner's mix. That's what I used. It went really well. Make sure you use your gloves though, and you get through a lot of this. So when you're trying to work it out, I think I used about 200 litres of vermiculite. You can't use too much of this here, so if you end up building it 200-300mm deep, then fine. All you're doing, you're adding additional insulation to your pizza oven, which means that you're going to use less fuel and you can keep it going for longer. So go wild. So I did this over a couple of days. You don't want a big 300mm batch of Vermicrete going off at once, so I did a first batch, let it go off for a couple of days under like a tarpaulin Then come back and did a second batch and built up the layers that way. So then I started to build my arch, and I had a bit of a nightmare with my arch, to be honest. I went through 2 different designs on it, and it's back now at the original design with a lot of faffing around with it. The arch is really, really simple. Just use some nice old rustic bricks, build a formwork out of some wood, build an arch. It really— don't overcomplicate it. You'll see in this build I overcomplicated it, and now I'm back to the original kind of rustic old brick arch. But it's very, very simple to do, as you'll see from these pictures. So I toyed with the idea of using fire bricks for the top of the arch, and it just didn't look right. I couldn't cut them very well, couldn't cut them neat, so I stuck to the rustic bricks. So that's the finished arch there. A bit messy, do you know what I mean? There's kind of concrete all over the face of the bricks, but it's just that standard kind of plywood carcass that I put in there. Made it really, really easy to build, and then I just cleaned it off with brick acid. So that's it, you know what I mean? The difference between those 2 pictures there, I think, is quite dramatic. Brick acid is your friend when it comes to building pizza ovens if you're not very good with brickwork, but please take all suitable precautions for that. It's horrible, horrible stuff. It melts concrete, dissolves it. So imagine what it's going to do to your skin or your eyes. So make sure you wear eye protection. Full proper gloves, cover all any skin areas, be really, really safe with any brick acid. So you'll notice here that the flue is quite small. So I started off my design with a very, very small flue, and I subsequently changed it to a much longer flue. And that's the benefit of using this twin wall system, is that you can just clip in another piece. So I added in an additional metre, so now I've got a 1.5 metre flue, and the draw on the pizza oven is so much better. But the added benefit is the smoke doesn't come in your face. It kind of goes like a meter above your head, so you can kind of operate it under all conditions and it works really well. So at this stage, I gave it a couple of days to kind of cure. I mean, at this point, you've got to understand that everything is full of moisture. I mean, you've got residual strength in there. The concrete's going off at different stages and curing, but the moisture is still there. And the way that concrete works is that the longer you allow that to cure, the stronger and the greater strength it will ultimately have. That's why kind of when they cure cubes of concrete underwater, that's where you get your best strength. If you cure them in really dry, arid conditions, you see kind of people in the deserts when they're building stuff spraying it with water, trying to keep it moist in order to kind of allow the cement within the concrete to hydrate at a slower rate. So what you don't want to do is build all of this and then think, I'm going to get it dry by building a fire to make it drier and stronger quicker. doesn't work like that. Cement and concrete products, you need to have a slow, moist hydration period, and then that's what gives you greater strength. So, um, so I left it for a few days. And I mean, you need to see a pizza oven as it's not a weekend job. This took me 6 months to build. Um, it takes a very, very long time to build a pizza oven. So waiting a couple of weeks for the concrete to cure is fine. Just let it cure. Nice tarpaulin over it, keep that moisture in. Keep the rain off. But then you can build a little fire and you can start to kind of build bigger progressive fires to get that final moisture driven out of the oven. So this is what you see in this picture here. Do a few kind of early fires just to drive off the remainder of that water moisture within the concrete. So obviously, first fire, had to cook something. I think I cooked some sausages or something. It's a good note and a good time to say, when you're using pizza ovens, you need to make sure you're not putting crap wood in there. Needs to be top quality wood. I've got loads of apple in my garden, loads of oak. So we chop that down, we cure it. So you need really nice, dry, good quality hardwood. Any oak's good. Fruitwood is particularly good because it's very mild in terms of the smoke, and ash is good as well. I'd stick to those 3. Don't use any pine. It gives off lots of resin and a lot of flavour. Definitely, definitely don't use any treated or painted wood. You'll contaminate your pizza oven and you just kind of can't get it back from there. So you really, you really need to consider the wood that you're putting into your pizza oven. Oven and make sure that it's top quality, not treated, not painted, preferably a fruit wood. So you see the floor here, so this was created by the fact that the flue wasn't long, so a lot of the smoke was escaping out the front of the oven because the draw wasn't significant to bring it up through the flue. So this is what led me to kind of change the design of the arch, and I didn't really need to, and it led me to change the design of the flue as well. So this is where I added on that extra 1-meter section And that really stopped that kind of blackening of the arch, but I changed it anyway. So this first coat here, you can see on the outside, I used a product called K-Rend. So this is like a coloured render. So instead of using just a standard kind of cement and sand mix for a, like, a render and then painting it, you can use K-Rend and it gives you like a really nice kind of coloured uniform render for your pizza oven. So this first one that you see here is a scratch coat, and I just kind of applied that all on as per the manufacturer's recommendations, let it go off for a few days, crossed it off so it gives it something nice and textured for the final coat to adhere to. So that's why it looks a bit naff at the moment. So then we jump forward a little bit. So as you can see here, I wasn't happy with the arch. I didn't like all the blackening, so I went with this kind of tiled effect. Now at the time I really thought it was cool, but the way that I applied it with kind of like an exterior tile adhesive, it's just not lasted very well. The tiles as well, because they're a laminate laminated slate tile, they didn't last to the heat very well. So the heat made them spall. So I kept on getting damaged ones, and I've gone back to the brick one now. Tidied it all up. Like it looks really really nice. I think there looks cool. It wasn't very durable. Pizza ovens—it's about a kind of long-term investment. You want to go for something simple and durable. So the other thing to say on this picture as well is the fact that you'll see the door, and again the door looks cool. I love the door. But there's no insulation behind the door. It's purely ornamental, and it created more, more of a headache for me than it was worth because it's the wrong side of the flue, so you get no benefit in terms of kind of functionality added into it. And it wasn't very well made, so it started to rust. So it cost me like £80. If I did it again, definitely wouldn't put the door in. So just a nice little shot here. Do you know what I mean? At this point, I was really chuffed with myself. Nice sunny day. Had our nice oak furniture built at the same time. We went out there. We had some pizzas. It was great. Loved it. Absolutely loved it at this point. So, couple of things in this picture. This is the first coat that I put on of the K-Rend. In fact, I only actually put one coat on. It's a great product, the K-Rend, but you need to be really, really careful with the manufacturer's instructions on it. So it's a product that you apply on, and you can kind of just slop it on with a a hawk and a plasterer's trowel. You want to get it onto a nice uniform thickness, but you don't need to worry too much about it being a perfect finish because then what you do after a couple of hours— and you need to make sure you follow the instructions on how long after since you applied it— you use this kind of like scratch— I don't even know how to explain it— it's like a scratching trowel specifically designed for this product, and you go over it and it gives you this kind of like— it scrapes everything off and gives you a really uniform feel around the whole pizza oven and gives you a really uniform texture and color as well. But make sure if you are using the K-Rend, only do this once. Don't go back and touch it up, because I went back after 20 minutes after scratching it off and touched a couple of pieces up and the color's different. So you only really get one stab at it, but it's a really good product and I definitely recommend if you're going to use— if you want a painted pizza oven, use a K-Rend with a pigment already added. Really great range of colours, and they're great. They're really well waterproofed as well, stops all the water getting into your pizza oven, gives it a really professional finish. So also at the base here, you'll see all the wood I've been stocking up. When you're doing your pizza oven, build a nice big wood store. You'll thank me for it when you, when you come to cook pizzas, having all of your wood just underneath it. You can top up the wood and top up the fire really, really easily. It's just worth building something watertight underneath your pizza oven because it's a kind of a void and a lost space otherwise. So the K-Rend's messy. I'm sure other people who use K-Rend, they're nowhere near as messy as I am, but I'm not the best in terms of kind of putting on plaster or putting on render. So I knew it would clean up well. So you'll see kind of from the finished products, bit of water, bit of brick acid, cleans up really nicely. And there you go. I told you, do you know what I mean? Just made sure, kind of let it go off. Washed it off with loads of water, a bit of brick acid for the more stubborn bits, and it come out really nice. So you can see from this picture here, you've got the table in the shot as well. You can see the additional length that I've added to the flue. It's basically finished at this point. The only thing that hadn't included on it then was a door, so I just built a door out of some oak. I thought I'd just add this shot in here. This was a classic kind of winter night when it wasn't raining. I put loads of lights up in the tree, me and the dog outside cooking some pizzas. It was great, but the problem with it being so far away from the house is that you become designated pizza man or woman, and then you're up there on your own tending to the pizzas while everyone else is cozy inside. So if I did it again, I'd have like big bifold doors leading out to a nice kind of external area where I could put some heating, I could put some shelter away from the rain, and then kind of everyone can be out there together. That's what's fun about pizzas, is everyone being there, everyone having a go. Don't put it too far away from the house so you're kind of like isolated from everyone, unless, unless you want to be isolated from everyone and then stick it as far away as possible. So I just knocked up a quick door to go on it and put a handle on it, rough and ready. I mean, I had some oak lying around, just kind of whipped it all together. It's just a really, really simple door with a simple handle and some hinges just to kind of hide what is quite ugly inside. And that's it. We're kind of at the, at the end of this pizza oven video. So I love my pizza oven. There's so many things that I would do differently if I did it again, but I don't think after all the hard effort that I've put into it that I would build another one without this one falling to pieces. And like I say, I've had it 4 or 5 years now and it's absolutely solid. Like, there's no water that gets into it whatsoever. A couple of things that I haven't shown on this video is how I built the door. So I used like a plug door To block off in between the flue and the main chamber, and I do that to kind of stop the airflow dead. And if I do pizza, say, on a Friday night, cooking at like 450°C, where a pizza will cook in 90 seconds, if I do that on a Friday night and then I plug the door, I can cook on that on a Monday— sorry, on a Sunday afternoon, maybe doing some baking or some slow cooking. So it keeps its heat for that long. I mean, I've had it kind of 450°C on a Friday night, come back on the Sunday afternoon and it's sitting around 150°C. So it's a really kind of efficient way of cooking. And then on the Saturday you can do— you can bake bread and stuff in it. So it's like 240°C on a Saturday. So it's a good efficient way of doing it. If you plug the fire when there's like a really well-lit fire in there as well, it's so easy to get it back going again. So you can use it kind of night after night. Without having to do that initial startup. A few tips and tricks that I've learned over the way is I always thought with pizza ovens you wanted to get the highest temperature possible, so I started off making pizzas and I burnt so many pizzas. People who will watch this video, if they know me, probably ate loads of burnt pizzas and were really polite and said, oh yeah, that's lovely, but it was burnt. And the reason for that was because I was trying to get this the highest temperature possible because I thought it was best to cook your pizzas as quickly as you possibly can, and I realized that's not the case. So what I do now is I build the fire up to get it as hot as I possibly can, absolutely roasting, and I've had it up at like 600-700°C. And then what I do is I load loads of big logs on, some nice kind of hardwoods— oak, apple, cherry, something like that— and then I let the temperature drop. And what you're doing there is you're giving yourself a really, really consistent temperature So I'll build it up to as hot as I can get it, and then I'll let it drop down to 450, which is like my target temperature, 400-450°C, and then I cook on it. And I find with that, that'll give me the perfect pizzas. Take about 90 seconds to 2 minutes to cook, but then you get the real kind of even, even cooking top and bottom. You don't burn the base. This is where I found that I was burning it. The flour was burning on the base just instantly. So that's a good tip. Obviously, the tip that I gave you before, make sure you use the good wood. You don't want anything painted, anything varnished. It's going to really taint the taste of your food, and it's obviously probably quite bad for you as well. So use good quality wood. I'm going to do another video on this. I'm going to show you kind of how I make the pizzas, how I make the dough, so watch out for that one. But the other thing, and the final thing I say, is you use good quality ingredients. Don't Use standard plain flour. Don't use standard bread flour. I use a Caputo blue flour. That's the standard kind of Neapolitan flour that they use. Really, really good. And then I just use like a really good quality tinned tomato, kind of whiz that up, put it through a sieve, mix loads of olive oil and a bit of oregano in with it. That's not traditional, that's just something I like to do. Good quality mozzarella, good quality toppings used sparingly is so much better. When we have pizza parties, you always see everyone wants to put loads and loads of toppings onto the pizzas, and I was like that at first. You get carried away, you put loads on, but the best pizzas are the ones where you kind of do it sparingly. Few good quality toppings come out a lot nicer, cook a lot more even than kind of loads of toppings slopped on. It just becomes a bit of a mess. So that's it for the end of the video. So I appreciate not a beekeeping video. You come here for the beekeeping videos, but you've got a how to construct a Neapolitan Pizza oven today, so something a little bit different. We're going to do a few more of these videos because I enjoy my food. I enjoy my construction activities. So we'll do a few more of these and hopefully people like them. So that's it. So thanks for watching. Like I say, we'll do more of these videos. So if you're interested in kind of some more kind of practical food videos in terms of construction, we've also got a hot smoker that we'll do a video on. But if you're interested in these videos, please hit the subscribe button. Please hit the bell, and I'll see you next time.