Insulating A Wooden Beehive With Cork Sheeting - Improve Thermal Performance
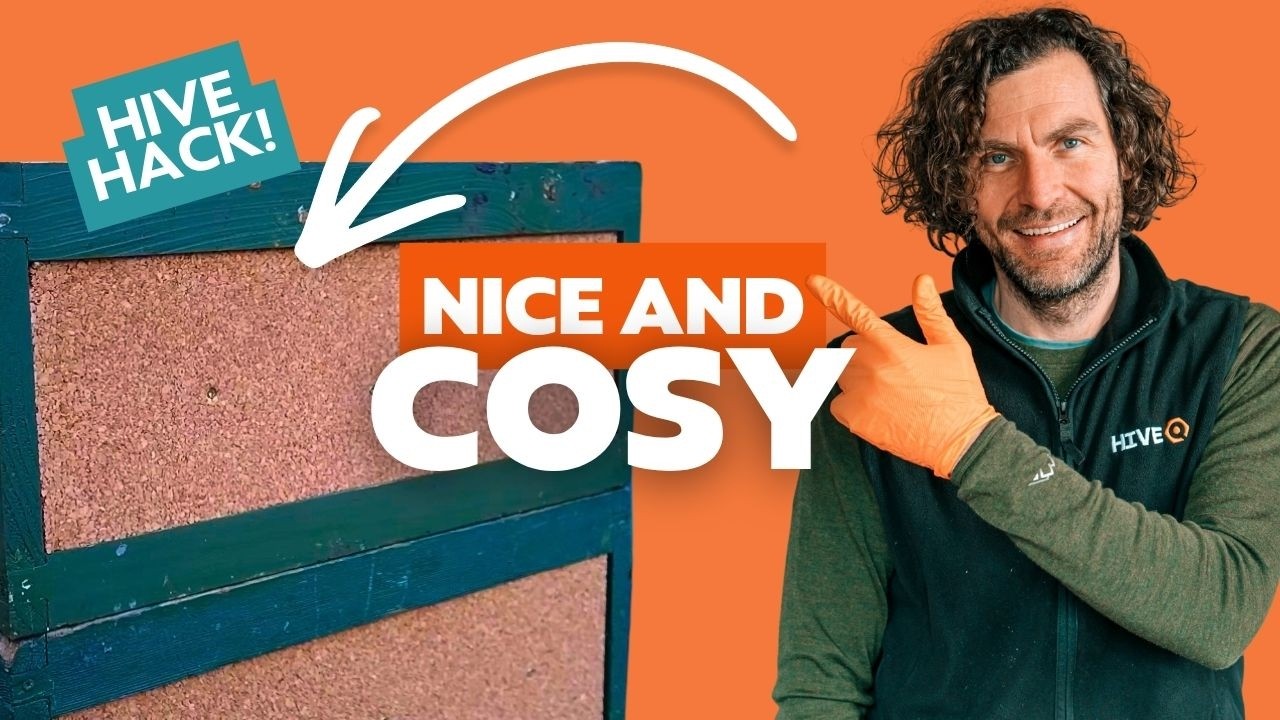
Laurence Edwards shows how to insulate a wooden National beehive with cork sheeting to improve thermal performance. Cork provides insulation equivalent to four inches of cedar per inch of thickness and is an eco-friendly by-product. The retrofit involves cutting 20-25 mm cork sheets to fit the hive's walls, adding plywood protection, and insulating the crown board to reduce heat loss year-round.
Chapters
Today I'm going to show you how to retrofit a wooden National hive with cork insulation. So cork sheeting is an absolute wonder product. For every 1 inch of cork sheeting, you get the equivalent of 4 inches of cedar. That's pretty remarkable considering that most cedar hives only give you about 20 millimeters of wood. So by replacing that with a 20 millimeter sheet of cork insulation, you're effectively getting a 5-inch wall of cedar. Bees love insulation, I love insulation, and I've seen firsthand the benefits that you can get by really insulating your hives well. So in this video, I'm going to show you exactly how to put one of these together. It's a retrofit, so it fits on all wooden National systems. All I'm doing, cutting up some cork sheeting, placing it in strategic positions all the way over the wooden National hive, and you end up with a super insulated, Really good looking wooden national insulated hive. Now cork sheeting has remarkable properties. We've spoken a little bit about the insulation properties, but it is essentially a byproduct from the cork industry. They break up all the little bits, they put them together into sheets. It's a really low carbon solution to give you an incredible benefit of insulation. It's an alternative to a poly hive, and I'm going to do some testing later on in the year. I'm really keen to work out what the thermal values are on this hive here. I'm gonna run this one throughout the year though. I'll do some testing. I'll run it up against some poly hives. I really like this though. In this video, I'm gonna show you how to make it. Right, enough of me rambling. I'll jump straight in and tell you how I retrospectively applied the cork insulation to my wooden National Hives. So wooden National Hives are a little bit of a rubbish design. I think we can all agree on that now. They have some really strange quirks. But when it comes to actually doing this application, this retrospective insulation, Think it works quite nicely, and I think what I've designed here will work very well. So you can see at the front there, I've cut a piece of cork insulation, and I've just put that into the rebate that you get on a wooden national hive. I'll stick up all the dimensions at the end, but what I would recommend if you're going to do this is just buy some insulation sheets and measure your specific wooden national hive, because depending on the moisture content, depending on how well it's been put together, these dimensions are going to change. So don't copy my dimensions; you do need to cut and measure this for yourself. And what I've done with all of mine is I've used 20 millimeter. Millimeter cork insulation sheet. I'll stick the link in the description as well. I found a really good company that does all of this sheeting. In this rebate here, I've used 20 millimeter thick cork sheet. If you go for 25 millimeter, it leaves it completely flush. And what I will end up doing with this as well is I'm going to rebate in, get the router in, and put a couple of little handles in there as well. You could go down to like 10 or 15 mil and then leave that grip on there. That would work well. That would probably be a lot cheaper as well because the 20 mil cork insulation sheet isn't cheap. But for the purpose of this video, it works. I can lift Up there, I've got about 5 to 6 mil of grip. Definitely work better with a handle. But then you come around to this side here and you kind of think, well, how am I going to insulate that there? All I can do is stick a piece of cork on the outside. But no, I've gone down the inside insulation route. So what I've got on the top here, that's just a piece of pine that I've ripped down to that size. And then if I spin that around, you can see what's going on. We've got that outer shell of cedar, then we've got a layer of 20 mil cork insulation, And then I've put another layer of 12mm ply on the inside. I didn't want any chance that the bees were gonna start nibbling away at this cork. For the sake of a little bit of 12mm ply on there as well, I think it's gonna give it the longevity. And the fact that it's all internal and covered by this piece of pine at the top should last for absolutely ages. So that's what the boxes look like. In that dimension, I've got insulation on the inside, and then on that dimension, I've got insulation on both sides of it there. So if you're in the middle there, you're a nice warm bee, You've got insulation all the way around you. So the way that I plan to run this is I'm going to run it all on single National Deeps. I'm not going to do a separate one for supers because it makes it easier, doesn't it, cutting everything on the table saw, getting it to the right size. So all I'm going to run, I'm going to run one hive throughout the season with 4 National Deep boxes, and then anything above that I'm just going to go straight with standard wooden National Supers. If the colonies are that big at that time of the year, They don't need any help from me in terms of insulation. The brood box will be super warm. Right, so I'll just run through exactly how I put that together now. Take a standard wooden national, you've got your rebate in there. The only angle cut that you need to do on here is a little chamfer. I'm not sure of the angle, I've not measured it. This is no-nonsense beekeeping. Get it somewhere in between kind of 45 and 90, that's gonna do you well. But I joke around there, you can measure it, you can do this as neat or as scrappy as you like, I always do things scrappy. A little bit neater with the table saw this time, but I pre-cut everything on my table saw. Absolutely love that table saw, gives you really nice clean cuts. I hate it when it kicks back the ply at me though. So then all you need to do is so simple. You just take your cork insulation and you just pop it into place. I like to get it on a really nice tight fit so you've got a bit of a compression fit on it as well. I don't bother gluing it, don't see the need to glue it. The compression fit will hold it in place. And then I'm just going to stick three screws in either side just to keep it there. So there you can see I've got that in. Probably the best bit of measurement I've ever done. That is down to about literally point one of a millimeter. Little gap over that side, but I'm well happy with that. So nice compression fit. I'm just going to stick three screws in, and then that's that side insulated. The outside bits really, really easy to get going. So then just flip it over exactly the same on the other side. Let's see if my measurements is good on this one. Hey, I'm getting pretty good at sticking them in there. That's such a good fit. You don't need to put the screws in if you can get it nice and tight like that. I reckon it'll probably stay in. You can glue it in as well. You can get special glue to hold it in. I think though, compression fit, couple of screws, not going anywhere. So this is what the insulation looks like once it's in. You can see, just screwed into position, nice tight fit. I've got the chamfer on that bottom edge. And that's it, the outside are completely insulated. So outsides are done, we're gonna move over now and insulate the insides. Like I said, you can't do the outside 'cause there's no rebate on this side of the National Wooden Hive, so you need to do it on the inside. And I'll show you my technique now for making sure that you maintain the bee space and you maintain the space above the frames in the box below. So again, we've got pre-cut cork sheet. This is so Blue Peter, isn't it? Again, I won't put the dimensions up here because I don't wanna say it's, say, 37.5 centimeters And yours is 37 centimeters, so you just need to measure it. I'll show you pictures. These are all really straightforward cuts, squares and rectangles. That's pre-cut there, and I'm going to put that inside the wooden National. So here's my wooden National side now. Like I said, I've got my cork completely pre-cut there. That just slides in, and then what's really important is that you get it flush with the top of the runner there. Same on that side, because we're going to cover that over. That means you're not going to get bees messing around in this space up here because we're going to cap All of that over. Again, we're just going to screw those into position there. Don't need to go all the way down, holds it in place easily like that. So once you've got your cork sheet in there, I've pre-cut some ply and we're just going to overlay that ply exactly over. Same again, keep everything nice and flush. Don't bring it up over the top there because we're going to cap all of that off. And then you can just stick some screws in. If you want to go all the way through to the wood, you can. If you're like me and you've not planned it very well and your screws are too short, It will hold it actually going into the cork as well. So there we go, I've got my ply in, I've got my cork insulation in. If you left it like that, it would work, but you've got these open edges that the bees can easily access. You don't want the bees going in there, you don't want brace comb, you don't want moisture going down. So I've just cut some pine, stripped it down, and I'm just going to cap that on the top, screw it in place. So you can see the makeup of it here. I've got my cedar on the outside, cork in the middle, and then a sheet of ply. And all I'm gonna do, again, my measurement's pretty good here, I'm happy with that. Got some nice piece of pine that I've trimmed down, and really important, you just wanna keep it completely flush all the way along. So there you go, that's the box complete. I've got my outside insulation, my inside insulation capped with some ply, and then I've got a pine topper to stop any ingress of water. So I have to say, I'm pretty happy with them, and I think they look really cool as well. You get this two-tone color effect. You can see I've got that outside insulation there retrofitted onto a wooden National, and then in the middle I've got these pieces of pine toppers and nice thick exterior walls as well. So in terms of other insulation in the hive, the only other place that I'm going to put insulation on here is I'm just going to put a nice 1-inch thick cork sheet on top of the crown board. That's the only other place that needs it, and that is the most important place to put it as well. Don't make your hives this insulated and then don't insulate the roof. You will cause yourself more problems doing that than if you just left it without anything. So make sure you get some really nice insulation on top of that roof and try and get it more insulated than the walls are here. So if you've used 20mm sheet in the walls, go for 25mm above. I'm actually going to use this with a poly Ashford feeder. I know it's a complete and utter cop-out because I'm trying to do this as a Kind of no-plastic hive, but I need a way to feed. I've already got loads of polyash forth feeders, so that's just what I'm going to do. If you don't want to do that though, completely understand it. I wouldn't do it if I didn't have the polyash forth feeders. Get yourself a nice thick piece of cork sheet, preferably like twice the thickness of what you're putting in the walls. Get that above the crown board and your bees are going to be so warm and cozy over winter. It's a really important point that I've just touched on there though. People think insulation is good for bees in winter. Keeps them warm in winter, and I hear loads of people saying to me, oh yeah, but it's really bad in summer. Doesn't work like that. Insulation works both ways. It keeps heat inside the hive and stops it going out, and it does the complete opposite in the summer, which is that it stops heat coming in, which means that they're able to keep themselves cool in the warm summer sun. Insulation in the summer is a massive, massive benefit. A couple of things to talk about in terms of operation. You might be thinking you've lost loads of space, there's not going to be enough frames in there now. The build-up that I've done there turns it into a 9-frame hive, which is a really cool number I think, because I'm obviously going to run this as a double brood configuration. Gives the bees the option to have 18 frames of brood down in the brood area. That is enough for all of the very biggest colonies of bees, so I've not got an issue with that at all. 9 frames fits in there really nicely. I'm going to run a colony in it this year. In April I'll stick a nuc in there, so definitely hit the subscribe button if you're interested in learning how these bees are going to get on. If you want to know more about how we insulate our beehives and talk about ventilation, here's a video I did talking about top insulation and bottom ventilation.










