Maisemore National Poly Hive Review
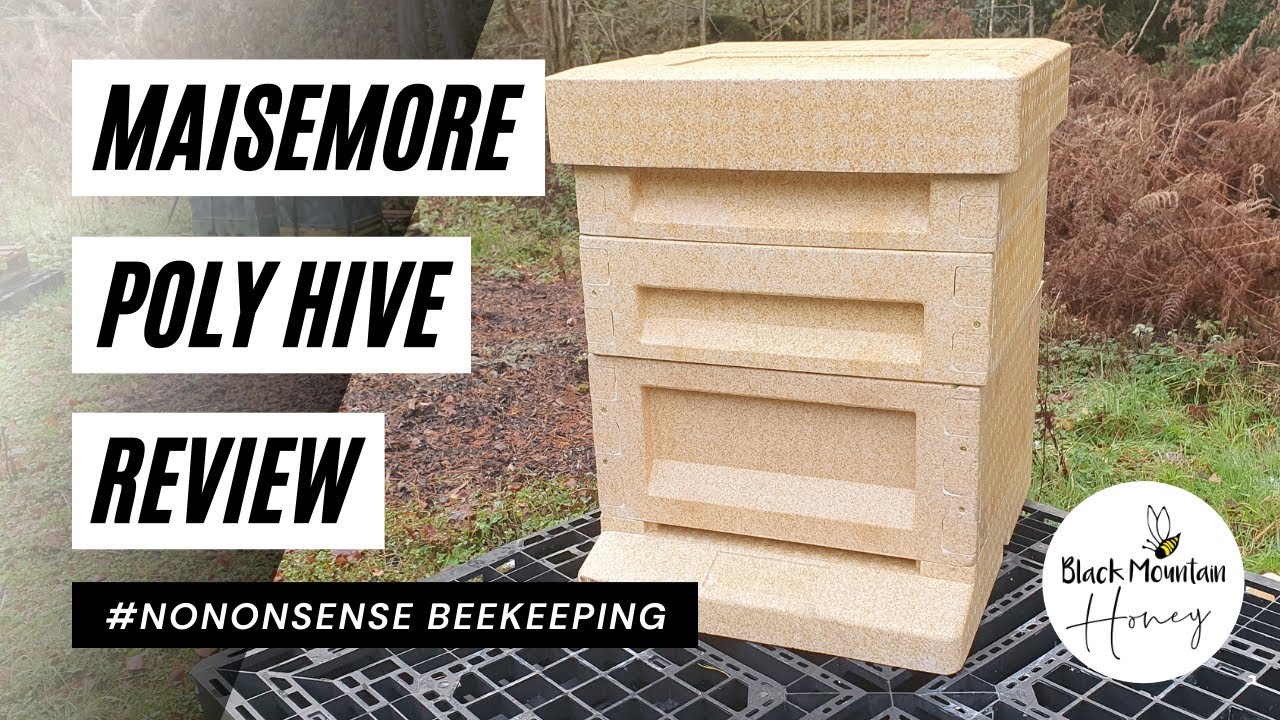
In this No Nonsense Beekeeping episode, Laurence Edwards of Black Mountain Honey provides a comprehensive, hands‑on review of the Maisemore (spelled Maysmore in the video) National Poly Hive. He purchased a full hive set for about £100 and walks through every component – roof, crown board, supers, brood box, queen excluder, floor, varroa mesh, and landing board – describing their construction, dimensions, material density, and assembly requirements. Edwards critiques the hive’s design choices, especially the non‑standard exterior dimensions that lock users into Maisemore’s ecosystem, the low‑density 100 g/L polystyrene, the telescopic roof’s water‑proofing versus space inefficiency, the limited hand‑holds, and the cumbersome floor/entrance design. He compares the hive to other poly and wooden options (e.g., Suyenti, Payne’s, Abello), highlighting cost differences and compatibility issues. While acknowledging the hive works and is suitable for beginners, he recommends several modifications (remove landing board, increase poly density to ~120 g/L, add four‑sided hand‑holds, redesign the floor and entrance, and consider a denser material). Overall, he rates the hive as serviceable but not his top choice, warning about vendor lock‑in and suggesting improvements for future iterations.
Chapters
Hi, I'm Laurence Edwards from Black Mountain Honey. Welcome to another episode of No Nonsense Beekeeping. Today I'm going to review the Maysmoor poly hive. So I had a request from someone late last year to say, can you review the Maysmoor poly hive? And I said, unfortunately, I don't have the Maysmoor poly hive. I'll buy one later on in the year and I'll do a review for you. So that's what I've done. I've gone ahead, I've bought this direct from Maysmoor, paid around £100 for it. Paid the full price all myself. It wasn't a freebie, and I'm going to give you the full review in this video. So we'll talk about the Maysmore Polyhive. I'll talk to you about the bits that I like. I'll talk to you about the bits that I don't like. I'll give you a full top-to-bottom run through all of the components that are in there, give you a little bit of a description about what they are and how they work, and then I'll just give you my general recommendations at the end as to whether it's a hive that I like or whether it's a hive that I don't So to start off, it's worth saying Maysmore was one of the the original kind of group of companies that went out and designed a polyhive. So they were one of the first people in the market, and this is one of the first polyhives that I ever saw on the market. It takes a standard national frame, but it's got interior national dimensions, and what that means is that the exterior national dimensions are consistent. Considerably bigger than a standard national footprint of 460mm by 460mm. So the Maysmore kit, although they say that it's compatible with wooden kit, it's not really because it's a different size. Although it's a bottom bee space hive, so you can put other bottom bee space units on it like a wooden national, the difference in size means it looks A bit odd, but also I think kind of practically it's not very good either. Gives water a bit of an easy route in because it can sit on the lips. So I don't think this is compatible with a wooden National Hive. Now the Maysmoor polyhives are made out of poly that's 100 grams per liter density. That's considerably more than the standard kind of packaging that you get. But it's the lowest poly that's available on the market in terms of density. So it's pretty standard. Maize More uses 100 grams per liter. I think Payne's uses 100 grams per liter. And then there's been further advancements. So BS Honeybees on their nucs, they use 120 grams, and you can really feel the difference. There's a lot more give in the Maize More and the Payne's ones compared to the BS Honeybee ones. And then the Abello ones are 160 60 grams per litre, and they use a different steam-moulded injection process as opposed to the standard injection moulding process that they use for these hives. Saying that, they're still really durable, they're still really easy to put together. I'll show you the assembly in a different video. Most of these components come flat-packed, so you need to go in and glue and screw the supers together and the brood box. The floor comes as one and the roof comes as one. Now polyhives, they're cheap, and I remember a few years back, it was around 2015, 2016, you could pick up in the sales one of these Maysmore polyhives for around £55, £60, full hive with the 2 supers in as well. The price of the poly has gone up rapidly year on year, and one of the real pet hates that I have with poly is that manufacturers lock you into their specification. And I think that's what Maysmore have done here. So my first impression, and the first thing that I'll say, is I'm really not keen on manufacturers locking you in. I don't like them locking you in through the use of a rebate. I don't like them locking you in through the use of unusual dimensions. I don't really like any unique design point that locks you into a specific manufacturer, because then they have a complete monopoly on that market. And if you need to buy another 40 supers for the hives that you already have, you are at the mercy of that manufacturer for pricing. Whereas some of the other kit that I've got, like the Suyenti, I personally think this is considerably better designed than the Suyenti. However, the Suyenti is compatible with wooden nationals, so when I go and buy new supers for my hives, wooden supers, I can pick them up for around £12 or £13 a super for a wooden national seed a second quality super. If I had all of my hives on Maysmoor and I wanted the supers and there wasn't a sale on, they're about £20 a go at the moment, maybe a little bit more now. So the differences are quite substantial, and I'm really not keen on manufacturers locking you into different types and formats of hive. I'd be much happier if they all just worked to a standard, whether that's National or Langstroth or whatever it is. Nice simple standard hive and they all clump together and then you could make a really cheap hive that no one had a monopoly on the market. So I'm sorry, I digress a little bit. That's my pet hate with the Maysmoor and it's my pet hate with the Paynes as well. And it's maybe my pet hate with the new Abello that's coming out as well. But luckily Abello are going down a slightly different approach and they're bringing out different iterations of the hive. So the new Abello hive that's coming out Although it's got the rebates on it and it does lock you into that system, they're still maintaining all of the old compatible kit. So they give you the choice, which is different from what Maysmore do, different from what Paynes do. They go into a new product and they stick with that product, and then you either don't get the design iteration, or if you do, you only get one version of it and the old version becomes obsolete and you can't get it. Right, so back to the review of the Maysmore Polyhive. We're going to go from the top down to the bottom, and I'm going to talk you through all of the components first. So the roof— first thing to say about the roof is it's a telescopic roof. I know that's an American term, but basically it means there's an overhang on it. I really like that design on a roof, and I like it for one main reason, and that is that it stops any ingress of water. That's the big reason for it. The reason that I don't like it is because it adds to the additional footprint of the hive in all directions, which means when you're stacking hives up, it's not an efficient use of space and you end up having like a 50mm void in the middle of just space where 2 roofs connect with each other. So one point I really like about it, it telescopes down. The other point I don't like is that it kind of does that and it's a, it's not a good use of space. So it's a pretty weighty roof. There's probably 30mm of insulation on the top and then around the sides it goes down quite considerably thinner. It's about 15mm on the sides, but you don't really need the insulation there. You need it on the top. It's got an embedded hive strap. It's a gimmick. You don't really need that, but it's no additional cost for them to put that in. And I think that's just a bit of a legacy design that they've stuck with. It's got the branding on the top there. What you need to say about all of these hives, all of the poly hives, they do need a coat of paint. You do need to get something on them just to prevent any UV degradation. So pretty standard roof. We'll continue our way down. Now, one of the things I like is the clear crown board. So it's ever so slightly translucent. But it's essentially clear, you can see through. That sits on top of whether you've got the supers or whether you've got the brood box at the top and you can see down. But it doesn't really work. It's just a straightforward flat piece that would work a lot better on a top-bees-based hive. In order for that to work on here, they're just going to glue the frames down onto it. So really you need like a crown board with a rim So that they've got the top bee space on the bottom bee space hive. So essentially you'd have it sitting about 8mm above like that, and then the bees could move freely over the top of it. As it is, it's just— they've just chucked that in there. I think it doesn't add a huge amount of value, and on my hive that I'm going to use, I'm not going to use that. I'm just going to not have a crown board, and I'm just going to put my polyash forth feeder on there. I'm just going to use that. Right, next thing to talk about then, The supers, and this is where that that footprint comes into play. So it's considerably wider than a standard national super, and I'll show you the difference now. So you can see the difference there is considerably larger. It's strange that internal dimensions are the same; the external dimensions, once you take into account the excess of poly, considerably bigger. So they're not compatible with each other. I know Maysmore say they are. They're definitely not. They're a different size on exterior dimension. Now that doesn't mean to say that in an emergency you couldn't put a wooden super on top of this hive. So you can, you can kind of do it like that, but I don't like it. Like the bee spaces between the frames do work, so you've got bottom bee space, bottom bee space, in between the frames you'll have 7 to 9 millimeters, a single bee space, But it looks a bit of a dog's dinner, and then you'll get water sitting on these bits here and they can go into the hive. And it's not the end of the world, it's just not a nice design. So it does annoy me if they say it's compatible. Definitely not compatible. It's a separate design. The only similarity is that it's the same bee space, the bottom bee space, and it uses the same size of frame. That's it. Now apart from that, there are a couple of differences as well to the wooden National. This actually takes 12 frames. It's a 12-frame design. So like I say, the interior dimension is actually identical to that of a wooden National. So you can use 11 frames plus a dummy board, or you can get the 12 frames in here. So you do get— that is a benefit that you get with Maysmoor, is you do get the ability to have that additional frame in the super and in the brood box. Now another design feature they have in here that some poly supers don't have is the ability to add castellations. Now, castellations can make honey harvesting so much easier, and a lot of the poly supers don't have it. On this, on the Maysmore, you just have a couple of slots and you can just pop castellations in, and then you pop your frames into the relevant spacing. So if you're the kind of person that wants to use castellations, you can do that on a Maysmore poly super and a Maysmore poly brood box, although I wouldn't advise for castellations in the brood However, what they also have is an integrated poly runner, so you, you can use this straight out of the box. As soon as you've assembled it, you can get your frame in, pop it in, and it brings the frame up flush with the mating faces, and you've got your bottom bee space super. So it's integrated, and what's nice is that because you've got the integrated runner, they don't stick it down anywhere near as much as if they did on, say, one like a Payne's Poly Nuc. Where it's just a flat piece of poly for it to sit on. It avoids any damage and it makes the frame so much easier to pull out. So you can pull them out like that. They've got handhelds on 2 sides, and again, this is something where I think we've really developed this in beekeeping over the last 5 or 6 years. I'd like to see handhelds on all 4 sides because if I come to pick up that side, I can't get my hands in. I can only pick it up that way and And it's something that really annoys me. So in a new iteration of this product, I'd like to see handhelds on all 4 sides. Another thing I'll say, and I touched on this when I did the assembly video, is that I don't think you get quite as tight a fit with the assembly of this one versus, say, the Suyenti. The Suyenti really does stay together well. I don't even glue a lot of my Suyentis, let alone screw them. The Maysmore ones do tend to work their way apart from what I've seen on other videos and advice from people. So you do need to glue and screw them, which means that it's a little bit more time-consuming when you're putting them together. Obviously, the Abello and some of the other products on the market, they come readily assembled. They do cost quite a little bit more. And the same with this one here, you need to paint it, doesn't come ready painted. So there's a little bit of work to do. You need to make sure that you're painting your poly supers, you're painting your poly brood box, paint everything, and then you need to make sure that it's glued and screwed. prior to putting any bees in it. So then the next super is exactly the same as we've just discussed. And then we get onto the queen excluder. Now the queen excluder is not a standard wooden national queen excluder because it's got the different size, so it needs to be considerably bigger. And again, this just kind of comes back to the point that I was saying. If I damage this queen excluder or I want to buy some more queen excluders because I'm going to do some Demarais, for example, which is what I'm planning on doing on a lot of my colonies this year, I'm in the market for 100 queen excluders, standard national size. I can pick them up for around £2.50 for a standard wooden national. These ones are about £6, £6 or £7, because they're a little bit bigger, and I can't buy these from anywhere else except Maysmoor. So they have a monopoly on the market, and it's just something that I don't like. I really don't like that monopoly that they have because of the size that they've made everything. I don't think there's anything malicious there. I don't think they've done it deliberately to target people. to get them onto their format and ramp up the price, although that would be quite a good business strategy. It's just the way it is and you're just tied into the system. So this is standard plastic queen excluder. I've not used it yet. I'm sure it's fine. I know Maysmore do, do really good plastic queen excluders. I've had some of the green standard ones off them before and the quality control is really good. The thickness is nice. That will last for ages. I quite like a plastic queen excluder because they're really easy to clean when you get a good frost. So I'm not dead against a plastic queen excluder, but I just don't like the monopoly on the size. So then onto the brood box, and there's not a huge amount more to say on the brood box that I haven't already said on the poly. You've got the same, you can put castellations in, you've got your embedded, already molded plastic runner for your frames. You need to glue and screw all of the corners. You've got 12 frames across, and you've got the dimension that's not compatible with a wooden super. So if you wanted, for example, to go and do double brood on this colony, you need to put another Maysmore brood on it. You can't go and put a wooden National brood on it as well. You can't mix and match. Takes me on to the floor. At the back of the floor, there is a board, and you can take that board out to turn it into a solid floor for winter. Now, what's really annoying here is that when you're doing your mite drops, It sits flush with the base, so if you were to leave that on and do a mic drop, maybe do some oxalic acid monitoring, do your mic drop, and then you take it out, A, it's quite difficult to get out, but B, it's just going to knock everything off as you take it out. Sloppy design, really, really lazy design, that is. And it's just due to the fact that they've used quite thick Correx. What you'd ideally want in there is like a thin tray, with some lips on the edge so that the debris can fall down into it, and then when you pull it out, it's not going to knock it off. So it's just, it's just a little bit lazy, that is. An easy fix, change the crown board over and you've got a better design, but it's just, yeah, I think that's a little bit lazy and it's not really very well thought through. You've got your standard Varroa mesh, and I'm glad to see that it's a solid mesh. It's not like a really cheap mesh, so it's got good quality mesh. And I like to see that it's screwed as well as a blob of silicone every now and again. So really nicely affixed to the poly, that's what we like to see. Now obviously this is a bottom bee space hive, but they give you that little bit of extra space on the floor, which I do think is nice. So effectively got a double bee space on the floor. They tend not to fill that up though, from my own experience from other poly hives and other wooden hives that also have that. Just gives you that little bit of extra flexibility. Now, what I hate, and I really don't like it, and it's not to say that it's wrong or right, but I just don't like that excess of landing board there. There's, in my mind, there's no need for it. You could probably cut off 20% of the weight and the poly from this hive by getting rid of that landing board. It would make it cheaper, it would make it more environmentally conscious, and I don't think you'd lose any functionality. So I really don't like the landing And then the final thing to say is that the entrance slot is like a standard wooden national entrance slot, so it's 15 millimeters high, and mice and rodents can easily get into this hive. So you need to make sure you're using an entrance reducer or you're using a mouse guard over winter. So it's something else that you need to buy. You probably need to buy it direct from Maisemore because the standard ones won't fit. It's just a bit of a frustration for me, and I think the The floor is really badly designed. I'd go as far as to say the floor is the worst element of this hive. Like, it'll work, but it means that I have to put additional work in to make it effective. The problem that I have with the landing board as well, which I forgot to say, is that when you're stacking your hives up, not only have you got the telescopic roof to add additional footprint to it, but you've also got that landing board. And that could be the difference between getting an additional row in your trailer or your truck It's just not needed. So I like to see everything kept to as minimal footprint as possible. If you compare the footprint of this to a Suyenti hive, it's crazy how much smaller the Suyenti hive is. And the Suyenti hive's got its own problems, like that is an absolute dog's dinner of a hive. I'd go as far as to say the Maysmore is probably better than the, the Suyenti, but at least you can get quite a few of them onto the back of your truck without trying to cut things off and make them work. So that's about it for the review. I've covered the main points. I've gone through from top to bottom, talked about the roof, the crown board, the supers, the brood boxes, and the floor. Told you about the bits that I like and told you about the bits that I don't like. Now for my recommendation, would I recommend this to you as a hive to go out and buy? And I'd probably say yeah. I don't— there's nothing majorly wrong with it in that it's not going to work. If you don't have any hives whatsoever and you're starting out in beekeeping and there's a really good price on the Maysmoor polyhives and you want a national hive, as in it's going to use a national frame, then it's fine. It's a good hive and it works. Would I recommend it over some of the other hives on the market? Probably not. It locks you into that system, which is something that I really don't like to see. You're locked in, and then if you want to add any of those other bits, so say a new crown board or a new queen excluder, then you need to go to Maysmore to get it, or you need to make it yourself. Which, if you're good at making stuff, then that's not so much of an issue. But if you're not and you need to buy it from them, the prices could go up loads, and then you're stuck in an incompatible system. The other thing that I'd say is that to get the best out of this hive, it needs a few modifications. So for me, I would chop off the landing board. I know a lot of other people— so if you've just got a hive in your back garden, keep the landing board on. If you're not moving them around, it will look nicer with the landing board, and you can see the bees coming in and out. I've not got a problem with that. So people in your back gardens, fine, keep the landing board on. But you'll need to do a little bit work on the entrance in order to get it kind of safe from rats or mice or rodents and to stop Wasps robbing it out as well. So you need to get some sort of entrance reducer, and you need to get some sort of mouse guard as well. Apart from that though, it's fine. It's not the best hive on the market, but it's perfectly acceptable, and you'll get many, many years of use out of it before it will need to be exchanged for something new. The things that I'd like to see Maysmore go away and develop and improve on this hive are, I would just scrap the floor, start again on the floor, Maybe look at a poly underfloor entrance if you're going down that route. There isn't one of those on the market. A poly underfloor entrance would resolve all of those issues, keep it within the footprint of the hive. I think that would be a really nice product and a USP on the market. I'd also go with a slightly denser polystyrene, so I probably wouldn't go up to the 150-160. I'd keep the same manufacturing method, so a standard injection molding, and see if you can just up it to 120 grams. Density per litre, just to give it— make it a little bit more solid. You lose a tiny bit of insulation, but it's negligible, and it'll make it a little bit more durable as well. Now, I wouldn't say to Maysmoor, you need to change that now to get it back to the exterior footprint of a National Hive, because I think it's too far down the road, and so many people have got these hives that if you were to chop and change to a new format, Then you're almost doing a bit of a disservice to all the people that have already got these. So I'd stick with that exterior footprint as it is, hold 12 frames, but I would just try and maybe make the queen excluders and the ancillary items that go with it just a little bit cheaper. The roof, I would say I don't like the telescopic roof, but I think for the, for the fact that I lose a little bit of space in my truck, it gives me the assurance that none of that water is going to get in up to the top to fall on the winter bees. So I probably wouldn't change the roof that much. Definitely not one of the areas that I think needs major attention. The only thing that I would change on it is that I would potentially make the telescoping effect a little bit more and have an offset rebate in there so I could feed fondant directly on the roof in a similar way that they've designed their Poly Nuke roof so you can feed fondant underneath it. I would just bring that telescoping material down a little bit further And then you can use that roof to feed fondant. And that's about it. So not too much, too many requests on my wishlist. I would make those changes though. The final one that I forgot to mention is I'd put handhelds on all 4 sides of the poly. It annoys me when they're only on 2 sides. I'd like to see that on all 4 sides as per most of the other hives on the market. So I've finished assembling this hive now. I've finished doing the review. I'll get some bees into it come April, May this year. I'll run my bees in it throughout the whole season, and I'll come back and I'll update this review once I've had a full year of having bees in the hive. So as always, I hope you've enjoyed this video. Please hit the subscribe button, please hit the bell so you're notified of every video, and I'll see you next time.










