In this instructional video, the presenter demonstrates a complete workflow for rearing and mating queen bees using the Abelo Mini Plus National hive system. The hive’s unique design features detachable, clickable frames and a dual‑colony layout that allows beekeepers to stock brood from day one, eliminating the high‑risk swarm‑in method required by smaller mini‑Apidea or mating nucs. The tutorial covers (1) preparing foundation sheets, gluing them into the click‑frames with food‑grade adhesive, and installing the frames into a strong donor colony; (2) allowing the colony to draw out the foundation, lay eggs, and develop capped brood; (3) dismantling the frames after about a week, splitting them into two Mini Plus mating nucs, and inserting protected queen cells; (4) making the nucs queenless, adding the brood frames, and placing the queen cells in the gaps; (5) transporting the nucs more than three miles away to a separate apiary to ensure successful mating; and (6) returning weeks later to inspect both halves of the split, confirming healthy brood patterns and locating multiple mated Buckfast queens. Throughout, the presenter shares practical tips on insulation, handling of queen protectors, avoiding robbing, and recognizing successful mating through brood patterns and queen behavior. The video concludes with a call to share the content.
Chapters
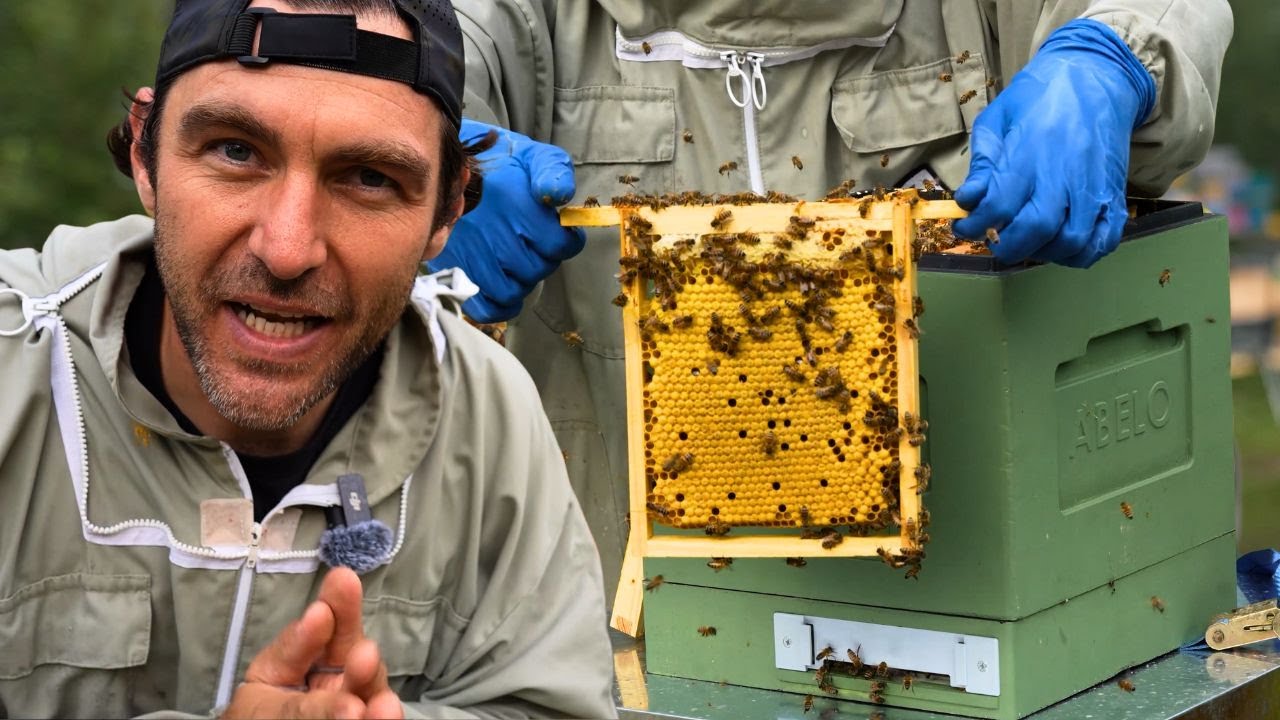
I'm going to show you the full process in this video to rear a mated queen in the Abello Mini National Plus hive. Now this hive here is specifically made for rearing queens. It has a very cool party trick, something that makes rearing queens in this hive so much easier than rearing them in the little mini Apideas or the little mini mating nucs. Now the reason it's so much easier is that those mini Apideas or mini mating nucs, you have to take a handful of bees, chuck them in basically like a package or a swarm. High, high risk of the bees of Because there's no brood in the mini mating hive. This hive fixes that because it has detachable, clickable frames that mean that you can stock it from day one with some brood. All of this hive here is made with a high-density polystyrene, 160 grams per liter, very, very insulative. So the roof's made of polystyrene. Double feeder because you have 2 colonies within this single hive here. You'll see that the 3 frames over this side have an entrance over there. And if I spin it around, that's the opposite 3 frames and they've got an entrance. So one entrance there, one entrance on this side here. And what we can do is we can take these frames, put some foundation in it, put it into our colony of bees. The bees will draw out that foundation. The queen will go up there, she'll lay lots of eggs, and instantly I have everything I need to rear some queens. Wait till they're hopelessly queenless, pop in a protected queen cell, and then that is ready to go out for mating. So first thing we need to do is get some foundation into these frames. This one here just has a bottom groove, so we're going to glue it in using some food-grade adhesive glue. What I have to do first though is chop up the foundation to make sure that it fits into the little frames. So then you take your glue gun, any glue gun will work here, food-grade adhesive, and then before the glue sets, I just take a sheet of foundation, pop that in, and then you just hold it there for maybe 10, 15 seconds until that glue sets. So I'm going to transfer over the Mini Plus clickable mating frames now. And as you can see, we've got the foundation in there, and if I wanted to put that in this box, not going to work, is it? So you need to take 2 of them out, slide them together, and then they fit perfectly into a National box like that. So the beauty of this setup here is that I can take these frames now, I could fill out this box here and go and double brood, or I could just go and chuck them into any nuc or any hive that I've got, and the bees will draw them out. And that's what's going to give me my bees and my brood to stock the Mini Plus mating nuc from Let's go and do that now. So this colony here is a super, super strong colony. Perfect. So a nice big strong colony of bees. So shake those bees off. But what I have in here now is space for my 3 frames. So that one can go there, that one can go in there. There we go, that's all set up. The bees will draw out that wax foundation now. The queen will go in, she'll lay eggs. It'll turn from eggs to larva to pupa to young emerging bees. And then I'll have all of the ingredients that I need to stock that Mini mating nuc and go out and get some queens raised. Very, very excited. Let's fast forward a week or so and see what the bees have done. So we added these frames about a week ago now, and it's safe to say that the bees have enjoyed drawing all of those out. And then once I've got capped brood in those Mini Plus frames, I'll be able to dismantle them, take them into the Mini Plus national mating hives, and go off and get some queens mated. We'll fast forward 3 weeks now and I'll show you what this colony looks like after 3 weeks. But the Abello Mini National Plus splits off into 2, so I need 2 queens. And as you can see here, I've got 3 queens here actually, 3 queen cells. Super simple though. All you do is you just take the queen cell out like that and then you take the protector and you just drop it in directly like that. So that was quick. I've harvested my queen cells. They are ripe. They've been in the finisher until day 15. And in the next 24 to 48, Depending on how old they were when I grafted them, they're going to emerge, and I want them to emerge inside the Mini Plus National from Abello. So I'll move over to that now and get that set up. So let's get the Abello Mini Plus mating nuc set up now by using the frames in this beehive here. So first thing I need to do is go in and find the queen. I don't want to take the queen from this colony and put it in there, defeats the point. I want them to be queenless over there. I'm not that fussed about them being hopelessly queenless. All I'm going to do is I'm going to take the brood over, Introduce that queen that's going to emerge within a couple of days. I've got the cell protector on it so they can't really stop her emerging, and I found that technique works very, very well. Saves you a huge amount of time as well. There she is, there's my queen. Didn't really want her on this frame, I'm not going to lie. We'll deal with that at the end. So I got my queen up there, just placed her off over to one side. So what we have now is these frames, which if everything goes to plan, I have the ability to pull these apart and form 2 New frames. There we go, got it away. That's the way to do it. Hold it closed and just slide it across. And you can see we've got 2 Mini National Plus frames there. So if I take these frames here and I'm just going to place them into the beehive, one on one side and one on the other side. We'll just place one over here as well. And over here I've got another set of clickable frames. And luckily inside these 2 here, you might not be able to see it, but there is just a little bit of eggs. I know the queen's well mated, so that will develop into capped worker brood, and there'll be plenty of nurse bees in there. The brood frames I'm going to put in the middle. Then I'm going back to the frame that had the queen on, just double checking she's not on these frames. And she's not there. I saw her just kind of fly back in there. Mated queens calm down a little bit after a few rounds of brood. But just pulling those 2 apart as well, and then we'll place them in here. Then all I'm going to do, the frame that I took out at the beginning, I know I've not got the queen on that one. So I'm just going to shake a few extra bees in like that, and then I'm going to take out of my pocket my queen cells in their protectors and very carefully just place them in between these gaps here. That is the setup, simple as that. Put the lid on, and I'm going to take that to a new site now so the bees go out and mate. Don't do it in the same apiary, all the bees will just fly back in, they'll rob that one out. Always take your mating nucs away, over 3 miles away. I'll head off now to the other apiary and I'll see you there. So I'm at the new apiary now. I brought the Abelo Mini Plus nuc, and all there is left to do now is wait a few weeks. The virgin queens inside those cells are going to emerge into those boxes. A few days after emergence, they'll become sexually mature, they'll fly off, they'll mate with the local drones, they'll come back to their respective entrances, and then in this video we will follow up later on in the season to show you how those queens have got mated. So it's been ages since I looked inside the Abello Mini Plus National. I brought it back to this apiary here to finish the video off. Last time I was there, I added 2 cells in into the 2 halves. I'm back today to See if those queens are mated. I'm gonna get my veil on. Let's get inside to see how they're getting on. So you can see we've still got that central divider board in there. 2 separate colonies. Both of them look very healthy, very active. Perfect little shot there with the macro. Look at that propolis. Wow. So let's get in, see what we can see. Have we got some mated queens? Oh well, I think there's no doubt about that on this side. Look at that pattern. Brilliant. So the frames are fully drawn out. Lots and lots of brood. Very happy with that. And I think I've seen the queen there. Yes, there's our queen. So she is just there. So mated queen on the middle of that frame there. And there we go. You can see her over there walking along. One mated queen. So that's one half done. Very, very easy indeed. So look at the other frames there. Wow. Even better brood pattern on that one there. Really nice pattern. Excellent mating. Same on that side. And wow, look at that, a full house because that one there is good as well. That queen definitely needs removal. That is pretty much perfect mating. So that was from this half. I've just left a frame out just so I don't squish her. Hopefully we'll find another queen in that half. It looks really, really good. I want to be quick because I don't want them to fight. Obviously you'd place something over normally. We have had exceptional mating weather this year. Look at that frame there. Same on that side. So another frame. Oh wow, look, running out of space. I said they're running out of space a little bit. So a bit of wild comb at the bottom there. Tidy that up. Up, get it into the wax bucket. But brood in all stages, lots of eggs there. Zoom into the macro lens and hopefully you can see at the bottom there we've got some eggs, lots and lots of eggs on the bottom of those cells, which is brilliant. So I would like to see the queen in the other one as well. Like, she's definitely there. There is eggs all over the place. Oh wow, we've got a queen in here as well. So there we go. See if you can spot her on that one. And there she is. I don't know if you can just see her right on the tip there. She's very flighty, very frigid, this one. The other one was So much easier to film. She did actually literally just fly off there and I had to get her from the floor. But you can see another mated F1 Buckfast queen. So fantastic, that's worked out really, really well. We went through quite a long way to get there, but these Mini Plus mating nucs worked very, very well. I got them to draw out the brood on these clickable frames together. I stocked it with brood, I added a queen cell in, we took it off for mating and come back and both half of the splits have been successful. I'm over the moon with that result. If you enjoyed that, the biggest compliment you can pay me is sharing the video on social media.