Swienty Poly Hive Review
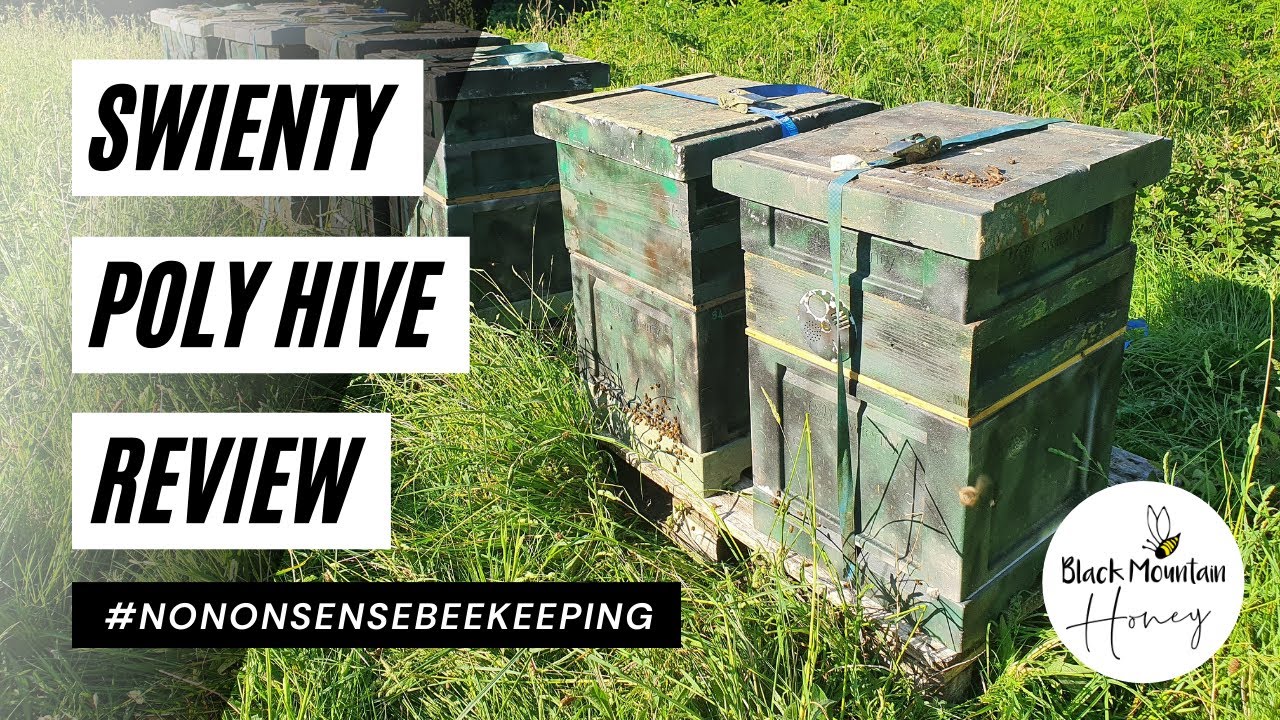
Laurence Edwards reviews the Swienty poly hive, a budget option at £80-£105 that works but has quirks. The soft material damages easily, dovetail joints loosen, and frames stick without a rebate. He rates it 7/10: cheap and modular, but not the best unless cost matters most.
Chapters
Hi, I'm Lawrence Edwards from Black Mountain Honey. Welcome back to my YouTube channel. Today we're going to have a look at the Swienti poly hive. It's available from Seawind Jones and Simon the Beekeeper. So first things first, thank you to everyone that subscribed to my channel. We now have a subscribe button available in the bottom right-hand corner, so if you're enjoying the videos, please Please hit the subscribe button. Right, on to the Suyenti polyhive review. This was the first polyhive that I ever bought, the actual one, and as you can see, it's in, it's in relatively good condition still. So it's about 4 years old. I originally bought it from Seawind Jones, and at the time I think I paid about £80-85 for it. The cost of that now has gone up to around kind of £100-105 depending on the options that you get with it. What I like with the hive, the options that they do in Seawind Jones, is that they give you an option of the different kind of queen excluders, the different sizes of box. You're not fixed into a kind of configuration, one size fits all, so there is a bit of flexibility there. So what I plan to do for this video is again go down top to bottom, roof all the way down to the floor, give you a bit of a summary of what I like about the hive, what I don't like about the hive, my experiences over the last 4 years with the hive. And then maybe put up some links at the end and see where you can buy these hives and if I recommend them or not. So starting off with the roof, there's nothing really much to say about this roof. The Abello poly hive review that I did the other week had some entrances and some other kind of nifty little additions to the roof, whereas the Suyenti poly roof is very, very bog standard. There is one feature of the polyroof though that potentially you might not have noticed if you've got this roof is it actually doubles up as a floor. Now I've had a number of instances where I've used that feature, mainly where I've found a swarm or I've been inspecting a hive and realized that they're about to swarm, so I wanted to do kind of a swarm manipulation. I didn't have a floor that was available, but I did have a spare roof. So all you do if you want to actually use this as a floor Is that you put it that way up on the floor and then you were to take another box, so maybe if you're doing a swarm split, this would be your brood box, and you put it on top there, and then that actually leaves an 8mm gap underneath along here where the bees can kind of come in and come out, and it works as a bottom bee base system. So not sure if everyone's aware of that, but that's a nice little added feature on there, something that I use occasionally. So other things to mention about the roof, it's Made out of 100 grams per liter poly, injection molded poly, and it's a little bit soft so you can damage the corners. I find when I ratchet strap it up, I do end up damaging the corners like this, which is a little bit annoying. But I find that the damage is pretty much limited to kind of like the compression of the strap there. The bees can't access that, so they can't start to nibble away at it. So it is just a bit of an unsightly addition. Another thing to say is that when it goes on the hive like that, there's quite a large overhang around the edge, and that doesn't mean that the overhang goes down, but it actually extends the exterior footprint of the hive by kind of a good 30mm all the way around. So if you're stacking these up onto trailers, it does cause a bit of an issue. The Abelo Poly Hive has kind of done away with that a little bit, and the roof sits flush with the exterior footprint. of the hive now. If you take the roof off though and discard that over here, the rest of the hive completely conforms to the standard wooden national exterior footprint, which means you can interchange the boxes for wooden boxes, which is very, very helpful. So I know a lot of people like to use the wooden boxes and then maybe put a poly roof on top to get you that added insulation on top, so this is fully compatible with that. I'll just go and grab a wooden super and show you the compatibility. So here we are with a wooden super, standard national with SN4 frames in it, and as you can see, if you put that on top there, it's exactly the same size in all dimensions. So this was what kind of pushed me towards this hive in the first instance, is that it was compatible with all of my wooden kit, all of my wooden supers, and that really helps out. So obviously with the wooden supers, I've crammed these in a lot, but I tend to get kind of 11 frames across all of my wooden kit. With the Suyenti, it's a bit of an odd size in the interior. Now when you're working with the supers, this doesn't pose too much of an issue because what I tend to do is that I'll use castellations in the supers like this. So this one, I've got 10 frames spread across Kind of 10.5 spaces, and this will mean that the frames are drawn ever so slightly thicker than they would be if they were kind of under an SN4 frame format. So the Supers, I don't find there's a huge amount of issue with it. Talking about the Supers in general, they're obviously quite light because they're poly, they're relatively robust, they fit together with dovetails, and I'll pull a couple of these apart and show you how they fit together. But it does mean that, as you can see with this here, I mean, it does tend to start to come away a little bit. So you need to every now and again give it that push in and then it goes back to normal. It can be a bit of a faff, but I don't find they kind of come too far apart to let bees in or let wasps— sorry, to let wasps in or any bees out. I did for an amount of time start gluing the corners together. So instead of just dovetailing them together and pushing them fit and then letting them come apart. I'd actually use kind of like a polyurethane glue or a Gorilla Glue and let that set, and that gives you a really, really rigid joint. The issue with that though is that if you damage the corner, so if you were to kind of drop one and then it pulls apart with the glue, you've got absolutely no chance of getting that super back together again. It has to go in the scrap heap. It's no use to anyone. Another thing to mention on the supers And it applies to all of the boxes that Swienty do in this range, is that they have this scalloped edge. So along all the edges here, it's like a bullnose. So instead of it kind of being a right angle design, you have this curved effect here. And a number of people do have issues with this. They have issues with the bees nibbling outwards. So what happens is you get kind of like a bit of a, a notchy effect where the bees are trying to kind of nibble out, and that that really does cause issues with this box. I haven't experienced it. As you can see, this box is fine. It's relatively new, this box, so I think after a few years it might be a different story. I haven't experienced it myself, but if I do start to experience it, it's potentially going to cause issues with this, and that's not good. Another thing to note is the lack of a rebate underneath the box. So all of this edge here is completely flush. Now, if you were to compare that to a standard wooden National, They have a rebate along this edge here, so when it sits on top of the frame lugs, you have a single bee space, and it means the bees can crawl over it and kind of move freely. The fact that Suyenti don't have that on their boxes does cause a real issue, and it means that the bees propolise the frames— frame lugs that rest adjacent to this edge here— they propolise it to this face. So when you come to lift up this box, So you get your hive tool in, you lift it up, you often lift up the frames underneath with it, and that— the bees don't like that at all. It can cause real issues for you. So hopefully if Swenty come out with another iteration of the box, they'll kind of take the advice of beekeepers and look into putting that rebate in there. All of the poly manufacturers are bringing out new designs now, so Abelo and other manufacturers are bringing them out. They've put this rebate in because it's a big problem and it's a problem that needed to be fixed. So I'm glad that some manufacturers are taking advice and taking notice of the advice. Other things to say about the box, there's handhelds on all 4 sides, which is one of the things I like. I really don't like it when you only have handhelds on 2 sides because sod's law is that I come down to collect it like that and I'm on the side where I can't pick it up, so I have to turn it and go around that way. It's just a bit of a faff. What they have done though is a little bit cheeky, is that they've shaved a lot of the poly off. So although the poly looks like it's a good 40mm thick, when you take into account the fact that you've got these recesses on all 4 sides, it probably takes it down to kind of around 20mm. Now I think you're still getting superior performance in terms of 20mm of wood versus 20mm of poly, but compared to some of the other boxes on the market, they do have a lot more kind of meat in their poly. which means that you'll get better insulation for the bees, which means they potentially use less stores and all of the other benefits that come with poly. But that is for another YouTube video, the debate of poly versus wood, so we'll leave that one there. So I'll just quickly pop over and get an unassembled one to show you how this puts together. So if you're buying a new Swenty poly hive, this is how it comes. It comes in a flat pack like this, and as you can see, you have these dovetails on the edges So they're the male dovetails, and then you have 2 with female dovetails like that. And it's just a kind of push and click system. Like I say, you can add glue into that if you want. If I had the time, I'd probably glue all these up. I do think the boxes are better when they're glued together, but I don't really have the time to do it at the moment, and kind of pushing them together as I go seems to be a more sensible solution for my time. So I'll just show you how they go together. You take one of the— sorry, one of the males, one of the females, and you just push it together like that. The other one clicks in, and that's it. So it felt a little bit loose, that one. So I think because that's been sitting there for a while, like I say, they do work loose. So probably the best idea to glue them together. Also, another note on the assembly is that you have push-in plastic runners. Now, if you want to work this hive as a top bee space hive, then you can do it without the runners, but what that means is that your frame lugs will sit directly on this poly here. So if you're going to do it that way, make sure you put a big smear of Vaseline on there because otherwise you might start ripping up poly when they propolise the frame lugs down. Other people put a They leave the frame runners in and then they'll kind of glue a rim to the top, a single bee space rim, to give them top bee space. I'm not overly keen on that because, because of this kind of scalloped edge. Looks a little bit unsightly. I'm not really sure how long it would potentially last. So I run all of my Serenity boxes and actually all of my boxes as a top— as a bottom bee space configuration, which means that you don't have a bee space on top. And that you have your single B-Space underneath the frames and directly above the frames underneath. So if you're running that on a Suyenti box, that means that you have these frame runners in like that, the lugs sit directly on them, and then everything sits flush. So you have a bottom B-Space super. So that's about it for the supers, so I'll just put them to one side for the moment. When you order it, you get a queen excluder. The standard offering is a plastic queen excluder. You can also upgrade to a wire-bound queen excluder, and then there's a further upgrade available to a wire-bound wooden-framed queen excluder. That's what I always go for, so this one's kind of just in my stack to get rid of or to get a frame put around it. I find the wooden-framed wire-bound excluders are really, really excellent to use. And offer you a lot of functionality kind of around the hive and around the apiary, especially when using the Suyenti poly feeder. You need something to give you that rim of bee space all the way around. So on to the brood box then, and as you can see, this is a very, very well-used brood box, but it's still in quite good condition. Like, it's a bit dirty and needs a good clean. I'll probably give it a scrub this year in some in some soda solution, but there's actually no major damage at all to the box. So the main issue with this box, or one of the main issues with this box, is the fact that it only takes the 10 frames. So I have to run this— I use only DN4 frames in my brood boxes, and if you put 10 of these in, you're left with a gap. And whereas with the wooden equipment you can sometimes squeeze an additional frame into there, Not that I recommend squeezing the frame in because it's hard to get it out, but you can actually get the frame in. With the Scuente boxes, you definitely can't get 11 in. Like, you've got enough room for 10.5 frames and that's it. So your options are you can either put up with the fact that they're going to build brace comb, which I definitely don't like because it means that you're potentially going to miss queen cells on inspections, and it's a really nice neat place for the queen to hide when you're looking for her. So scrap that idea straight away. Another option is that you kind of screw something into that place there, maybe a piece of ply, maybe a piece of Celotex, some additional insulation, and kind of expand the side of one of these to remove that additional space. Or my favorite option is I've put together some DN1 frames with a piece of Correx in the middle, and then that fits really nicely in that gap there, and then that means they don't need any brace comb whatsoever. And it gives you a dummy frame that you can take out when you're doing manipulations. So I'll just pop along and show you one of these for an example. So there you go, just do a little bit of a close-up. So what you've got there now is you've got 10 frames, 10 DN4 frames sitting in there, and then this black bar at the end, that is a DN1 frame that I've— it's actually got a bit of foundation in that one, but normally I'd put a piece of Correx in, and then that stops them building any comb in this region. And as you can see, it's an absolute perfect fit for it. So it tends to work quite well like that. The annoying thing is, is you've got 11 frames in there, but you can only use 10 of them, so it's a complete waste of 10% of your frames, slightly less than that, but it does work well. And if you're the kind of person that likes to use a dummy frame, then that's actually quite a neat solution. So that's how I run my Swienty brood boxes. So another thing to say about the Supers, and I hadn't realized this for a long while, and this is why I've actually started to use some SN1 frames in here, is that the Castellations, if you're the kind of person that wants to use Castellations, they actually sit within the plastic runner over here and they fit in absolutely perfectly to give you that real flush finish that you're looking for when you're working bottom bee space. So any kind of bog-standard castellation will work, but you do need to cut one of the edges off. And I find that if you work on the 11s and you cut it down to a 10s, so you've got the spacing of the 11s castellations but cut it down to a 10s so you've got equidistant on either side, then it fits perfectly in that orientation and slots really well into the gaps. That fits perfectly kind of, sorry, in that orientation as well. So if you've got 20 boxes and you're Annoyed that you can't use your Castellations, you can. They just slip in. You don't need to screw or glue them or do anything like that. They're held in by that plastic runner, and that really, really helps out. So what I'm moving over to this year is I'm moving over to 9s. So I want to have in my Suyensi boxes that can hold, say, 10.5, I'm going to have 9 frames. And then that means I can build out the frames nice and fat, and then hopefully when I come to extract it on my auto uncapping machine, I should get kind of nice clean frames, and it should kind of flow really smoothly through the machine. So back to the Brood Box, it's a very similar design to the Super Box really. There's nothing more to say about it. I mean, it's got handhelds on all 4 sides, it's got the scalloped edge that I don't like, it's got the lack of rebate underneath, so when you're using the double brood system and you crack the first box up like that, you can kind of interrupt the frames underneath and then the bees can get angry. Definitely don't like that. So I'm moving over to 14 by 12 on my Swinty boxes going forward, and then that means I should only be working one box in the actual brood region and only have that 10 frames. So a bit of a gamble, but hopefully that will work for me, and it means that I'll avoid any issues with this lack of rebate. So moving on to the floor, I actually really like the Swinty floor. I know some people are not overly keen on it, but I do think it's one of the better parts of the design. So it's in line completely with the exterior footprint of a National Hive, so you don't have any landing board whatsoever and you don't have kind of any additional space over above that you'd have on a wooden super. So you're kind of keeping that absolute minimum footprint that's required, which is good for migratory beekeeping or good for kind of if you're trying to get more than one hive on a pallet or a stand. What I really like about it though is the entrance. So you kind of have this run built up there, and then when you put a box across it, you're left with a very wide entrance that runs the whole width of the box, but it's only 8mm high. Now what that's good for is that it means that you never need to use a mouse guard. So these floors, they can remain kind of in place like this all the way throughout the year. You don't need to put mouse guards in or change them over or do anything like that. The mice just can't get in. There's plenty of space for the bees to get in. It's a reduced entrance in terms of height, so it kind of helps to a certain extent against wasps, but wasps will definitely still get in here. So yeah, so I quite like that. It's one of my favourite floors on the market, the Sweemtee, in terms of the exterior footprint and the actual size of the opening. What I'm not so keen about is the mesh. So the mesh only covers quite a small footprint of the floor. Not entirely sure of the actual mesh style either. I mean, the holes seem to be maybe a little bit small to let any varroa through. I don't necessarily use it for that anyway, like I clean my floors out every now and again. One thing to note though is that this isn't fixed in place, and that's caught me out a number of times. Especially when I'm moving bees. So what I've been going around doing now is just screwing that in place, just with a screw, a little dab of Gorilla Glue as well, and then that kind of holds that in as a permanent fixture. And you can still get in there and clean it, but it just means that you kind of got confidence that the floor is not going to open if you're moving the hive. And that's it! So that is the Swenty Polyhive. You can buy it from Seawind Jones and Simon the Beekeeper, or you can buy it direct from Swenty. If you're a bee farmer, get in contact with the sales line. I think they do special rates and bulk discounts on the Suenti kit. I've got a huge amount of this kit and I like it, and I think it's relatively good. Like, I'm not one for kind of saying everything's a 10 out of 10 on my review, so if I had to give it a score out of 10, I'd probably give it a 7. It's definitely not perfect. There are a number of key issues that I really don't like. One being the scalloped edge. 2 being the lack of the rebate. 3 being the dovetails and the kind of issues that that has when they pull away from each other. And 4 being the soft nature of the material. That one's a bit subjective. It adds additional insulation in place, but I just find it a little bit too soft, a little bit too easy to damage. I mean, so there's 4 kind of major issues that I don't really like with these boxes. Nonetheless, I have a lot of them. So I just kind of have to make do, and when I damage them, I'll stick in a bit of wood filler and that seems to solve the problem. Glue can solve the problem with the dovetail edges. Using only one box in your brood region can solve the problem with boxes sticking together. The scalloped edge on the top, I'm not yet to experience bees nibbling that too much. If that one does occur quite badly, I've got some plastic L-section that you can glue in place to kind of resolve So I've got remedies for all of the major issues with the hive, but I shouldn't have to be faffing around with kind of remedying boxes that are only three or four years old. These boxes are designed for a thirty-year working life, and I don't expect that they'll kind of come anywhere near that that amount of service. So I'll update it maybe in a couple of years and give you a bit more feedback on how they're kind of faring up in. Commercial operation, but for the time being I'm kind of making do as best as I can. So would I recommend you go and buy a Suyenti polyhive? Probably not. I would say that there's other polyhives on the market at the moment that are slightly better, and there are some that are really kind of way in advance of what Suyenti offers. So I think Suyenti need to up their game a little bit and come out with a new offering for the UK market. They seem to do new offerings every now and again for foreign markets, but they've had nothing in the UK for a long while. They did do an iteration and change some of the roofs and the shape of some of the boxes, and I don't think it went very well, and they reverted back to this old style of roof and old style of box. So I think they need to kind of have a think about all the issues with this box and sort something out, because I do believe that the competition is going to overtake them. So I wouldn't necessarily recommend this for people going out and buying it now. Saying that, it's a lot cheaper than the other hives on the market, and if you buy them in bulk, it comes down again. You can get really good discounts on the Swenty gear. I use it and it gives you a honey crop, but it just comes with various issues that you need to manage. So if cost is your number one factor, then yeah, go ahead by all means and collect the Swenty. Or buy the Suyenti. It's available at Seawind Jones, Simon the Beekeeper, and direct from Suyenti, and you're looking around kind of £100-ish, somewhere around there for a full setup. So it's a cheap hive, it's a good beginner hive. So that's about it again for today's review. Thank you for watching. I really do hope you're enjoying our videos. We've got lots coming up in the future. It's a bit quiet this time of year in terms of bee activity, so Come the spring, we'll be doing loads of inspections. We'll be doing loads of kind of swarm manipulations. We'll show you some live streams from some of the apiaries. We'll have a look. We'll maybe find some chalk brood. We'll find you some disease so you can look at that. We'll do some queen rearing. Literally every single beekeeping video that you can possibly imagine, we're going to do over time. So please subscribe to the channel below, and also if you hit the little. Bell icon as well, then that'll notify you each time that we put a new video on. So thanks again for watching, and I'll see you next time.










