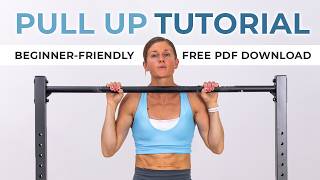
In this beginner‑focused video, Lindsey Baumgrand of Nourishment With Love walks viewers through a step‑by‑step method for achieving their first unassisted pull‑up using assisted techniques. She begins by highlighting the health benefits of pull‑ups and the low percentage of women who can perform one unassisted, establishing the goal of moving viewers into that 31% group. Lindsey then outlines the essential equipment (door‑frame pull‑up bar) and the preferred overhand grip, emphasizing proper body alignment during a dead hang and an active hang to build grip and core strength. The core of the tutorial covers band‑assisted pull‑ups: selecting band thickness, securing the band, foot/knee positioning, and cueing the pull by driving elbows toward the hips while maintaining controlled eccentric motion. She stresses the importance of volume, prescribing a progression of sets and reps (e.g., 3‑5 reps × 3 sets, then increasing sets before increasing reps) within a linear periodization model. Throughout, she promotes a free 12‑week program that maps this progression and provides a link in the description. The overall message is that consistent, volume‑based, assisted training—paired with proper form and gradual band reduction—will enable viewers to move from zero to multiple consecutive pull‑ups.
Chapters
Hi, I'm Lindsey Baumgrand of Nourishment With Love, and I want to help you get your first pull up. So I'm walking you through an assisted pull up tutorial that's going to get you there. There are so many reasons to love pull ups. From improved strength, bone density, posture, metabolism, and I could go on, but the stats show that only 31.3% of women can do an unassisted pull up. I want to get you into that 31%. But first we have to start by mastering the assisted pull up, which is what this tutorial is, is all about. And before we dive in, I want you to know that the exact program I followed to get my first pull up, it has now taken me from zero to getting 12 consecutive pull ups. It's a 12 week guide and I want to give it to you for free. It's going to be linked in the description below. So go ahead, check that out. It's the exact program I follow to get my first pull up. And now I can actually do up to 50 pull ups in a workout set. It's pretty awesome. And I want to get you there too. All right, let's jump in and get through the assisted pull up. For the purpose of this tutorial, I'm going to be using the fancy pull up bar you see behind me to demonstrate how to do the assisted pull up. But actually, when I do pull ups at home, I use just a good old door frame pull up bar. So you plop it into your door frame. I'll link this below. I can buy it on Amazon. It's a door frame pull up bar. They're a great way to build strength at home. I encourage everybody to get one so you can jump up on that pull up bar and see if you can actually do an unassisted pull up. If you can, good job. If you can't, we're going to get you there. But actually being able to do one unassisted pull up isn't where you want to be. You want to be able to work on volume. Volume is so important with the pullup. So I'd rather have you do five assisted pull ups than one unassisted pull up. So let's get into it. But before we even do a pull up, we got to do the setup. So we're going to start by mastering the hardest version of the pull up first, which is the overhand grip pull up. A lot of women want to start with an underhand grip because it's easier, but that's Actually going to activate more bicep. We want to target the lats in the back, so we're going to start with the hardest version, which is the overhand grip. Now, when you're doing the overhand grip, you can hook your thumbs over the bar. That's really going to target the lats. Honestly, for me, it's most comfortable to have my thumb hook under the bar. You can choose whatever works best for you. I just want you to take that overhand grip. From here, you're going to go into a dead hang on the bar. So you're just going to completely hang on the bar, body hollowed out. But there's a couple things I want you to be thinking about. I want your hips to be in line with your knees and your hips to be in line with your shoulders. All right? We want to keep our body in front of us, keep our core active. The minute our knees go behind our body or behind our hips, the core disengages. And this is very much a core exercise as it is a back exercise. So make sure the knees and hips stay in line with the shoulders. Now that you're hanging on the bar, we're going to go into an active hang, which means that you're going to pull the shoulders down towards your hips. You're going to pull up on the bar about one inch. You can hardly see the movement you're to going. But this is going to be an active hang. I want you to be able to perform an active hang for 30 to 60 seconds before even attempting a pull up. Now, if you can only do five to ten seconds, that's great. Start where you are and do what you can, but try to get to a 30 to 42nd active hang on the bar. This is going to increase your grip strength, which you need to do pull ups and also get you into that proper form. Once you've mastered the hang, then we're going to move on to the assisted pull up with bands. So depending on where you are in your strength journey, you might need to start with a thicker band. Thicker band is going to have the highest resistance and as you get to a thinner band, it'll have less resistance. So I want you to be able to do five assisted pull ups with a band times three sets. And that might sound like a lot, you can always scale it back. Maybe it's three assisted pull ups with three sets, but whatever band you need to get you there, start there. So start with a thicker band if needed and then you can slowly progress down into that thinner Band that's all walked through again in my 12 week free guide that is linked below. But start with a band that allows you to do three to five assisted pull ups. You're going to hook it around the bar, pull it nice and tight, make sure it's secure. Now if you have room, you can step your foot into the band, cross your other foot over and perform the pull up from there. If you don't have room, example, you're hanging in a door frame and you need to bend your knees. You're going to hook one knee into the band, loop the other foot around and perform the pull up from there. So find what's ever comfortable. Again, we want to think about hips underhands. Don't let the hips fall back. And instead of thinking pulling my chin up and over the bar, I want to think about actually pulling my elbows down towards my hip pockets. So now that you're in the band, you're going to go ahead and go for that first pull up again, pulling elbows down towards the hips instead of chin over the bar. I want you to get to the top, pause and hold for a moment and then slowly release yourself all the way back down. You are not falling down, you are controlling the downward movement. And, and the best way to do that is to think about pulling your hands apart. That's going to keep your lath turned on the entire time. Once you reach the bottom of the pull up, you're going to repeat and go all the way back up to the top again. Mastering a pull up is a volume training game. You need to be able to do three to five reps with this assisted band times three sets. Much more than you can do just one unassisted pull up. It takes volume to get to where you want to be and I walk you through this in my linear periodization model which again is linked below in my free 12 week guide. But basically you're going to with five reps of an assisted pull up times three set, then you're going to get four sets, then you're going to get five sets and then you're going to go up to six reps but drop the sets again. It sounds confusing but it's all completely mapped out. Click the link below to get my free guide and get your first pull up.