The Right Way to Upload Videos on YouTube in 2026 (Best Settings)
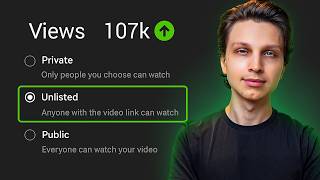
A step-by-step walkthrough of uploading a video to YouTube in 2026, covering file naming, SEO descriptions, thumbnail A/B testing, playlist organization, tag creation with TubeMagic AI, end-screen setup, mid-roll ad placement, and scheduling based on audience analytics.
Chapters
In this video, I'm going over the right way to upload and optimize YouTube videos in 2026 and all of the best settings that go into it for doing this correctly. I'm going to walk you through on my computer as I actually upload a YouTube video from start to finish so you can see the exact settings that I put on it to get the maximum amount of views and in order to make the most amount of money. Stuff that a lot of people overlook. And I'm going to show you how to use AI for certain parts of this as well. To make it a lot faster. So the first thing we need is our video itself. I keep all of my videos on this right here, which is called Trello. And I create a Trello board for all of my different YouTube channels that consists of my video ideas, and then they get moved to pending script when their script is getting written. When it's ready to record, it gets moved here, and it basically gets moved along this assembly line until it is ready for upload. This is the video we're going to be uploading today. I have a due date on this right here of today's date, and this video is all set and ready. So what I'm gonna do here is go ahead and copy the title of this video and then go to my Complete YouTube Video that's linked right here. So I have my editor attach it to this Trello card when the video is ready. And then I'm gonna go to download this video. I'm gonna make sure to give it the name of the title of the video. And even though YouTube says file names and metadata doesn't really matter, I just think it can't hurt to have the video the exact title of the video. So when I go ahead and download it, I'll make sure to have that. Next up, we are going to start the upload of the actual video. In order to do that, we just go to YouTube, click Create, and click Upload Video. Then we're going to find the file on my computer, which is right here, and we're simply going to drag this into our browser and drop it right there. From here then, you'll notice some punctuation gets messed up. As you can see, the three dots from the title are gone right there. So we're going to go ahead and copy that title again and then paste it in there. Then I have a default description written that is set within my settings. However, I want to change a few things and show you how to do this from scratch here, so I'm going to delete this. And the most important part of your description is going to be the first few lines since that is what is considered to be above the fold before people click Show More. And I always like to give a really quick summary of what the video is about. And so for this video, which is about 'If you're under 1,000 subscribers, do this now.' I'm gonna try to use keywords like subscribers, YouTube, grow on YouTube, and I'm gonna write that in a natural way. If you want to use AI for this, you certainly can. My recommendation would be Google Gemini or Claude for that, but I'm gonna write it myself here and just simply say, 'In this video, I show you exactly what to do if you're under 1,000 subscribers.' subscribers, to grow fast, and most importantly, monetize the right way. And we don't want to give away what we're talking about in the video in the description, and so we want to incentivize actually watching the video to get the information. So I'm going to say something along the lines of, I share a secret strategy that almost nobody talks about that I bet you haven't seen before. There we go. Now that's the first part of the description. The second part is going to be a call to action to a long video on your channel. So I'm gonna go to YouTube, go to my YouTube Studio, and then go to the Content tab right here. And then I'm going to find a very long video on my channel. I have a video specifically made for this, which is an hour and 30 minutes long, which is basically a full tutorial for what I teach. And this is what I consider to be my money video. So I direct the traffic from all of my other videos to this video specifically. So that's going to be the first link always in my description because at the end of this video, I sell my YouTube coaching. And this can be an affiliate product that you're selling, this can be your own product as well. But essentially what this does is it keeps people on YouTube for an extended period of time, increasing a secret statistic called session time. This is how long people stay on YouTube after watching one of your videos, and nobody prioritizes it, everybody neglects it, they send people off of YouTube. You wanna keep them on YouTube for about another 30 minutes to an hour, and then send them off to whatever you wanna sell. This way, not only will people be primed to buy whatever you're selling, but also you'll make a lot more money as well. Now if you're running an entertainment channel, just link to the longest video that you can find on your channel. So I have a more or less default description I use throughout my videos, and I'll break it down for you right here. That first link goes to that video, which again, I consider to be my money video, that very long video. The second link right here goes to my program. So if you are selling something, whether it's an affiliate product or your own product, that will go right there. If you have any notes about the video, you can also add them here. I'm gonna remove that for this one. But then I simply have an about me section, and asking people to subscribe, and an email that sponsors can contact. And it's really important that this email is not your Google email because that creates a security threat where people will try to log into that email to get access to your channel. So you don't wanna use that. You wanna make sure this is a separate email. And then I have a disclaimer right here. If you're doing anything related to finance or health especially, I do think it's a really good idea to have a disclaimer saying something along the lines of, this is for educational purposes only. And also if your description contains any affiliate links, make sure to put that disclaimer in there as well. So what I'm gonna do is copy this section of the description from this video, simply highlight it right here, copy that, go to the video that I'm uploading, and paste it in there. Then I'm going to delete that since that was specific to that video. That was just that note about it right there. And now my entire description is done, it's written. Now let's go on to thumbnails. I also keep my thumbnails within Trello. I upload them right here. But again, you can just have these on your computer, you can have them wherever you want. But when I'm ready to use these, then what I'll do is go ahead and download them right here. And once they're downloaded onto my computer, I have a folder called thumbnails where all the thumbnails for this channel are stored. Now one thing about YouTube thumbnails is that they have to be under 2 megabytes. And if we go to the main thumbnail I'm gonna use here, this is a 6 megabyte file. So it's too big to use. So what I'm gonna do is, on Windows, what you can do is click these three dots and then click Resize Image. If you're using another operating system, you can simply use an online tool that will resize an image to be whatever size that you want it. You wanna make sure it's under 2 megabytes. I'll change this to JPEG since it takes up a little bit less space, do the highest quality I can, making sure that it will be under 2 megabytes, and then clicking Save. Then I'll simply name it like 1.1 at the end just to differentiate it. Save it. There we go. Now going back to YouTube, as you can see, I have multiple different variations of thumbnails that I'd like to use. And if you do, this is actually a really good idea to utilize them all. And you can do that by going to A/B testing. This will allow YouTube to test these different thumbnails to find the one that converts the best, and then YouTube will pick that one for you. Then you just click Add Thumbnail and then go to your thumbnails and select the main one that you want. And then let's do a secondary one. As you can see, I have one without my face with a blue logo and then another one with an orange one. So I'm testing out a few different variations to find the best thumbnail. Then I'll just click Set Test and then that test is ready. So when the video is published, it will run automatically for us, which is awesome. And scrolling down here, next up we have playlists. I do recommend adding your videos to at least one playlist on your channel. And the reason for that is because it gives your videos one more place they can surface. Plus, if people ever find that playlist for whatever reason and they watch videos through it, when they're within a playlist environment, the next one plays automatically. And it helps YouTube index to see, okay, this video is similar to all these other videos on their channel, and it helps YouTube understand what the video is about. So I always like to add it to something that relates to it. So this video is about basically how to grow on YouTube, so I'll add it to the How to Grow on YouTube playlist. Click Done. And then we'll scroll down to Is This Video Made for Kids? You always want to select no. And that's due to the reason that there's something known as COPPA, which is the Child Online Privacy Protection Act, which states that advertisers cannot run targeted ads towards kids. And obviously, if your channel is directed at kids, you'll definitely have to select yes, it's made for kids. But I would really recommend that you don't run a channel for kids just for that reason. So you can select that it's not made for kids right there. Then also for age restriction, don't restrict the video to 18 only. And then scrolling down, If you had a sponsorship in your video, you would check this. This one doesn't, so we're going to skip it. Altered content. This basically means is if you make a real person like a celebrity or even yourself, but you make yourself like an AI clone and you make yourself say something that you didn't actually say, then you have to check this box right here that it contains altered content. Usually most of the time if you use an AI tool, you'll just want to select yes just to be safe with this. It won't impact the performance of your videos whatsoever. It's just a nice disclaimer to have and it'll add a disclosure to your content really small and it'll keep your channel safe. Now this one doesn't, this is a personal video. However, on most of my faceless channels, since I'm using AI with most of them, I will select yes for that. But for this channel, I'll just click no. Then scrolling down right here, I do like to allow automatic chapters. There's some debate on this on YouTube. Some people say that you shouldn't add chapters because it allows people to skip to different points in the video. However, my view on it is that if you make the best experience for viewers, they're gonna wanna come back and watch more content then later. So maybe even in the moment, if people can skip around in the video easier, the fact that they get a better experience makes it more likely in my mind that they're going to come back to my channel and watch more videos in the future. So I like to look at YouTube as a long game for that, and I suggest you do the same. So I always like to do allow automatic chapters. Another thing about chapters as well is that they will get indexed in YouTube search results. And so what this means is that if I talk about in this video how to get views in order to get subscribers, it'll rank for that keyword, how to get views, and YouTube will actually link to that specific chapter. You might have seen this when you're searching things on YouTube. So I'll leave that checked. I'll also leave allow automatic places checked as well, and automatic concepts. And right here as well, you can add a collaborator if you collabed with someone else to make the video. It'll make both people's channel names appear on that video. I'm gonna skip that since I didn't do it here. However, if you run multiple channels and multiple of them are in the same niche, This is a really great way of cross-linking them, and I do eventually plan to do this with my channel called Stickman Matt, but only if that Stickman Matt character makes an appearance in my video, then I'll be able to do that. So the next step is adding tags, and tags have gotten so easy now on YouTube. I did a video about them a little while ago where I mentioned that tags do not matter as much as they used to. However, the fact that YouTube does still give us the option of adding tags means they're not completely useless. So I do think it's a good idea to add them, but don't put way too much time in trying to find the best tags because that's going to just introduce further resistance towards uploading videos and it will reduce the total amount of videos that you upload. I noticed this was happening to myself as well back when I used to upload videos and do crazy keyword research and everything else. I wouldn't look forward to it because it was just so much work. Now it's so easy for me to do. I haven't seen any difference in my views. In fact, views are up on most of my channels. So this method works really well. And what I use now is my tool called TubeMagic. You don't have to use this if you don't want. You can also use any AI of your choice, but TubeMagic is made specifically for YouTube. And then you can go into the All Tools section right here and then scroll down to this tool called Warp Upload. This allows you to put in a YouTube video link that is set to be unlisted. So what I like to do is to first of all turn on monetization for this video. If your channel's monetized, it might not be, in which case you'll skip that. Then go to Add Suitability, click None of the Above, submit the rating, and then go to Visibility, and then set it to be Unlisted, and then click Save. From here then, what we're going to do is to copy the link of this video by clicking Get Shareable Link, and then going to TubeMagic, going to URL, pasting it in right there, and clicking Generate. What this is going to do is index everything that was said within that video, as well as all the concepts and everything else, and then generate you 3 sets of title ideas, a description, and a set of tags that you can just simply copy and paste. And what you wanna do is to look through these and make sure they all make sense. Like for example, I talk about TubeMagic in the video, I talk about YouTube tips, YouTube strategy, channel growth, it all looks great. So I'll just simply copy those, go over back here to the specific video, click details, then scrolling down here. And now before I paste these tags in here, I always like to add what I call a title tag. This is a tag that corresponds to the title of the video. For example, this one is "If you're under 1,000 subscribers, do this now." So I'll add a title tag of "1,000 subscribers," and that's due to the fact that that is the main search term that people will search for for this video. It's got it directly in the title. And then I'll paste in all the additional tags, and as you can see, it's over 500 characters, so we're gonna need to delete a few. I'm gonna delete stuff like submilestone, not something people are likely to search for. YouTube tips, YouTube growth, yeah, that all looks good. New channel tips, get views fast, grow channel fast. I don't really see too many people keying that in, so I'll delete that as well as video ranking as well. There we go. And then I like to leave a little space at the end so that I can add one additional tag, which is my channel name tag. So my channel name is Make Money Matt, so I'm going to add first of all just my real name Matt Parr and then Make Money Matt at the end as well. That way when people search my channel, it'll index and also it'll connect this video to all of the other videos on my channel just a little bit more as well, which is always nice to cement that in so that your own videos will appear in the suggested video tab of your other videos. And now just like that, our tags are done. If you want to head back over to TubeMagic and look at these titles and see if any of these are better than the title that you were thinking of, like How to Get Your First 1,000 Subscribers, Do This Now. You can actually split test titles as well, so you can split test these 3 titles if you want. I think the title I have is pretty decent, to be honest, so I'm just going to keep that right there. And then I'm going to scroll up and then go to end screens. This is one of the most important things that I put on any video on my channel because I always make sure to have a verbal call to action in my actual videos to that pillar money video on my channel. That's that very long video that sells something. You know, if you don't have that, you can always make one and then make sure to reference it in future videos because it's going to absolutely blow up your channel if you do. So then you'll just click element, click video, and then you will go choose specific video. And I'm going to find that long video that I made specifically for this, and I'm gonna put it where I'm pointing here. Now, if this is a faceless channel, I'm gonna have the AI character pointing in a certain direction, just like I do on my channel Stickman Matt, or if it's just a standard faceless channel with no character, I'll just put an arrow as to what to watch next. So there we go. Now we have that video right there. We can adjust the timing to make sure it plays at the right time. It looks like I'm pointing right when it starts there, so that looks good. Perfect. Then we'll click Save, and then the next step is adding advertisements at the right spots. So then we'll save all these changes so far. And then go to monetization. And as you can see, this video is 7 minutes and 39 seconds, and only videos longer than 8 minutes are eligible for mid-roll ads during the video. Now, the majority of videos on my channel are over 8 minutes. You'll be able to make a lot more ad revenue by making videos longer than 8 minutes. So take the amount of time it takes you to give maximum value. Sometimes it'll be an hour, other times it'll be 5 minutes. Now, if this video was over 8 minutes, then what I would do is go to manage mid-roll ads, and I'll show you an example on a video that was longer than 8 minutes, like this one, for example. If we go to this video, go to the monetization tab, and then go manage ad slots right here, this allows you to then add where the ads are going to be popping up throughout the video. Now, what's the best strategy for this? What I recommend doing is putting ads right before spots that are likely to be very high audience retention. This is right before you reveal something, right before people are going to get a payoff, you drop an ad. And TV shows do the same thing when they end a show on a cliffhanger before an ad break, before the show continues to keep people watching. And this can be your way of doing the same thing. And what I like to do is to add an ad close to the beginning of the video within the first minute or two. And then I like to wait another 2 minutes at least before adding another one. As you can see, I put one here at a minute 50, and then another one here at 4 minutes, and then another one at 7 minutes. And then space them out a little bit, tapering them off towards the end of the video. And I also check this box for automatic ad slots as well, because if YouTube sees that some spot is really perfect for an ad, they'll add one automatically like it looks like they did there. Then you can just click Continue to save that. And now going back to our video, if you scroll down here, you'll see some additional settings like the category of your video. I always just select How To and Style. You can actually set these in the settings of your channel. So if you go down here to Settings and then go to Upload Defaults, then you can add a section of your description that'll be consistent on every video on your channel. And then if you go to Advanced Settings, you can set the default category of all future videos, so you don't have to do this manually. With every video on your channel. And I just have mine set to How To and Style. Setting it to Education could certainly work as well because I'm teaching people how to grow on YouTube. So either one of those works. I just did How To and Style there, but choose the one that most closely aligns to your content. And I just keep everything else default here. And now when we're ready to publish our video, then we'll scroll up, go to Visibility, and we can set this to either be public right now and then click Done and your video will be published. Or we can set it to be scheduled. Scheduling can really come in handy if you produce more videos than you upload. So for example, if you're producing 5 videos a week but you're only uploading 3, that lets you stack an extra 2 videos per week and you can schedule those out into the future. So you could theoretically take a break in a few months for an entire month and not even have to upload a single video, yet videos would still continually be going up to your channel. This is a great way to get ahead of your content schedule by using the scheduling tool. Now, what's the best time to upload a video on your channel? Well, what you can do is go to Analytics right here and then go to Audience, and then this will show you if you scroll down when your viewers are on YouTube. So for the majority of my viewers right now, I'm actually traveling out of the country, so this might be a little bit messed up from my normal time zone, but in the time zone I'm in right now, most of my viewers are on YouTube at like 1 in the morning. However, most of my audience is in the US, So I believe that's like 1 or 2 PM in the US. So the ideal time to upload videos would be a couple hours before then, so you hit that big surge of viewers that are going onto your channel. So I'd ideally upload my video anywhere from 10 AM to 12 PM. However, this really only comes into play once you have a lot of videos on your channel. If you don't, then don't worry about this at all. Upload at any time you want. Heck, upload even at 3 in the morning. I actually used to have to do this. And I couldn't use my whole family's internet, so I had to wait to upload till then. And I still managed to grow a channel with over a million subscribers doing that, so don't let this stop you. It's just one extra optimization you can add on to this when you can. However, I'm ready to upload this video right now, so I'm just gonna go back to content and then put this to be public. You can also switch it right there and then click publish, and now our video is up. And just like that, we have uploaded and published a video from scratch. That's exactly how I do it. But just because you upload a video, it doesn't mean you're automatically gonna get subscribers and views and of course make a ton of money from this, I want to show you some secret strategies that I've never shared anywhere publicly before on how to legitimately go viral on YouTube and then make a lot of money from those views as well. And I'm going to show that to you in this video next to me right here. So I'm doing exactly what I talked about, but trust me, this video is incredibly valuable. I do highly recommend watching it, especially watch the last couple secrets in this video because it's going to show you how to blow up your channel like crazy and monetize it to the next level. So check it out right there. It'll show you also how to make sure you're making videos on the right topics, everything else. This is basically my completely free course, gift to you. I'll see you there.
More from Matt

I Let GPT-6 Astra Run My Faceless YouTube Channel For 60 Minutes and THIS Happened

Stop Waiting for 1,000 Subscribers to Make Money on YouTube (Do THIS Tonight)



I Tested Letting Claude Fable 5 Create a YouTube Channel for 1 Hour and THIS Happened