A Simple, Minimalist Bullet Journal Setup for 2026
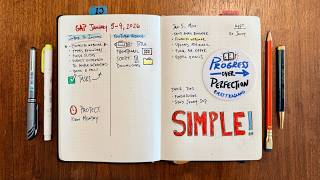
Matt shows how to set up a bullet journal focused on productivity without decoration. He uses a two-column monthly layout, a daily log with appointments on the right, and a weekly GAP method for goals, actions, and protection. Consistency with these simple structures is what makes the system work.
Chapters
So you're ready to set up your first or your next bullet journal, but you look online and you're a little put off by the art projects that seem to pass as bullet journals these days. Well, I'm here to tell you that you don't need to have a bunch of nice pens, brushes, washi tape, or clips to use a bullet journal to keep track of your life. You can just write things down and do them. It's crazy. Look, I don't have anything against beautiful bullet journals. I'm just a guy with a pen and a notebook writing his best life into existence. But we'll get to that in a little bit. What I'm going to show you in this video is the best way to get started with a bullet journal and what you do and do not need to spend time and energy on as you set this up. Hey, before we keep going, I want to tell you that if you want to get my daily and weekly layout in the bullet journal as a free printable, I call it the Most Productive Week Ever template. It will help you set your goals, align your actions, and protect your time so you can get the things done that matter the most to you. It's a free download. All you have to do is click the link in description or in this card that's going to pop up in the corner. Okay, let's keep going with the bullet journal setup. Okay, the first thing that you're gonna do is actually skip a few things. So I would go ahead and skip past the intentions, skip past the index, the future log, and just get to like that first blank page or two. Because right from here, you're going to set your first monthly layout. And this is obviously gonna be for January. It's really easy to do. You, this is something where you see a lot of really pretty beautiful, like grid style layouts for a month. And again, nothing against those, but they're kind of hard to set up. You have to do math and it's just, That's not something I'm going to spend time on. What I do instead is this really simple two-column layout where it's every day of the month and then the corresponding days of the week. And so, you know, January 1st is a Thursday, so there's an R for Thursday. Second is a Friday, so 2, and then F for Friday. So we'll talk more about the monthly layout later in the video, but just to start, I protect two pages for this, one with key dates and then the other page on the right side is for daily highlights. And again, we'll talk about that more in a minute. But for right now, this is only going to take you a couple of minutes. Just write down those dates and days, and then let's move on. Okay, now we're going to flip to the next page and leave the left side blank. We'll come back to that in a minute. And on the right side is where you're going to start your daily log. And your daily log is really the heart of the Bullet Journal. What I use this for— any tasks, any notes, any appointments. I will say, quick caveat, that I do put all of my like I have to be somewhere appointments or time that I have to block appointments into a digital calendar as well, mainly for reminders. And if I'm meeting with someone, obviously we want to have an invite there, but I'll also put them into the Bullet Journal. And then I'm just using like, hey, make a, make a bullet for a task, make a dash for a little note, X out that bullet when you have completed the thing. Really simple, like draw the right-facing arrow when you need to migrate it to the next day. These are things that I love about the simplicity and the consistency of the Bullet Journal. One other thing, like, related to the appointments that I do a little bit differently is I put my appointments on the far right side of the page. I just, I never really liked the circle identifier or, you know, signifier for a time. I just put those all on the right side. So everything that is like, you know, on the page in the normal, like, daily log. Q is just, again, it's tasks, it's notes, and like anything else that I might want to put in there. Now you might be thinking, Matt, when are you going to talk about habit trackers? Where does that all go into it? I have some videos about how to do habit trackers in the Bullet Journal, but again, I keep it pretty simple. I keep it pretty minimalist where I'm just using that monthly layout as the framework for what habits that I'm tracking. But really, again, the heart of the Bullet Journal is in the Daily Log. That is where you are going to put your tasks. That's where you're gonna put your ideas. That's where you're gonna put your notes and your reflections are on these daily pages. So if you only do one thing to get started setting up a Bullet Journal, please just do the Daily Log. Just do the Daily Log and you will get value out of this. Okay, the other thing that I do a little differently in my Daily Log is I do like pre-plan the setup for it. Now you can just go as the days like come and then the notes and the actions, whatever it is. I, after doing this for 10 years, I put 2 days on each page. So the beginning of the week, the left side is where I put my goals. I'll put that, I'll talk about that in a minute. And then I have Monday at the top and then Tuesday halfway through the page. And then the next page goes over, it's Wednesday and Thursday. Top of the next page, Friday, and then I do my wrap review or my wrap reflection at the bottom of that next page. Now you might be thinking to yourself, Matt, why don't you do a Saturday, Sunday, like a weekend layout? And I did that for a number of years. I just found that I wasn't looking at my bullet journal as much over the weekend. I use it a lot for work and a lot for work-related activities and notes. And so writing down to-dos on the weekend wasn't something that I would normally do. That's something that if I have something to do over the weekend, I'm usually putting it into my Field Notes notebook so that I can carry it around. Or just, you know, I know it's kind of like, you know, hearsay, heresy, sacrilege, whatever. I might, you know, put it into my Reminders app on the phone. But that's why for the weekend, I don't really have a weekend layout here. I just like put my weekend reflection. So again, I want to really hammer this home for you. This is the foundation. If you do this consistently for a week, a month, a quarter, a year, you will be successful. You're gonna hear other things even in this video, like, hey, here's how you do your goals, here's something for a monthly layout. I have videos about habit trackers. You're going to see really complicated videos, but I can tell you, like, y'all, if you write down the things that you need to do, you write down the things that are important to you, and you align them with the vision and intentions that you have for your life, then you are going to have a successful year. It takes a lot of courage to do that. It takes a lot of consistency. It takes the ability to bounce back when you had a bad day, when you had a bad week, maybe you had a bad month, to be able to get back on that horse and do the thing that you wrote down that you said was important for you to do and to keep doing that day after day. Y'all, if you can do that, you're gonna have a good year. You're gonna have a good life. All that being said, if you really do want to give yourself a good chance of having a great year, of having your most productive, your most successful year ever, you do need to go from I'm having a productive day to I'm having a productive week and then stacking those productive weeks on top of each other. And that's what we're going to talk about in this next section. Okay. You can learn more about this in the goal setting video that I have. You can, you can click the card in the corner or the link in the description below. This is also going to be in the end screen. But the thing that I want you to see here is how I'm setting up my weekly goals. Now, these weekly goals could be something that I just need to get done in the context and the timeframe of this week. It could also be, and this is where we start to see success and we start to see bigger projects and more responsibility and hopefully more, more income for you come from these bigger goals, is stacking successful weeks one on top of another. Because obviously some of your big goals, they're— you're not going to be able to do the whole thing in one week. And so you have to be able to look at this big goal that you have and break it down into smaller chunks and give those like smaller sub-goals an assignment in a week. And that's, we're gonna talk about a little bit right here, but in even more detail in the goal setting video. So to do that on this left side page, I make 2 to 3 columns and each of those columns are going to be the plan for the week for the goal that I have. And again, that could be a goal that just exists in the timeframe of this week. It could also be a sub-goal of a bigger project, a bigger goal that I have that will take many weeks to complete. And what I'm doing is applying my GAP method to this goal. And the G stands for goal. So what is the thing that I need to achieve or complete or accomplish at the end of this week? And then the A stands for actions. What actions do I need to complete? You can also think of this like tasks, to-dos, What actions do I need to take in order to achieve my goal? So it's taking the big thing that I want to finish, that I want to achieve, and then what are the smaller things that I want to, that I need to do in order to accomplish the goal? And then the P stands for protection, looking at it and understanding how much time can I protect, do I need to protect in order to work on the actions so that I can achieve the goal? One of the things that I like about the GAP method is that you can actually approach it from either side. You can either start with the definition of the goal that you want to achieve. The actions that you need to take, and then the amount of time that you need to protect. Now you might look at this and actually say from the other side, well, like, well, I have this goal, but I can only protect an hour for it each week. Okay, how many of these actions do you think you can fit into that hour? And based on the number of actions you think you can complete, do you need to adjust or redefine your goal a little bit? And one of the things that you'll notice is as you go through this, and as you get more like in tune with it and more like have a greater understanding of the things that you can do in the amount of time that you have to do it is you start to like now set better goals, more realistic goals. Say like, okay, I know I can only work on this for 2 or 3 hours. That's what happened a lot with me when I started my YouTube channel. It's like, okay, well, I have 4 hours to work on a YouTube video. I can totally do a YouTube video in 4 hours. Turns out I couldn't. Took me like 6 hours, took me 8 hours. That's the amount of time I could protect. That changed the number of actions that I knew that I could do, which changed the goal that I had for each week. So that's how the gap works. Talk about in a lot more detail in the video. Again, click the, click the card in the corner or the link in the description below. Okay, real quick, remember the monthly layout? Let's come back to this and let me explain a little bit more. Like I said, 2 columns, day of the month, corresponding day of the week. I just handwrite them in. It only takes me a couple of minutes, and again, I like the feel of pen to paper. But Bullet Journal recently did start including these stickers with, you know, 31 days, and then like the Monday through, Monday through Sunday, Sunday through Saturday, whatever, uh, layout. So you could just take these stickers and put them on the page as well. I prefer writing them down. The other part of the monthly layout is on this right side page. So the left side is more for like key dates. This isn't for like appointments and stuff. It's like birthdays, it's trips, it's like big things for the month that I have to remember and want to like see at a glance. The right side is my highlight of the day. So this is literally just a single sentence, a one line a day of a highlight, a memory, an experience. And I think of this type of journaling practice as different than a bullet journaling practice. I need to record a video that like goes into that in more detail about how I think about those two things separately. But if you don't have a journaling practice, which for me is more stories, experiences, kind of like letters to my future self, whatever, however you want to think about it, it's more reflective, then this is a really good way to start. Just Write down your highlight for the day. Write down a memory and experience a little bit of a story. Yeah, kind of hard because it is just that short thing. But hopefully that, that short piece might just be the starting point that you need to be able to write more from a reflective and like, you know, perspective of how your life is going, which, by the way, is really helpful for your week in review, your year in review. That's something that I just did a video about, when you can go back through and read your highlights from from the entire year, from every day during the year. That's really cool. And it gives you a lot of perspective and, uh, really just makes me feel really good when I'm reading back through the year. But if you wanna see a video on how to do your annual review or your weekly review, it's the same prompts, just a different timeframe. Check out the link in the description below. Okay, I gotta be honest, I don't use the future log very much in the Bullet Journal, and I don't stress about it at all in the setup. When I'm using the future log at the beginning here, I add in birthdays, travel I already know about, business projects I'm working on, stuff like that. I do look at it once a month before I set up the next month's layout, which I just talked about. But besides that, I'm not looking at the future log very often. Now, the other thing that I don't do anything with at the setup is the index. The index for me is something that I kind of like backfill. So I'm like, okay, the January layout starts on page 5 or 6 or whatever. The February layout's gonna end up starting on page 32. And then if I have like a YouTube ideas collection, if I have my books collection, I'll put those in, but I'm not going to add them in until I actually like have a page to be able to add to the index, if that makes sense. So don't get, don't get bothered by the index at setup. I honestly don't use it a ton. I don't think I've ever used more than one page of the index, uh, on any of my bullet journals. But it is something that I wanted to address because I do see people kind of getting tripped up by it, wondering what do I do about this at setup. My answer is Nothing. The thing that you do is nothing. Now, the other thing that I wanted to tell you about the Bullet Journal is that I do think the Bullet Journal Leuchtturm1917 notebook is the best notebook to Bullet Journal on. Now, if you've been an experienced Bullet Journalist for a little while, then you probably understand what I'm saying. And you also like— maybe there are other notebooks that you like instead, and that's totally fine. You can use the Bullet Journal Method in any notebook, but the reason that I like the Bullet Journal Leuchtturm series is because of the small details. So you see this right when you open to the front cover and this nice inlaid grid layout that shows you the number of columns on a page, the number of rows on a page. There are even like little, like gold and white, like spans that show you if you want to get If it's halfway to a page, it's this. If it's just a fourth, if it's a third. And as you look at each page, you'll see that there are little tick marks on each page to show you this is where half a page is, this is third a page, this is, it's really helpful, especially like for me as I'm doing that weekly goal layout, I'm not trying to guess where the third a page or half a page is. I'm just looking at those tick marks. The other thing that I've already mentioned is that they have these cool date and day of the week stickers and some other, some other stickers that are cool to use. I use them here and there. There's also a back pocket for putting in any like loose notes or stickers, things of that nature. And then the other thing that I don't think people notice all the time with these bullet journals is that there's this, booklet at the, at the back. And it really is like, it's the system, it's the practice, it is a really an overview of Bullet Journal basics and the method. So if you've never used a Bullet Journal before and you get this one specifically, make sure you flip through this. It's only 10 pages. It's really easy to like look through and understand, and it will be really helpful for getting you into a routine with your Bullet Journal practice. I gotta admit, I'm also a fan of the flat matte cover, if only for two really important specific reasons. One, I love stickers. I've always loved stickers. I have moved past the phase in life where I'm putting stickers on like the back of my car. I've become a little bit more classical in that, but I still put them all over my water bottle. I still put them all over my Bullet Journal. And so It's just a little bit of personality and swag that you can add to your bullet journal. So that's another thing. The other part that I do here is that I always date and then name each of my notebooks. I haven't done it for this one yet, um, because I just, I don't know what the name is yet. It hasn't come to me, uh, for the notebook itself. And I just use a paint marker for that, which is also fun for like adding adding details or names to other things, like even just something like right here, this, uh, Blackwing colored pencils. I just write my name on it with, with that. So that is something that I recommend doing, and it's just nice about the details of the Leuchtturm bullet journals are really strong, and I think make it a— the right choice, my favorite choice for, uh, whatever— for the notebook that you want to use for your bullet journal practice. Okay, if you like this video, you'll love the goal setting video that I have because now you know how to set up your bullet journal. What this next video is going to show you is how to use your bullet journal effectively to plan, track, and achieve the goals that you have in your life and do more of the work and spend more of your time on things that matter the most to you. And don't forget, you can also get the Most Productive Week Ever planner template just by clicking the link in the description below. Thank you so much for watching, and I'll see you in the next video. Bye.
More from Matt


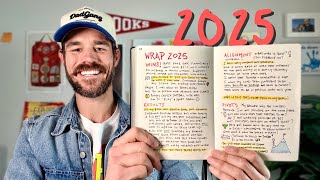
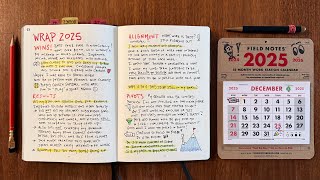


Journal reading 📖 Reflectjons on how I’m living & how it aligns with the vision I have for my life.

You don’t have to listen to me. But you do have to be intentional about the systems in your life.
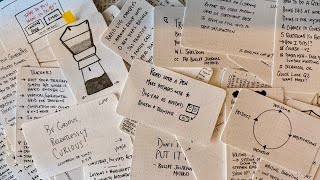

A reading from my personal journal in January 2025. A way to think about big decisions #journaling