Easily Turn Your Videos into Cool Animations with AI
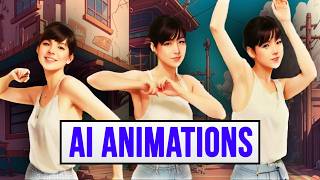
Matt Wolfe converts a 4-second dancing video into anime-style animation using Stable Diffusion, DaVinci Resolve, and Runway. He extracts frames, runs them through image-to-image generation with Protogen v2.2, then reassembles them into a finished sequence in under an hour.
Chapters
I just made this fun little anime video. It's not super polished, but I'll show you exactly how I did it. Let's go check it out. In this video, I'm going to break down how to actually turn a real video into an animated video. This is going to be sort of the quick and dirty poor man's version of what Corridor crew did with their big rock paper scissors. It's not going to look nearly as cool, but you'll kind of get a quick idea of how they did that. Going to use a much shorter video and I'm going to try to turn it into a sort of cartoon animated video using stable diffusion and DaVinci resolve. So this is the video here that I'm going to be working with. It's just a four second video of this girl dancing here. And I'm going to see if I can turn this into something that looks like an animated dancing. So the first thing I need to do is I need to take this video and I need to break it out into its individual frames. And then I'm going to use image to image to change each frame of the video into a cartoon looking FR and then reassemble the animation again. So in order to do that, the first thing I'm going to do is I'm going to go into DaVinci Resolve. Now if you don't have DaVinci Resolve, it's a totally free video editor. It works on Mac, it works on PC. You can get it at blackmagic design.com just scroll all the way down to the bottom and click on the free download and you can use DaVinci Resolve. They do have a paid version, but I am using the free version. Once you've got DaVinci Resolve installed and you've got it on your computer, what I'm going to do is I'm going to take this video of the woman dancing here and I'm going to drop it in. I'm going to go ahead and let it change the frame rate in DaVinci to the frame rate of the video. And you can see I now have this video in here. I'm going to take this four second clip here, throw it in my timeline. There is no audio on it, so I'm just going to go ahead and delete the audio track here. And then what I want to do to pull out all of the individual frames from it is I'm going to click on this little magic wand down here that says Fusion next to it. And then up at the top I'M going to click this little button that says Effects. And then what I'm do is I'm going to hit Control space bar and it's going to bring up this little select tool. I'm going to type Saver and then we can pull in this little saver node. So I'll just click on Add here, and it'll add this little saver node here into my timeline. So now if I click on this saver node and then come over to the top, right over here under my Explorer, I'll click on Browse, and then I'm going to pick where I want it to save all of the individual images. So in this case, I'm going to go ahead and create a new folder. I'm going to call this Input Images, because these are going to be the images that I input into Stable Diffusion to generate my video. So I'll call it Input Images and then I'll leave the file name as Dancer PNG and click Save. Now the next thing I need to do is come up to the Fusion dropdown up here and click on Render All Savers. And now what it's going to do is it's going to render out every single image as its own frame. So if I look at this Input Images folder that I just created, you'll see that it's starting to render out all of the individual frames here. We'll go ahead and let that finish processing. And there we go. It's done. It took about 30 seconds. So I'm going to go ahead and click. Okay. And I'm just going to minimize Stable Diffusion because we'll be coming back to it later. And now we can see we've got all of our input images here. Let's sort them by name. I'll click on the first one and you can see if I click through these, it's every single frame of this video here as a separate image. All right, so now it's time to boot up Stable Diffusion. If you don't have Stable Diffusion installed already, check out the video that I already did about how to set up Stable Diffusion. There's probably a link somewhere above on this video right now. Now, for this example, I want to use the Protogen Anime 2.2 model. If you don't have this model installed inside of your Stable Diffusion, you can find it pretty easily by going to Civitai.com or Civitai. I don't know how that's pronounced. I think it's Civitai. Be careful when you come here because there is a lot of not safe for work models. I believe they are blurred by default, but just be careful, they may not be. Now, to find this Protogen model, you're going to do a quick search for Protogen. Click on Protogen v2.2 and this is the model we're going to use. I'm going to try to generate in one of these styles for my animation here. Go ahead and click on this little arrow here next to download. Download the safe Tensor model here. And when it's downloaded, you will add it to wherever you installed Stable Diffusion on your computer. Just double click into the Stable Diffusion web ui, double click into models, click into Stable Diffusion and then you'll drop it right here. You can see I've already got it installed on Stable Diffusion. Once you've done that, the model should appear under your Stable Diffusion checkpoints here. Just make sure you have Protogen V22 anime blah blah blah installed. So once we're inside of Stable Diffusion, we're going to click on the Image to Image tab and then we're going to open open up the folder where all of our input images were created. And what we want to do is we want to try to find a good example image here where there's not, you know, a lot of motion blur going on and the face is nice and clear, probably not blocked by hands. So this is probably the best one I could find here. This is image number 19. So I'll go ahead and grab this one. I'll come over to Stable Diffusion, make sure we're on image to image here and let's go ahead and Pull image number 19 in. Once this is in here, I'm going to jump over to this website again and I'm going to click on the info here and I'm going to pull in the exact same prompt here, just as sort of a starter prompt. Because I know I want my video to be sort of in this style. So I'll go ahead and grab that. Let's go ahead and grab the negative prompt here. Paste that in. The sampler is DPM plus plus SDE chorus. So we'll come down here, make sure the sampler is DPM plus plus SDE chorus, CFG scales 10 steps 30 and then we'll grab this seed CFG scale 10 sampling steps we have at 30. And then I'll go ahead and use this exact same seed here. And now let's go ahead and tweak the prompt. This isn't necessarily a full body shot photo, so I'll just get rid of that and start it with photo. Most beautiful artwork in the world. World War II nurse holding a liquor bottle sitting on a desk nearby. We'll go ahead and get rid of that part. And then all of this other art information here, let's just go ahead and generate one and see if it comes close to what we're looking for. Ideally, they'll be in somewhat of a similar pose to this. Let's click Generate and see what we get. All right, so here you can see the image that we got after generating it. Pretty happy with the style. It's kind of got the anime look to it. It's a little more realist, I like, but it'll do for the purposes of this demonstration. So now what I need to do, now that I have the style that I like, I've got the prompt that I like, I've got the settings dialed in. The way I like down here is I'm going to click over on Batch, and I've got my input directory where I've created all these images. And I'm going to go ahead and right click on this, and I'm going to copy as path. And then in the input directory, I'm going to go ahead and paste that in, and I'm going to get rid of these quotations. They're not necessary. And then I created a folder called Output Images. And this is where all of the new images are going to generate. So I'm going to go ahead and copy the path to this one here. I'll paste this into my output directory here. Get rid of my quotation marks. And now we're ready to go. And what it's going to do is one by one, it's going to convert every single frame from our original image and use the same prompt, the same seed, the same details, everything we just did to get this image. It's going to do that for every single frame. And then once we have all that, then we're going to go and compile them all back together into an animation. So I'm just going to go up here and I'm going to click on Generate, and we're going to let it run. All right, so my render is completed. So now if I come back over here, click into these output images here. Let me just sort them by name. You can see that it outputted a new image in that same style. It added a whole bunch of little extra images in there. You can see it's got some funkiness going on. That's just kind of the way this works with Stable diffusion right now. So what I can do now is let's open up DaVinci resolve again here. I'm going to go ahead and delete my little node there. I'm going to go over and click on my Media bin here. And then what I want to do is grab this Output Images folder and just drag this whole folder in here. And if I select all of them, come over to these three dots up here. And then under Frame Display mode, select sequence. And now it recognizes this whole thing as a sequence here. Now that I have this sequence, I can pull this sequence down into here. And when I jump back to my timeline, this sequence shows up here. I could pull it into my file. And now you can see I've got my video sequence. I'm going to go ahead and resize this resolution here to 768 by Save that. And now it's all in the proper order. So you can see we turned this original video here, which you can see the original there. And we turned it into more of a cartoony style with this version here. Now it is stable diffusion and it is regenerating a new image every single time. So it does have a little bit of that weird funkiness going on throughout the video. But. But now we can actually render this out and do some really cool stuff. So let's go ahead and render this video. So I'll come to my little rocket ship here and I'll title this Anime Dancer. I'll go ahead and save it to the same folder I've been saving everything to here. Add it to our render queue. We'll render this out. And you can see I've now got my video file here. I can open it in vlc. This is the movie we just made. Now if we really want to get crazy with it, we can make a background real quick using Mid Journey. So let's jump into our Mid Journey here and let's create some sort of cartoony anime background. So let's go imagine in anime style, City, street, colorful. Let's make it aspect ratio 768 by 512 since that's what our video is. And then let's put no people because we don't want any people in the scene. We just want the cityscape. And let's see what that gets us. All right, so we got a few options here. They're all really cool looking. I like them a lot. Let's go ahead and take this bottom left one and have our girl dancing on that background. So I'll go ahead and Click Upscale three here. And while we're waiting for that to upscale, let's head on over to runwayml.com and what Runway does is it actually allows you to remove the background in videos. So if I scroll down here, you can see an example where they take this girl here, and they completely remove out the background of it. So let's go ahead and log into Runway here. Let's click on AI Magic Tools. Let's click on Remove background. And then down here where it says drop media here to get started, we'll grab our new video. We'll drag it down into here, and here's our video. And then it says click on any area to start masking. So let's go ahead and start masking our girl off here. And you can see it found our girl. Let's go ahead and click on Preview. And you can see that it's finding our girl and masking her off pretty well. There was a couple frames in there where you could tell it wasn't perfect. So let's go through and clean some of that up. Go ahead and mask that off right there. And I'll just kind of go frame by frame and find anywhere where I need to clean up this mask a little bit. All right, there's another one that needs to be cleaned up right there. And with each frame, it's looking pretty good. Let me just double check all the way through to make sure there's no other frames that need to be cleaned up here. All right, we're losing some of her arm in a few of these frames, so we'll go clean these up here. So I'll click up here on her arm. It found her arm in that frame. Now it's still finding her arm in these future frames. So we should be pretty good here. So let's go ahead and just scan through. It should be pretty good. I'm not going for perfect. I'm just going for demonstration quality. Obviously, if you were to spend a lot more time on this, you'd probably go a lot better with it. All right, so now we'll go ahead and click up here for export transparent background. Let's uncheck include audio, since we don't have any audio. And let's go ahead and click export. Now. It says export submitted. View it in the Assets page. We'll click on our Assets page here. And you can see that it's working on the export right now. All right, so we've got our fully exported image. If we click on these three dots under our Assets page over Here we can go ahead and download our video. I'm going to go ahead and open DaVinci resolve again. We've got our image here that's now finished and it's the property size. So let's go ahead and open this in the browser and I'll save this image. So now we've got our background and we've got our video that we just created. So now If I open DaVinci Resolve, let's go ahead and create a new project here. Let's come down here to the settings, and we'll set the timeline resolution to 768 by 512, which is what we've created everything in so far. And I can bring in our background here, and I can bring in our anime dancer without the background. And now if I pull this image down here onto the timeline and I pull our little anime dancer up over the top of it, and then I cut this here and start it from the beginning. Now we've got an anime dancer dancing over the background of an anime city. I want I can loop this so it goes a little bit longer. What I'll do is I'll actually take this animation here, duplicate it like this. Basically what I'm doing is I'm pressing Alt on my computer and dragging this over and it's duplicating it. But then what I can do is over on the right side, if I come down to speed change, I can click on reverse. And now it'll look like she's continuing to dance and then kind of going backwards in the opposite direction. I'm going to go ahead and combine these two clips. I'm going to right click on them and come up to new compound clip and create a compound clip so it all shows as one clip. Now if I want, I can even move her over so she's a little bit offset. So let's go ahead and click this little box right here, which puts a box around my image up here. And now I can slide it around and set it where I want it. I can even make her a little bit bigger if I want. I can come over to color correction here, see if I can get her to blend a little bit more with the background, mess with some of the the contrast and the color here. See if I can make it look a little bit more like the scene that she's in. Jump back over to our original thing. And here we go. We got an anime girl dancing on the anime streets. So fun little project to take a video and turn it into an animation. If you watch the recent Corridor Crew video, which just sort of exploded. A lot of people loved it, a lot of people hated it, A lot of people said it's ruining animation. Everybody seemed to have opinions on it and I thought it was really cool. And I wanted to show you sort of a real simple, basic way that you can accomplish something similar. Obviously they put way more time into it. They trained their own model on their own images and just went into so much more depth. They spent, you know, months making that. I did this whole thing in less than an hour and then edit it down to however long this video is. I'm showing you the real quick and dirty way to do it. You can do it in run diffusion as well if you want to do this in the cloud. Pretty cool little trick to make your own animation off of an existing video. So hopefully you enjoyed this one as always. If you enjoy nerding out with me over this kind of stuff, check out FeatureTools IO. This is where I curate all the cool tools that I come across in the AI space. I'm adding new tools every single day. There's thousands in here now, and if there's just too many tools, it's too overwhelming. Join the free Newsletter Every Friday I'll send you the TLDR of the Week, which will include five tools for the whole week, a few news articles, a few YouTube videos, and a cool way to make money with AI. And I'll just kind of break down. Here's what you need to know for the week and I send that every Friday and you can get it for free over at FutureTools. I oh, hopefully you enjoyed this tutorial. I'm going to kind of switch back and forth between making kind of cool tutorials on how to do some of the AI stuff and sort of the groundbreaking stuff that's happening in the AI space. I'm super fascinated with both kind of showing how to do this stuff and learning how to do it myself so that I can show you, but then also kind of exploring the groundbreaking tech that I don't even have access to that's in the pipeline. Both those videos really fascinate me and I love making them both. And hopefully you enjoy watching them. If you do, click the subscribe button below and it'll make sure you see more of them. Give this video a thumbs up. You give this one a thumbs up, it'll make sure you see more cool AI content in your newsfeed on YouTube. And that's all I got for you today. So thanks so much for tuning in. I really appreciate you. I'll see you guys in the next one. Bye.
It.
More from Matt



AI News: Dots, GPT-6.1 Sol, Sonnet 5.5, Gemini 4, and everything you need to know