How To Make Cool AI Videos (Step-By-Step)
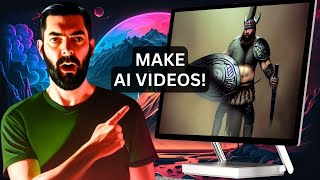
This content was created by Matt Wolfe. This content was uploaded by Matt Wolfe. This is a YouTube video titled "How To Make Cool AI Videos (Step-By-Step)" created on February 22, 2023. The video features Matt Wolfe providing a detailed tutorial on using AI tools, specifically Deform and Stable Diffusion, to create animations and videos. He explains the installation process, settings, and provides examples of generating animations with different prompts and configurations.
Chapters
I recently made this video and I posted it on Twitter and I got a lot of people asking, how the heck did you make that video? Well, I did the whole thing with AI, and in this video I'm going to walk you through exactly how you can make videos just like the one you're seeing right now. Let's get into it. All right, so in this video we're going to install Deform, which is a really cool add on to Stable Diffusion, which allows you to make really crazy animations. Now, if you haven't already, you need to have automatic 1111, the stable diffusion user interface installed on your computer or run in a cloud server, like Run Diffusion already. If you don't have the automatic 1111 stable diffusion interface installed, I did make another video about it. I'll make sure it's linked up below. If you're watching this in a browser, it should also pop up somewhere above me. Installing Deforum is really easy. Once you've already got automatic 1111 installed, you're going to come to GitHub. Com. Up in the search, we're going to type deforum D E F O R U M and then we're going to click on deform for automatic 1111 web UI. We're going to come over here to code button, click on the little arrow to drop down, and we're going to download the zip file, we're going to grab this zip file and we're going to move it to where we have Stable Diffusion installed. So on my computer, that's under the C drive, under the AI folder, and then under Stable Diffusion Web ui, I'm going to double click into Extensions here and then I am going to paste this zip file inside of Extensions and we will go ahead and unzip this zip file right here to this folder. We no longer need this zip file, so I'm going to go ahead and delete it. And then we have this new folder called deform for automatic 1111, I'm going to double click on that so I could rename it. And I am just going to delete all of this so it just says deforum. And once you've done that, we're going to click back to come to our Stable Diffusion Web UI folder and we are going to run Stable Diffusion the way we normally would. We're going to come down to Web UI User Bat, double click on that and fire up stable diffusion automatic 1111 like we normally would. Once this is done doing its thing, we're just going to double click on this URL here, control C. To copy it, jump over to our browser, past URL into our browser and fire up automatic 1111. And once you've done that, you'll notice that you have a new tab here that says deforum. Now, if you're running a cloud version on rundifusion, we're just going to go ahead and boot up our Run Diffusion server here the way we normally would.
And would you take a look at that? The good folks over at Run Diffusion already pre installed Deforum for you, so you don't have to do anything. You just got to log in. Okay, so here's the thing with deforum, there are a lot of various buttons and knobs that you can turn on this thing. There are so many settings and so many different things that you can tweak with it that I am nowhere near an expert on exactly what everything into forum does. I'm going to give you a very basic overview of how to play with some of the settings and how to get something that looks fairly cool. I'm kind of figuring a lot of this stuff out as I go myself, so I'll probably be making a lot of future tutorials as I discover cool things about Deforum that I'm not going to show you in this video. This is just meant to be kind of the basics and show you what it's capable of and open your eyes to something that you can do with stable diffusion pretty much for free or very inexpensively with like a cloud service. I just want to show off cool tools and nerd out with you. I may not always be a hundred percent accurate with my descriptions of how some of this stuff works. I'm just going to explain it from what I've sort of found through my own experimentation. All right, so let's go through some of the tabs and settings that are available here. So on our Run tab here we've got our sampler and it's just like the text to image. You've got all of these various sampling options that you could play around with. And I highly recommend generating different videos with different samplers and seeing what kind of results you get. From my own experimentation, I've had the best results from this Euler A but definitely just experiment and try different samplers because different samplers are going to give you different results in the same way that when you're doing text to image, different samplers are going to give you different results. Now, the steps here, these work just like the steps that you'd find in the sampling steps in Text to image. The more steps, the more it will sort of improve the quality of the output, but also the longer it's going to take to render out the final product. You've got your width and height. It works pretty much as you'd expect it to. So you set the dimensions that you want your video output to be. I'm going to leave it at 512. By 512 you've got your seed. It works just like a text to image seed. If it says negative one, it's going to generate a random seed every time you make a new generation. If you got a video that you really, really liked and you want to try to recreate something that looks similar, you can try to reuse the same seed from that video that you used in the past. The batch name Deform. This is basically, I believe, the folder that it's going to save it into. And pretty much all this stuff down here I just don't mess with. Now this key frames tab here is where all the knobs and buttons are that I was talking about. This is where you're going to tweak all of the various settings and stuff that you're going to do in the video. And we'll skip this for a second because there's a lot here. This is where there's honestly, things that I don't even know what they do. I haven't played with them yet. But I'm going to go over some of the basics with you. And then you've got your prompt area. This is where you actually write your prompt that you want to generate here. And quite honestly, I don't really mess with the rest of this. I haven't really played around under this tab yet. I haven't really played around under hybrid video. And there's not a whole lot that you need to mess with on output. Leaving this CRF at 17 seems to work pretty well. This is your frames per second. Leaving at 15 has always done a good job for me. You can add a soundtrack to your video as well. I haven't even done that myself yet, but that's something that you can play with. So let's jump back over to the prompts real quick and let me explain this. If you click this little arrow here, there is some instructions that you can follow that will help you with your prompt. But here's the basics of it. So you've got these numbers here in quotation marks. That's the starting frame of where you want that specific generation to start. So you can see here in the sort of pre filled prompt here that they've created for us. Starting at frame zero, it's going to generate a tiny cute swamp bunny, highly detailed, etc. Etc. You'd use all the same kind of image prompting that you would use with text to image. Starting at frame 30, it's going to change into an anthropomorphic clean cat surrounded by fractals and all of this stuff. Starting at frame 60, a beautiful coconut. Starting at frame 90, a beautiful durian. Trending on Art Station. You can see right here, starting at frame 60, they also added this dash, dash, negoto and realistic. They're basically adding a negative prompt here. They don't want this beautiful coconut to look photorealistic. You can see right here, it gives some instructions about the negative prompts. It says for negative prompts, please write your positive prompt. Then dash, dash, neg, and then ugly text, asymmetric, etc. Whatever you want to make sure is negative. So again, these are the starting frame of what you want this to change to. And this actually relates to over here on the keyframes. If I jump over to keyframes real quick, you can see this is the max frames. So right now you can see that this video is going to be 120 frames total. So if we look at the prompts here, from 0 to 29 it's going to be our tiny bunny. From frames 30 to 59 it'll be our clean cat. From frame 61 to 89 it will be this beautiful coconut. And from frame 90 through frame 120, which is the max frames that we set. So the remainder from 90 to 120 will be this beautiful durian. Now if we change this keyframes because we want our video to be longer, let's say I want it to have 200 frames in our video instead of 120 frames. Now when I come back to the prompts, if I want each of these prompts to be equal amount throughout the video, I would need to adjust these numbers. So now from 0 to 50 we want it to be our cute bunny. From 50 to 100 we want it to be our cat. From 100 to 150 we want it to be our beautiful coconut. And from 150 to frame 200 we want it to be our beautiful durian. If you do change the amount of keyframes, make sure you also make the proper adjustment to your prompts so that it changes when you want it to change. So let's start by just leaving everything on the default but tweaking some of the prompts so that we can see it just kind of move through these various images. So let's do a realistic gray wolf in the forest. I always like to add trending on artstation because it seems to make some pretty decent images when I do that massive red fire breathing dragon. Trending on art station. A realistic Viking warrior wearing war paint. Trending on art station. And then a shiny metallic humanoid robot. So ideally it'll be kind of a robot shaped like a human. And so there we go. From 0 to 50 frames we'll have a gray wolf. From 50, 50 to 100 frames we'll have a fire breathing dragon. From 100 to 150 frames we have a Viking warrior. And from 150 up to 200 frames we have a shiny metallic robot. If we go ahead and generate this, let's see what it gives us before we even mess with any of the default keyframes here. All right, so it's finished processing. You can see there's a little preview image here and then there's a gray button up here that says click here after the generation to show the video. So let's see what it made for us again. It should start with a wolf. Go into a fire breathing dragon. Show a Viking warrior, a metallic humanoid robot. Let's see if it cycles through those various images. There's our wolf.
Now it kind of morphed into this dragon. There's our Viking.
And then there was our metallic robot. Looked like it had some sort of kitchen colander or something.
And you can see just by kind of leaving everything on the default, it's just sort of cycling through these images. It kind of has a slow zoom in on it as it's doing it, but it just cycling through these images really. So now let's jump over to our keyframes here and explore some of what's available. So you can see right here, it's got this sort of long value here for the pace at which it's zooming in, which I don't totally understand what all that means. I think it's just a very, very, very subtle zoom in. Now I believe if you just set this to one and leave it at one, it doesn't really affect the zoom. It just stays stable. Up here you've got your angle. The angle is sort of the RO rotation. If you put a negative number in there, it's going to rotate clockwise. If you put a positive number in there, it's going to rotate counterclockwise. Translation X That's the, you know, left to right sort of value. And translation Y, that's your sort of up and down value. Now, one of the best ways to test how these motions work here is to come up to your prompts. Just get rid of all of the rest of the prompts. Just have kind of one image. And if you only have one image, you want to get rid of this comma at the end, come to your keyframes, and under max frames, just set it to, like, 15 frames. Just set it to something really short. And now we can play around with the angles and the zooms and the translations and see what effect they have on them on a real short video. Before we start making longer videos, let's go ahead and just set the angle on this one to two and see what happens when we generate something real quick here. Now we can go ahead and preview this. And you can see that it rotates counterclockwise with a positive number here. Now, if I change this angle down here to a negative two and generate it, we could see that now it's rotating clockwise. So let's go ahead and set this angle back at zero here. Now, the zoom number, it can't be zero if we just leave it as at one. That's just stationary. It's not zooming. If we set it to two and we generate, you could see that it zooms in, but it's zooming in really, really fast. That's why when we first opened it, it had that long fraction. So really, for a zoom, you probably want to go more like a 1.02 or something like that. If we generate that, you'll see it'll be a much less aggressive zoom. You can see the zoom isn't quite as crazy with a 1.02 there. Go ahead and set that back to 1. Now, if we mess with the translation X, that should shift it from left to right based on whether you give it a positive or a negative number. So let's go ahead and just set this as a two, and let's see what happens when we generate that. And you can see that now it's shifting to the right. Set this as a negative 2. Take a peek, see? And now it's shifting to the left. Translation Y does the same thing, just up and down. So now that we know what each one of these things does, we can start to tie it all together. So if we come back to our prompt, let's go ahead and add some more prompts in here. Again, we'll go ahead and generate a 200 frame image this time. So I'll go ahead and start with the realistic gray wolf. I'm going to go ahead and paste that in here again. But this time, Starting at frame 50, let's go a realistic lion on the planes. And then let's say starting at frame 100, we can do a realistic tiger in the jungle. And then starting at frame one fifty, let's do a realistic great white shark in the ocean. We want this to be 200 frames. Let's make sure we set our max frames up to 200 here. And then we can start to mess with some of the motion. So it's going to zoom in very slowly on the animals. So let's say we just want to kind of stay stationary for the first 50 frames. We can set the translation x to zero. And then so from frame zero to frame 50, it'll stay stable. And then starting on frame 50, it will actually start to pivot to one side. Let's go ahead and add a two there. So that motion will start at frame 50. And then let's say once it gets to frame 100, we want it to stabilize again and stay in place. So we'll add frame 100, and then we'll make this zero again. So now from frame zero to 50, it's going to stay still. Once it hits frame 50, it's going to start to move. Once it hits frame 100, it's going to stay still again. And then let's say from frame 150 on, it's going to start to move up and down. So let's go ahead, and starting on frame 150 will start to translate it on the Y axis. All right, so it's going to zoom in slowly through the whole thing until frame 50, it's going to stay stationary. Once it hits frame 50, the camera is going to start to move on the X axis. Once it hits frame 100, it's going to stop moving on the X axis. Once it hits frame 150, it's going to start moving on the Y AIs. All right? And as it goes through these prompts, we're going to see a gray wolf, a realistic lion, a tiger, and then a shark. So let's go ahead and generate this. All right, so let's see what it generated for us. So remember, from frame 0 to 50, we have a wolf. From 50 to 100, we have a lion. From 100 to 150, we have a tiger. And from 150 on, we have a white shark, a great white shark. So let's see what this looks like. There's our wolf.
Now we got that lion in there. You could see that the camera shifting around.
Now it's shifting to a tiger. And now it's shifted to a shark with a lot of extra teeth. If we look at our keyframes again. Oh, I forgot to put a colon in this one. So we didn't get our translation on the Y axis. But you can see we've got a very slight zoom in throughout. The camera sort of shifted and then stopped. I think I want to regenerate it without the translation on the X axis here. And let's get rid of the translation on the Y axis. Let's actually have the angle changing as it's going. And let's have the zoom be a little bit more dramatic here. And let's go ahead and generate this one more time and see what we get.
So there's our wolf zooming in. Now we've got our lion. And now it's starting to shift into a tiger. And now it's shifting into a great white shark. Let's go try one more. But let's use some different prompts this time. Let's start with a realistic monkey on an alien planet. An astronaut on an alien planet. A little green alien on an alien planet. A metal robot shooting laser beams from its eyes. Let's do that. And then for our keyframes, I'm going to get rid of the rotation angle here and I'm going to actually up the rate of the zoom a little bit here. So 1.08. And let's generate this one with a new set of images. All right, let's see what our short science fiction movie looks like.
It's actually zooming in quite a bit faster than I thought, but it still looks pretty cool. There's our alien. A robot shooting laser beams starts back over with the monkey. I wish the alien and the astronaut stuck out a little bit more. I mean, the monkey's very, very prominent.
You could kind of see the astronaut on the edge there. The alien is like practically non existent. And then there's our robot with the laser beams. All right, I'm going to generate one more and I'm just going to slow down the zoom a little bit. Make it 1.03. Let's generate one more time. Can already tell it's going to be interesting because we got a two faced monkey here.
The astronaut looks a lot better in the second version.
I saw our alien for a second and then there was our robot.
Now obviously if you wanted to. You can get a lot more detailed with these prompts, but for the sake of this demonstration I was kind of trying to keep the pace up. I only scratch the surface of what you can do with Deforum here because there's the 2D animation, the 3D animation mode interpolation, and then video input where you can actually upload a video and put some effects over it as well. There's also the replicate border, there's the wrap border which does different things and there is just a ton of other settings that we didn't even touch on. I just hit the basics. So as I learn more about it, I'm going to make more videos. I actually have some calls coming up with some experts into forum. I'm going to try to record some of those calls and and share some of the insights that they give with you. And we're gonna deep dive into Diff Forum and figure out how to make some really, really awesome videos in some of my upcoming YouTube videos. So if you haven't already, make sure you subscribe to make sure you see those when they come up. Also make sure you like this video too. Cause if you like this video, you'll see more like it in your feed. And finally, if you haven't Already, check out FutureTools IE. This is where I curate all of the cool tools that I come across in the AI space. Right now there's almost 900 of them. And if 900 is too much and you're just like oh my, my brain is can't handle that many AI tools. That's just too many AI tools for me. Join the free newsletter because every Friday I just send you the five coolest tools that I come across over the week. So if I come across 150 tools this week, I'll tell you the five coolest that you should pay attention to. I send that email out every Friday along with some cool interesting news articles, a handful of YouTube videos, and one cool way to make money with AI. So you're gonna wanna be on it. You can find it over at FutureTools IE. Click this button here and I will hook you up. It's totally free and thanks again for tuning in. Hopefully you enjoyed this one. Thanks for nerding out. See you guys in the next video. Bye.
More from Matt



AI News: Dots, GPT-6.1 Sol, Sonnet 5.5, Gemini 4, and everything you need to know